Creator Hub

How to Create a Wedding Invitation with AI: Photo & Video

Higgsfield11 min

An AI wedding invitation is created from ordinary photos of the couple in seven steps, from character training to a finished film of up to 30 seconds in Cinema Studio 4.0. The whole pipeline runs on higgsfield.ai, inside one AI-native creative suite. Cinema Studio 4.0 is how Higgsfield handles cinematography.

What do you need for AI-generated video and photo invitations?

Wedding invitations take many forms: printed cards, dedicated wedding websites, video announcements, even live performances. This guide walks through one of them step by step: an invitation video created with AI from pictures the couple already has, plus photo invitations made from the same set of frames. Every step pairs the method with a worked example.

To start, you need:

  • Photos of both partners: several clear, recent shots of each.
  • The invitation details: names, wedding date, venue, RSVP method, dress code, timing of the day.
  • A story concept: a basic idea for the video, refined in Step 2.
  • Optional references: the real outfits, favorite locations, a meaningful prop.
  • A visual direction: a palette or a mood, locked in Step 3.

Each part of the pipeline is handled by a dedicated part of the suite:

What do you need for AI-generated video and photo invitations?

Stage

Model / feature

What it does

Identity

Soul ID

Helps keep each partner's face consistent across generations

Outfits

AI Stylist

Tries real wedding outfits on the couple's photos

Recurring objects

Elements

Helps keep a prop, such as an envelope or bouquet, consistent across frames.

Key frames

Nano Banana Pro, Seedream 5.0 Pro, GPT Image 2, Soul Cinema

Generate the styled shots of the couple

Film

Cinema Studio 4.0

Turns the frames into a 30-second film with audio

Step 1: Prepare the photos and identity

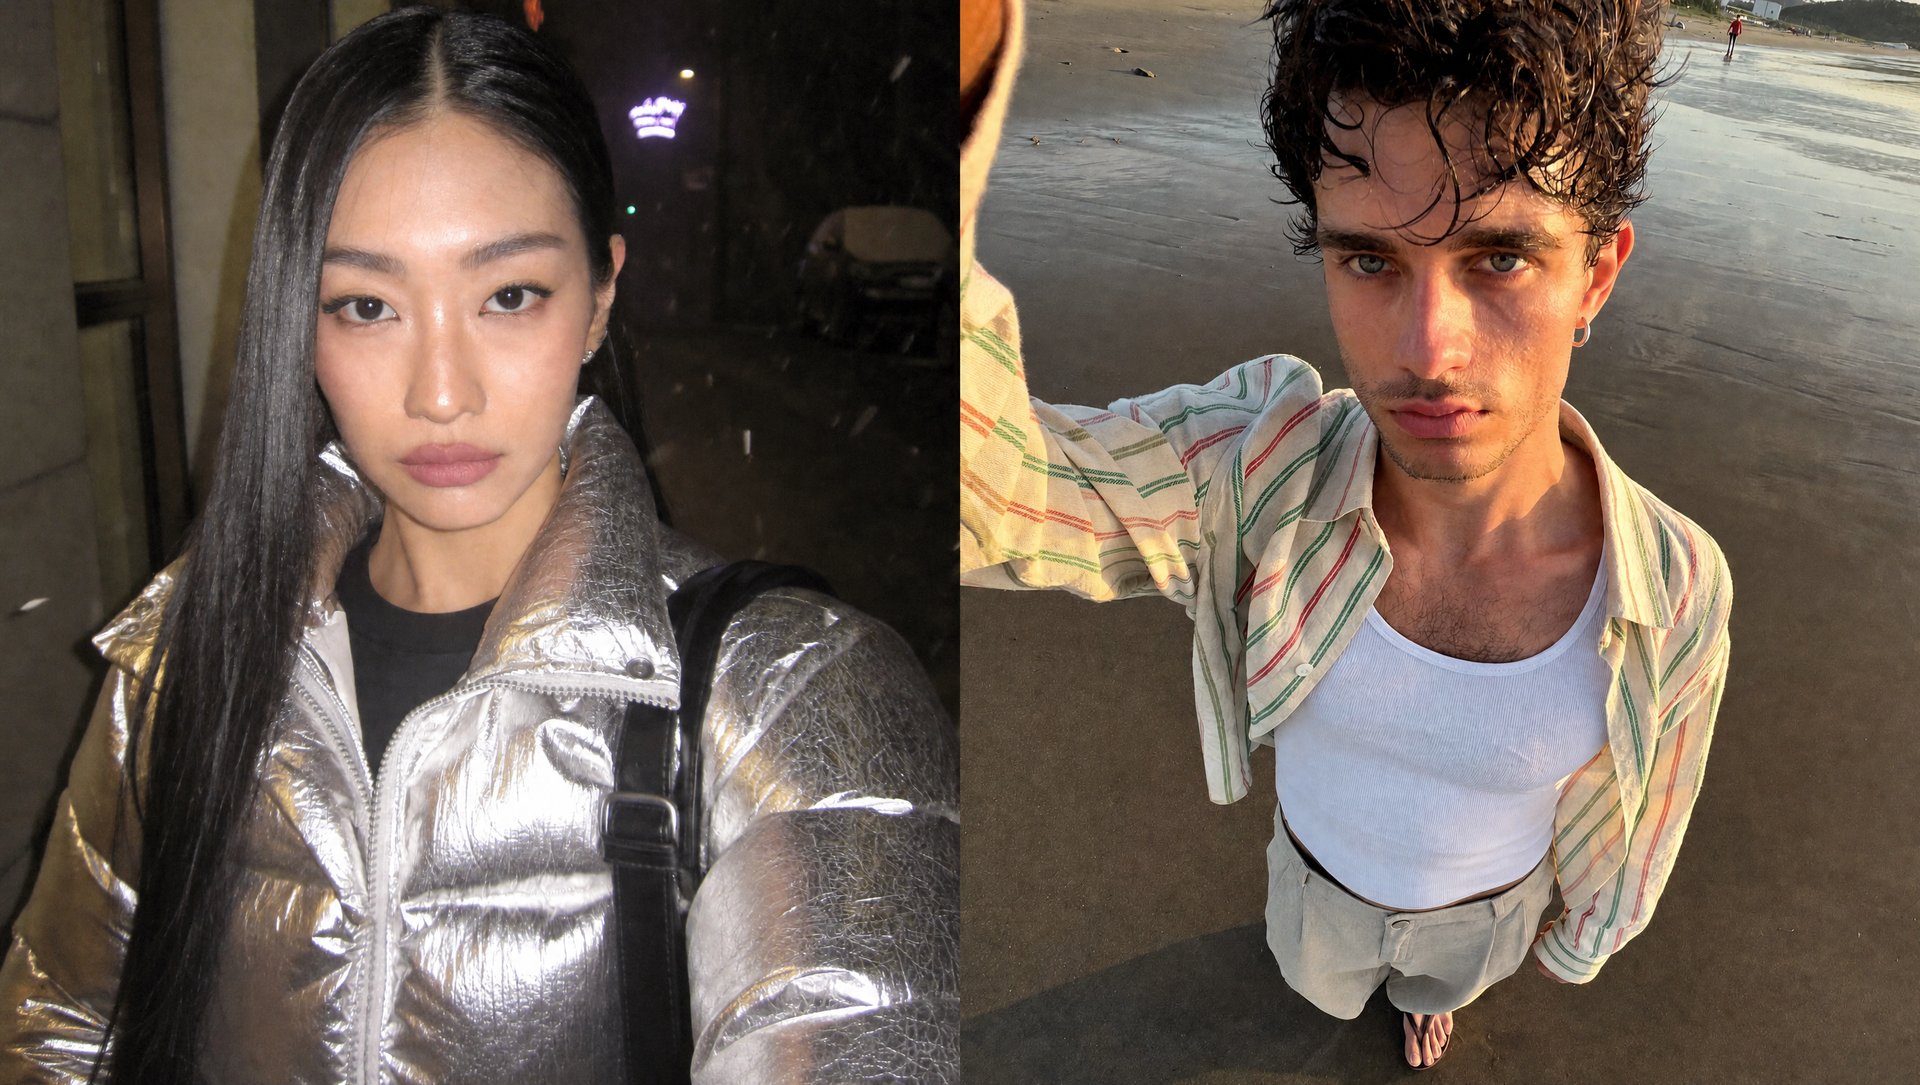
Create a character for each partner in Soul ID. Upload 20 to 80 photos of one person: clear, recent, with varied angles and at least one full-height shot. Training runs once; the character is then used through the Soul 2.0 model, appears in Elements automatically, and is tagged with @ in prompts. Soul ID is how Higgsfield handles identity: one face trained once, helping maintain the likeness across generations, styles, and angles.

Generate a few portraits with the new characters before moving on. This confirms the likeness and gives you a feel for how each partner reads in different light and framing. The couple in this guide's example does not exist: their reference selfies were generated in Soul Cinema, and the rest of the pipeline treats them exactly like real photos.

Two optional additions at this step:

  • Try on the real outfits. If the dress and suit are already bought, upload your photo and photos of the clothing to AI Stylist, piece by piece. The results become outfit references for the key frames.
  • Skip training for short projects. For a small set of frames, real photos also work directly as references: the number of supported references depends on the image model you choose, and it is usually enough for both partners, outfits, and a location at once.
Step 2: Write the scenario

Write the scenario before generating anything, and split it into arcs with time ranges. A 25-30 second film holds 6 to 8 beats of 2 to 4 seconds each. A template that works for an invitation:

  • Opening (2-4 s): introduce the symbol or the couple with one close-up.
  • Development (8-12 s): movement across two or three locations; a chase, a journey, a countdown.
  • Pause (3-4 s): one or two quiet close-ups; hands, a look, a smile.
  • Culmination (4-5 s): the couple together in the emotional peak of the story.
  • Finale (5-6 s): the spoken invitation line to camera, then the save-the-date card.

Here is the example timeline built on this template:

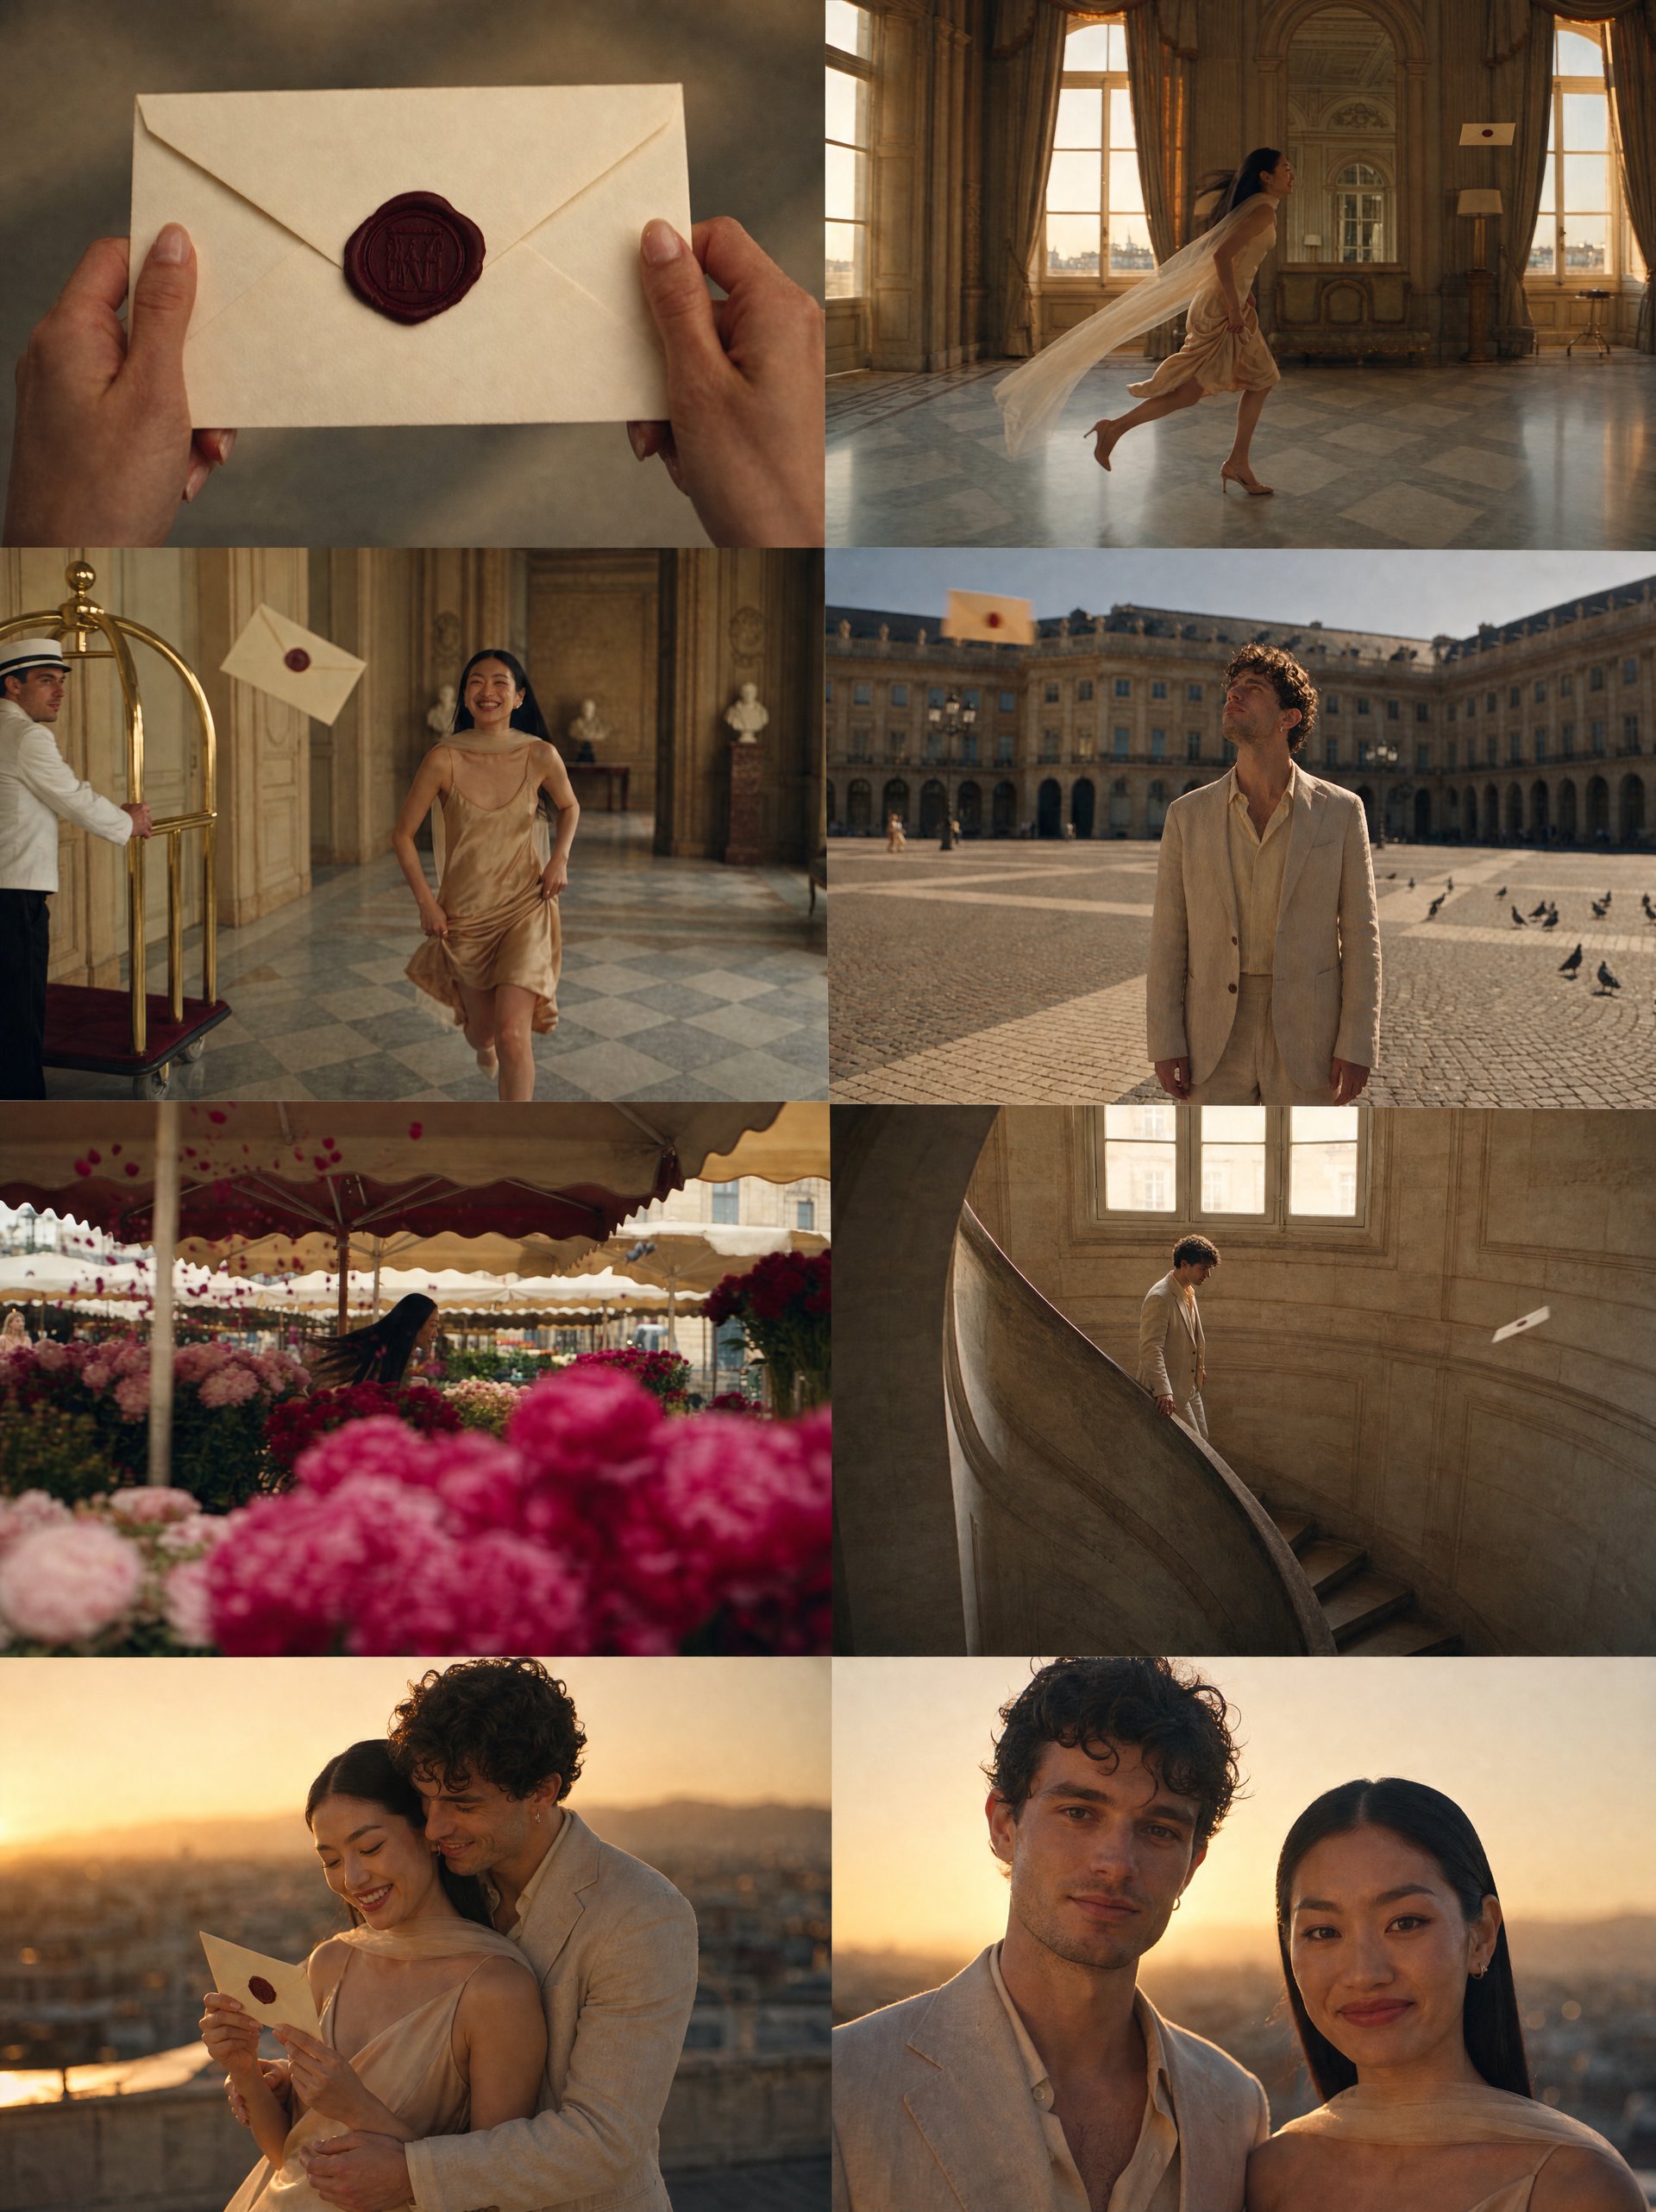
  • 0:00-0:03 - close-up: the wind pulls the envelope from the bride's hands.
  • 0:03-0:07 - she chases it laughing through a historic hotel hall.
  • 0:07-0:11 - parallel cut: the groom spots the envelope over a city square and runs.
  • 0:11-0:15 - fast cuts: a flower market, a spiral staircase.
  • 0:15-0:18 - quiet inserts: intertwined hands, her head on his shoulder.
  • 0:18-0:22 - they meet on a rooftop at sunset and catch the envelope together.
  • 0:22-0:25 - stillness: they open the envelope, close-ups of eyes and smiles.
  • 0:25-0:28 - they look into the camera and say the invitation line.

To adapt it, replace the envelope with your own symbol (a bouquet, a ring box, a paper plane) and the locations with places from your story. This timed script becomes the video prompt in Step 6 almost word for word.

Step 3: Lock the style and the recurring objects

Style is locked in two places: in the image prompts and in the film settings.

  • Write a style block for the prompts. A style block is a fixed phrase added to the end of every image prompt: the palette, the light, the texture, the mood. For example: palette of ivory, champagne gold and powder blue with one deep cherry accent, natural directional light, 35mm film texture. Written once, it keeps the visual direction of the frames more consistent.
  • Set the palette in Cinema Studio 4.0. Pick the template closest to your style block from the 50+ built-in color palettes, or create a custom one. The frames and the film then share one grade.
  • Keep recurring objects in Elements. Create or save the recurring prop as an Element, then reference it with @ wherever it appears: this helps keep the same object consistent across the project. The couple's trained characters are referenced the same way.

Step 4: Generate the key frames

The scenario from Step 2 defines the key frames: one still image per beat. These approved frames become visual references for Cinema Studio, while the timed scenario directs the action and sequence of the final film. All iteration happens here, where images cost a fraction of a video generation. Generate each beat in your chosen image model, tag the couple and the props with @, end every prompt with the style block, and regenerate until the frame is right.

The image models on higgsfield.ai differ in what they hold best:

Step 4: Generate the key frames

Model

Strength for key frames

Nano Banana Pro

Precise object control, exact quantities, reliable text rendering

Seedream 5.0 Pro

Combines several reference photos of people into one shot with unified lighting

GPT Image 2

General-purpose generation, instruction-based editing, reliable text rendering

Soul Cinema

Cinematic characters, locations, and film-style grade

Frames generated in any of these models can additionally be passed through Soul Cinema for a cinematic pass, helping the set read as stills from one film.

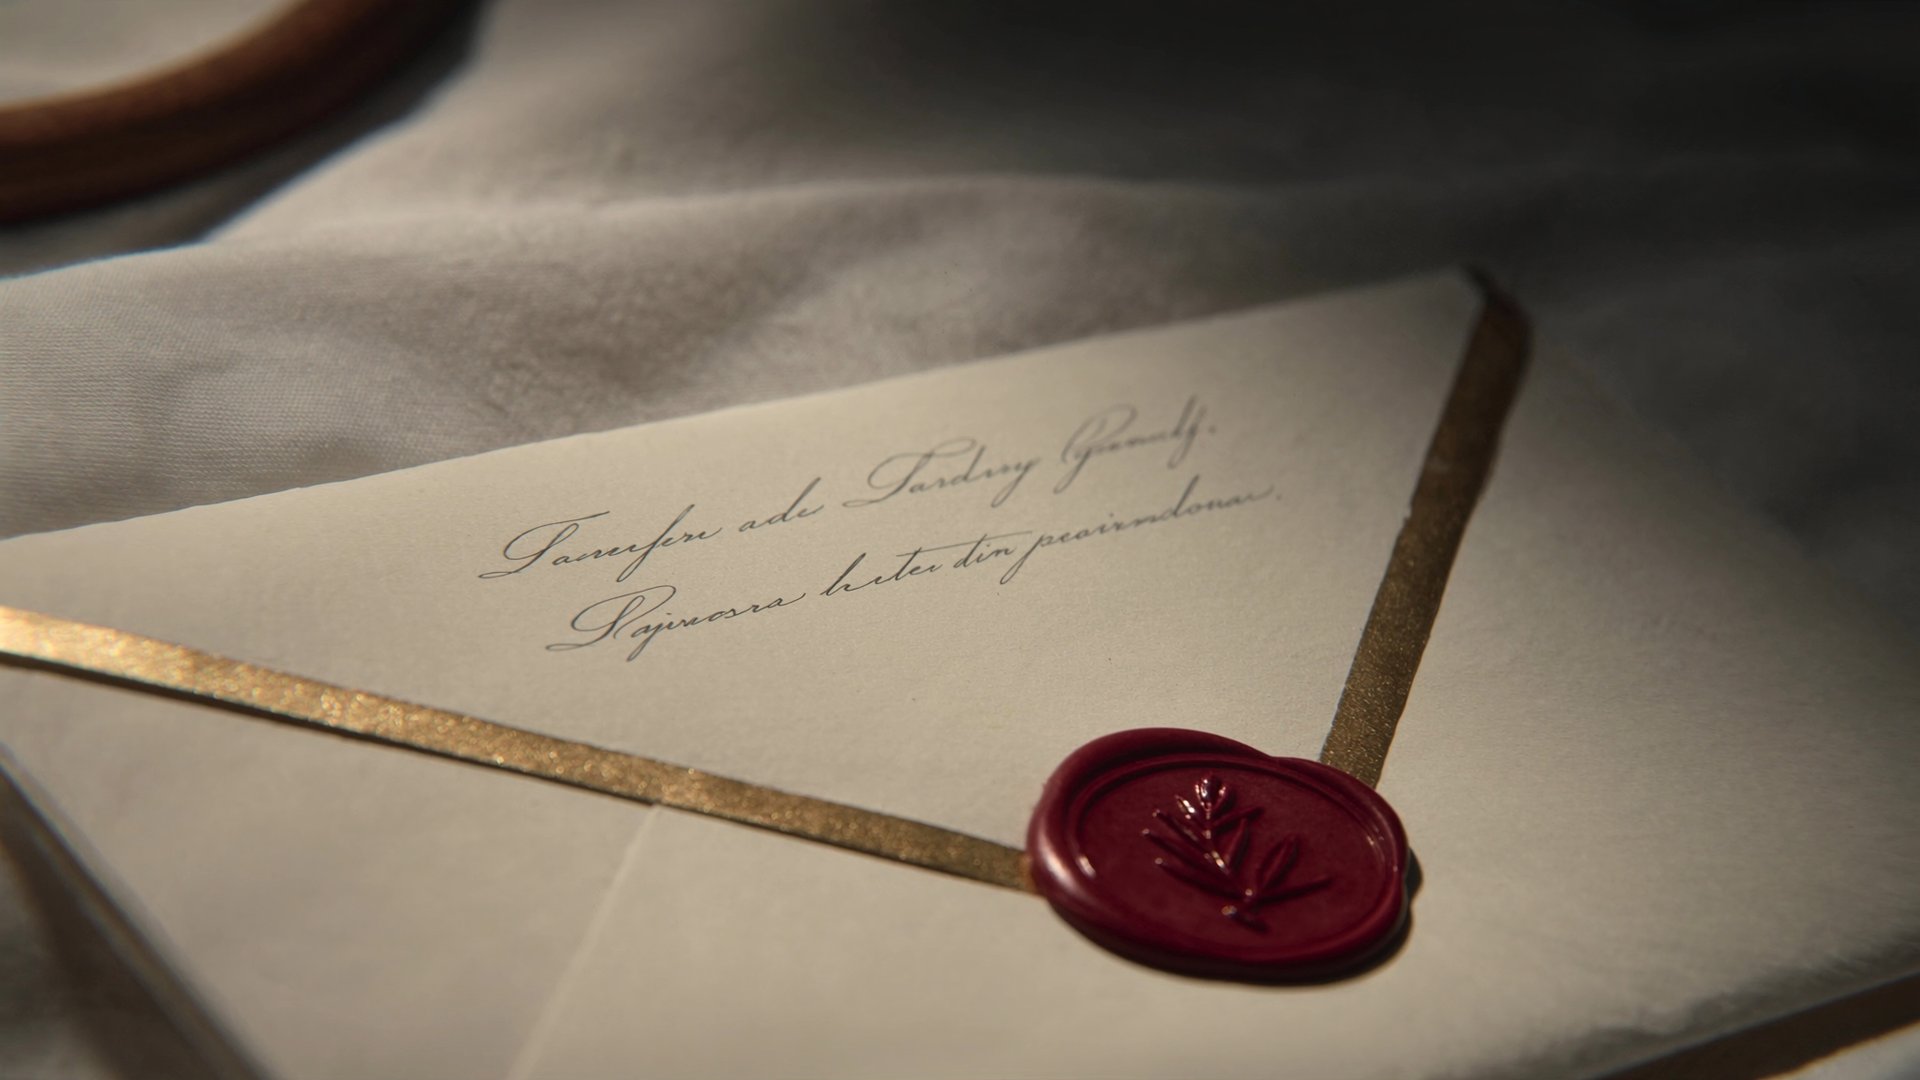
The prop frame from the example:

A single cream wedding envelope with a deep cherry wax seal, gold-edged flap, lying on ivory linen, soft window light, product photography clarity, no text on the envelope

The key frames of the example timeline:

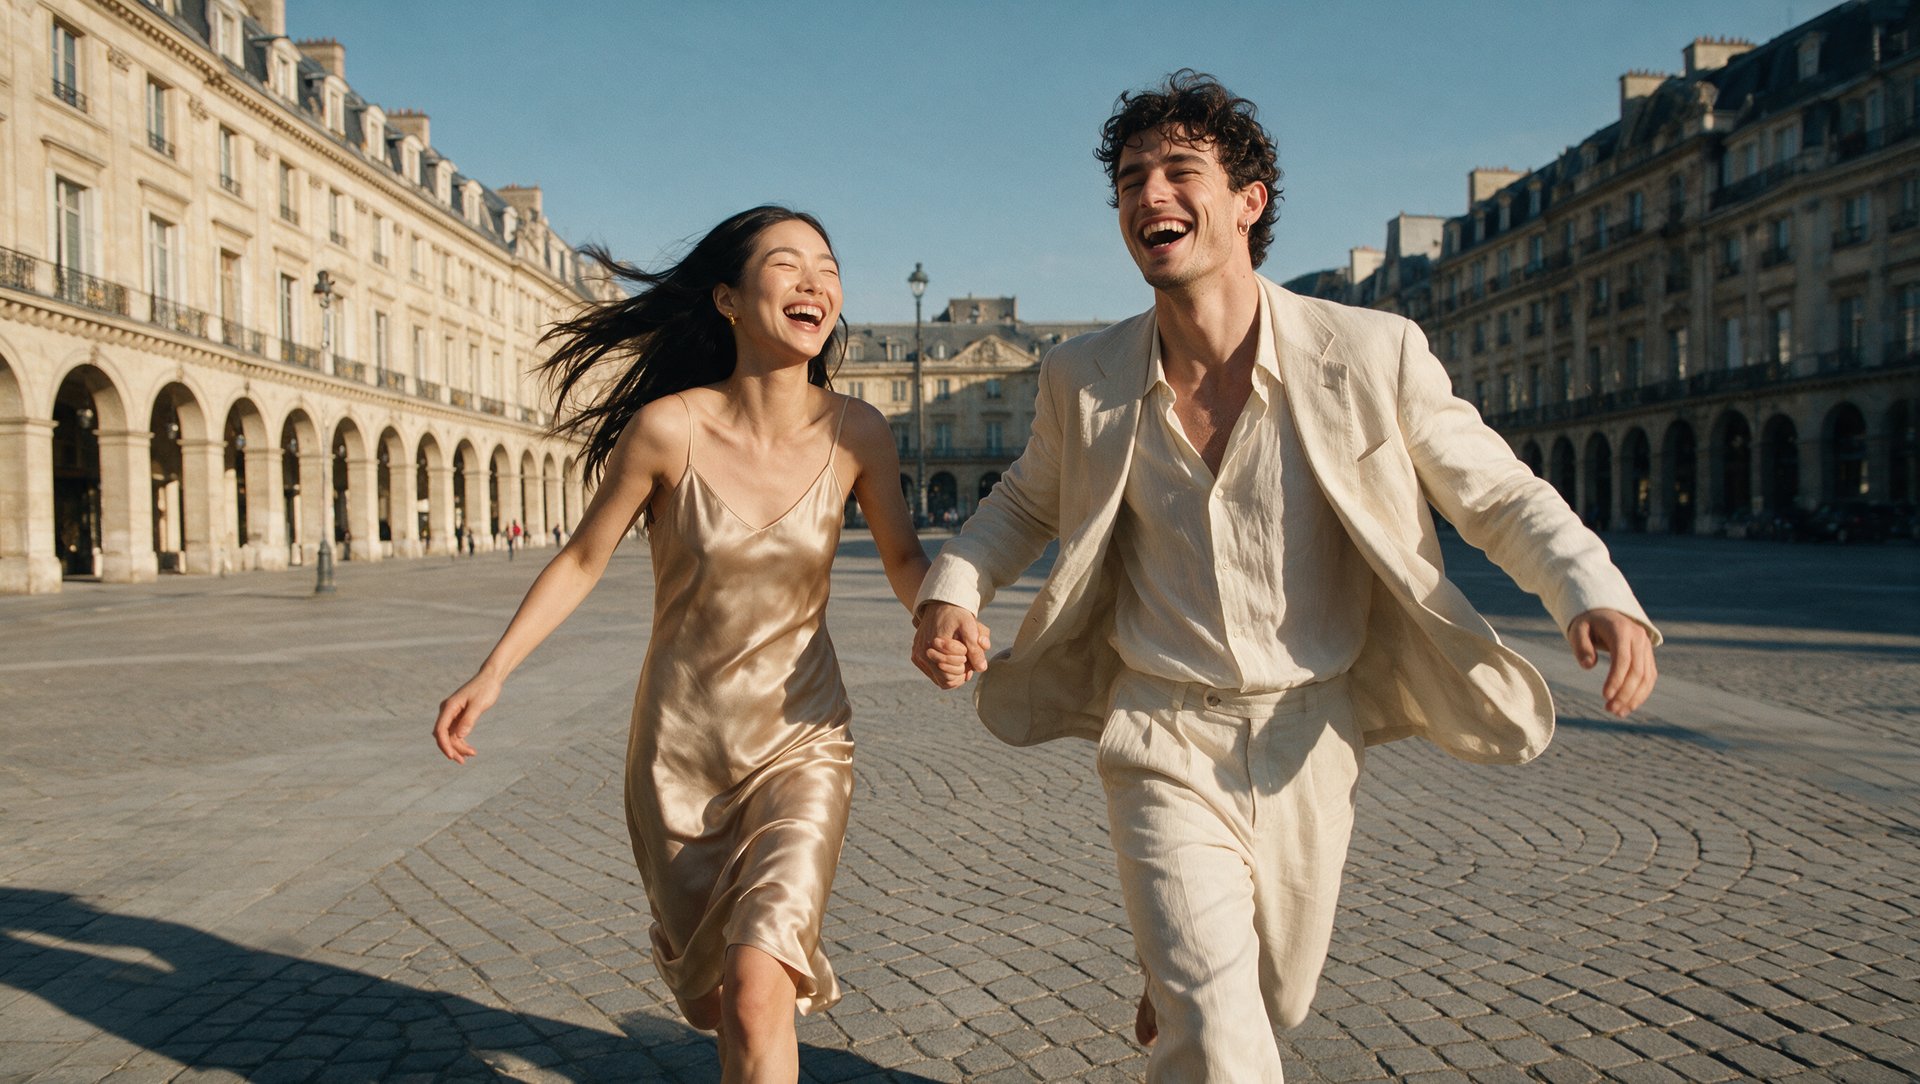
Close-up of @bride hands in champagne gold sleeves holding @envelope, fingers just losing grip as a gust of wind lifts it, motion blur on the flap, powder blue sky reflected in a window behind</prompt> <prompt url="/ai/image">@bride in an ivory silk evening dress running through a grand historic hotel hall, laughing, her powder blue silk scarf streaming behind her, @envelope flying ahead above the marble floor, tall windows with golden afternoon light</prompt> <prompt url="/ai/image">@groom in a tailored dark suit on an old city square looking up at @envelope drifting overhead, caught mid-turn about to run, pigeons scattering, warm stone facades, deep cherry cafe awning as the color accent</prompt> <prompt url="/ai/image">@bride weaving through a flower market, brushing past buckets of cream and blush roses, reaching up toward @envelope, petals lifted by the wind, dappled light through the market canopy</prompt> <prompt url="/ai/image">@groom rushing down a spiral staircase, one hand on the brass rail, jacket flaring, seen from above in a full spiral composition, @envelope visible through the stairwell window</prompt> <prompt url="/ai/image">Intimate close-up of @bride and @groom intertwined hands, her head resting on his shoulder in soft golden light, quiet and still, shallow depth of field, warm skin tones against ivory knitwear</prompt> <prompt url="/ai/image">@bride and @groom on an empty rooftop garden at sunset, holding an opened @envelope together, wind moving her dress and his jacket, city softly blurred below, champagne gold light wrapping their silhouettes, joyful and triumphant

One of these frames doubles as the photo invitation. In the example it is the rooftop shot: strong enough to work as the main digital invitation, a printed card, a Reels or Stories cover, and the background of the final save-the-date card, all from a single generation.

Step 5: Add the names and the date

Generate the lettering as a separate asset in a model with reliable text rendering (see the table in Step 4). Put the exact wording in quotes, describe the typeface explicitly (a widely known typeface can be named directly in the prompt), and place it on a plain neutral background so it overlays cleanly:

Elegant serif calligraphy text "Save the Date" with "Elena & Michael, 14 June 2027" below, deep cherry lettering on a plain ivory background, centered, classic wedding invitation typography, no other elements

Then combine the lettering with the chosen key frame: either in a second image generation with both images as references, or in any editor. For the card inside the video, keep the background frame blank and add the typography after the film is generated: text in motion is regenerated on every video pass, so a separate lettering asset keeps the names and the date under your control.

The photo invitation path

The photo invitation is finished before the film. The path is three assets long: the chosen key frame, the lettering from Step 5, and their combination in one image generation or any editor. The result works as the digital invitation, a printed card, and a Reels or Stories cover. If you only need a photo invitation, the workflow ends here: Steps 6 and 7 cover the video.

Step 6: Generate the film in Cinema Studio 4.0

Open Cinema Studio on higgsfield.ai: version 4.0 loads by default. It takes up to 50 references per generation (your images, videos, and characters) and produces clips up to 30 seconds.

The Director's Panel controls the look of the film, and every setting can be tuned to your own scenario: seven genres from General to Noir, an era from the 60s to the 2020s, a tempo from Single Shot to Chaotic that drives the cut speed, cameras including 35mm Film and 8mm Film, lenses from clean sharp to vintage anamorphic, apertures from f/1.4 to f/11, camera moves including POV and Helicopter Shot, 50+ color palettes, and six lighting presets plus a custom setup. A character emotion slider controls how expressively the couple performs.

Settings for the example film:

Step 6: Generate the film in Cinema Studio 4.0

Setting

Recommendation for an invitation film

Genre

Drama

Tempo

Dynamic for a chase-driven script, Calm for a slow romantic one

Camera

Modern; 35mm Film for a retro look

Lens and aperture

Clean Sharp or Anamorphic; f/1.4 for intimate close-ups

Lighting

Window for interiors, Contre-jour for sunset scenes

Colour Palette

The template closest to your style block, or a custom one

Format

16:9, duration 25 to 30 seconds

Select the approved key frames and the couple's characters as references: everything generated on higgsfield.ai is already available to pick. Then turn the timed scenario from Step 2 into the prompt: every beat with its time range, the action, the spoken finale, and the music arc:

A 28 second wedding invitation film in one continuous edit. 0-3s: close-up of the bride's hands as the wind snatches the cream envelope. 3-7s: she chases it laughing through a grand hotel hall. 7-11s: parallel cut, the groom spots the envelope over a city square and starts running. 11-15s: fast rhythmic cuts between a flower market and a spiral staircase. 15-18s: two quiet memory inserts, intertwined hands, her head on his shoulder. 18-22s: they meet on a rooftop at sunset and catch the envelope together, camera orbits the couple. 22-25s: stillness, they open the envelope, close-ups of eyes and smiles. 25-28s: they look straight into the camera and say "We found the date. Now save it." Music builds from light piano to strings, then cuts to silence before the final line.

The spoken line, the music, and the sound effects are generated together with the video in the same pass.

Step 7: Fix and finalize the invitation

If one moment of the film fails, use the built-in modes instead of a full rerun:

  • Edit Video makes regional edits: fix an object or a face in one moment of the clip, for example the couple's faces in the rooftop shot, aiming to preserve the rest of the clip.
  • Genjutsu works with reference videos in two ways. It transfers motion from a real clip onto the generated characters, so the couple's actual first-dance video can drive their movement in the film. It can also replace an object in a finished video using reference images.
  • Full regeneration is the last resort, not the first response to a single failed moment.

Once the film is right, add the save-the-date card: overlay the lettering asset from Step 5 on the closing frames, or append the card as a final still. Export the finished film in 16:9, and the invitation is ready to send along with the photo version.

How many credits does an AI wedding invitation cost?

The typical cost of one invitation breaks down by stage. Frame-level iteration is the main cost lever: regenerating an image costs a fraction of regenerating the film. The total covers the example set of nine images (one prop frame, seven key frames, one lettering asset) and the film; iterations and the optional stages add to it.

How many credits does an AI wedding invitation cost?

Stage

Model / feature

Credit cost

Cost in USD

Reference selfies (optional, if you have no photos)

Soul Cinema

0.125 credits per image

under $0.01

Character training (optional, per partner)

Soul ID

25 credits

$1.25

Outfit try-on (optional)

AI Stylist

2 credits per generation

$0.10

Key frames, prop and lettering

GPT Image 2

6.5 credits per image (2K)

$0.33

Invitation film, 28 seconds, 16:9, 720p

Cinema Studio 4.0

182 credits

$9.10

Total for one invitation

-

~241 credits

~$12

The minimal path skips the optional stages: direct photo references instead of Soul ID training, and outfits described in prompts instead of AI Stylist. On plans where a model is included in the Unlimited list, generations on higgsfield.ai do not deduct credits: check the Pricing page for the current list for your plan.

How to Create a Wedding Invitation with AI: Photo & Video

Try Cinema Studio

Got any questions left?

Both paths work. Real photos go directly as references for a short set of frames; Soul ID training pays off when the same faces must hold across a large set of wedding visuals.

Any image model on higgsfield.ai covers the basic frames. General-purpose frames and reliable text suit GPT Image 2, precise object control suits Nano Banana Pro, shots with both partners suit Seedream 5.0 Pro, and Soul Cinema adds a film-style grade to frames from any model.

Save the object as an Element after generating it once, then reference it with @ in every prompt. This helps keep the object consistent across frames and video references.

Yes. Cinema Studio 4.0 generates audio in the same pass as the video, including speech, music, and sound effects, so the invitation line to camera is part of the single generation.

Up to 30 seconds in one Cinema Studio 4.0 generation.

by Higgsfield