This page shows a complete, cost-aware production workflow for an animated character ad in Cinema Studio, built on a real case with real credit numbers.
What we are building
This page shows a complete, cost-aware production workflow for an animated character ad in Cinema Studio, built on a real case with real credit numbers. It answers four practical questions: how to save a product, characters and locations as reusable Elements and call them by tag across many generations; how to stop generating separate start and end frames for every shot; how to reduce failed generations and rerolls; and what the same story actually cost in Kling 4 (720p) versus Seedance 2.5 Draft (480p), including drafting at low resolution and upscaling only the selected result.
In this workflow we go through the whole process of creating an animated ad in Cinema Studio: we organise the project, prepare the product, the characters and the space, save the approved materials in Elements, get videos from two models and fix individual fragments. After selection we move the files to editing, upscale the chosen result and save the final version in the project.
What we are building
Version
Test mode
Length of the assembled file
Seedance 2.5
Draft 480p · 480 × 854
54.42 seconds
Kling 4
720p · 720 × 1280
72.68 seconds
These are two results of a specific production test. The length was measured from the delivered videos. At the end we compare the production cost of these two versions, excluding four accidental Seedance runs in 16:9.
Create the project
Start with a separate project for the ad case. In the name field you can enter the brand, product, campaign or any other label your team uses. A clear name helps when several tasks are in progress at the same time.
Video 01 · Creating the project. New project → name → workspace → suitable access → create project.
In our example the project is called HIGGS Gummy Jelly. Private is selected in the screenshot; for collaboration, set up access for the team. Having a team workspace does not replace checking who has access to a specific project.
Suggest a folder structure
Prepare a place for sources, working images, video generations and final files. Below is one way to organise an animation case. Choose the names and depth of the structure based on how your team works.
Suggest a folder structure
Folder
What to keep in it
01 — References
Source images and visual references.
02 — Images
Image generations, variants and corrected versions.
03 — Animation
Video generations and corrected fragments.
06 — Selected
Approved materials for work and editing.
07 — Final
Assembled videos and upscaled versions.
Screen
An example project structure. For this case we use the animation branch; folder names are adapted to the team.
Numbering helps keep things in order. Selected is convenient for the approved set, and Final for the finished delivery. If your team already has its own rules, keep them: the structure should help you find your way, not create a second parallel process.
Lock in the brief and the story
After creating the folders, fill in the Project brief. Here you can collect the task, audience, style, script and requirements for the result, so everyone works from the same version of the agreement.
Video 02 · Project brief. We open the Project brief and add the task description and the script.
In our case the task is to show a repeatable process for creating an animated ad and compare two ways of generating it from prepared materials. The story goes through a familiar situation, a small solution and a mirrored joke at the end.
Lock in the brief and the story
Stage
What happens
Role in the story
First morning
The boy rushes to the door without his backpack. Mum sends him back for his bag.
We introduce the boy in a hurry and the problem.
Second morning
The backpack is on his shoulders, but the lunchbox is forgotten.
We repeat the situation with a new item and different clothes.
Evening
The son makes a list. Mum takes an interest and brings the jar.
The hero takes part in the solution; the product appears in the conversation.
Gummy bear and conversation
Mum opens the jar and puts a gummy bear on her son's palm. He eats it.
The packaging and its contents get a full action.
Next morning
Lunchbox inside, bottle in the side pocket, the zip closes.
We show the result of the preparation.
Finale
The son notices Mum's slippers. Product shot.
We swap roles and end with a warm joke.
The open-source skill we used to write the story
We wrote this story with pitch-drama, an open-source skill for writing short animated drama stories that sell a product. From one idea it builds a pitch card, a timed beat sheet and script, a storyboard, a shot list and a prompt list. We then adjusted the plot slightly to fit our actual tasks. Download the skill to use it in your own projects.
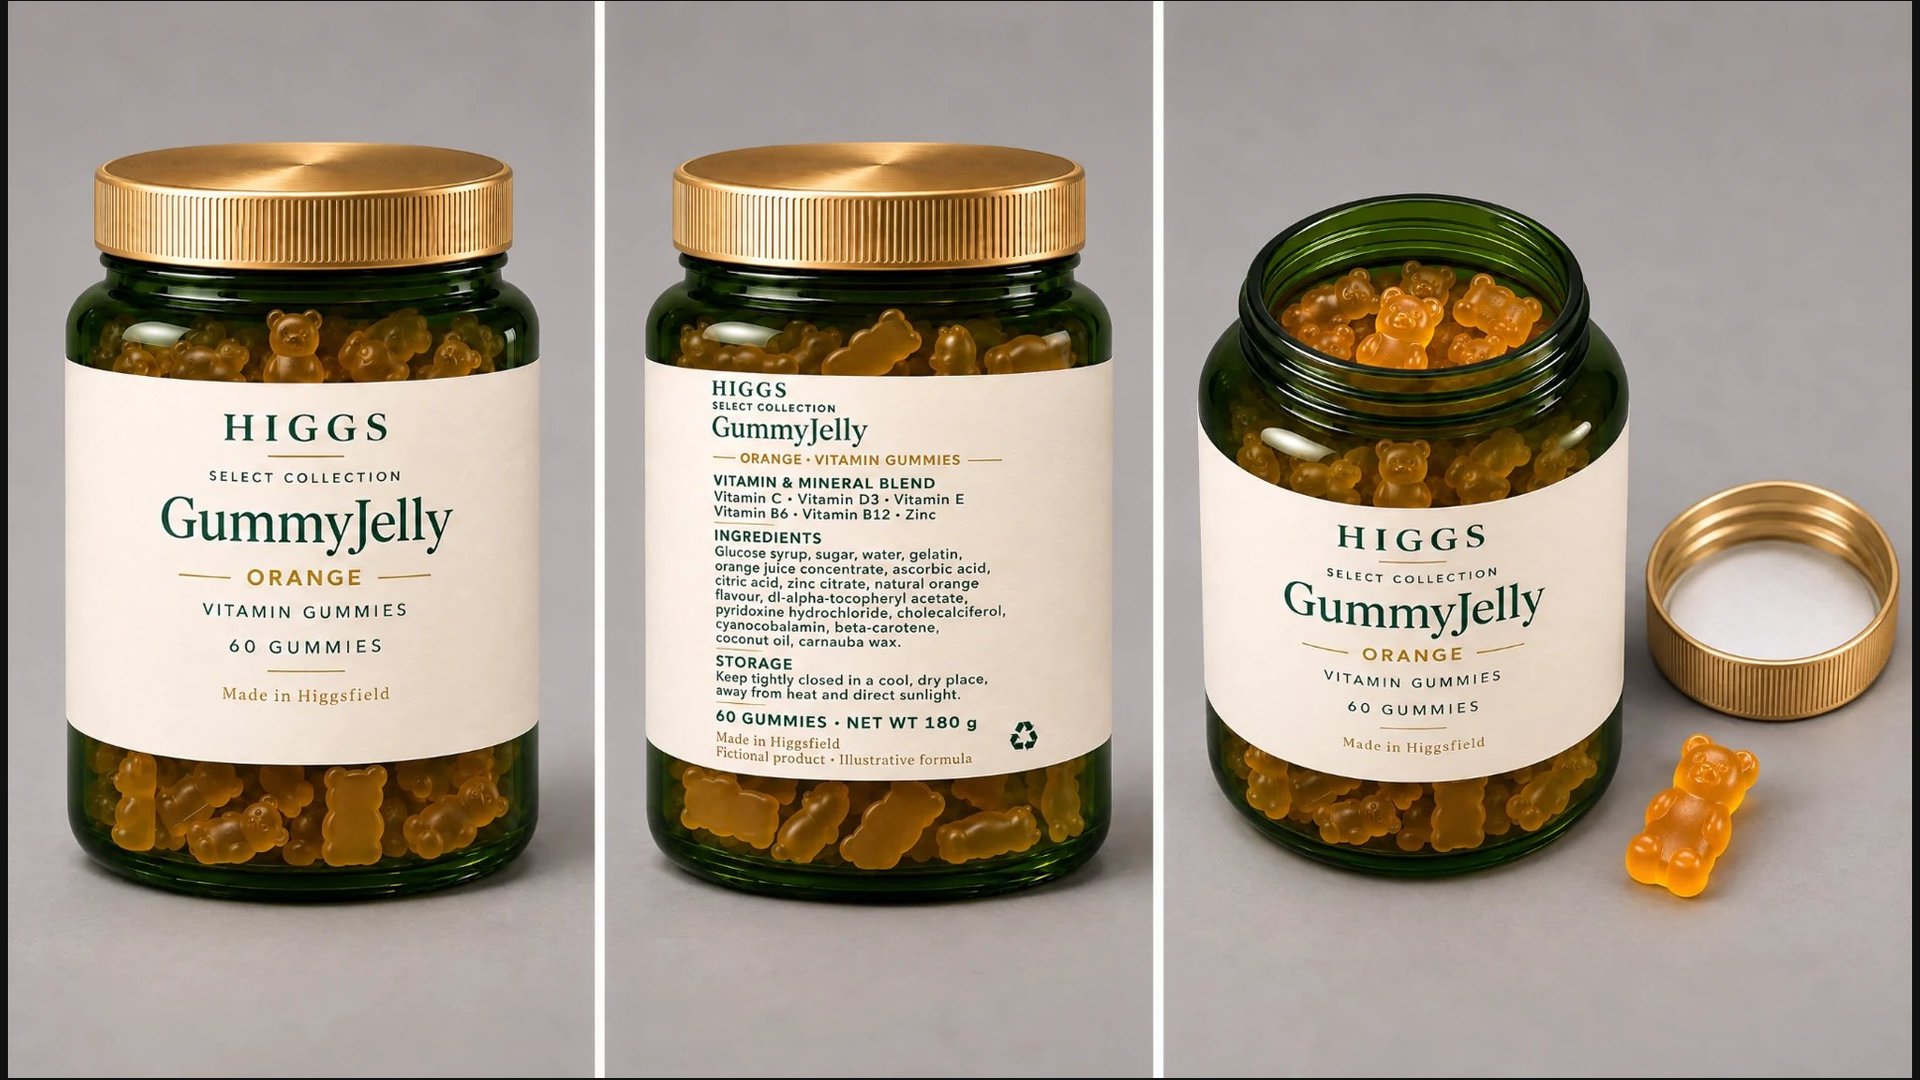
Before scenes with hands, prepare the product from the front, from the back and opened. The front view locks the recognisable packaging, the back view the reverse side. The open jar shows the neck, the thread, the contents and the inside of the removed lid.
Screen
Realistic template: front side, back side and the open jar.
For the animated story we adapted the product to a 3D cartoon style. We kept the green jar, the gold lid and the label design. In the scenes we use the approved stylised version.
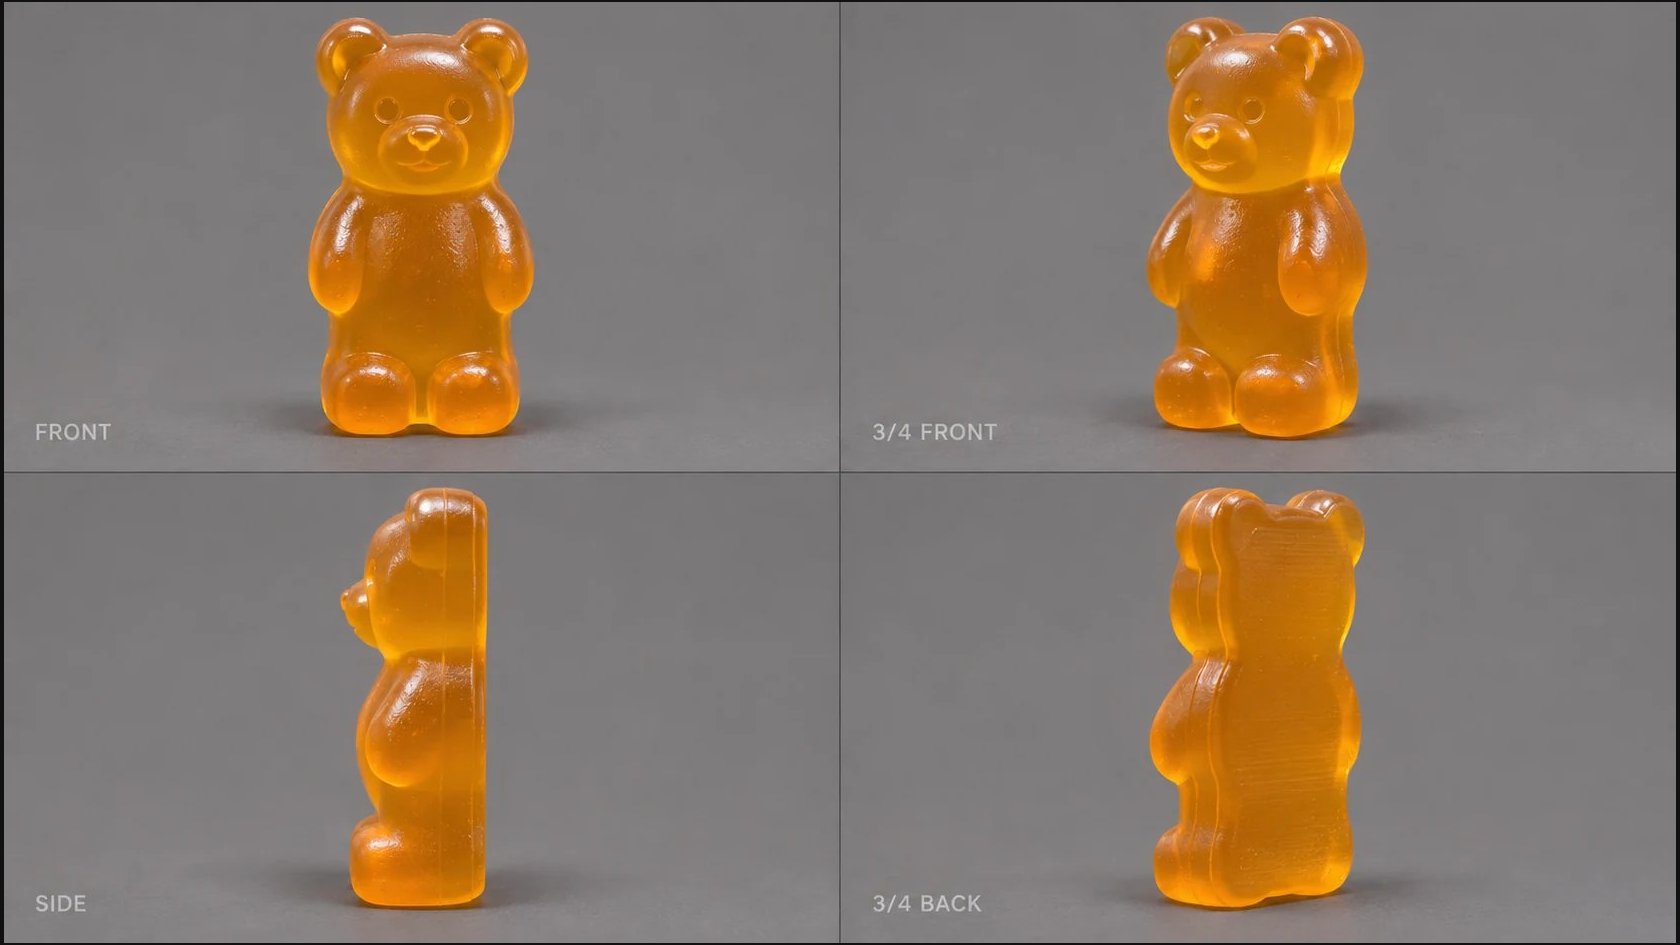
Screen
A separate gummy bear helps keep its shape during turns and interaction with a hand.
We check the size of the gummy bear against the jar and the character's fingers. An image of a single gummy bear filling the frame does not fix the scale on its own. For a working shot, use the open jar with a gummy bear next to it and check that it can be held naturally between the fingers. Do not invent centimetres if the product dimensions are not given.
We also check the capacity of the backpack and the size of the lunchbox and bottle. If the items do not match already in the image, it is hard to fix with a single phrase in the video prompt.
Create the characters and transfer them into the style
For this example the mother and son were created with AI Influencer via MCP and then used as references for stylisation. We show the rest of the process manually inside the project.
You can attach an image as a reference via the right-click context menu or by dragging the material into the references window.
Video 03 · From a realistic look to 3D cartoon. We add the image via the context menu or by dragging it in. In our example we choose GPT Image 2.5 and enter /3Dcartoon.
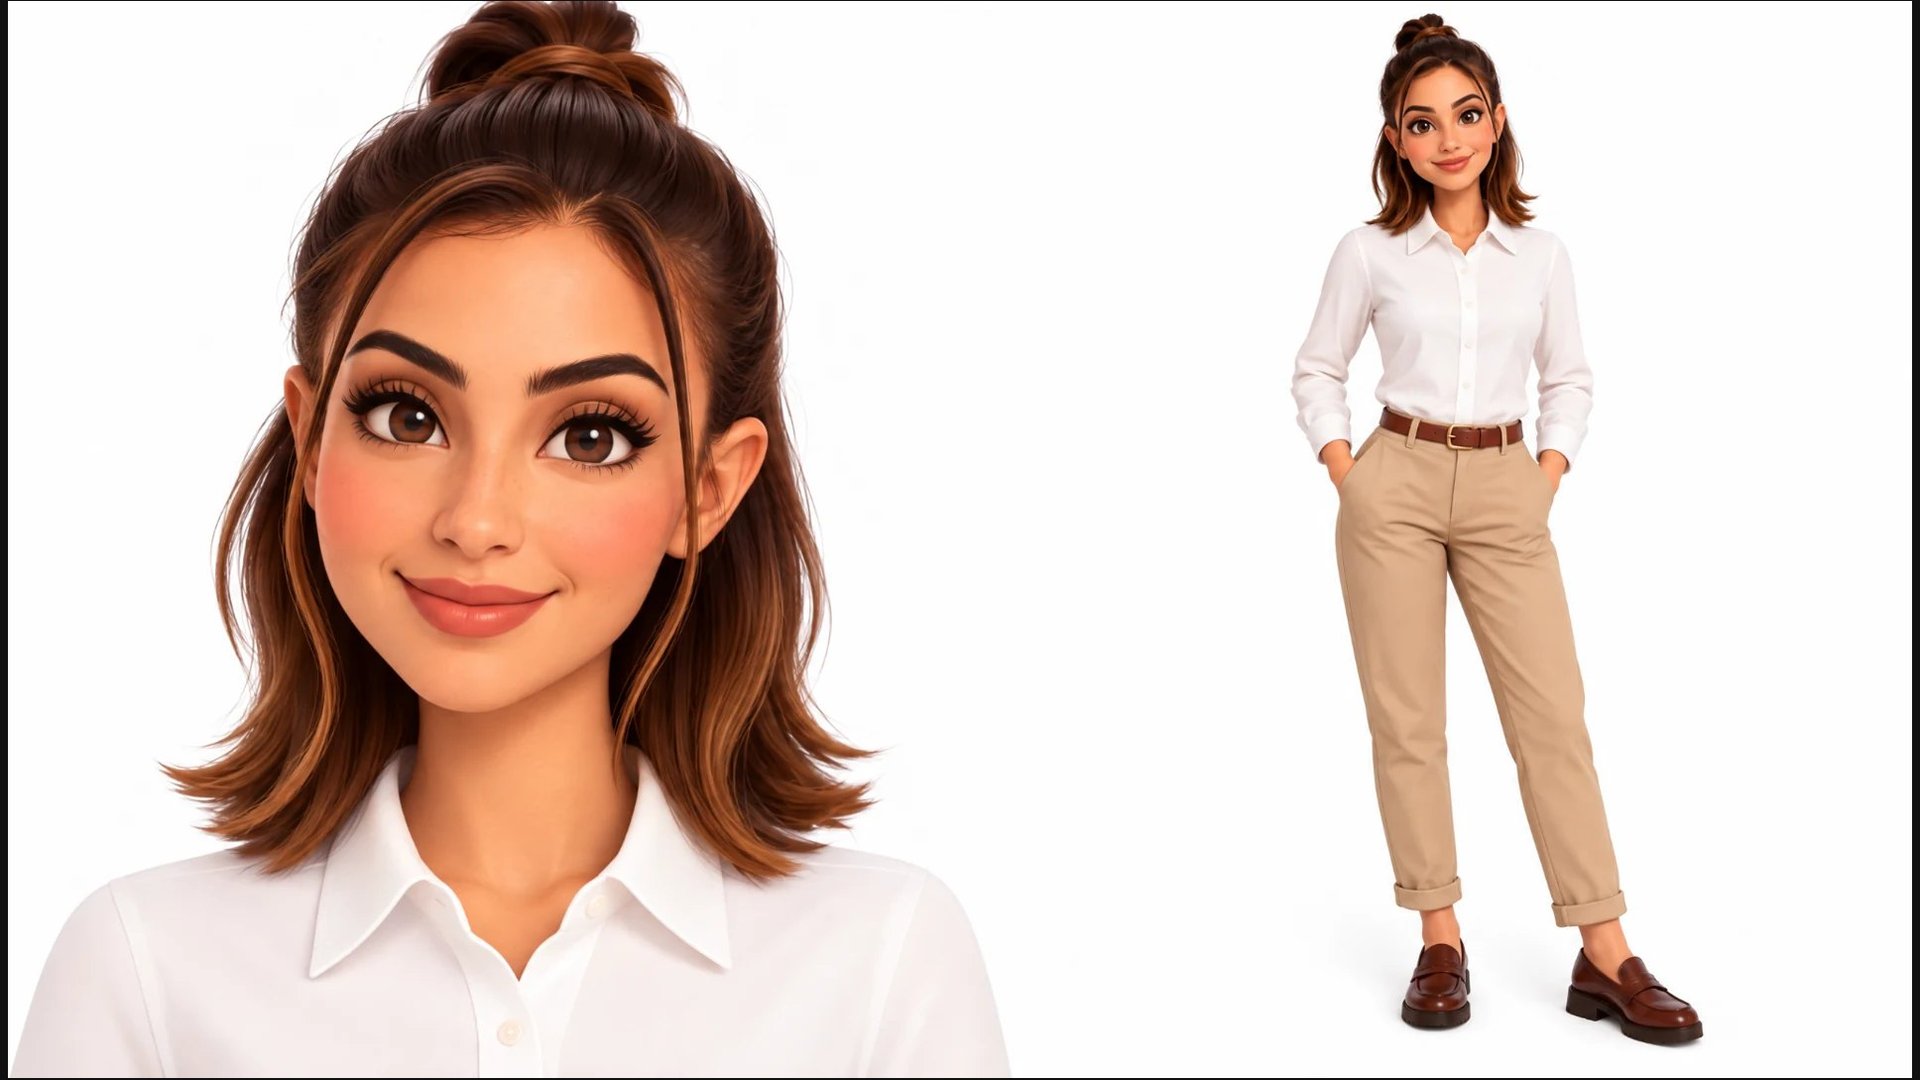
Prompt
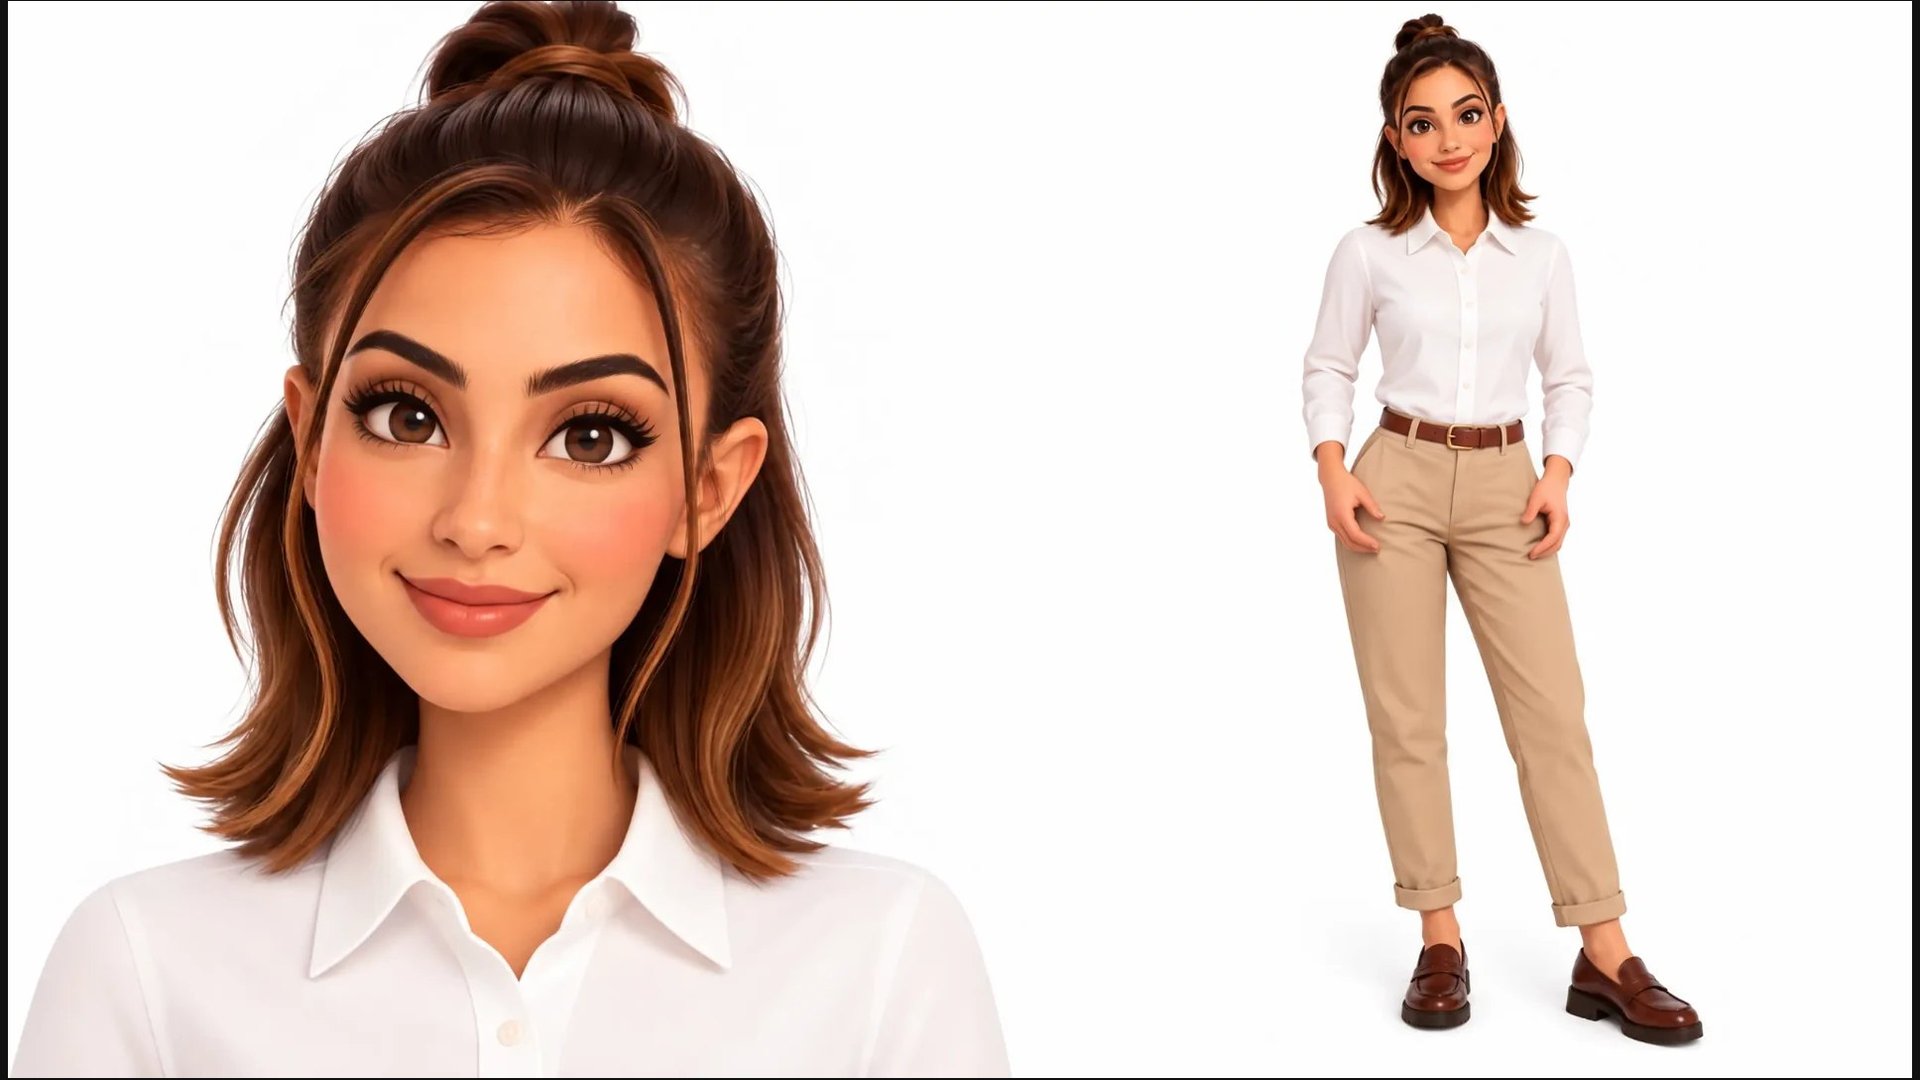
Mum: portrait and full length after the style transfer.
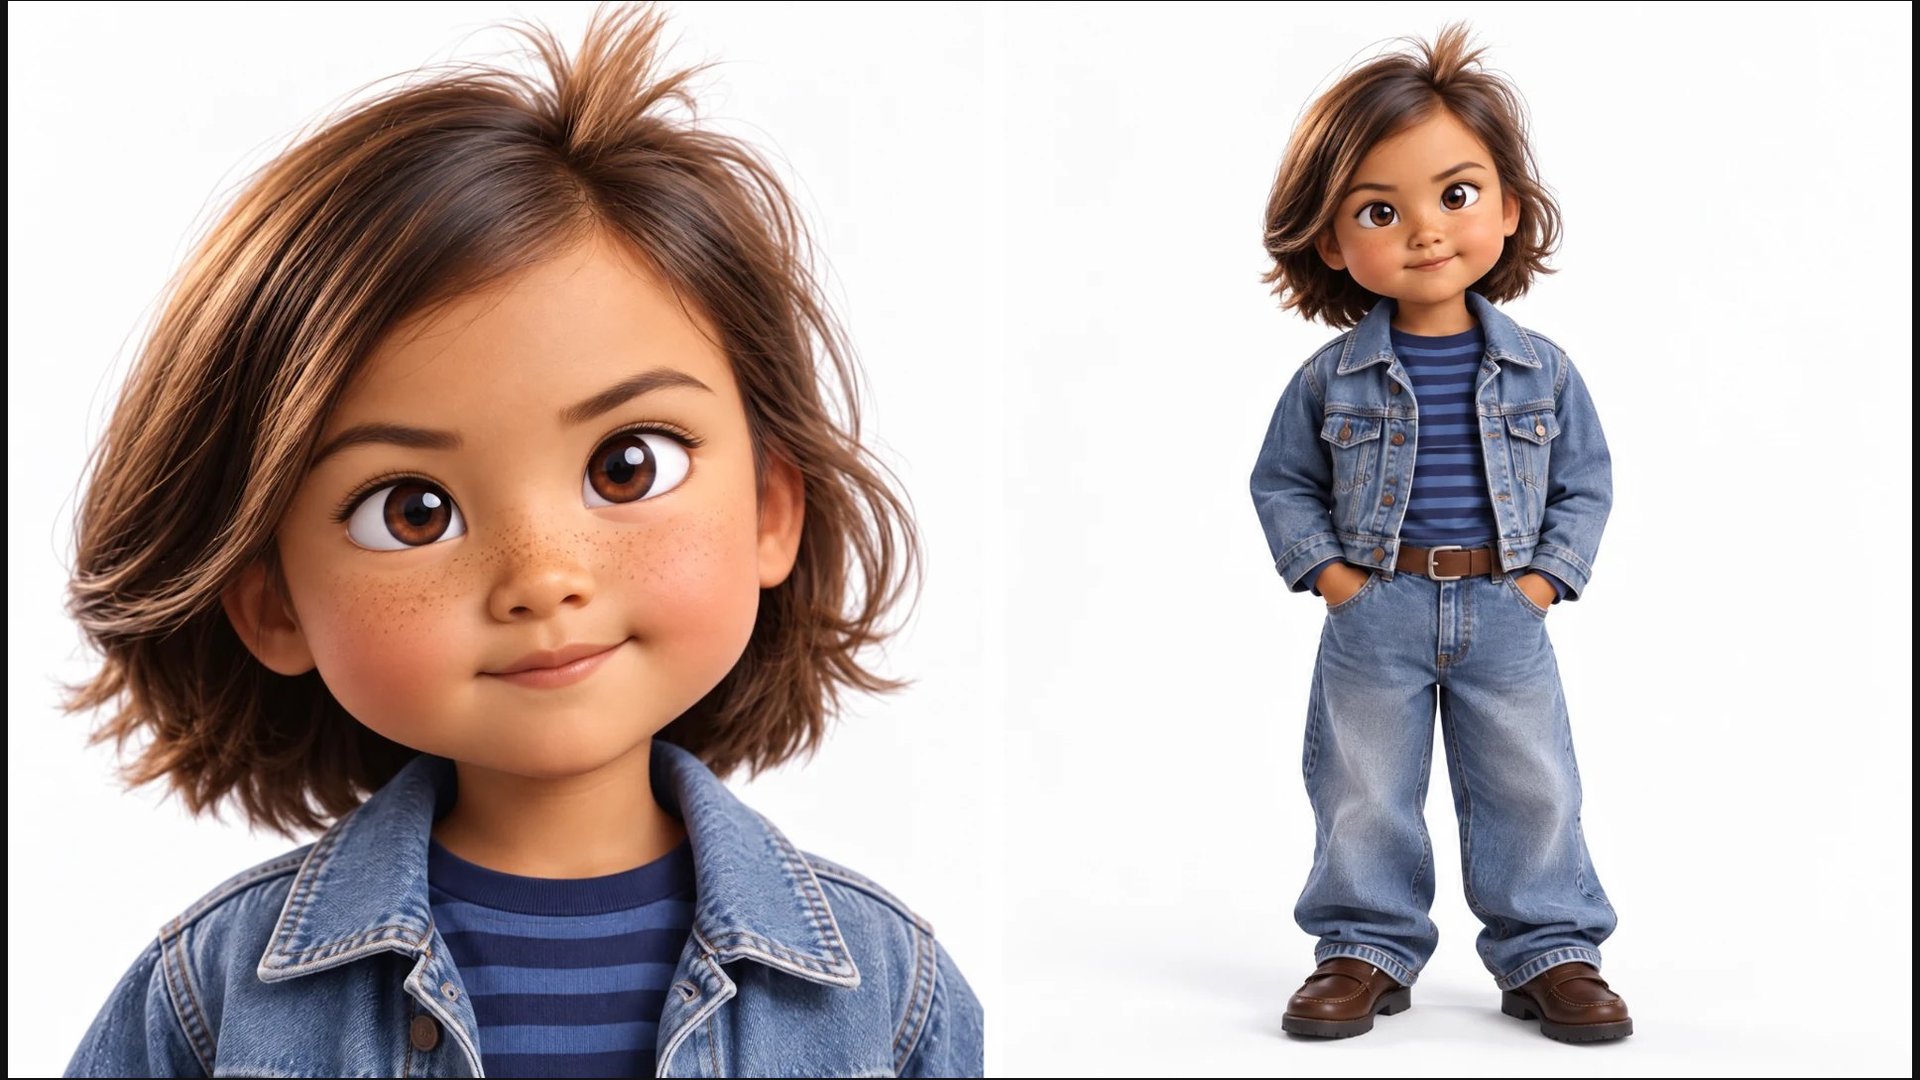
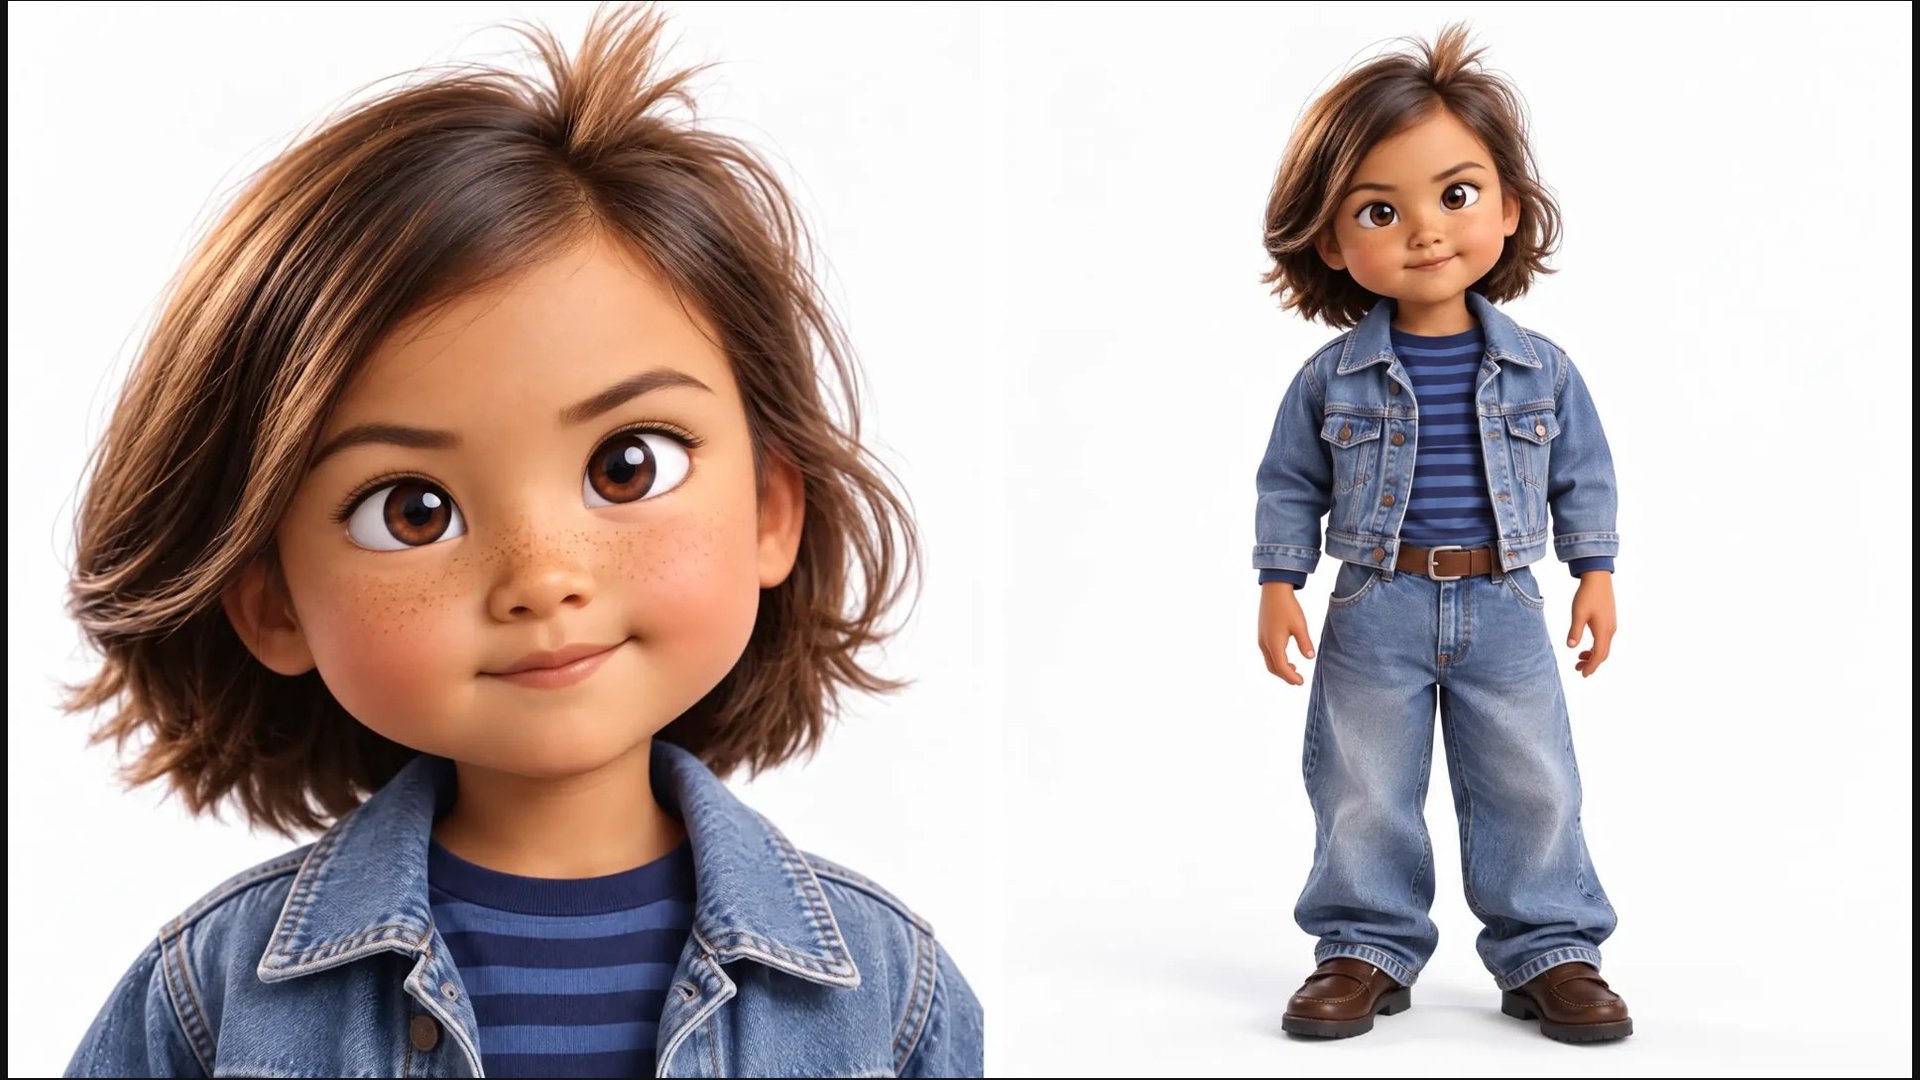
Son: portrait and full length in the same style.
Judge the result as a working reference: what matters is a recognisable face, the clothes, the proportions and the visibility of body parts involved in the action. A beautiful pose does not yet mean a convenient base for video.
Edit an image inside the project
In the first characters the hands were hidden in pockets. That does not suit our story: the mother hands over items and opens the jar, and the son takes the gummy bear and packs the backpack. We fix the position of the hands before the video.
In the editor, select the area of the hands, sleeves and the adjacent part of the torso. Describe the specific change and what needs to stay the same. Leave the selection enough room for the new position of the hands.
Video 04 · Local edit of the hands. We open image editing, select the area and ask to lower the arms along the body.
Edit prompt
Corrected mum: hands visible and free for interaction.
Corrected son: we keep the look and change the position of the hands.
After the edit, check the hands, sleeves and pockets. Keep the approved version as the base so the next generations do not go back to the old pose.
Video 05 · Download the file and add external material. We download the edited image and show how to upload an external file via Upload directly into the project.
Prepare the props for the story
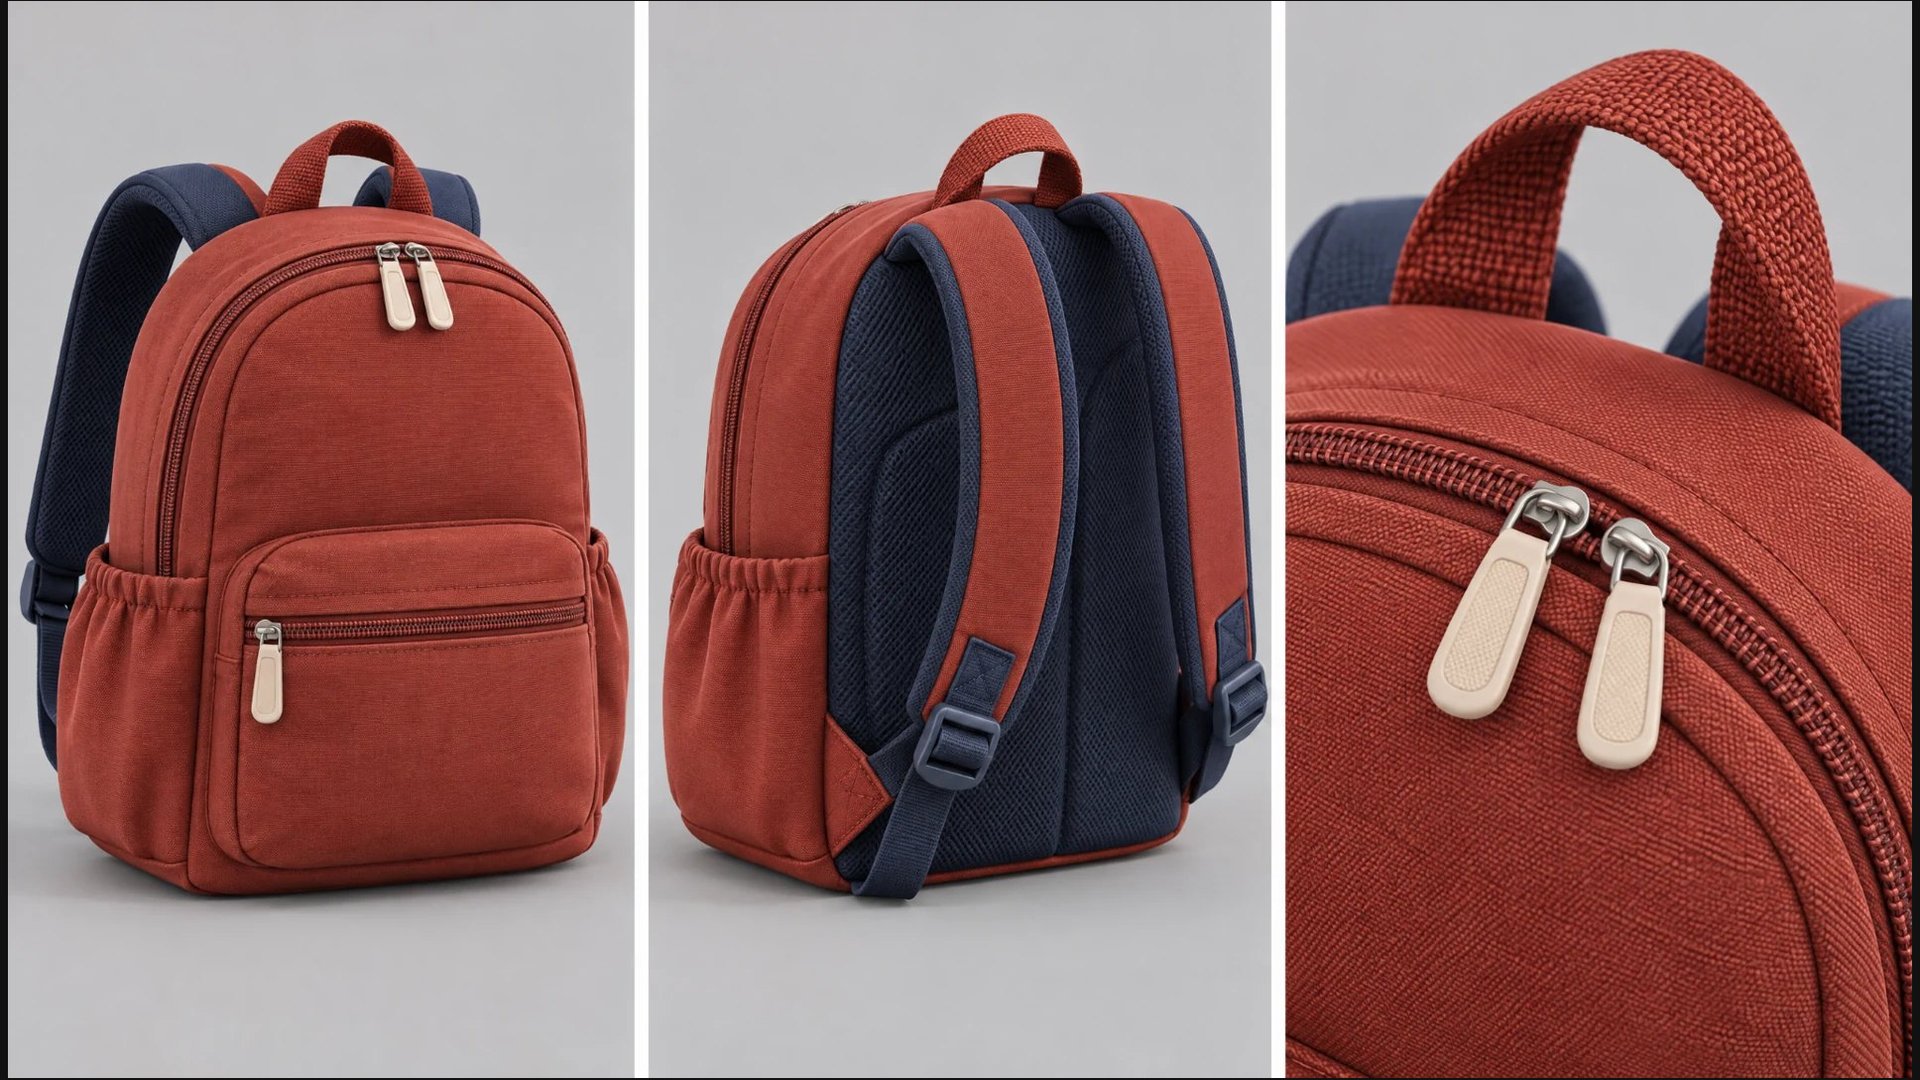
The set of props is defined by the actions in the script. We need a backpack, a lunchbox, a bottle, slippers and a card with a pencil. For the props we use a three-panel sheet: front view, back view and a close-up of the details.
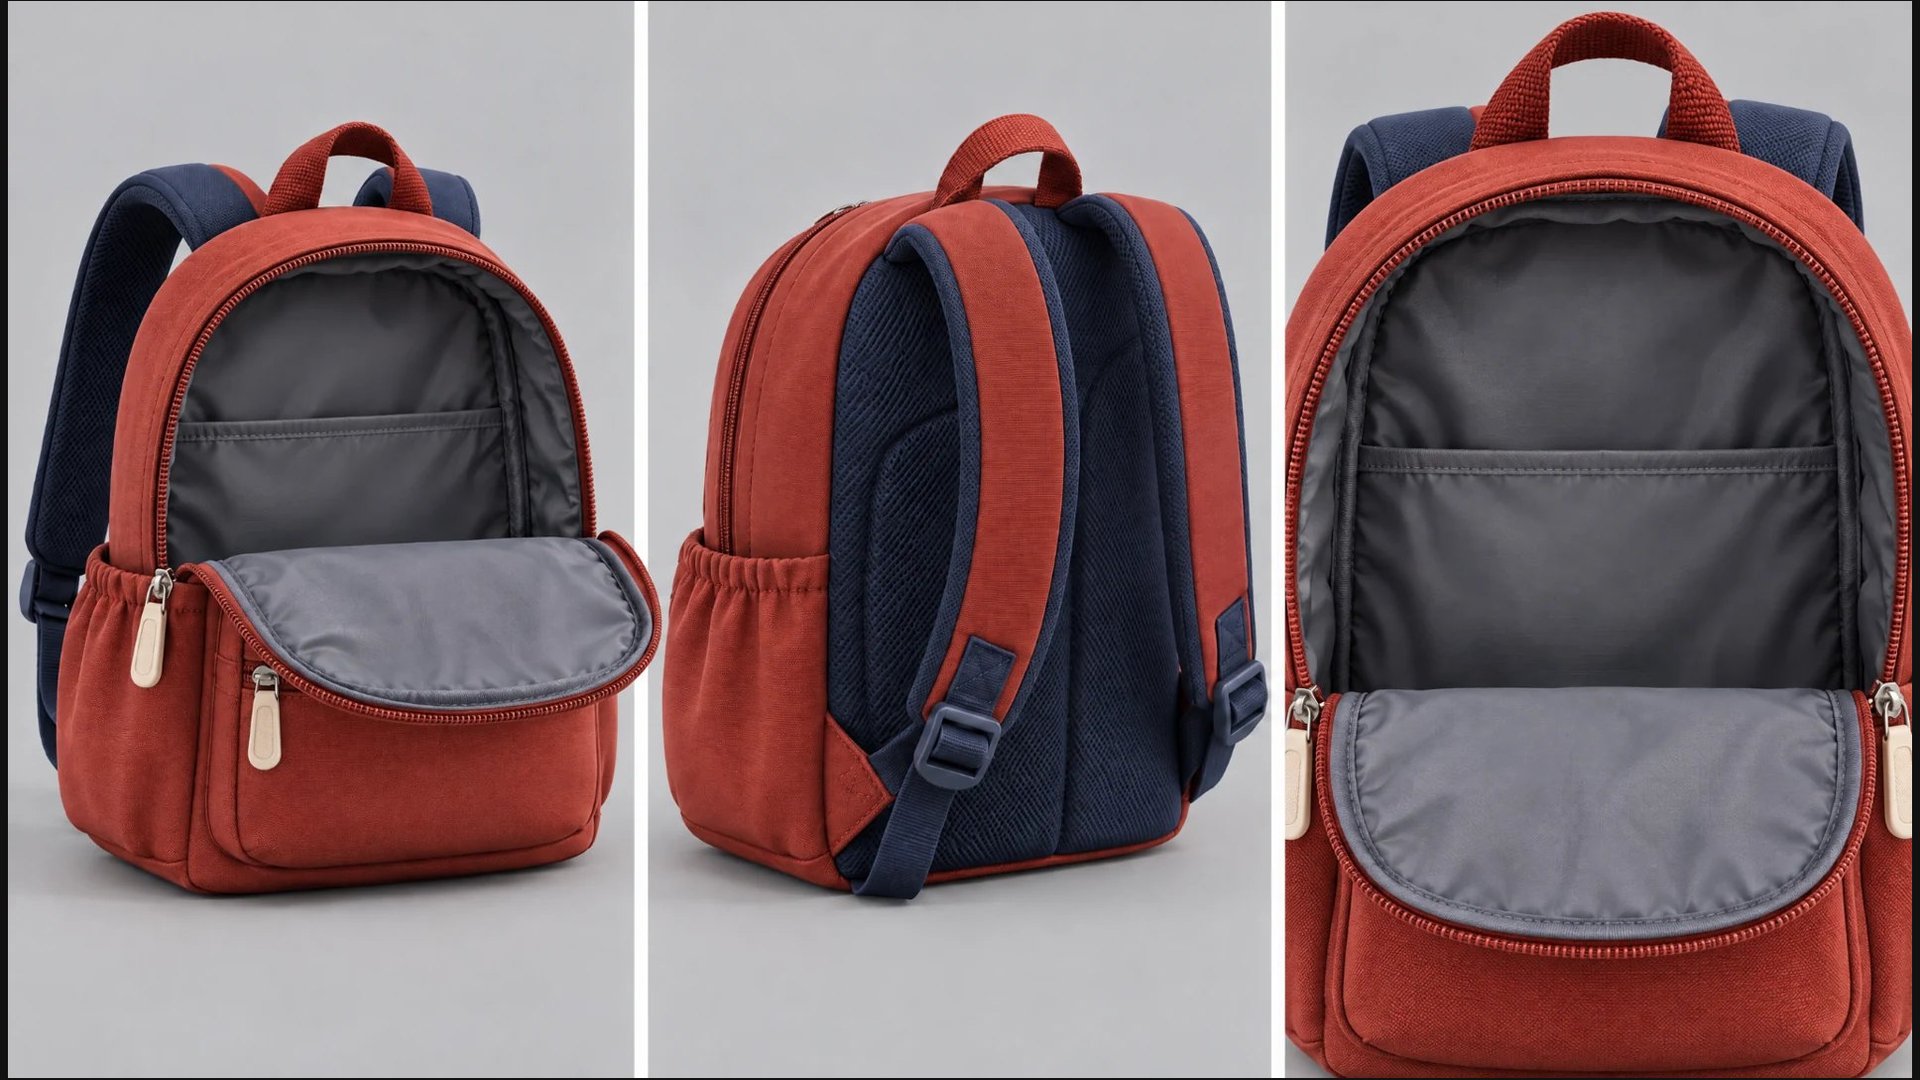
Closed backpack: exterior, straps and zip details.
Open backpack: wide front flap and grey lining.
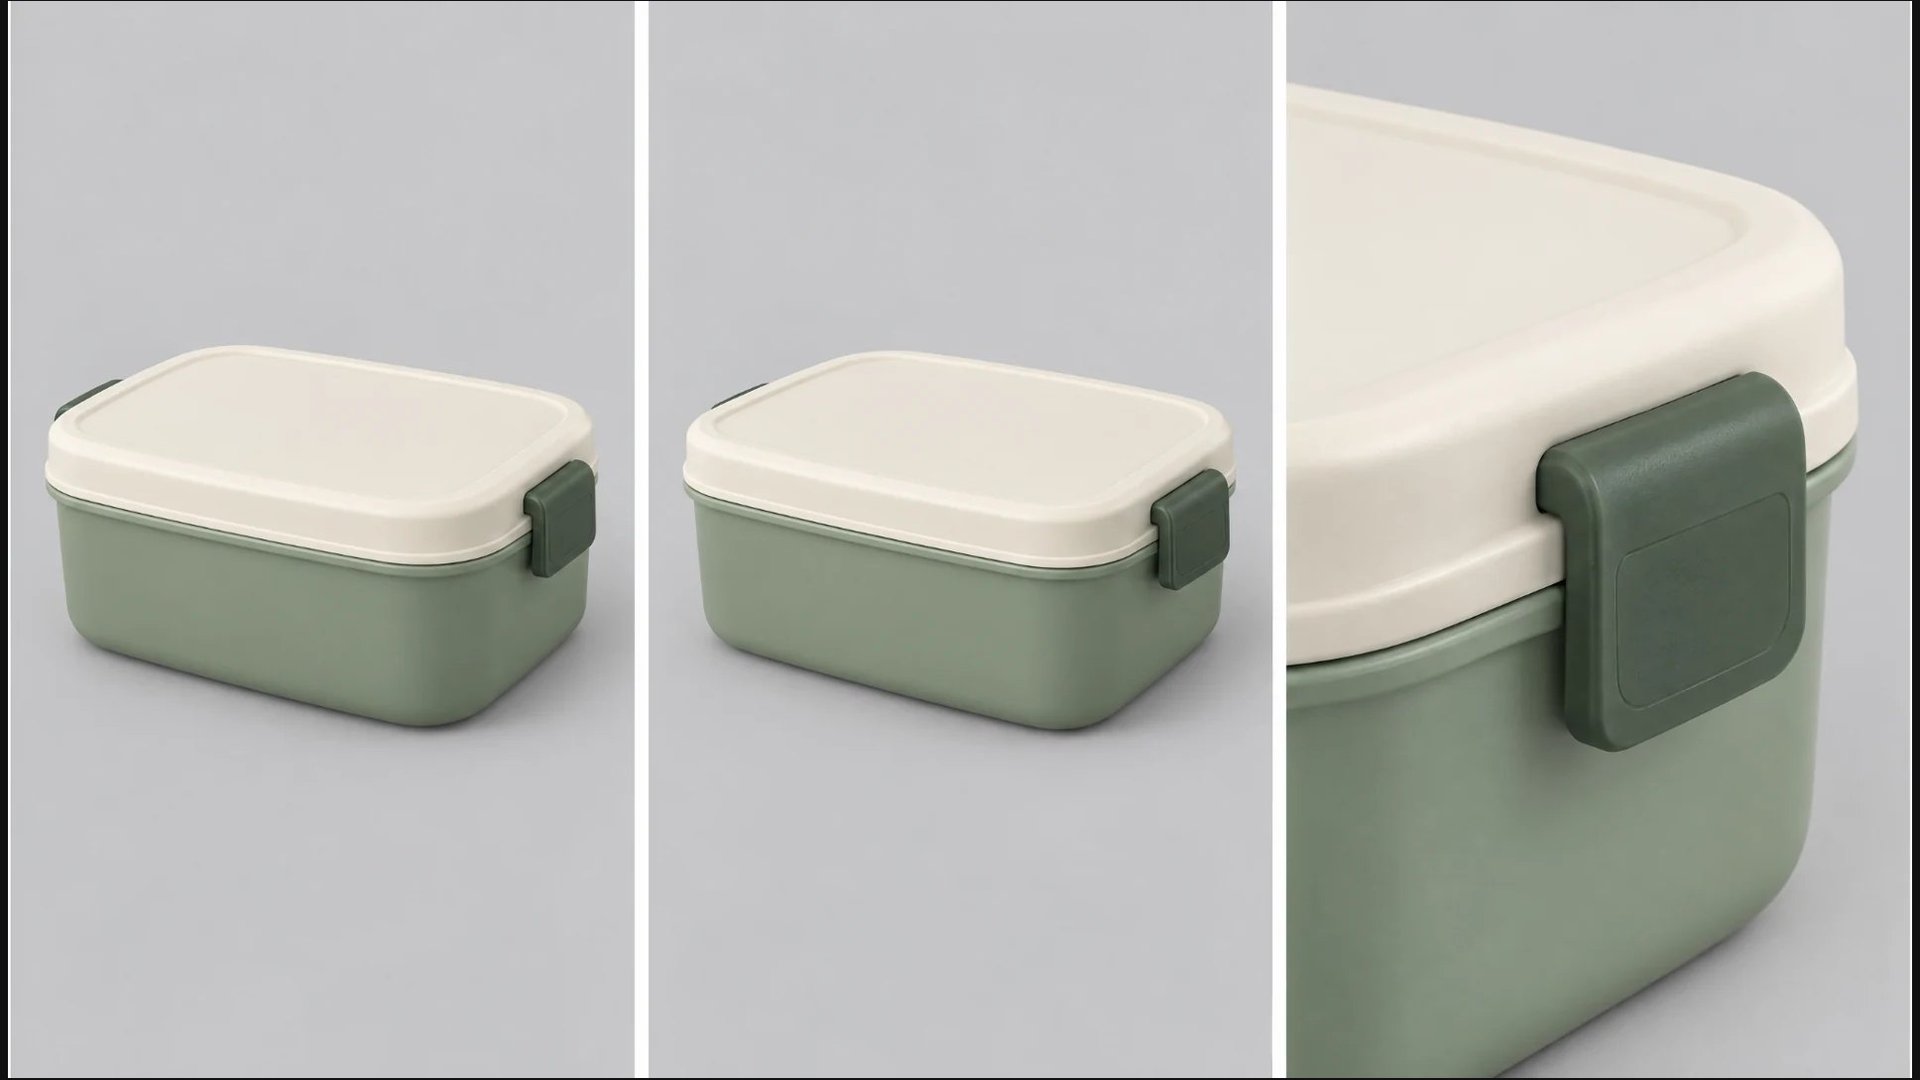
Lunchbox with the lid closed.
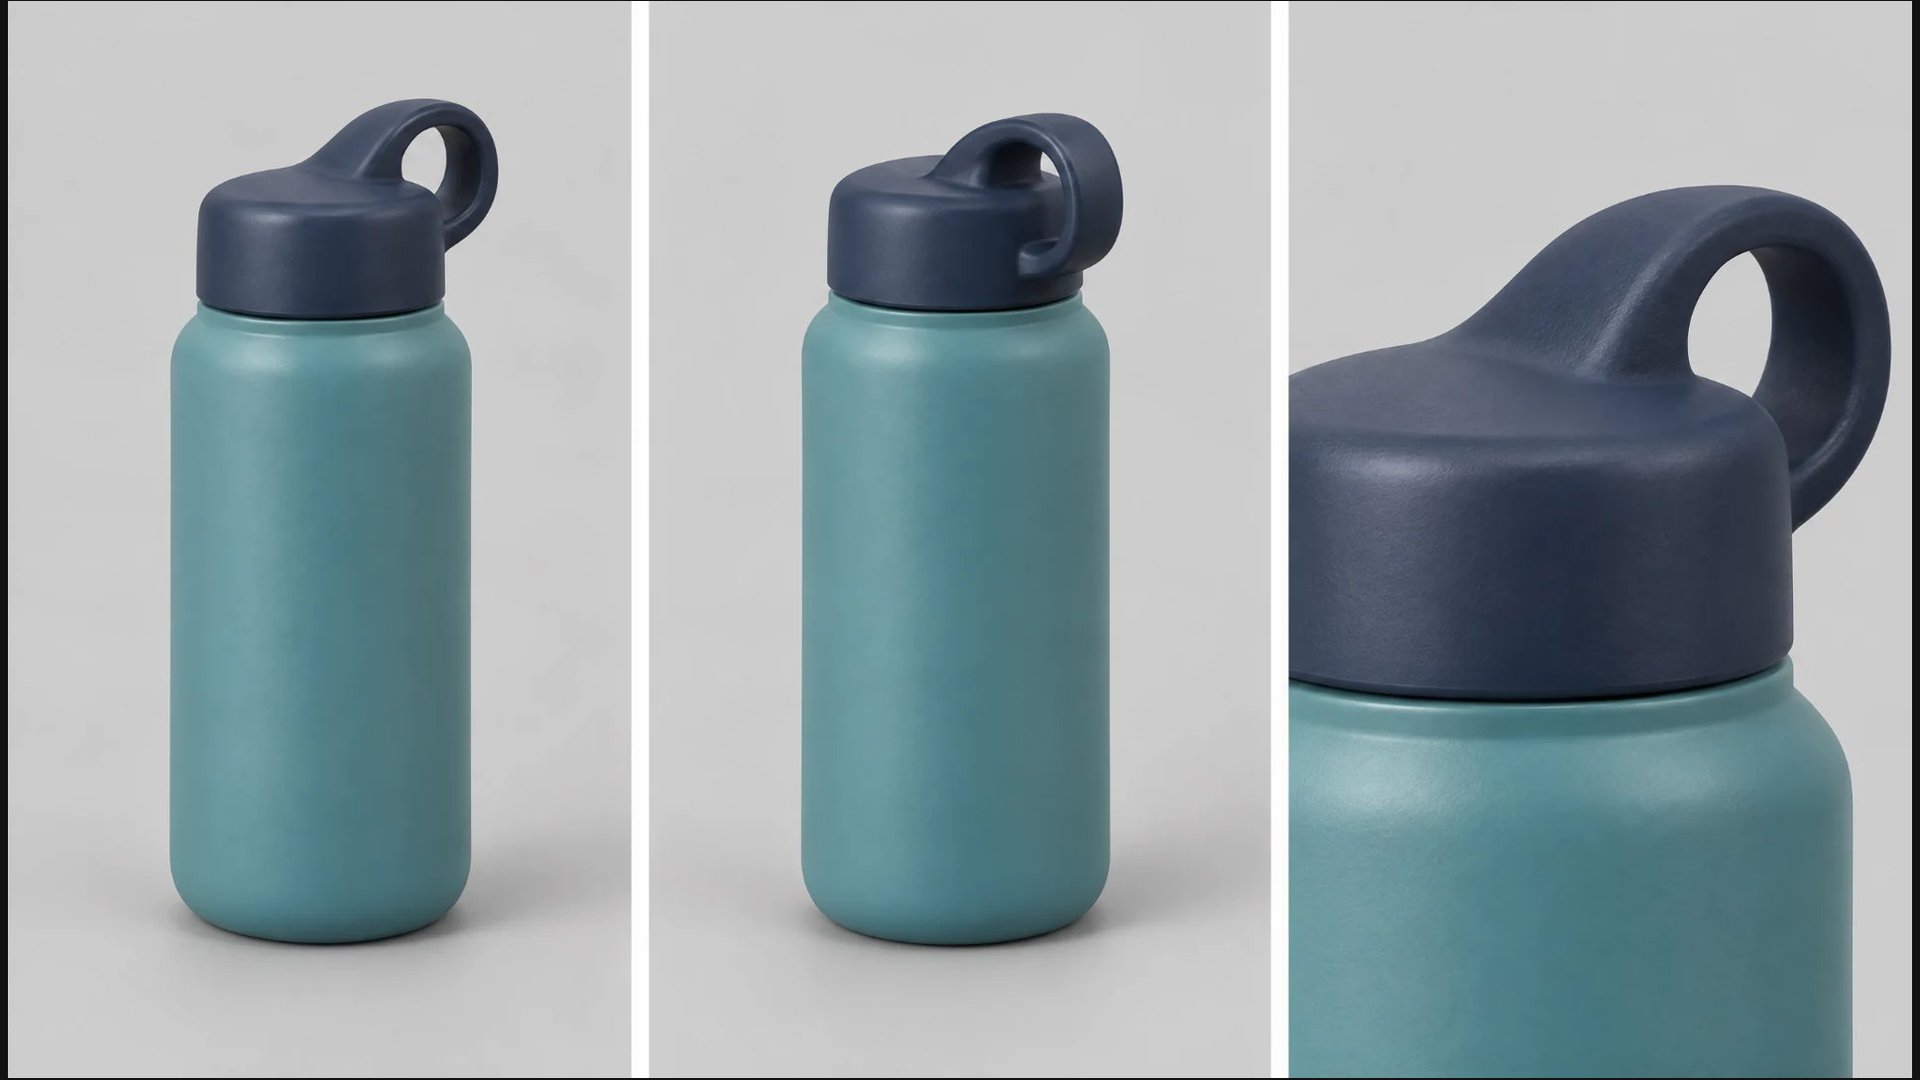
Bottle with a dark cap.
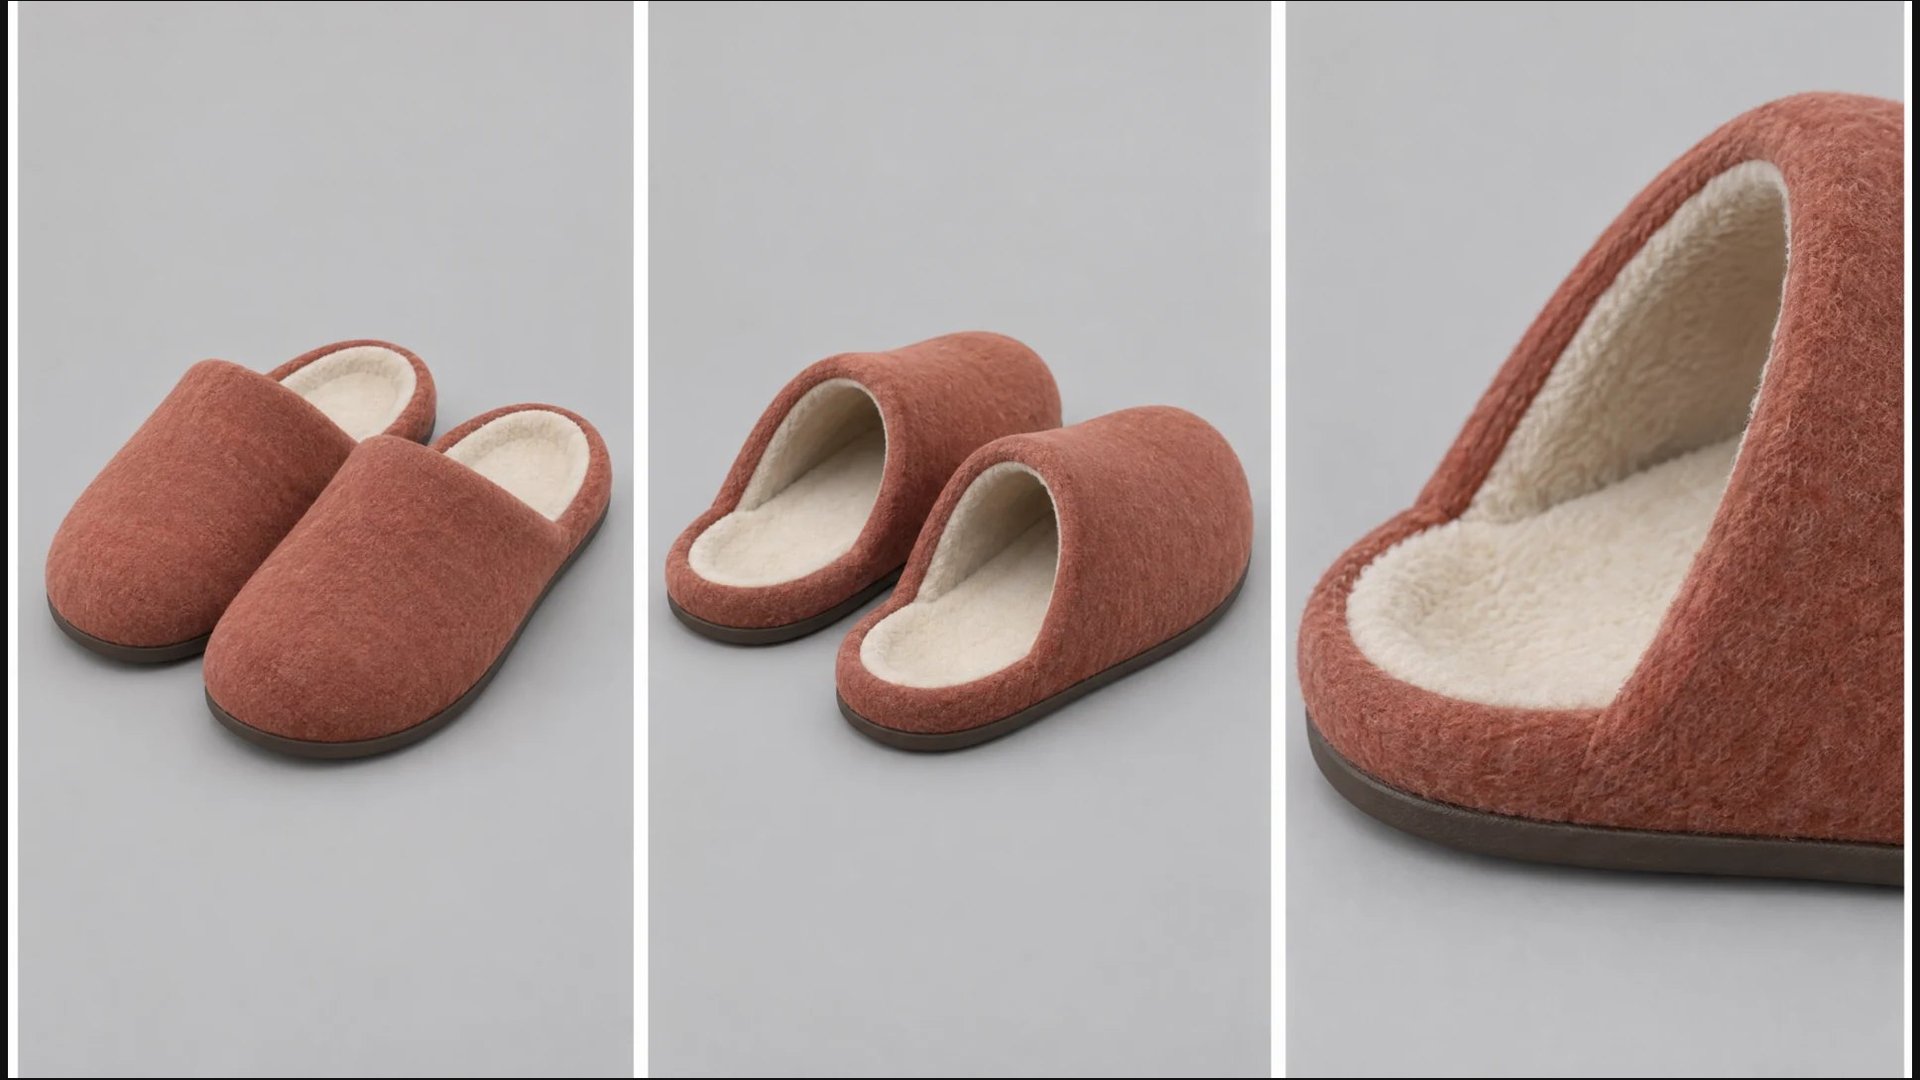
Slippers: the prop for the final joke.
The open backpack is a state of the same item. The reference shows a wide front opening, so the lunchbox goes in through it. If you describe a narrow top opening, the text will start to argue with the image. The same logic applies to the jar: the removed lid and the thread must match the closed packaging.
Lock in the space and the time of day
We prepare locations in 16:9 to capture more of the space: the door, furniture, window and work surface. The final videos are made in 9:16; the wide reference sets the layout of the room, the prompt sets the framing of the scene.
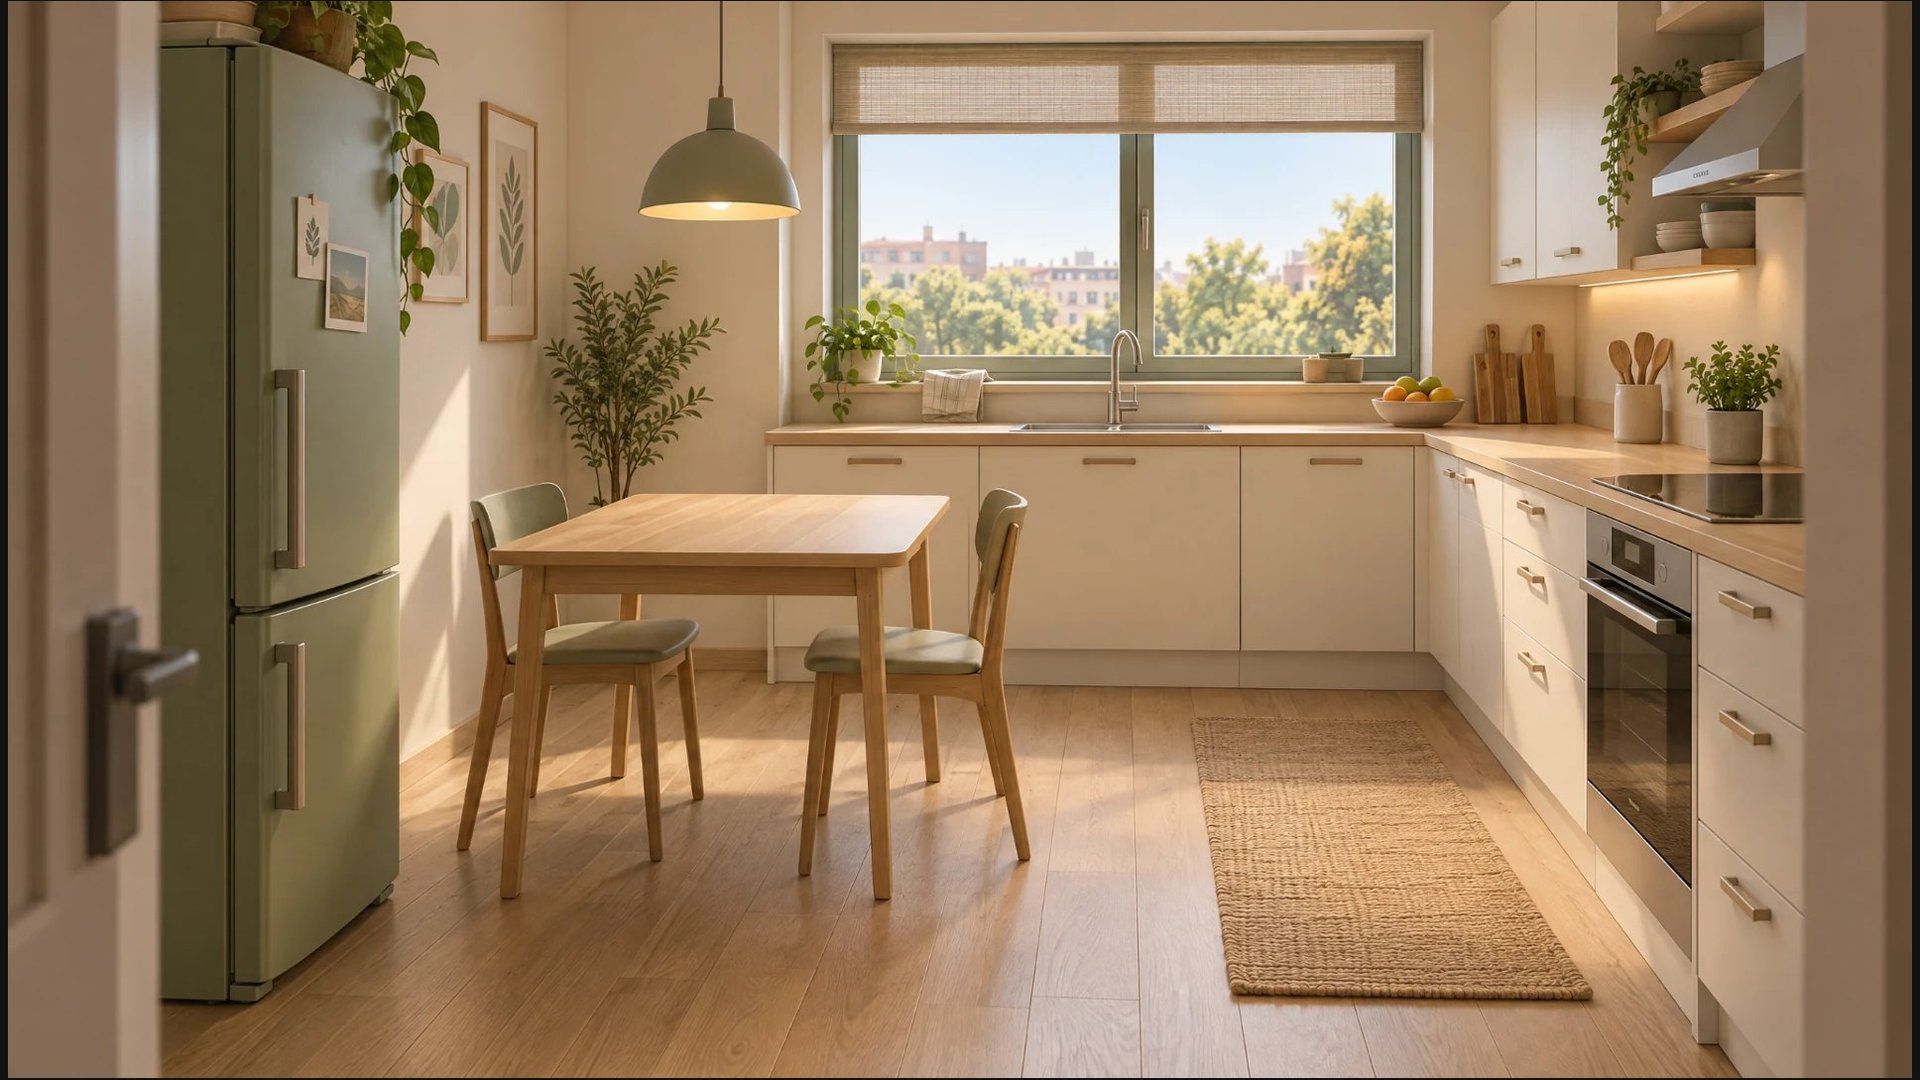
Kitchen in the morning: basic geometry and daylight.
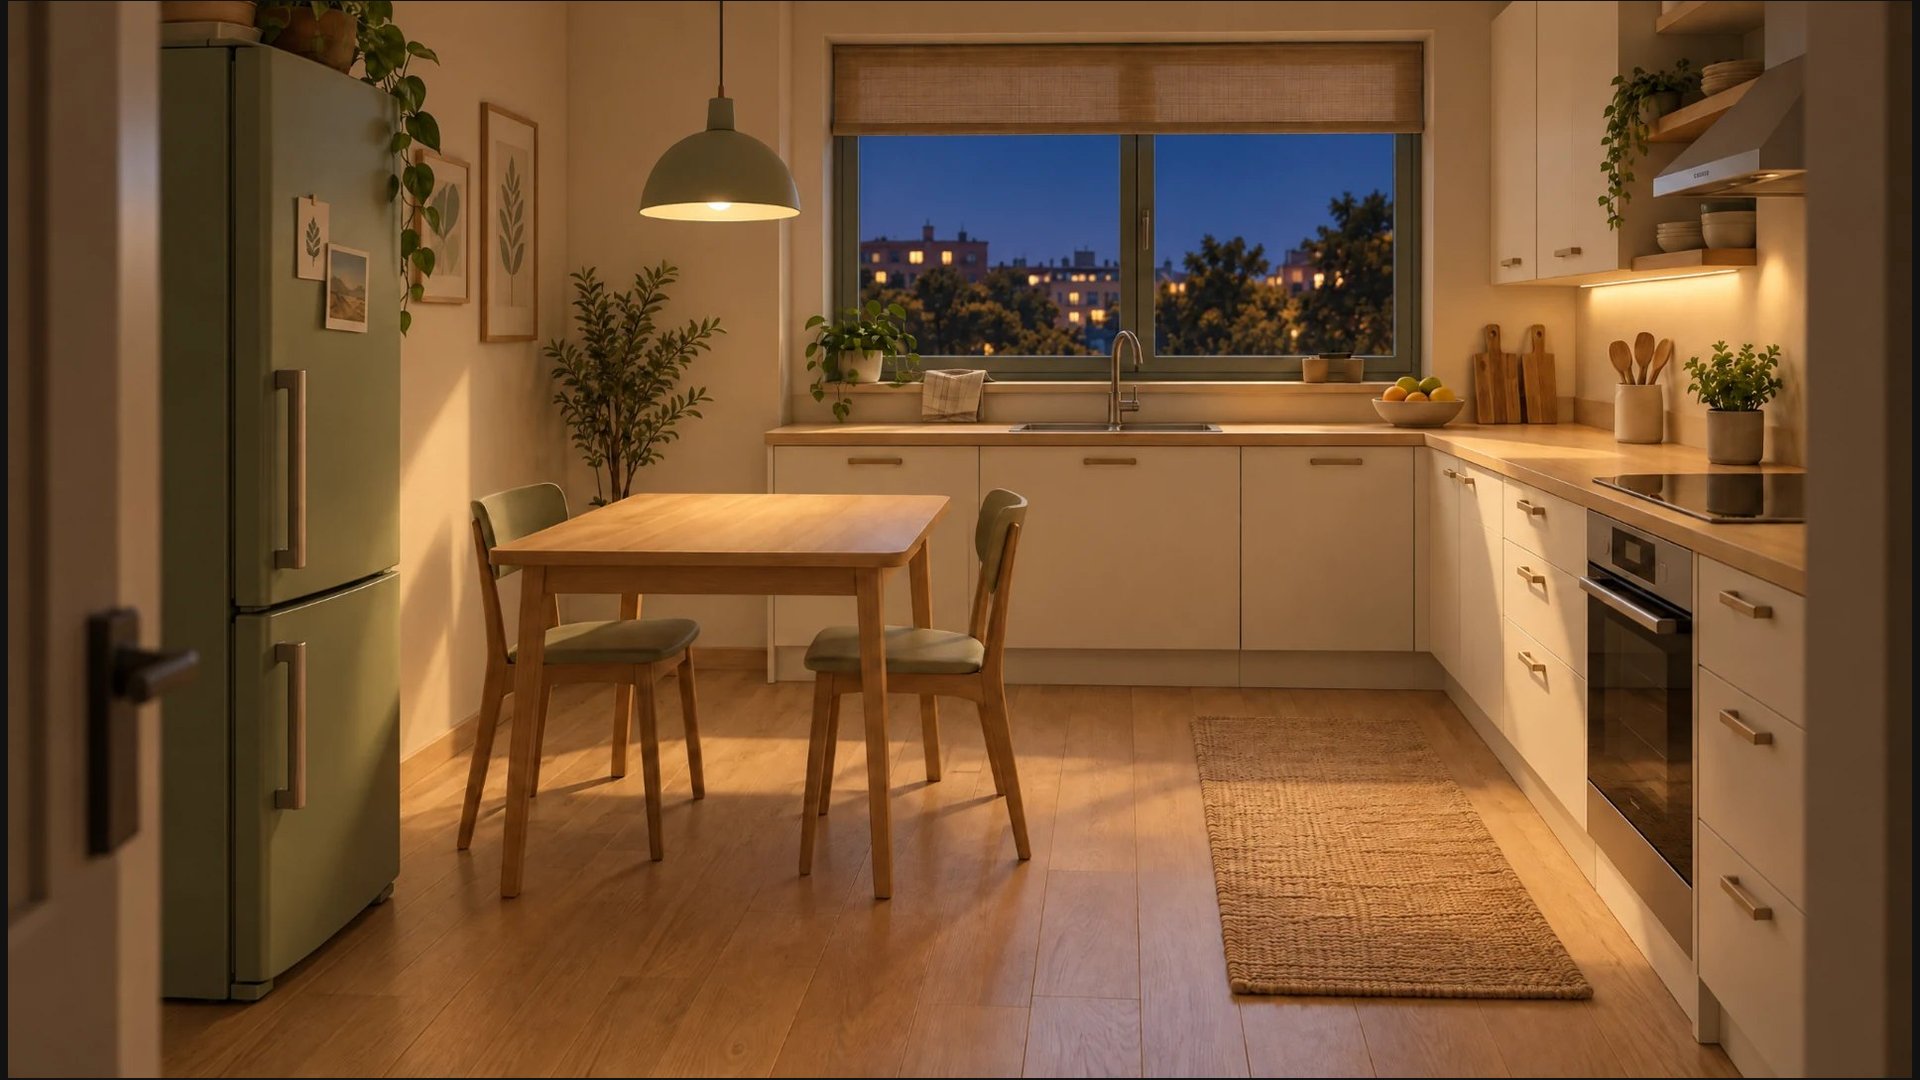
The same kitchen in the evening: we keep the room and change the time of day.
For the evening version we attached the finished kitchen as a reference and used a simple request:
Prompt
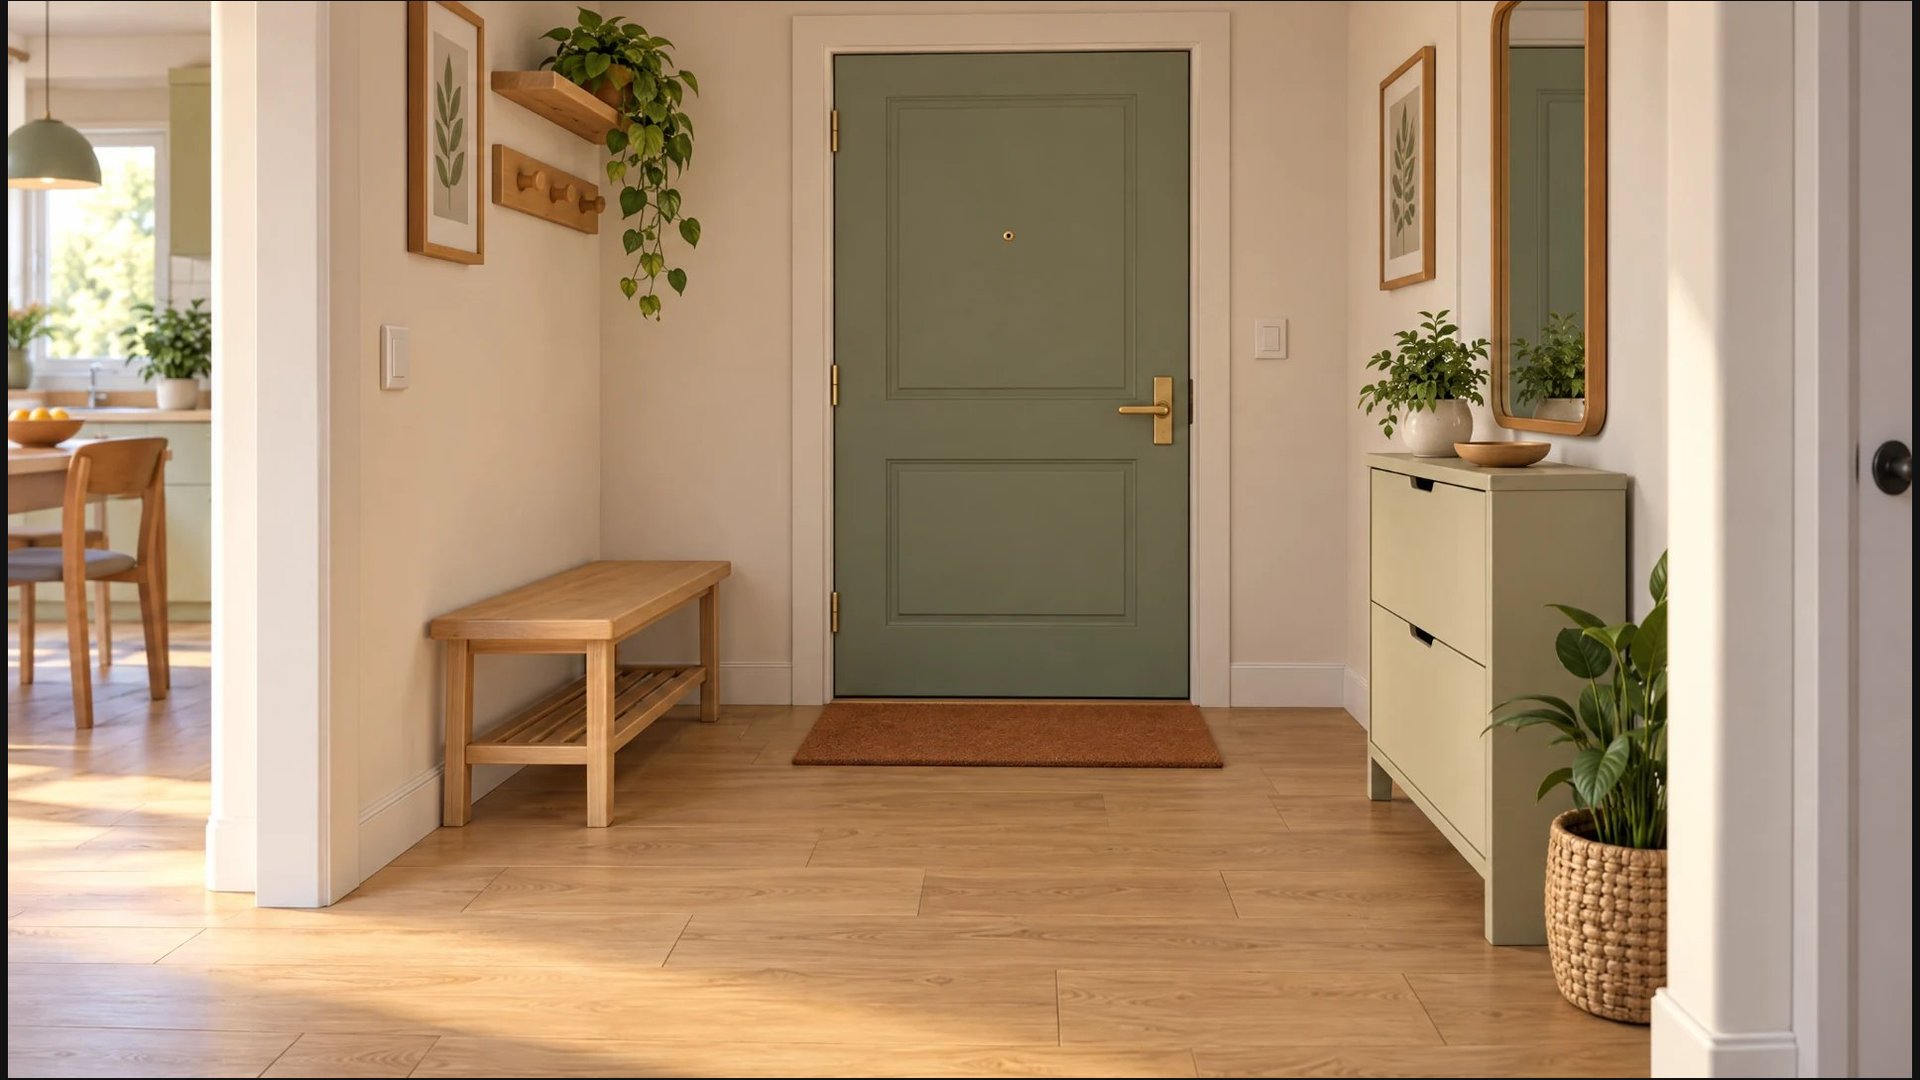
Entryway Door: a view from inside the apartment towards the closed green front door.
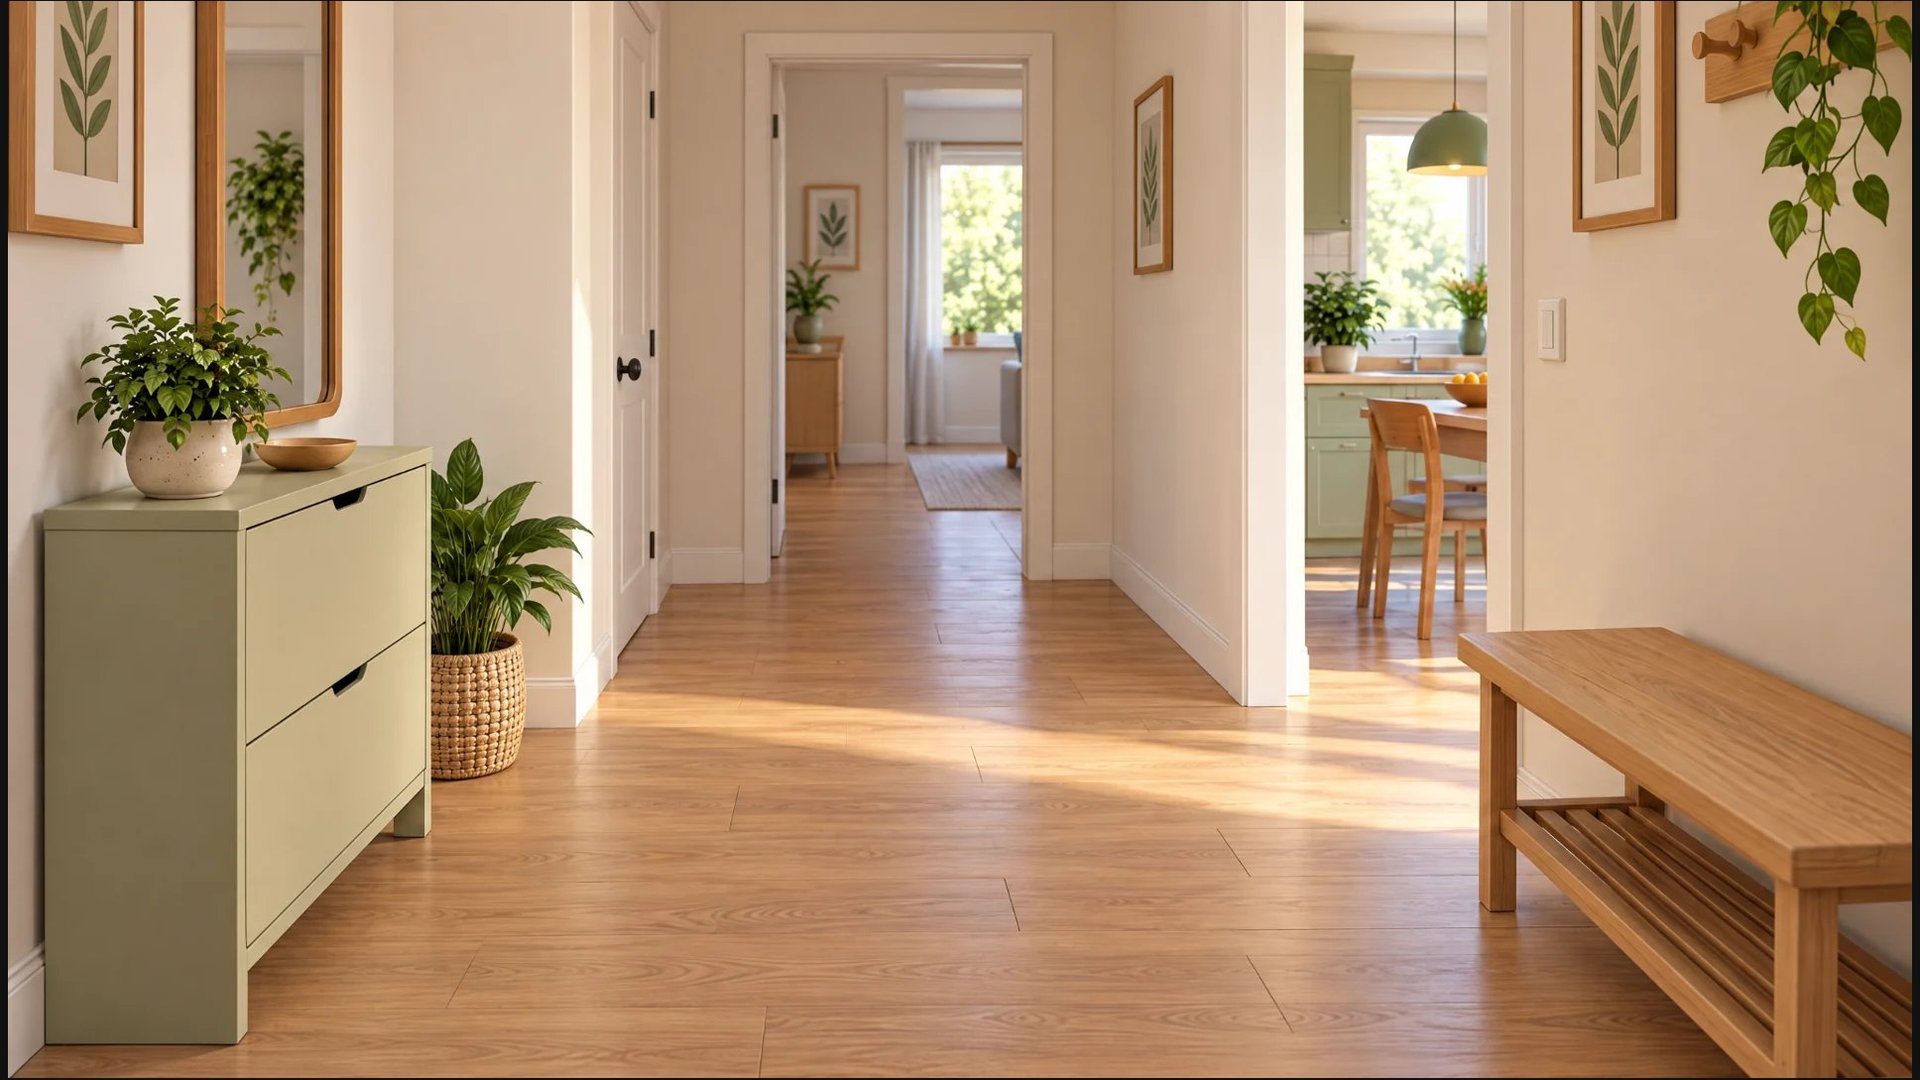
Entryway Reverse: a view from the front door into the depth of the apartment.
Reverse is used for the mother's reverse shot. The boy is at the exit, the mother is inside the apartment, closer to the kitchen. When the camera changes, the sides of the furniture on screen naturally swap. A requirement like "Mum is always on the left" would be contradictory for opposite angles.
For the kitchen dialogue we choose a constant composition: son on the left, mum on the right, the camera on the open side of the table. The position of the jar and lid carries over to neighbouring shots. We check small inconsistencies in the locations on a working shot; noticeable differences are fixed before long generations.
Approve and assemble the working set
Before the video, the team reviews the characters, props and locations. Approved marks an approved image, Rejected a rejected variant. This way everyone knows which version to rely on.
Video 07 · Statuses and moving materials. Approved / Rejected, moving files to the right folder, removing them from it and moving them back.
Approved versions can be collected in Selected. Choose the folder name and the approval order to suit your team's process. If a decision changes, update the status and the working set so editors don't use different versions of the same look.
In the video we separately show folder operations. Deleting a material entirely and changing which folder it belongs to are different actions: go by the specific command you choose.
Create Elements and check them
We save the approved materials as Elements. One element represents a character, a prop or a location. Clear names help you quickly find the visual materials you need. Spaces and props prepared in advance and locked in Elements give the model constant visual references between generations. This helps keep the image more consistent and reduces drift in appearance, the shape of props and the layout of rooms. We still check the result: elements set a base for repeatability but do not guarantee that nothing changes at all.
Video 08 · Adding materials to Elements. We create elements for the characters, product, props and locations. We check the names and the attached images.
The backpack states have separate tags. In the script we explain that this is one bag before and after closing, not two different items.
Video 09 · Where to find the created elements. We open Elements, switch tabs and check the saved versions.
When collaborating, check the availability scope of the elements and the project or sharing settings. Before handing a task to an editor, make sure they can see the materials they need.
Give the LLM the tag cloud
After creating the elements we ended up with a set of exact tags. This is the dictionary of the project's visual materials: the LLM receives it together with the script and uses the names unchanged.
Entryway: camera facing from the door into the apartment
The LLM describes the action, composition and camera, while the tags point to the materials. In our workflow, when the prompt is pasted, recognised tags call the elements into the generation window. Check that the tags became active elements and did not stay as plain text.
Task for the LLM
Change a prop to fit the action
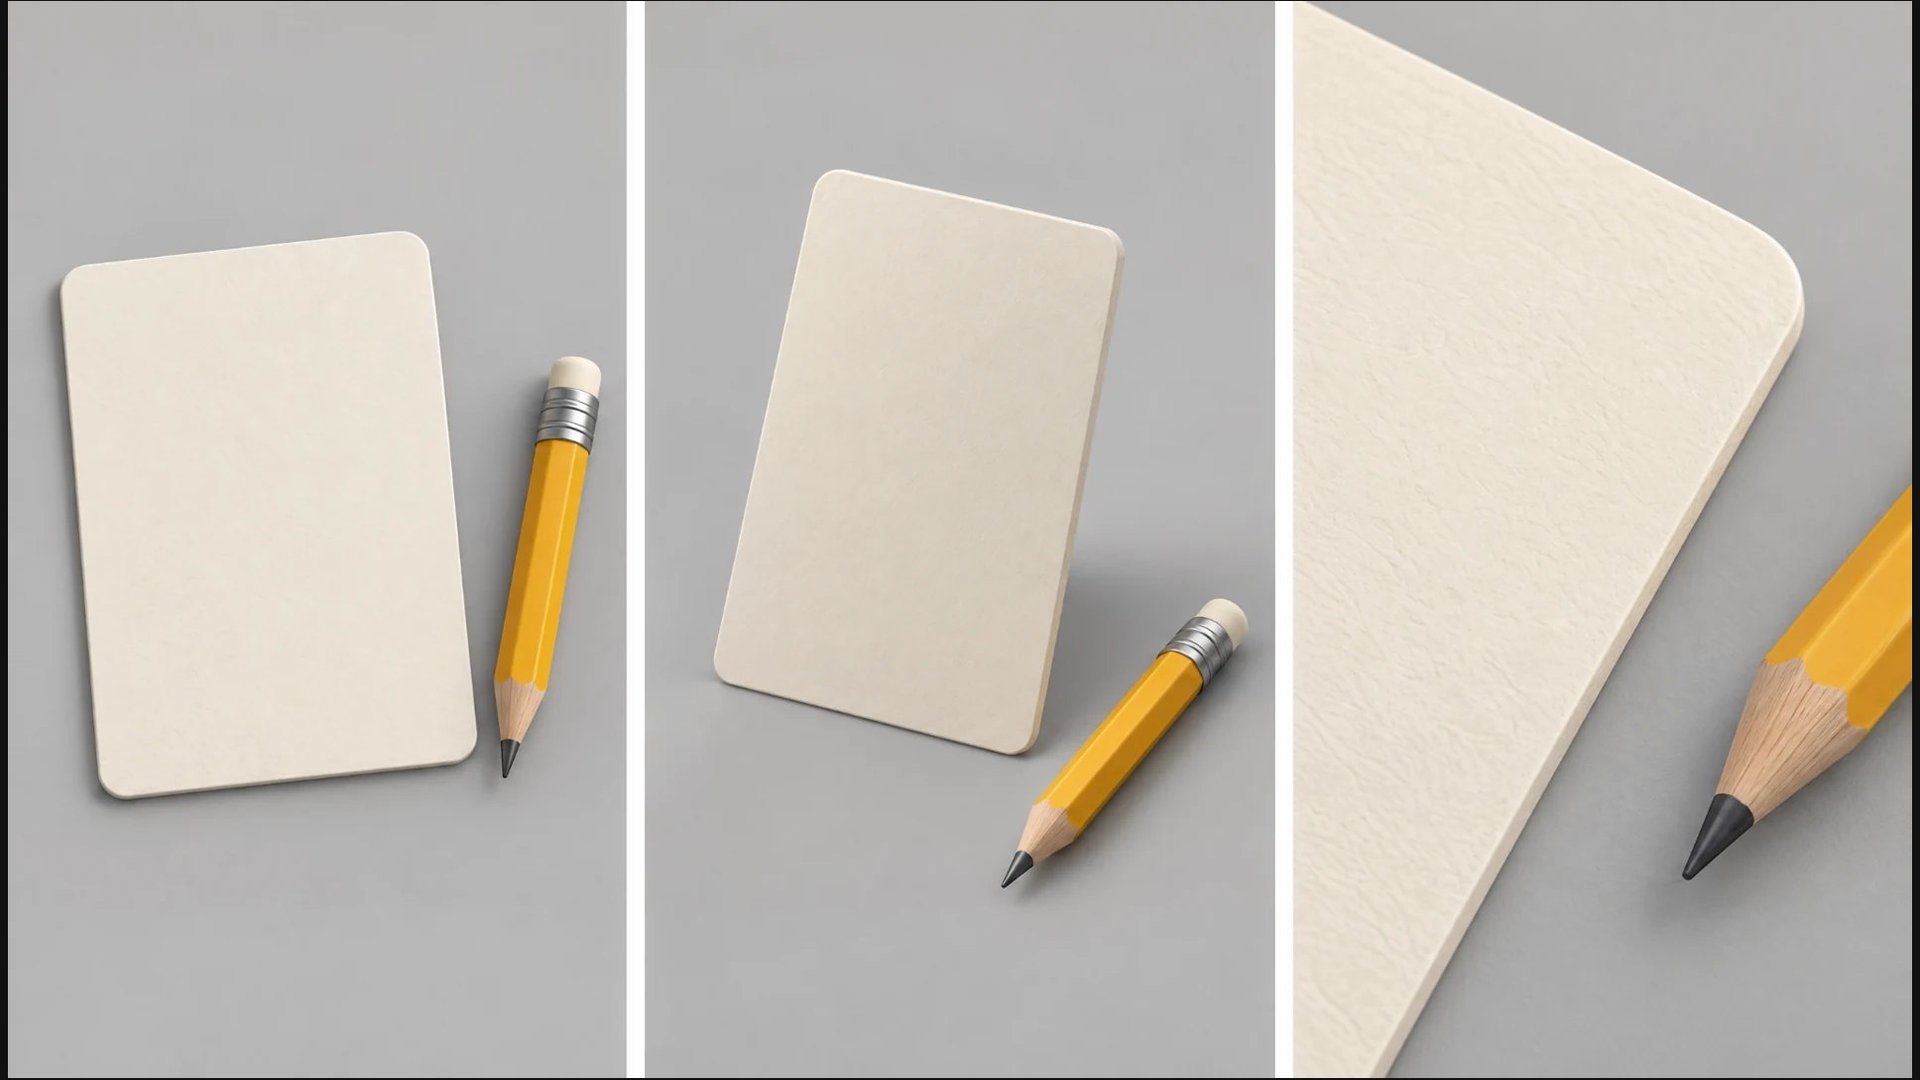
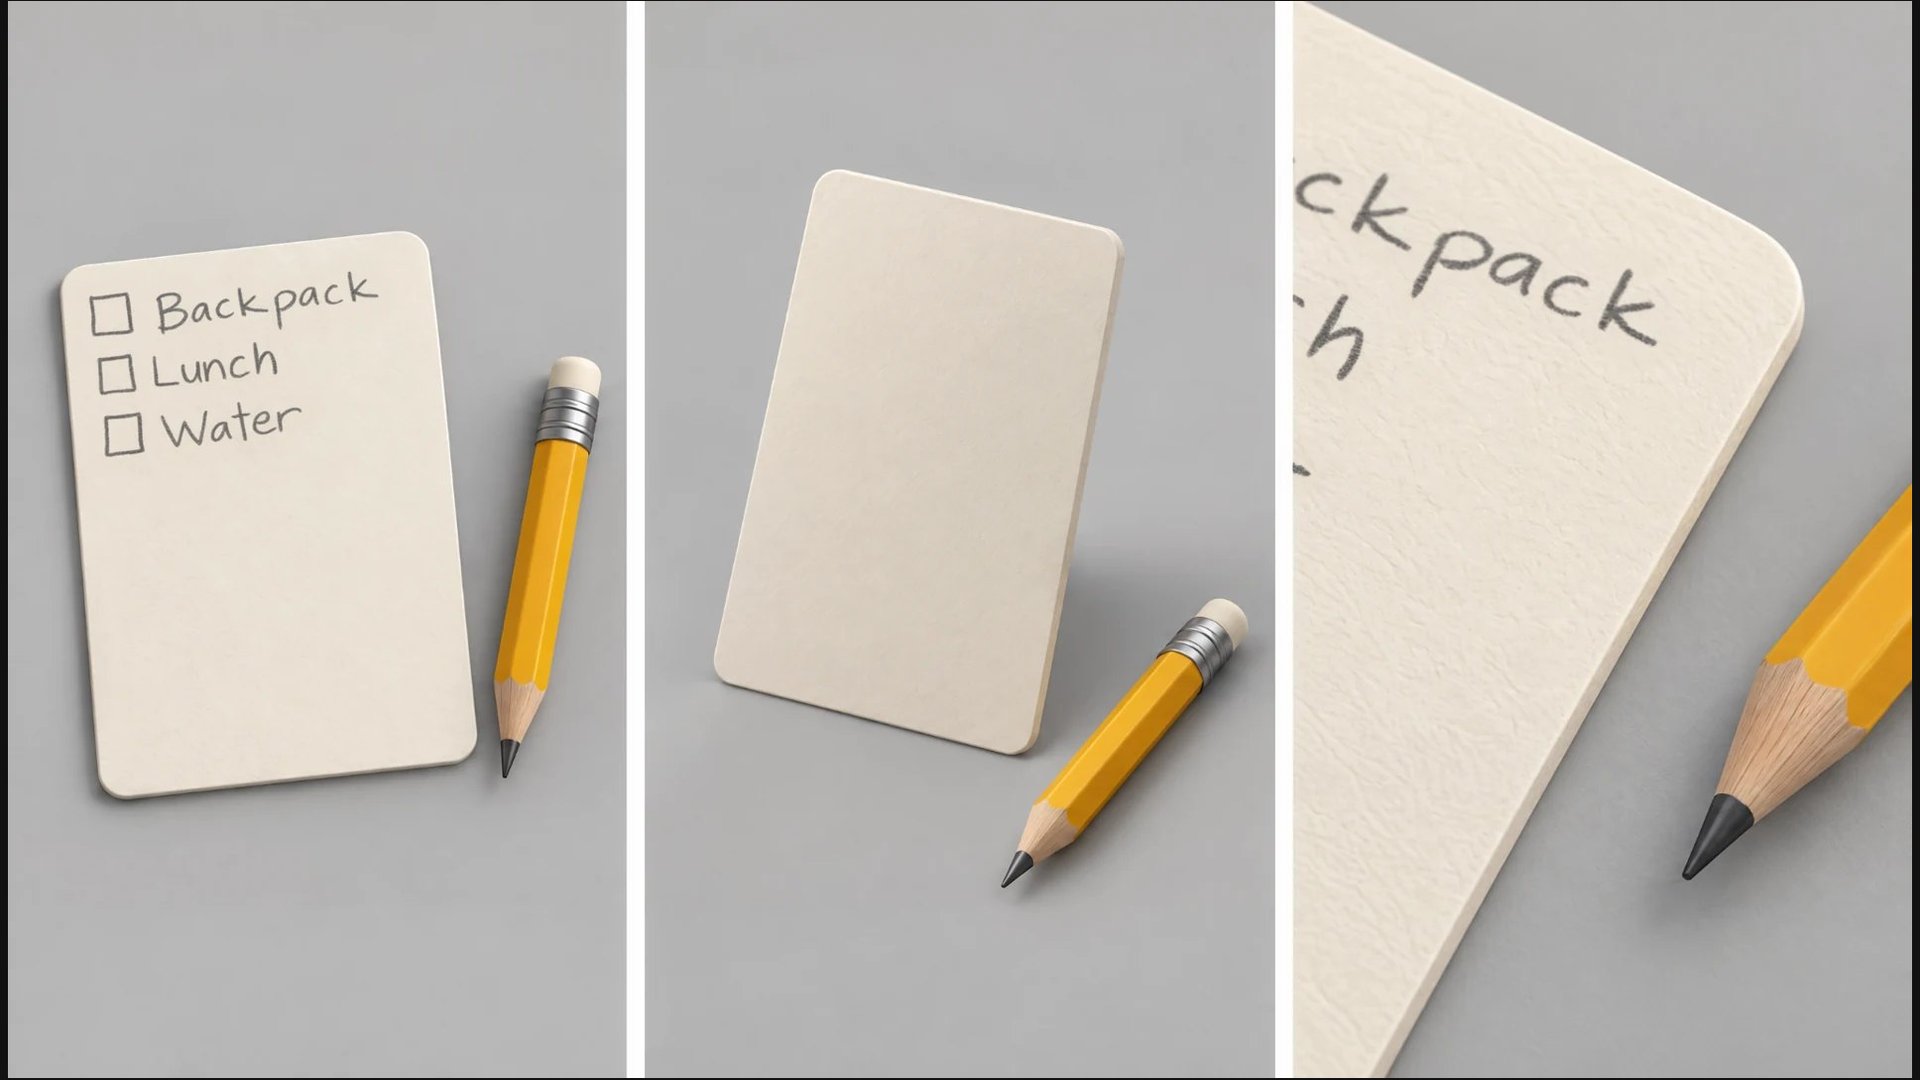
The first card template was blank. For a child making a list, we need a suitable prop: simple words in pencil and uneven boxes, without a designer heading or complex illustrations.
Screen
Original card: shape, pencil and materials, still without the list.
Screen
Approved checklist: Backpack, Lunch, Water handwritten, empty boxes; the back side and a close-up of the same card.
When editing, keep the card's shape, material and angles. We place the handwritten list on the front and leave the back blank. The close-up shows a naturally cropped fragment of the same writing, as in the approved template above.
Prompt for adding the list
Video 10 · Replacing an element's material. We replace the original card with the version with the list and check the material called via @checklist.
Updating an element sets a new reference for the next generations. A finished video is checked separately: to replace the card in a video you already have, we edit the relevant fragment.
Generate the story along two routes
From one set of approved characters, props and spaces we create two versions of the story: Seedance 2.5 Draft in 480p and Kling 4 in 720p. We compare the resulting videos and the costs of this particular production case.
Both Seedance 2.5 Draft and Kling 4 can create videos up to 30 seconds long. Kling has a limit on adding references: up to 7 per generation. So for our script we split the story into 15-second clips: this way the set of characters, props and spaces needed fit into each request.
Generate the story along two routes
Route
How we split the story
Reason for the choice
Seedance 2.5 Draft · 480p
Two main requests of 30 seconds each.
A story in two consecutive parts with prepared Elements.
Kling 4 · 720p
Five requests of 15 seconds each.
For each clip we pick no more than 7 references; the split is tied to their number, not to the model's maximum length.
In each request we use only the elements it needs. The LLM helps describe the action, lines and camera based on the tag cloud; the team can use its own prompting skills and tools. The shared visual base is kept thanks to the prepared references.
Video 11 · Generating with elements. We paste the prompt, check the tags, choose the model, length, format, resolution and sound. Before running we check the price on Generate.
In this test the original generations were made in Draft 480p and 720p. After review we select the working fragments and assemble the video. Upscaling the chosen result is shown in the next step.
Fix part of a finished video
If the video works overall but a single fragment does not, open Edit and select the section. In our example we fix the packing: lunchbox inside, bottle in the side pocket, then closing the backpack.
For the edit we select shots 4 and 5 together: roughly 00:15–00:26 of the original video. We select the whole problem chain and check the state of the items at the edges of the section. Packing and closing are easier to match together than to get incompatible pieces.
Video 12 · Editing the selected shots. We select the fragments, describe the fix, add elements via @ and check the result and the joins.
Packing fix prompt
The elements clarify the appearance of the items. The original video remains the base for the character, scene and lighting. After the edit we check both the action and the join with neighbouring shots.
Extend a video instead of generating a new one
Next to Edit there is Extend. Choose whether to continue the story after the selected shot or add a prequel before it. Paste the prompt in the side panel and choose the quality settings.
Direction: continue the story forward, or add what happened before the shot.
Model: by default the extension uses the same model as the shot you selected to extend.
Duration: set how much to add, from 5 seconds up to the full 30.
Prompt and quality: describe the new part in the side panel and pick the resolution before running.
Extend: choosing the direction, pasting the prompt in the side panel, quality settings and the extension length.
Example: one story from two 30-second prompts
This 60-second video was generated with two prompts of 30 seconds each: the first generation and then an Extend that continues it. The result is a fairly consistent video: the characters, props and space carry over from one part to the next, without generating every shot from scratch.
Extend result · 60 s from two 30-second prompts · 480 × 854
Select and download materials for editing
Filter the generations by model to view Seedance and Kling separately. Select the approved versions, including the corrected fragments, and download the working set.
Video 13 · Model filter and download. We choose the materials of one model, mark the working results and download the files for editing.
Check that the corrected version was downloaded. In your editing software, join the scenes, trim the pauses, remove bad takes, add graphics and music. The time windows in the prompt set the desired order and rhythm, but the actual cuts and the start of lines may shift.
Different days can be marked by the hero's clothes, an edited repeat or a title. We add the final line after generation: Every morning is different. Make yours together.
Seedance 2.5 Draft · 480p54.42 s
Kling 4 · 720p72.68 s
The files have different lengths and were assembled from different sets of attempts. These are two production routes, not a frame-by-frame identical test.
Upscale the chosen result
After selection and editing, upload the chosen video to the upscaler. In our example, in the top navigation we open Video → Upscale, upload the video and choose Topaz Video, 4K output and the Gaia preset.
Video 16 · Upscale on the platform. Video → Upscale → upload → Topaz Video → 4K → Gaia. We show the FPS and the cost before running.
Upscaling one clip to 1k
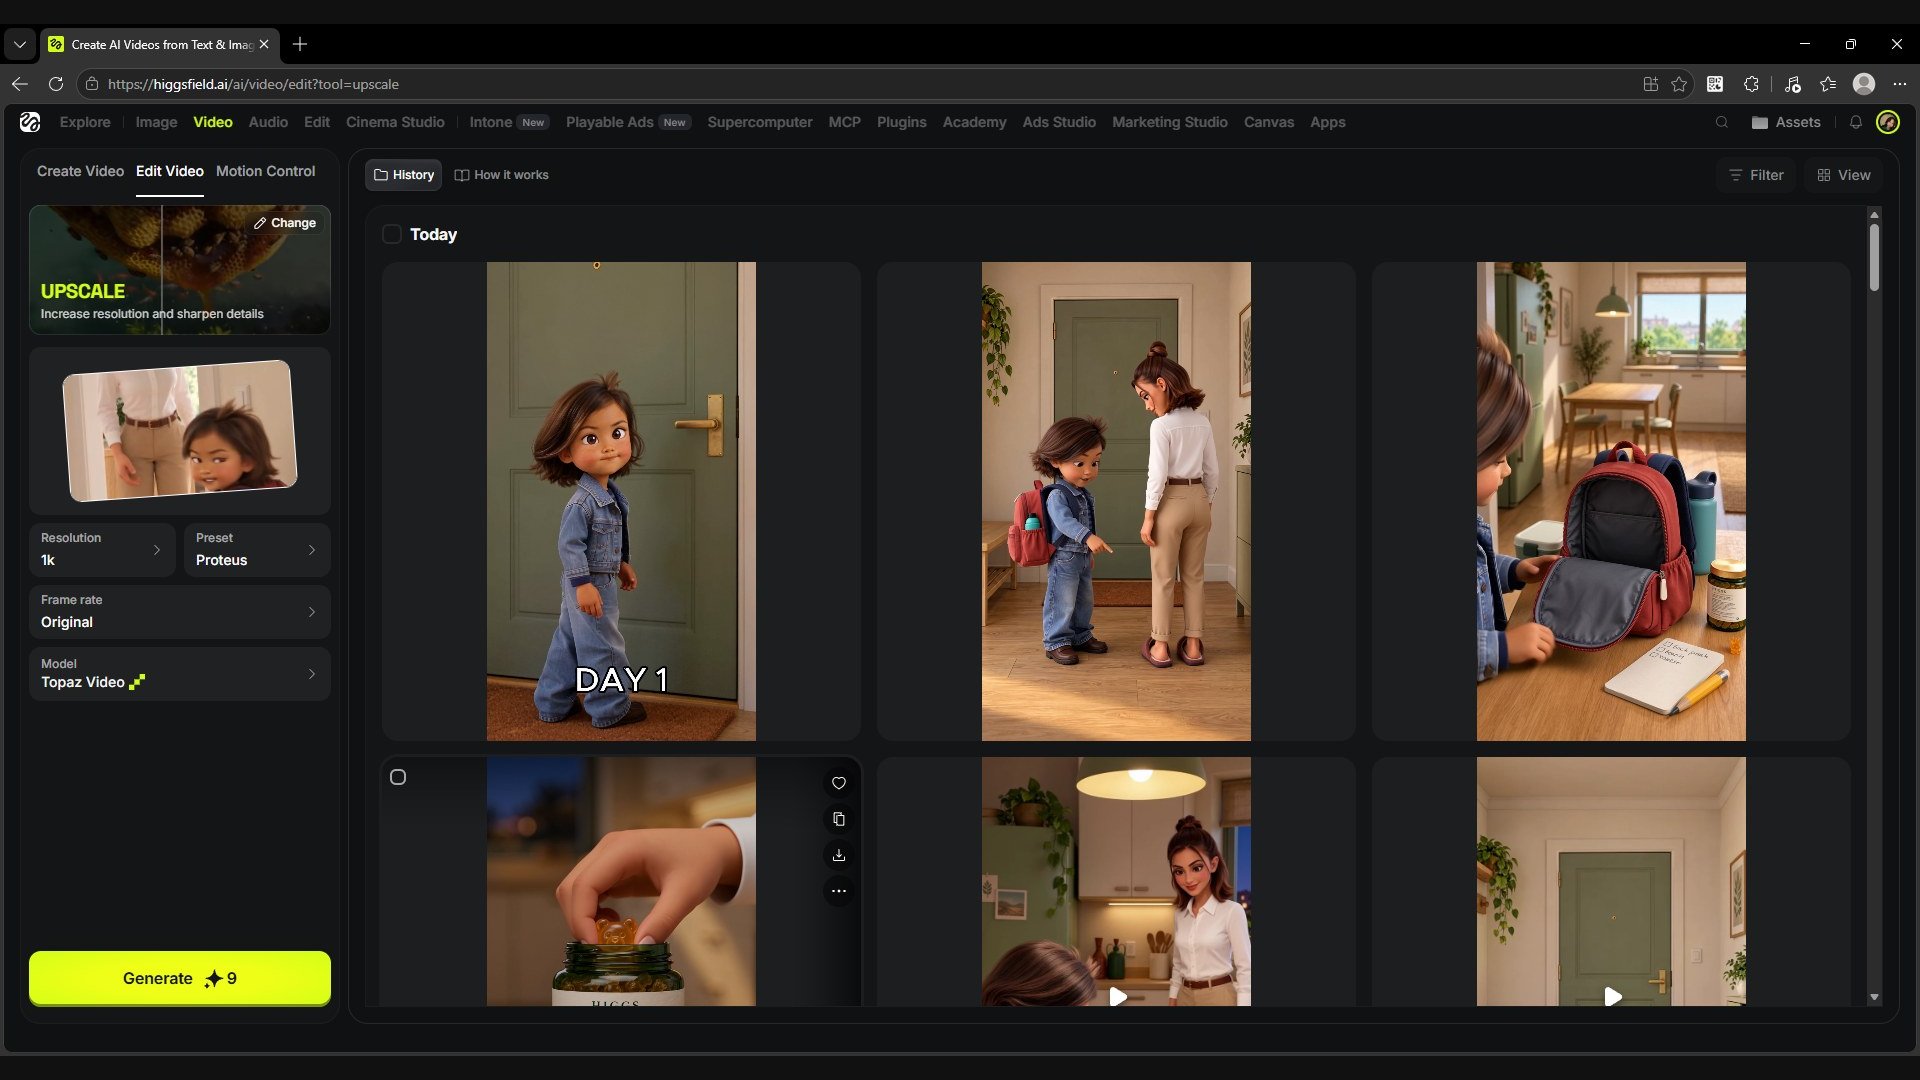
Upscaling a single generated clip is inexpensive. In this example, upscaling one of the case clips to 1k with Topaz Video, the Proteus preset and the original frame rate costs 9 credits. This makes it practical to generate and select at low resolution and upscale only the clips that go into the edit.
Screen
Video → Edit Video → Upscale: Resolution 1k, Preset Proteus, Frame rate Original, Model Topaz Video. The Generate button shows 9 credits for this clip.
You can leave the automatic FPS option or choose 24 FPS if that matches the source material and the delivery task. Before running, check the source frame rate and what the setting means: changing the FPS is a separate decision, not a required part of upscaling.
Fix morphing, the order of actions and bad scenes first. Upscaling does not replace these fixes. After processing, compare the faces, hands, label and moving details with the source. A larger file size does not prove that every detail has improved.
Bring the finished version back into the project
Save the upscale result inside the project so everyone can easily find it and use it further.
Video 18 · Saving the final into the project. We show adding the finished result to the right project and the Final folder.
Name the file clearly, with the version and resolution. For example: GummyJelly_Animation_Seedance_v03_4K. This helps tell the final apart from the original edit and the generations. Approval can follow the order accepted in your team.
Compare the results and credit usage
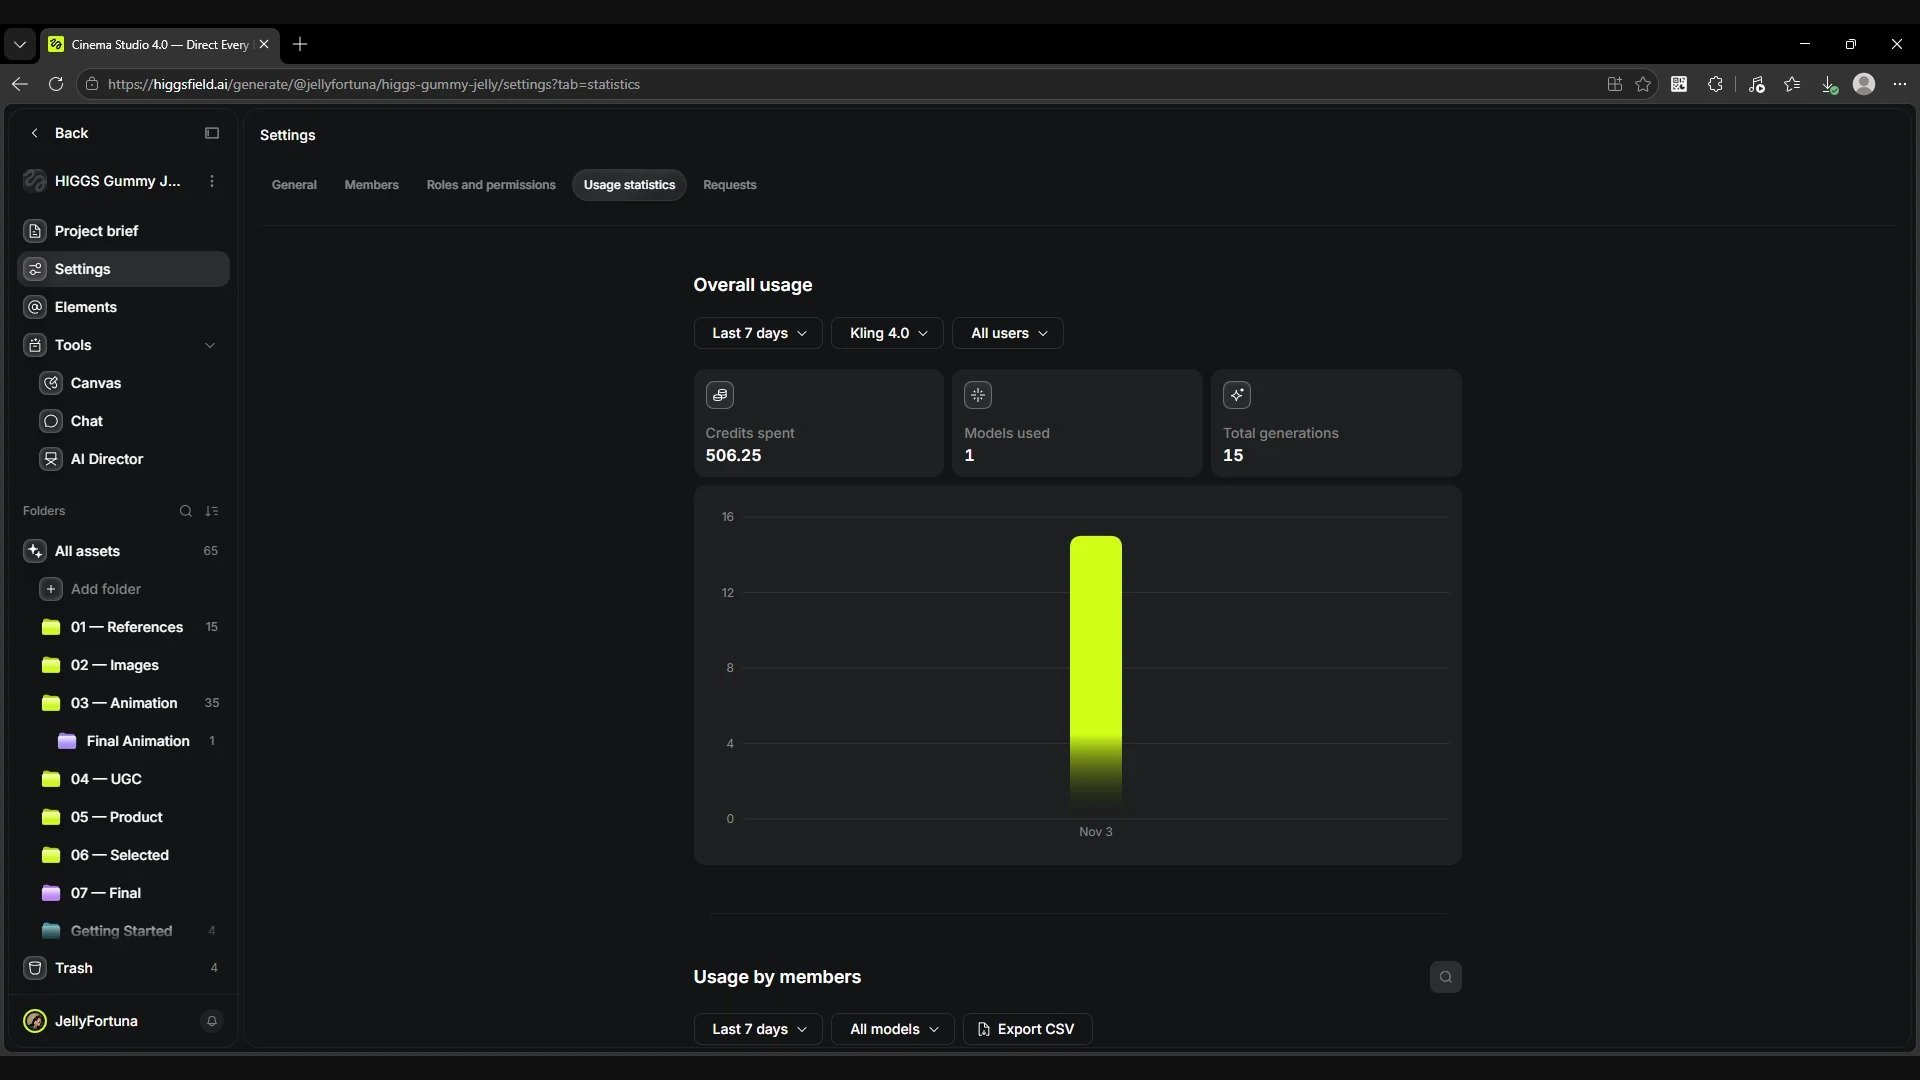
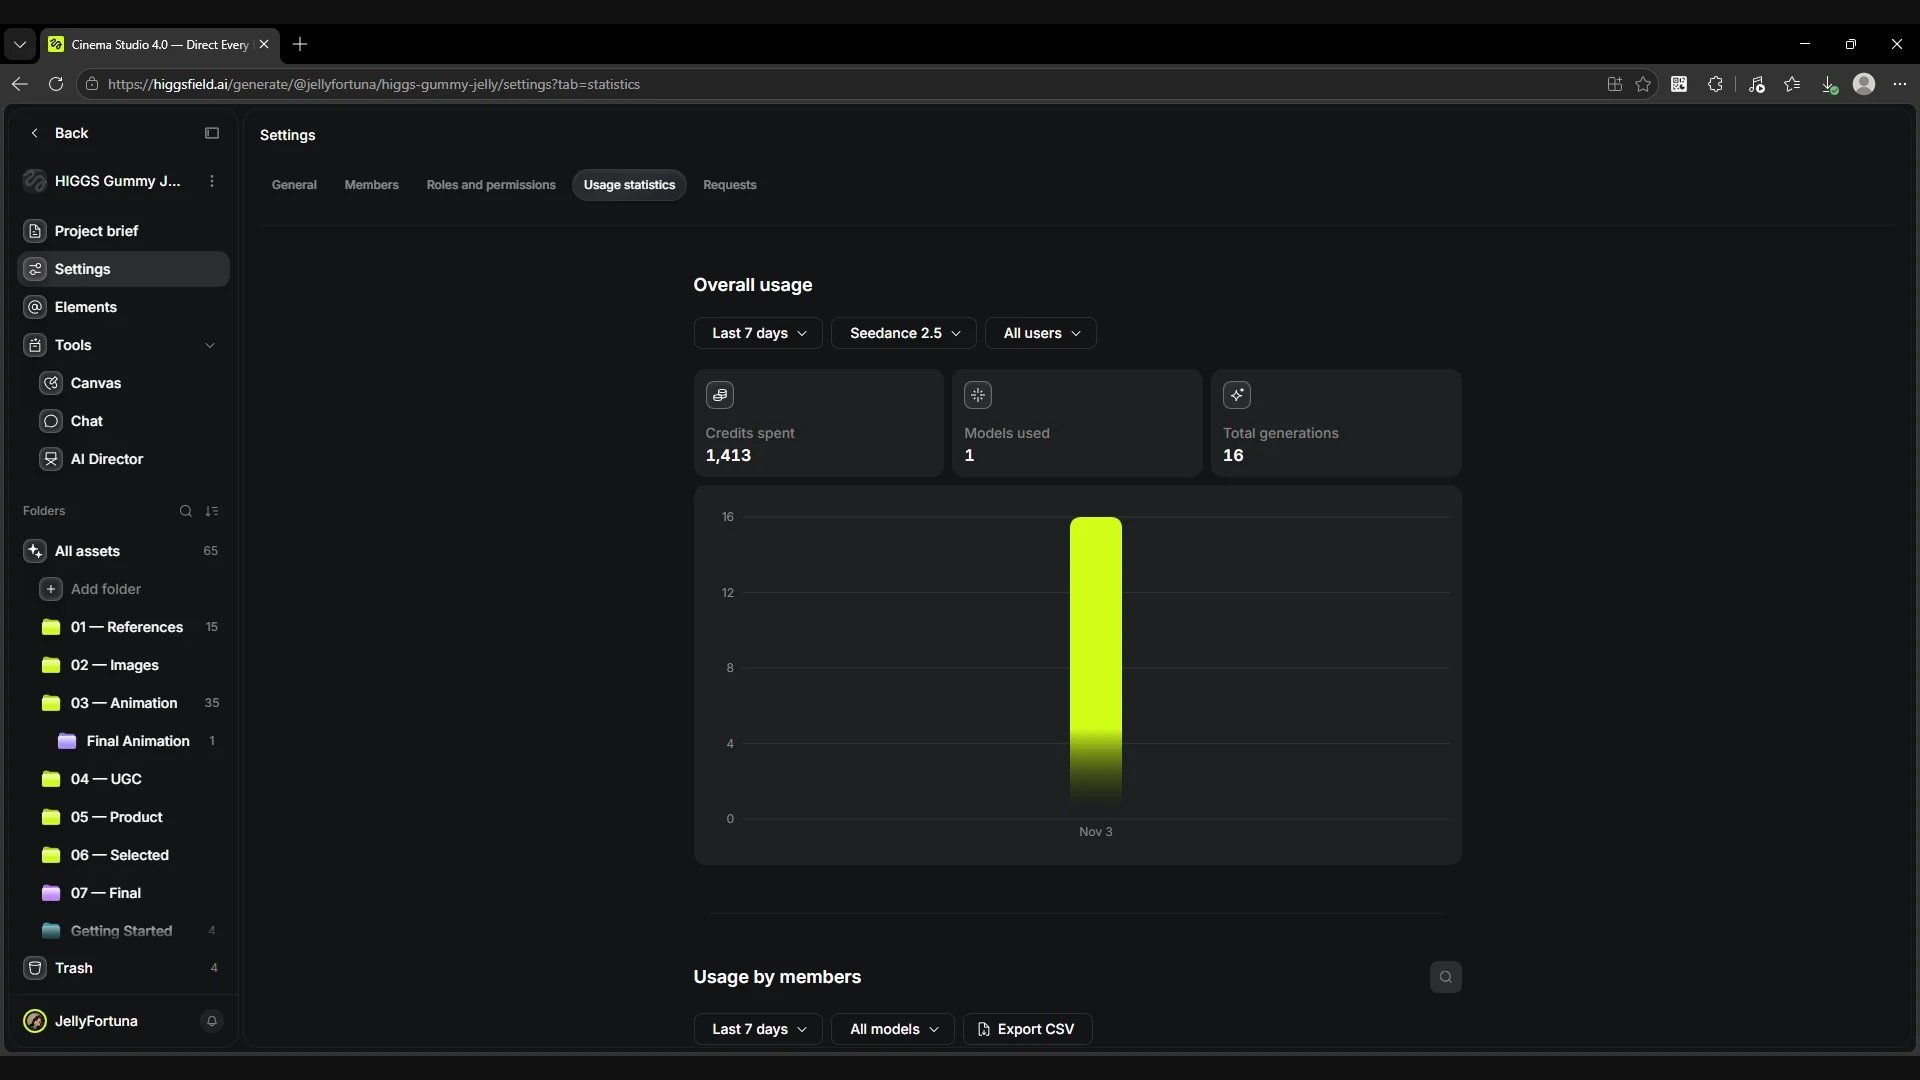
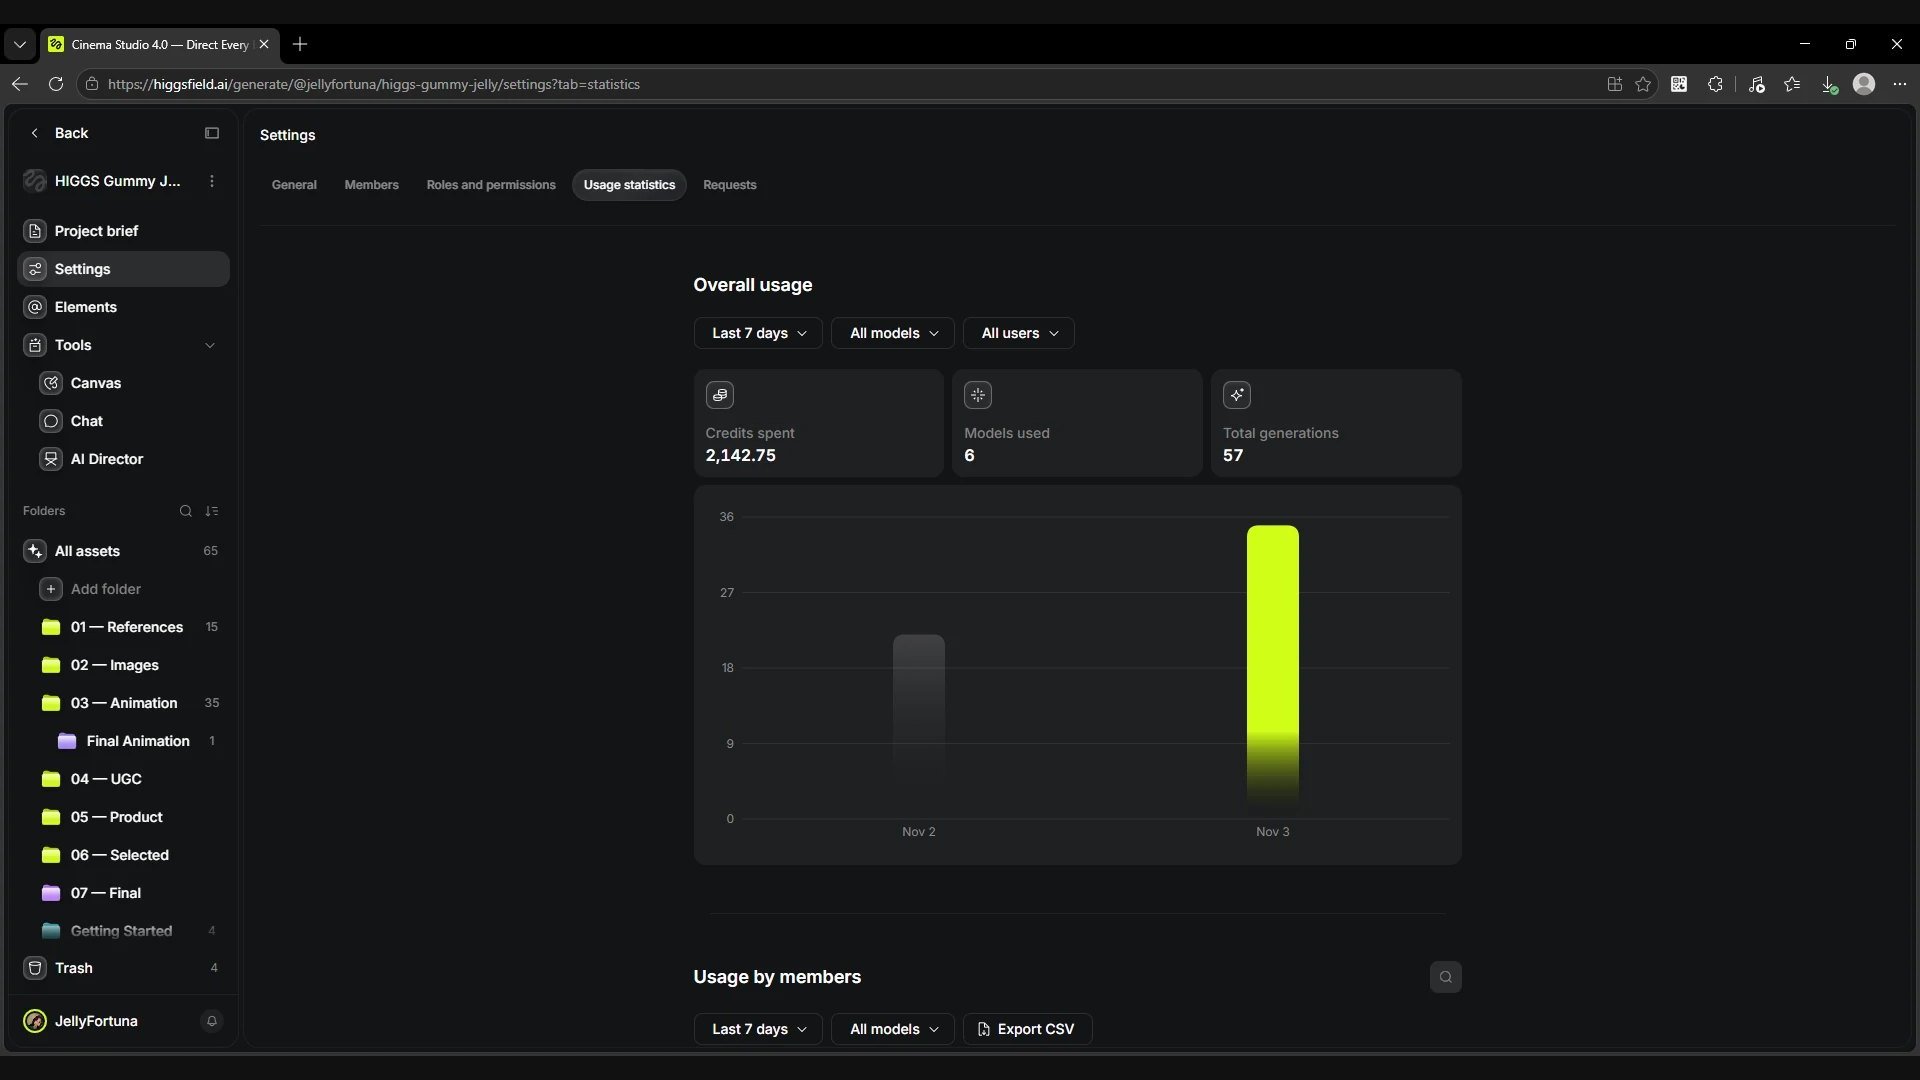
In Settings → Usage statistics we choose the same period and switch the model filter. The screenshots show the original project statistics, including all runs. To compare the two working routes, we adjust Seedance separately below: four videos were accidentally generated in 16:9.
Screen
Original Kling 4.0 statistics: 506.25 credits and 15 generations.
Screen
Original Seedance 2.5 statistics: 1,413 credits and 16 generations, including four accidental runs in 16:9.
We exclude the four accidental Seedance runs from the comparison: 90 + 63 + 90 + 90 = 333 credits. This gives 1,413 − 333 = 1,080 credits and 16 − 4 = 12 generations. The screenshot itself remains the original; the adjustment is shown in the calculation.
Compare the results and credit usage
Metric
Kling 4 · 720p
Seedance 2.5 Draft · 480p
Generations compared
15
12, after excluding 4 accidental
Credits compared
506.25 credits
1,080 credits
Length of the assembled file
72.68 s
54.42 s
Resolution of the assembled file
720 × 1280
480 × 854
The difference in cost in this comparison is 573.75 credits. The versions differ in length, source resolution, how the story was split and the number of attempts. These numbers show the course of a specific job; in another case the ratio may change. Watch both videos above and compare the results with the costs.
The screenshot shows the Seedance 2.5 filter as a whole. Draft 480p is the generation mode used in this case; the screenshot does not contain a separate breakdown by mode.
Screen
Original statistics for the whole project: 2,142.75 credits, 57 generations, 6 models. The four accidental runs are still included.
The full actual project cost remains 2,142.75 credits. If the same accidental runs are excluded for the analytical comparison, it comes to 1,809.75 credits and 53 generations. Of these, the two compared video models account for 1,586.25 credits and 27 generations; other models for 223.5 credits and 26 generations. These screenshots do not allow the remainder to be split between images, edits and upscaling.
Credit cost by resolution and duration
Prices from the Generate button in the generation settings, 9:16. The first number is the current price; the regular price shown crossed out in the interface is in brackets. Use them to plan a budget beyond this case.
Credit cost by resolution and duration
Model
Resolution
4 s
10 s
15 s
Per second
Seedance 2.5 Draft
480p
12
30
45
3
Seedance 2.5
720p
28
70
105
7
Seedance 2.5
1080p
45 (64)
112 (160)
168 (240)
11.2 (16)
Kling 4.0
720p
9 (11)
22.5 (27.5)
33.75 (41.25)
2.25 (2.75)
Kling 4.0
1080p
13 (16)
32.5 (40)
48.75 (60)
3.25 (4)
Both models are billed per second of output, so cost grows in a straight line with duration.
Sound is only an option: generating with or without sound does not change the price.
Seedance 2.5: a 480p draft costs less than half of 720p; 1080p is the most expensive tier even with the current discount.
Kling 4.0 is cheaper per second than Seedance 2.5 at the same resolution: at 720p, 2.25 against 7 credits; at 1080p, 3.25 against 11.2. Kling 4.0 has no 480p mode.
The Kling 4.0 rate matches this case: one 15-second clip at 720p costs 33.75 credits, and 15 such generations gave the 506.25 credits shown above.
Seedance 2.5 Draft creates a 480p take that can be finalized at 1080p within seven days. The final renders the draft's full duration and is billed for it, so only the approved take is paid for at full resolution.
Not verified
Not covered by these screenshots: the exact price of finalizing a Seedance draft. Discounts can change, so check the number on the Generate button before running.
The key to this workflow is to prepare the characters, spaces and props in advance and lock them in Elements. They become a constant visual base for working through the prompt: the team describes the story, actions, emotions and camera, and the tags call the materials needed. For each new scene it is no longer necessary to generate a separate first and last frame to set the appearance of all participants again. This reduces the amount of preparation and can noticeably cut the time it takes to create content.
A story prompt gives the model a complete situation: what the characters want, how they react to each other and what the action leads to. This kind of direction leaves more room for coherent motion, expressive acting and emotional visuals. The team can focus on developing the scene while keeping the approved looks through the elements.
A practical way of working is to do 3–4 prompt iterations, review the resulting videos and pick the best actions, reactions and lines for editing. Instead of a long shot-by-shot assembly of the story, you get several performances of the same scene. Selection and editing help assemble a more expressive result; the number of iterations depends on the task and does not guarantee a finished video in a fixed number of runs.
Scale also needs to be locked in the references. In our test Kling changed the size of the items relative to the characters. That is why it is important to work out an element not only by appearance: show the jar next to a single gummy bear, the gummy bear in fingers, the backpack relative to the child and the lunchbox relative to its inner compartment. Separate large images without a shared scale leave the model more freedom of interpretation. Such ratios in the materials and the prompt help reduce size drift; during selection we still check it in motion and at the joins.
Here we show a way of organising production and the difference between the two resulting versions. Model choice, costs and the number of attempts needed should be assessed separately for each case.