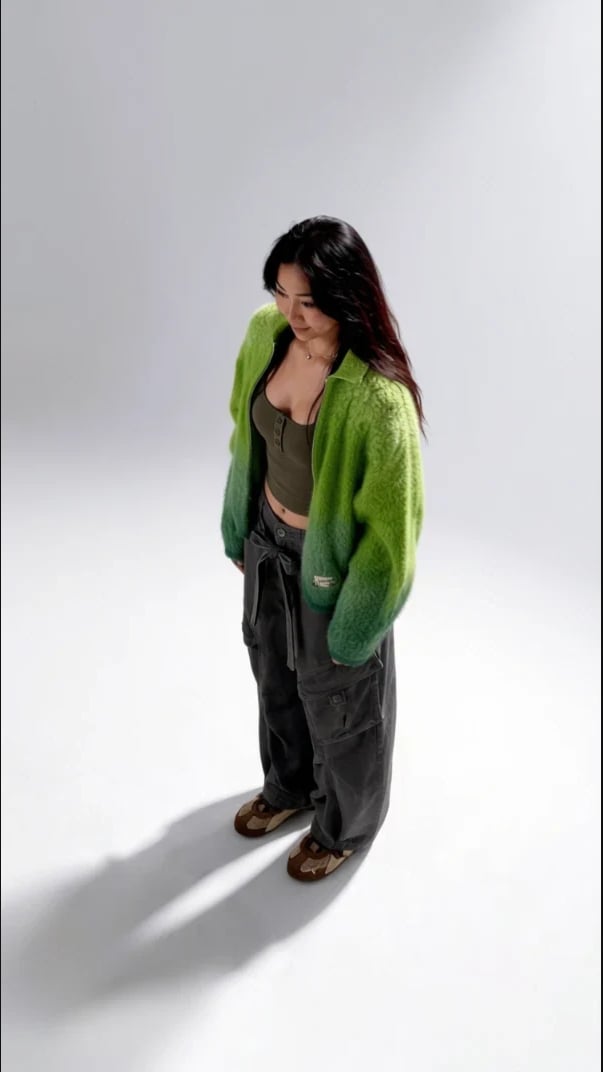
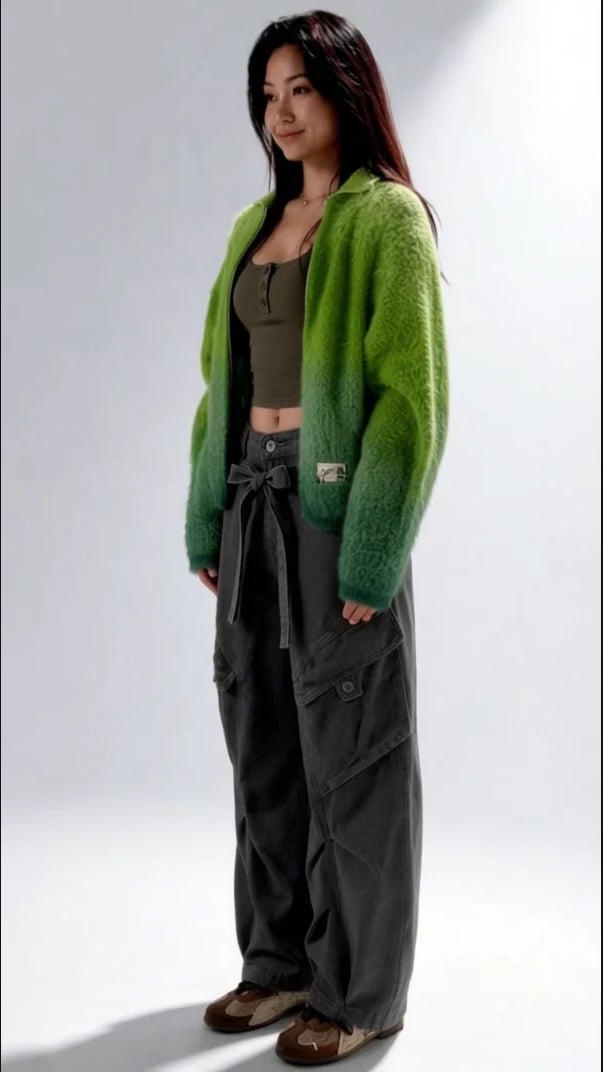
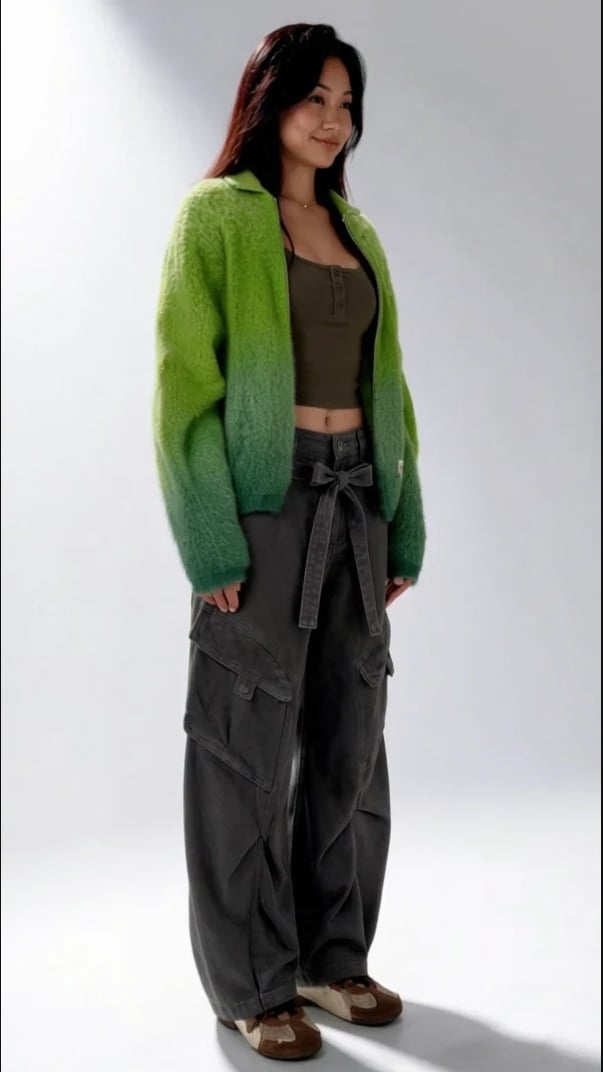
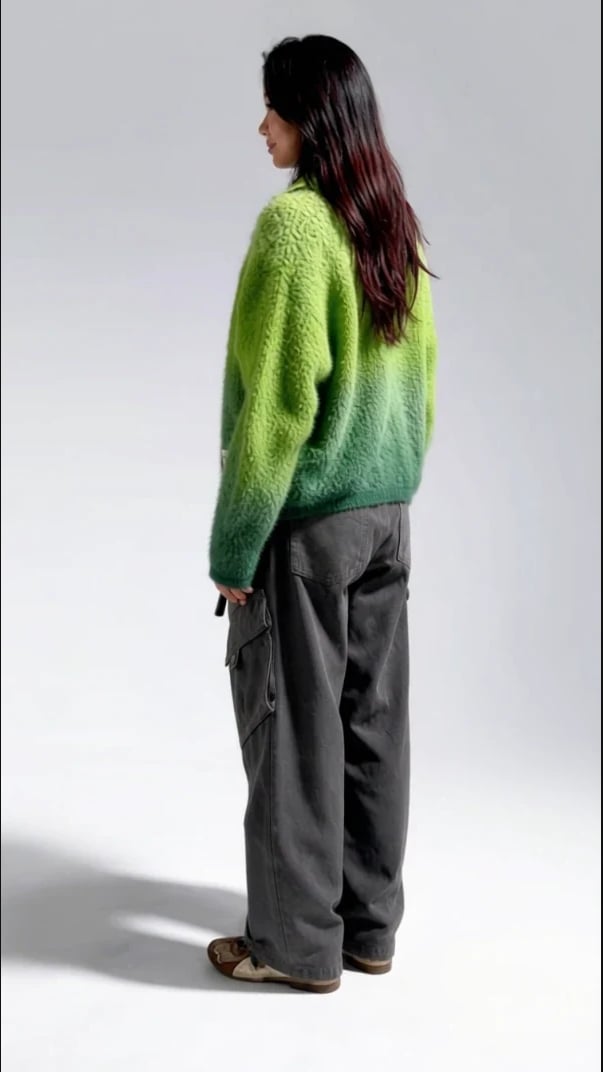
Once a frame has turned out well, you can refine individual details in Layers.
Opening Layers for the first time
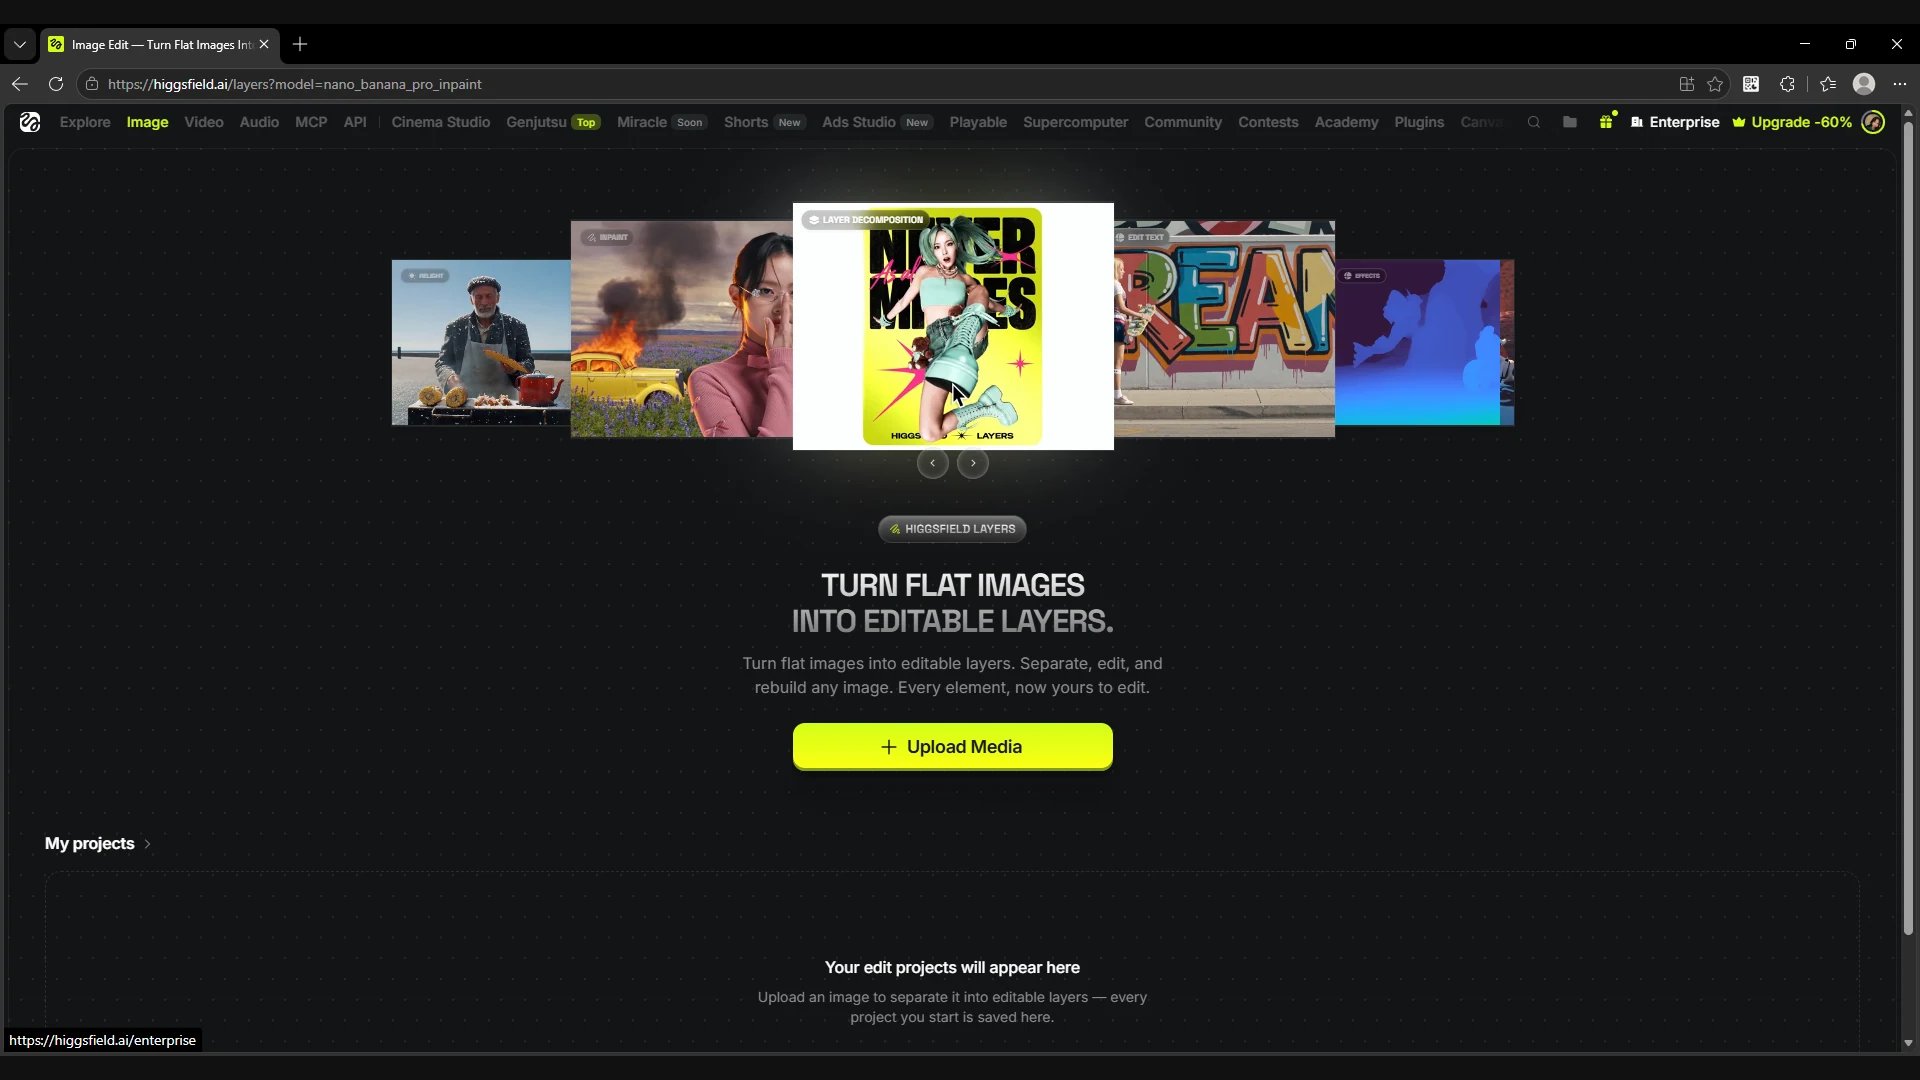
Open Higgsfield Layers. On the start screen, the Upload Media button sits below the editing examples. Further down is the My projects section, where your projects will appear.
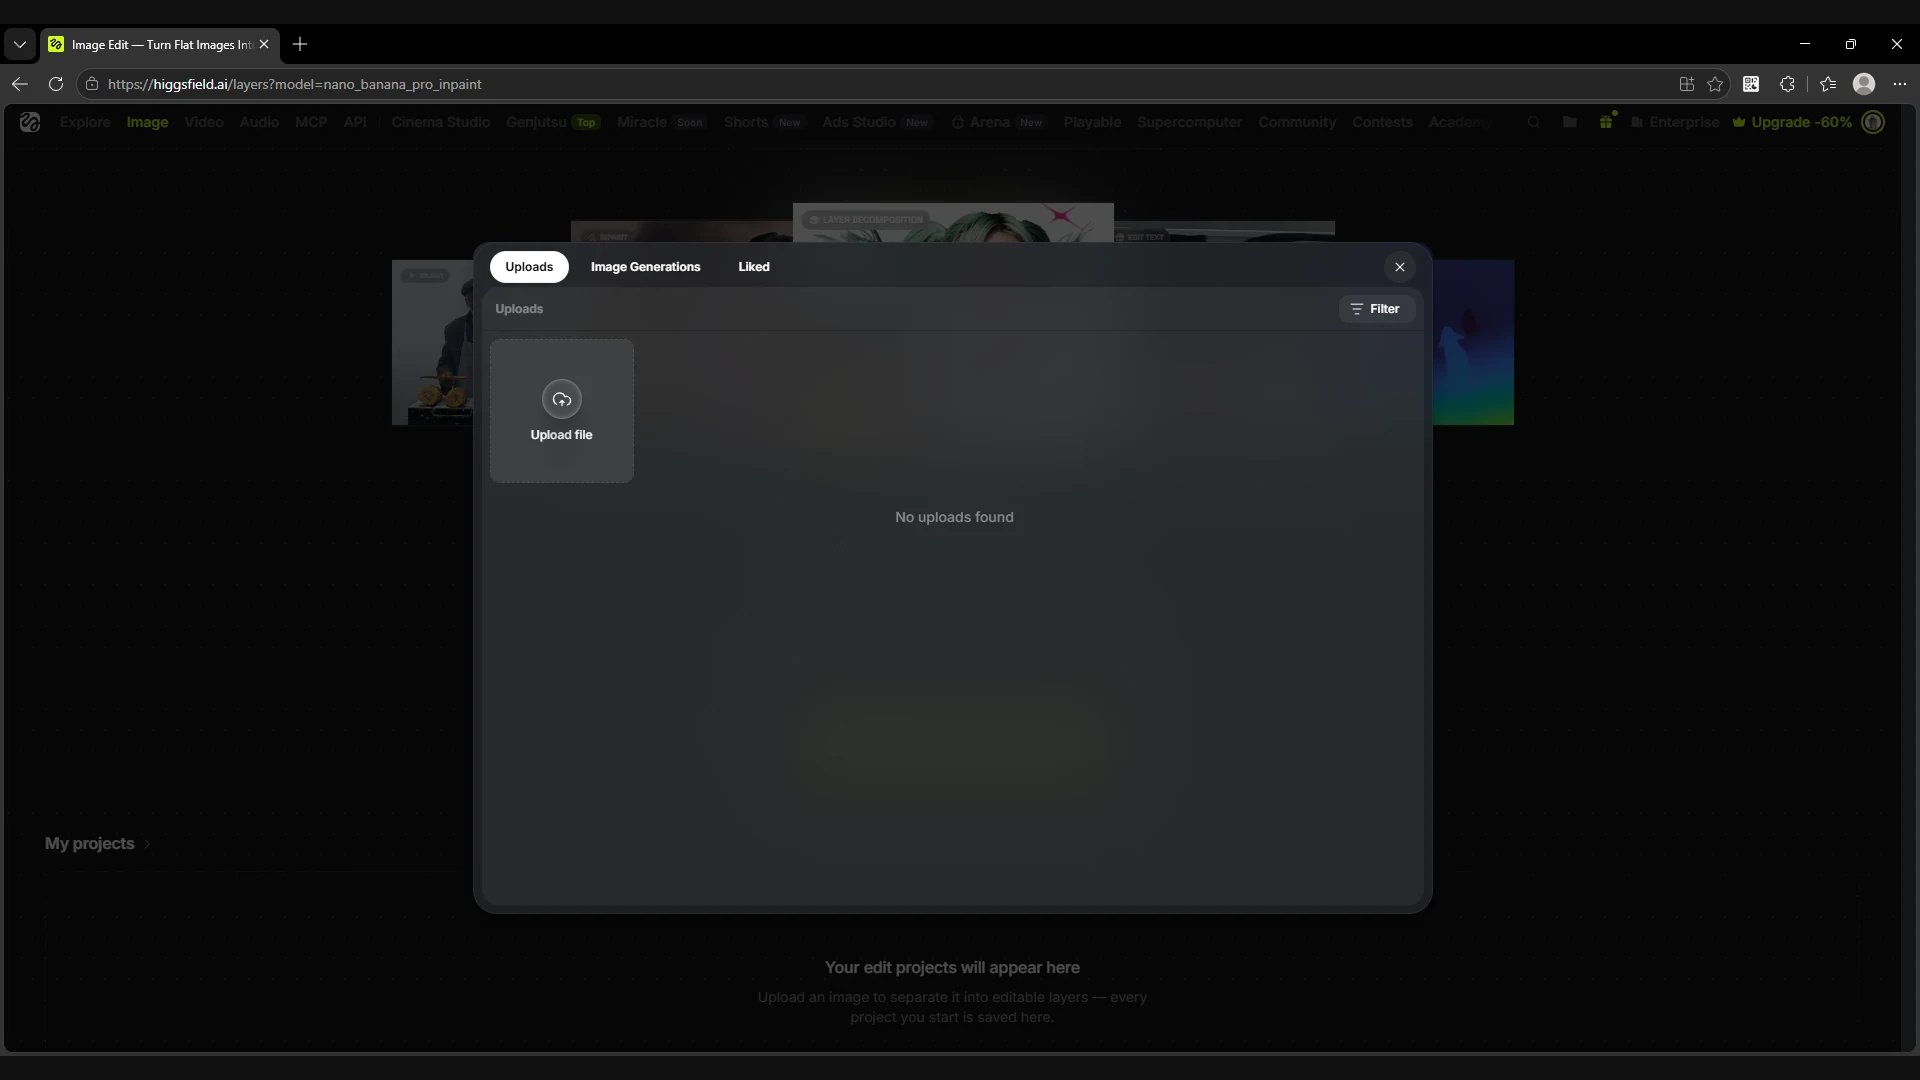
Upload Media opens the image picker. On the Uploads tab you can choose an image you uploaded earlier, or click Upload file and add a file from your computer. The Image Generations tab has your generations, and Liked has the images you liked.
Screen
The Layers start screen before the first project is created
Screen
The image picker. The Upload file button is on the Uploads tab
Where everything is in the editor
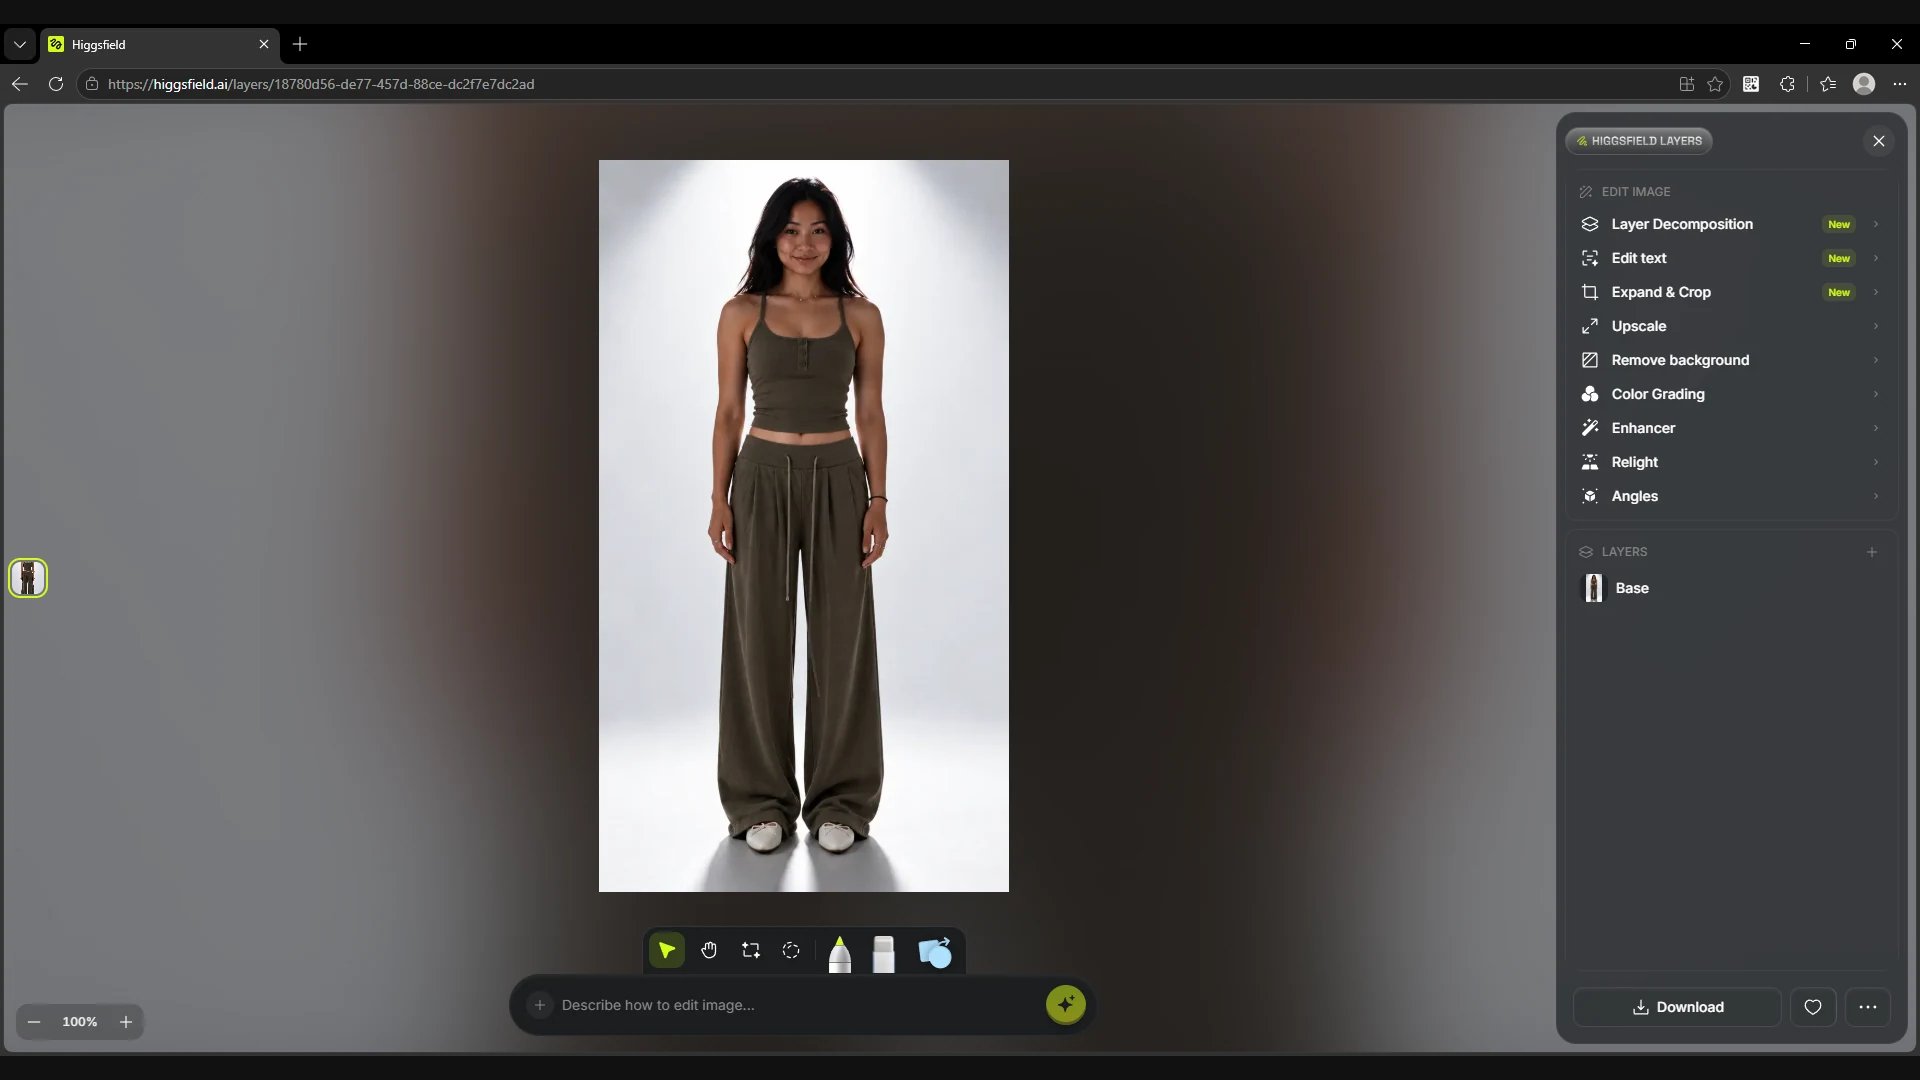
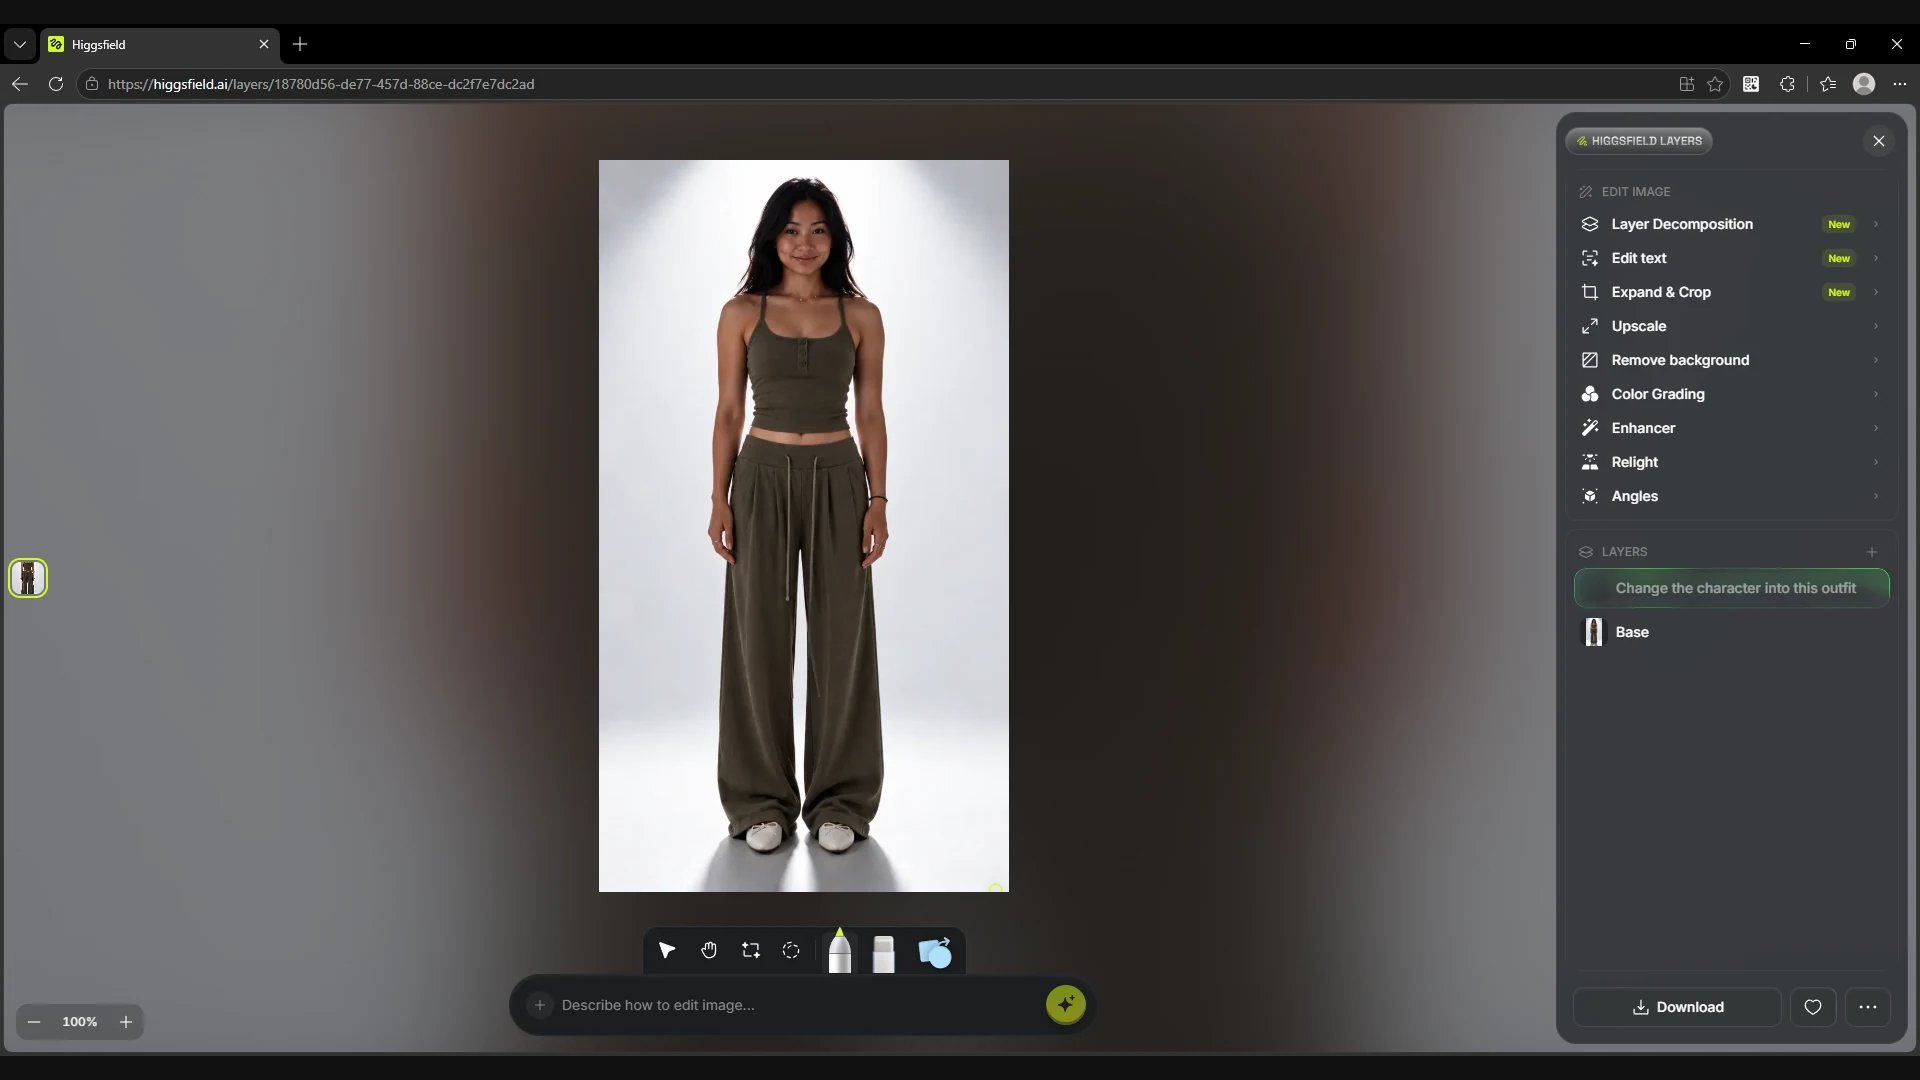
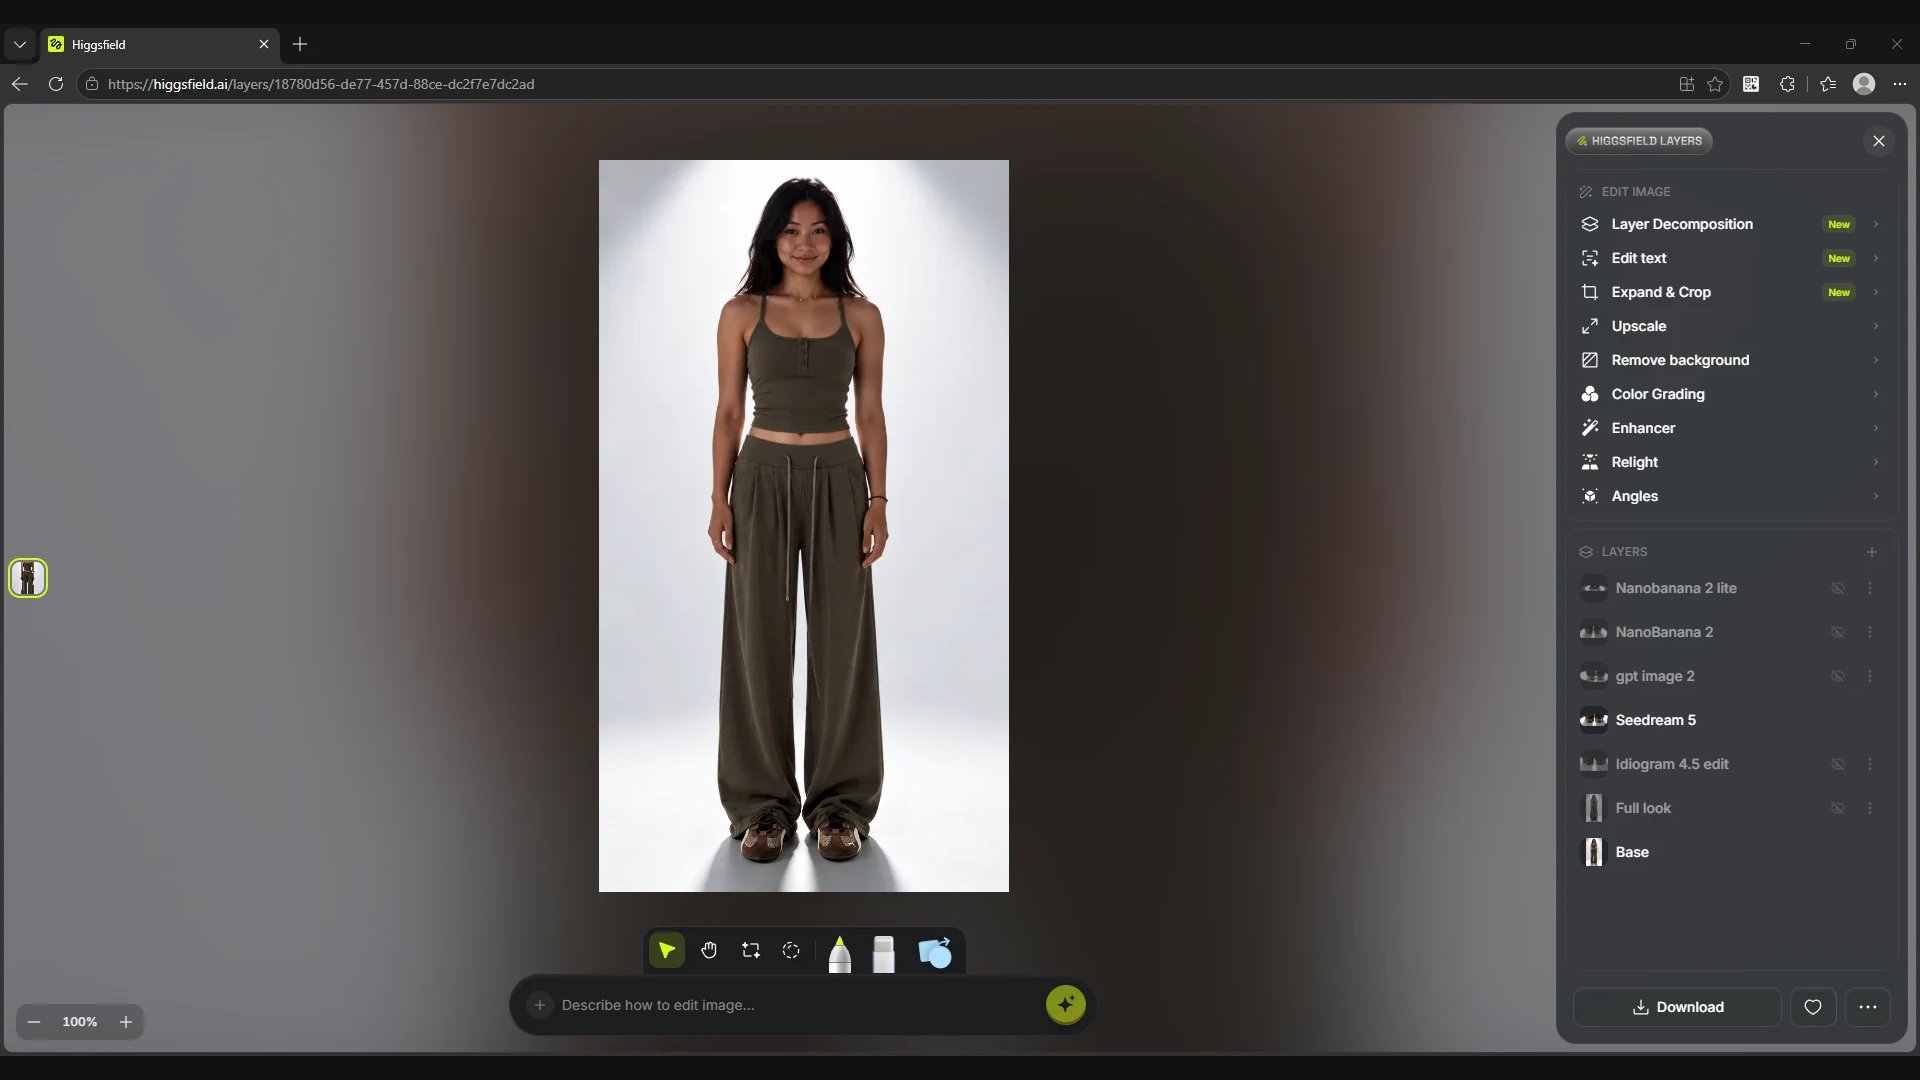
After upload, the image opens on the canvas. Below it are the selection and markup tools and the Describe how to edit image… field. To the left of the field is the + button for references, and to the right is the generate button.
The Edit Image block on the right holds additional tools. Below it, the Layers panel shows Base, the layer with the original image. The results of your edits appear here too. The eye icon controls whether a layer is visible.
Screen
The original image on the canvas, the tools at the bottom and the Base layer on the right
Editing with a prompt and a reference
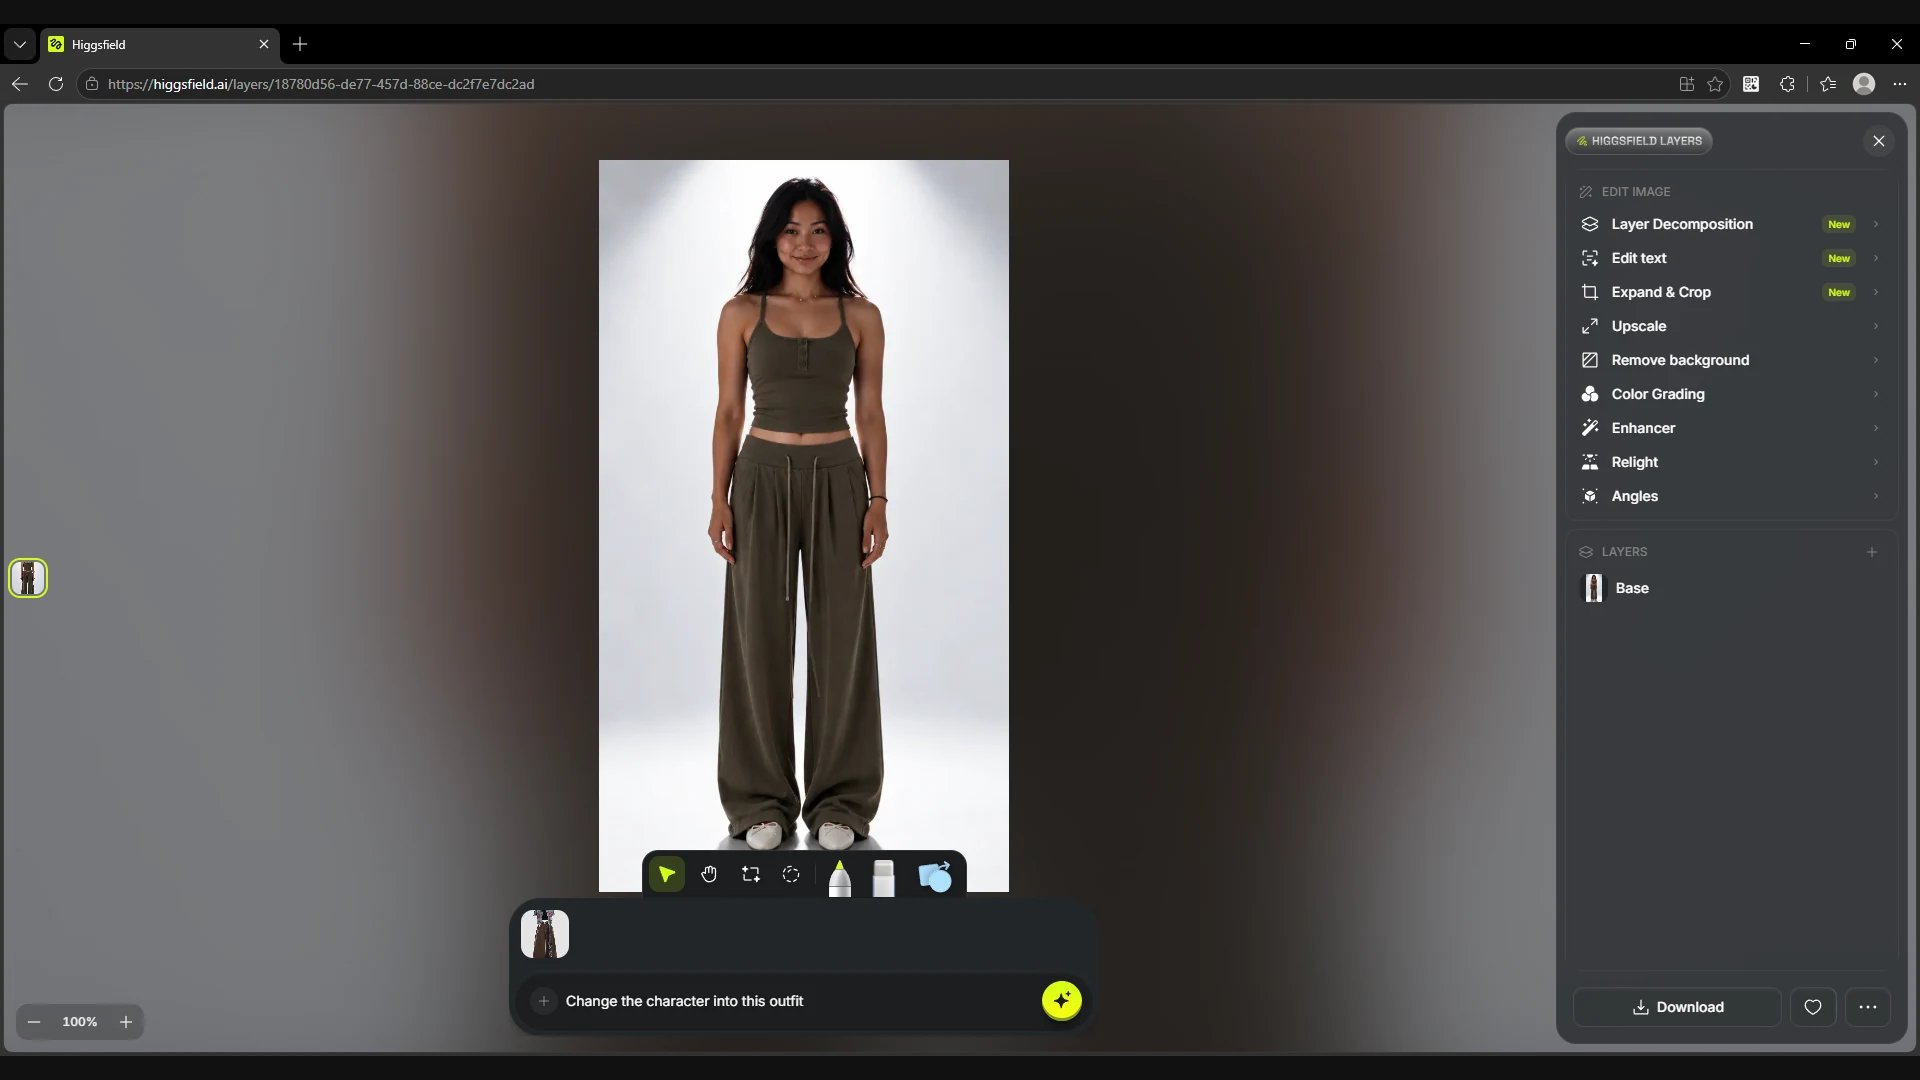
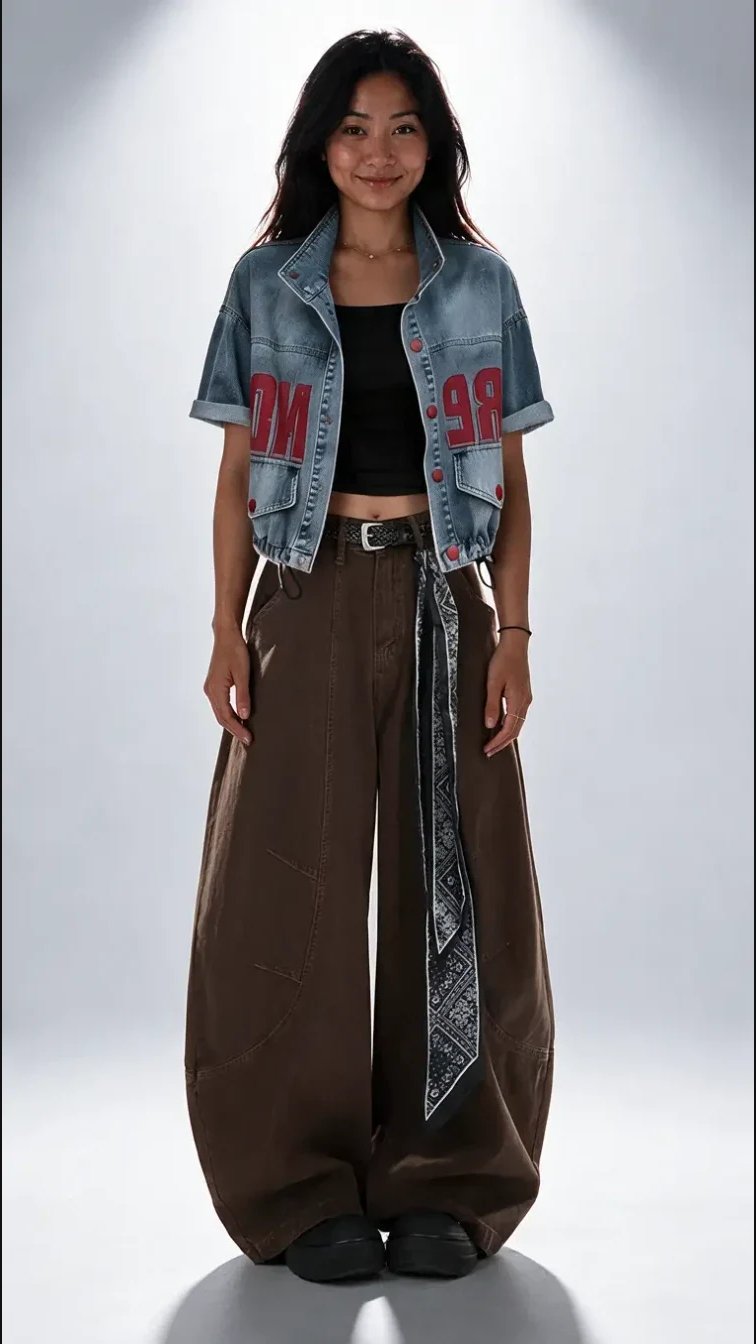
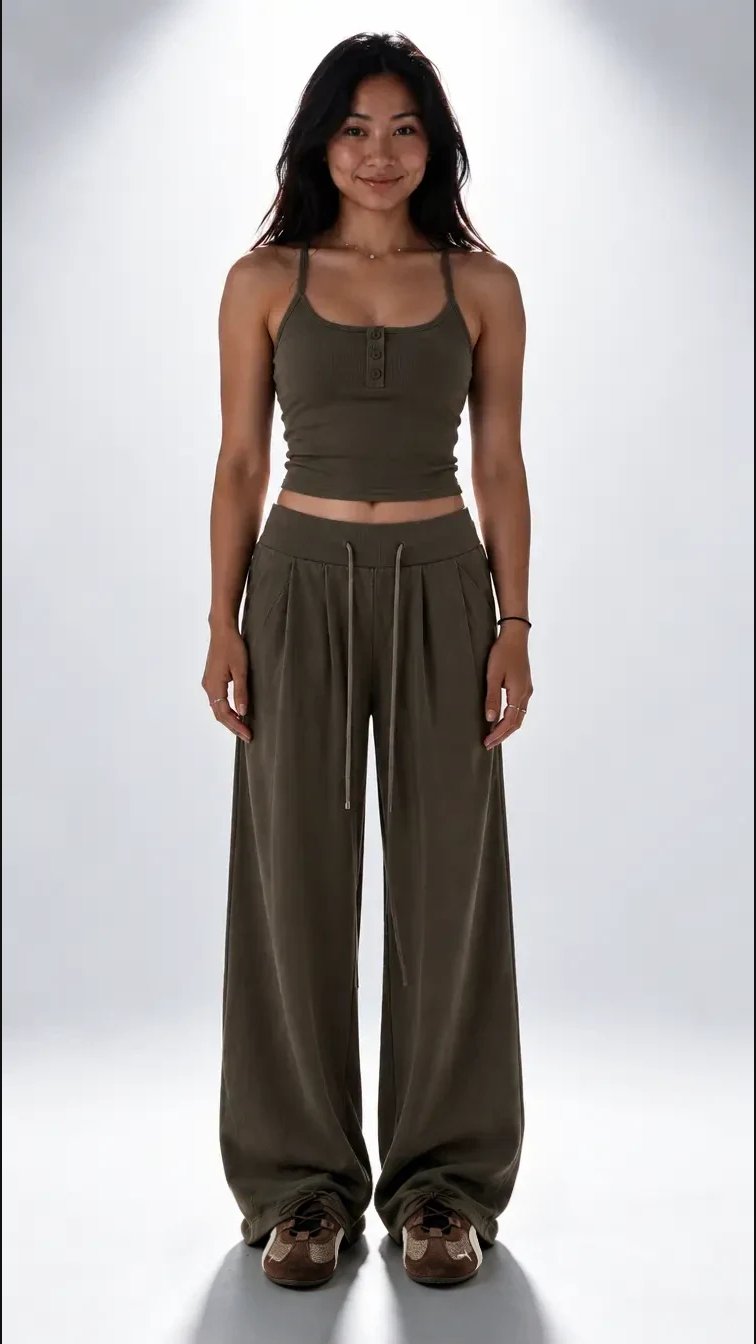
In the Describe how to edit image… field you can describe an edit for the whole image. If you have a visual example, attach it with +. Its thumbnail appears above the field. Here we attached a reference for an outfit and used this prompt.
Prompt
Click the generate button. In the Layers panel, a layer with the prompt text appears above Base. While the edit is processing, the canvas shows the original frame.
Screen
The outfit reference and the prompt before generation
Screen
The new layer while it is generating
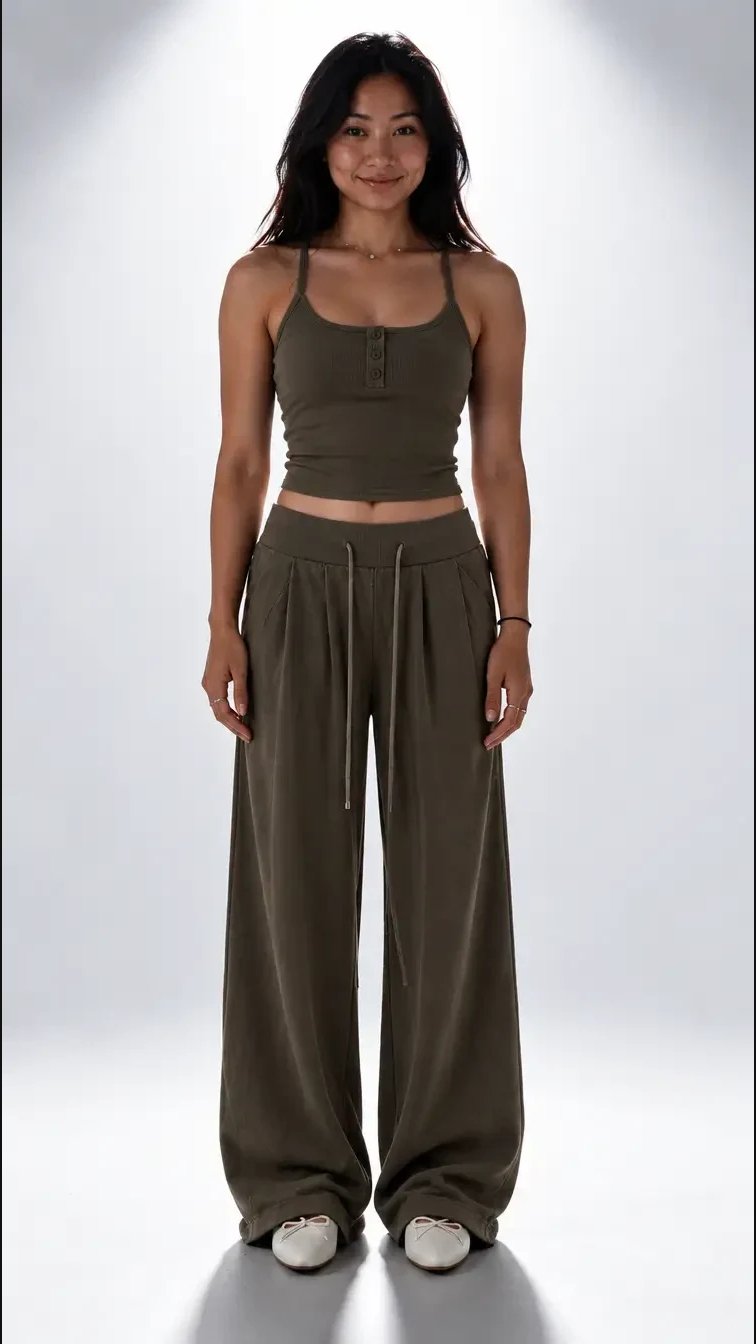
Original character
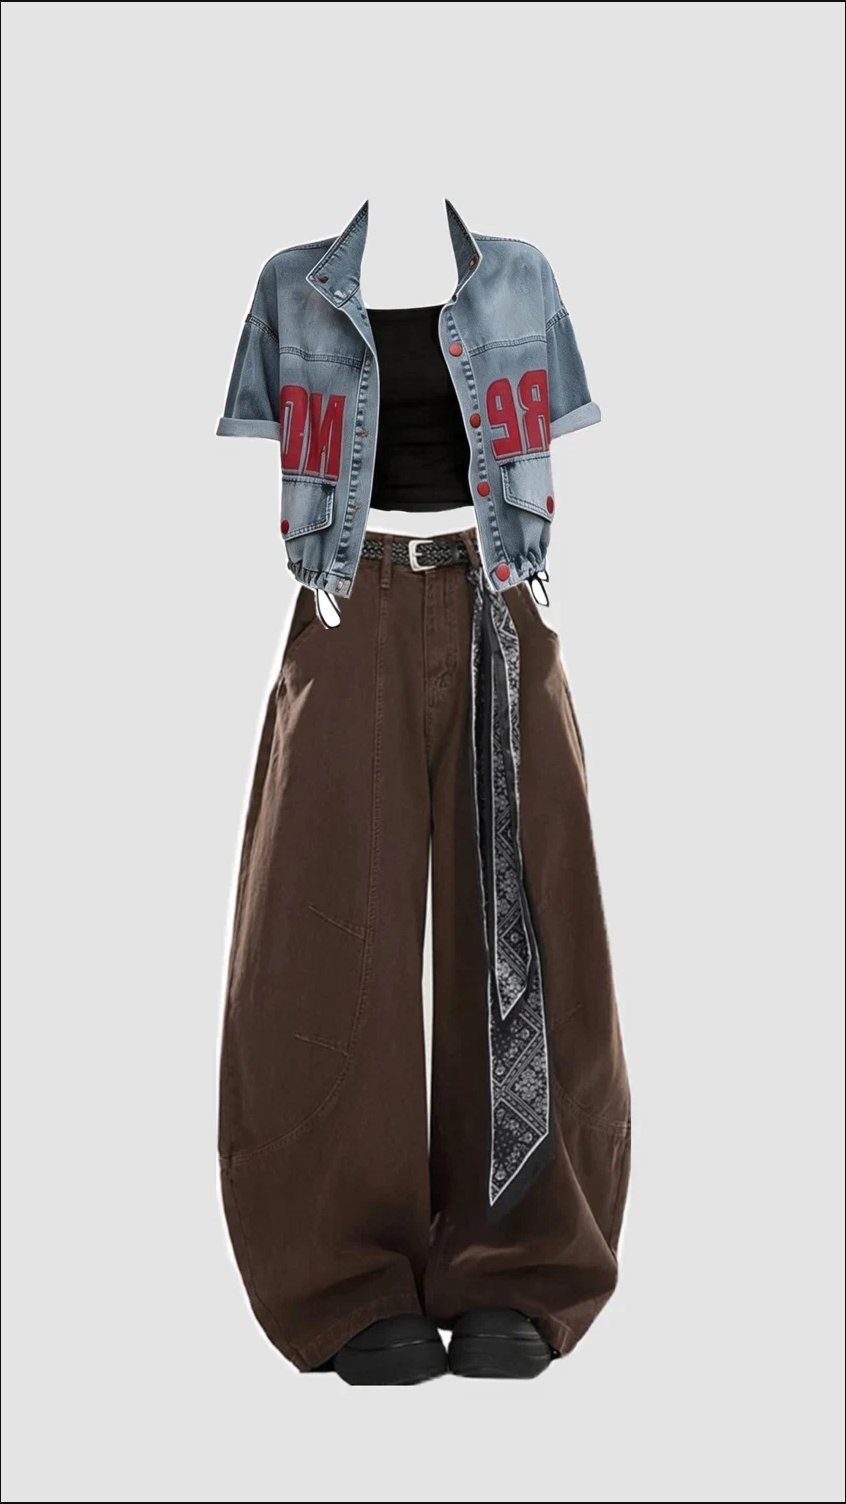
Outfit reference
Result of the outfit change
Local edits with Regional Edit
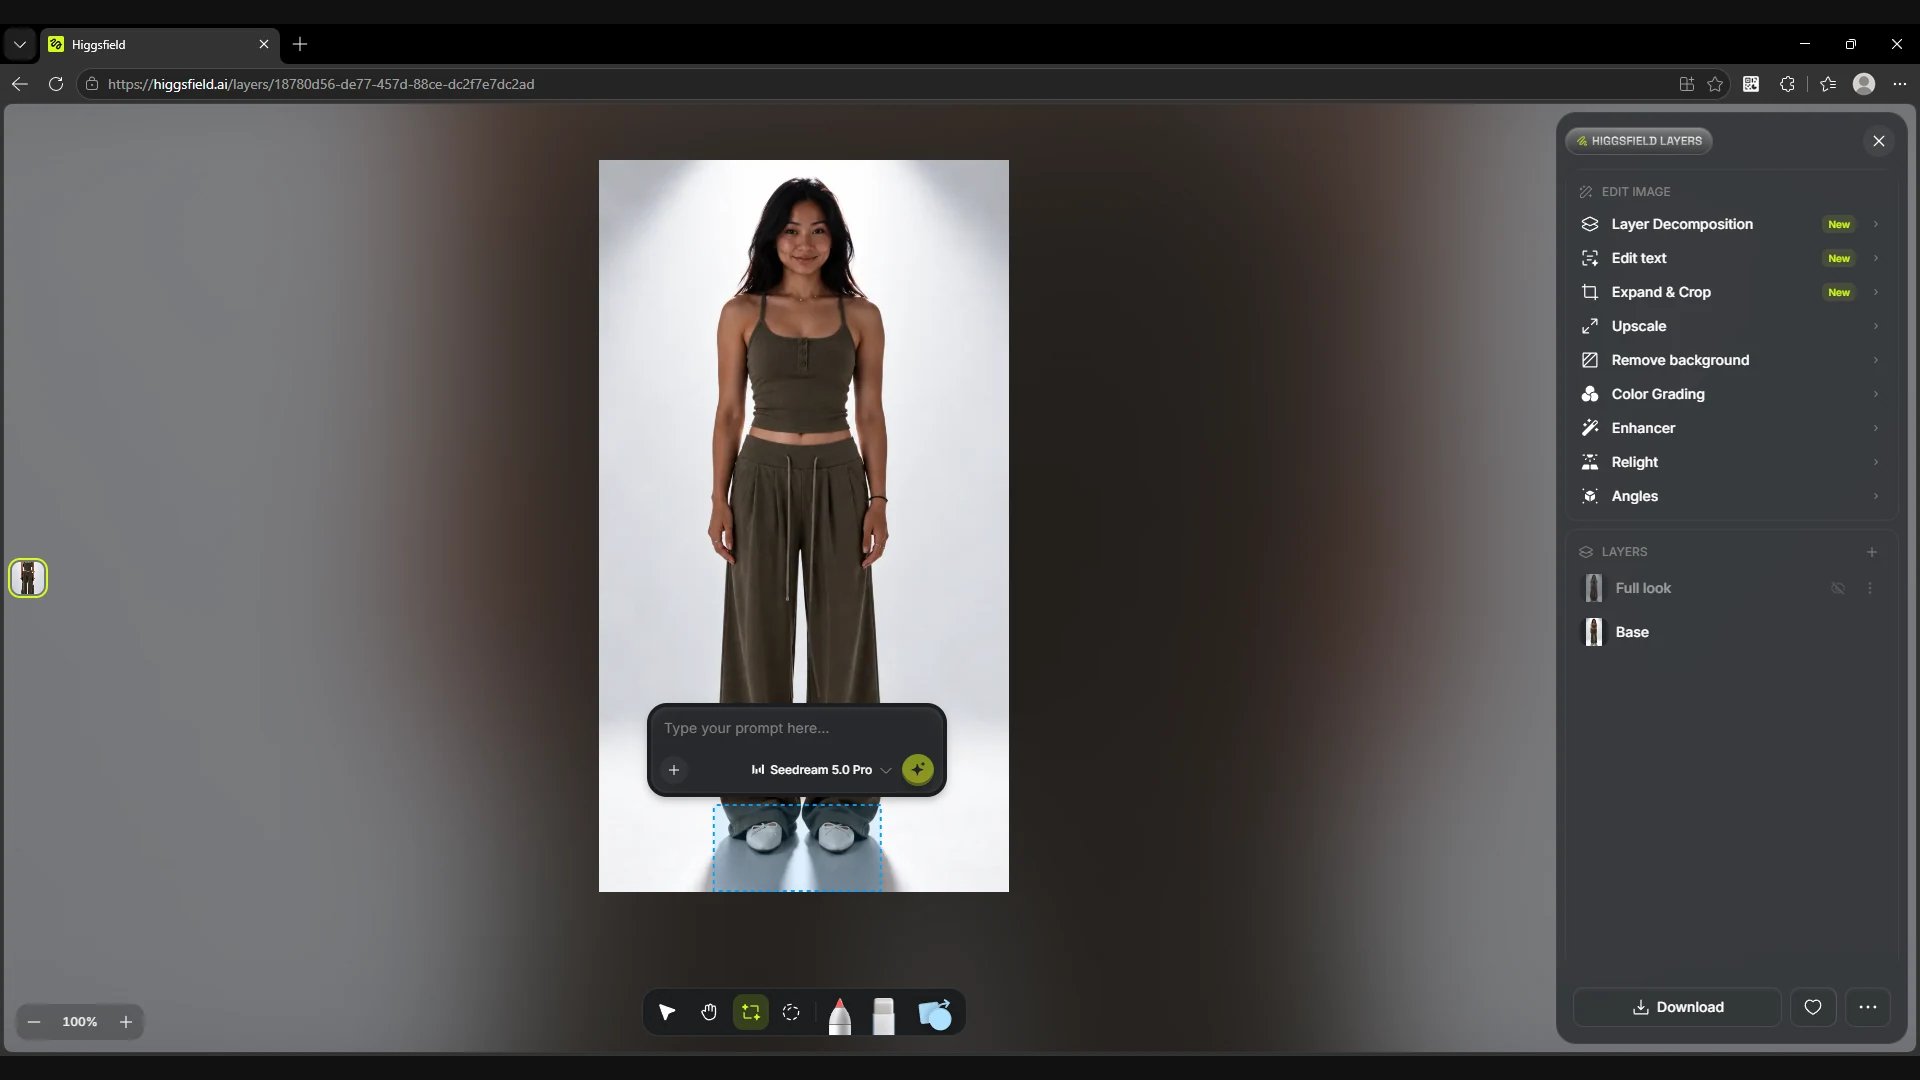
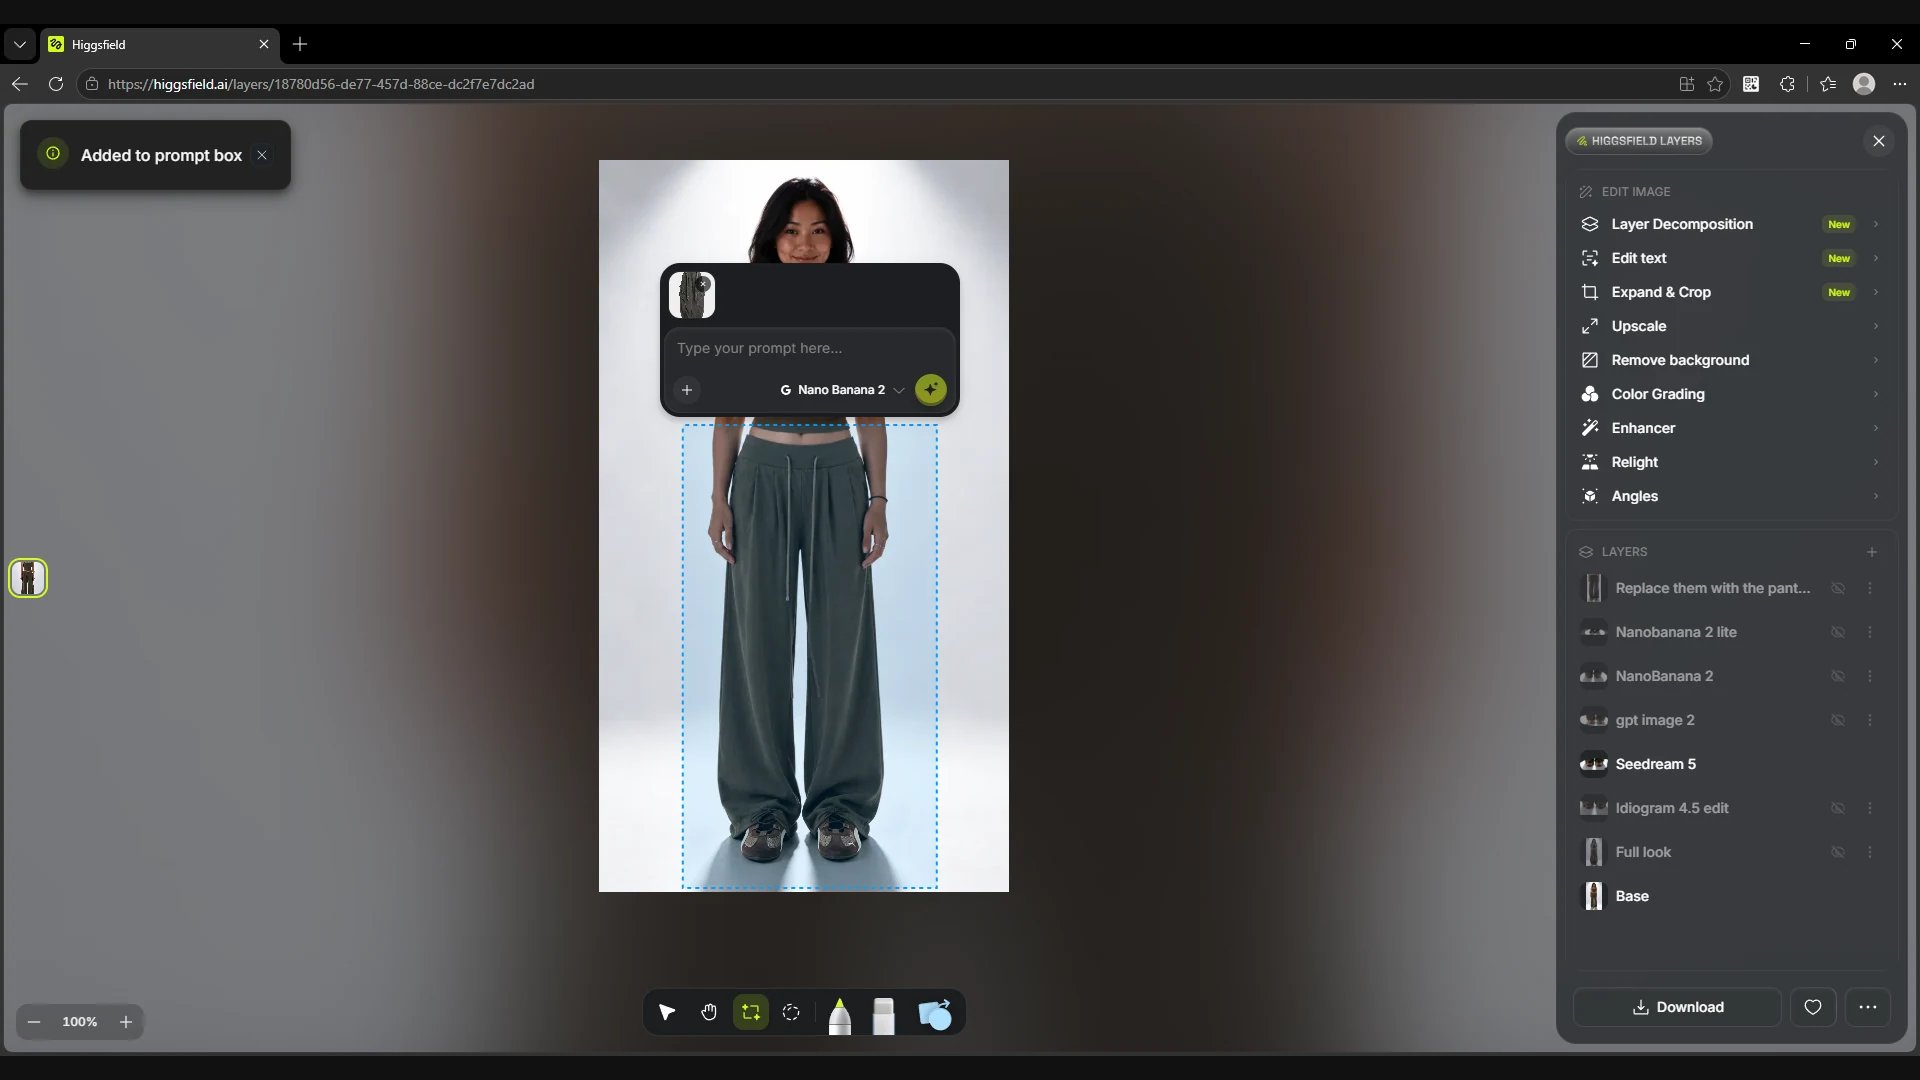
When you need to change a specific detail, choose Regional Edit on the bottom toolbar and select the area with a frame, or outline it by hand with the Lasso tool. The selection is marked with a blue dashed outline. The Type your prompt here… field opens next to it, where you can describe the edit and add a reference with +.
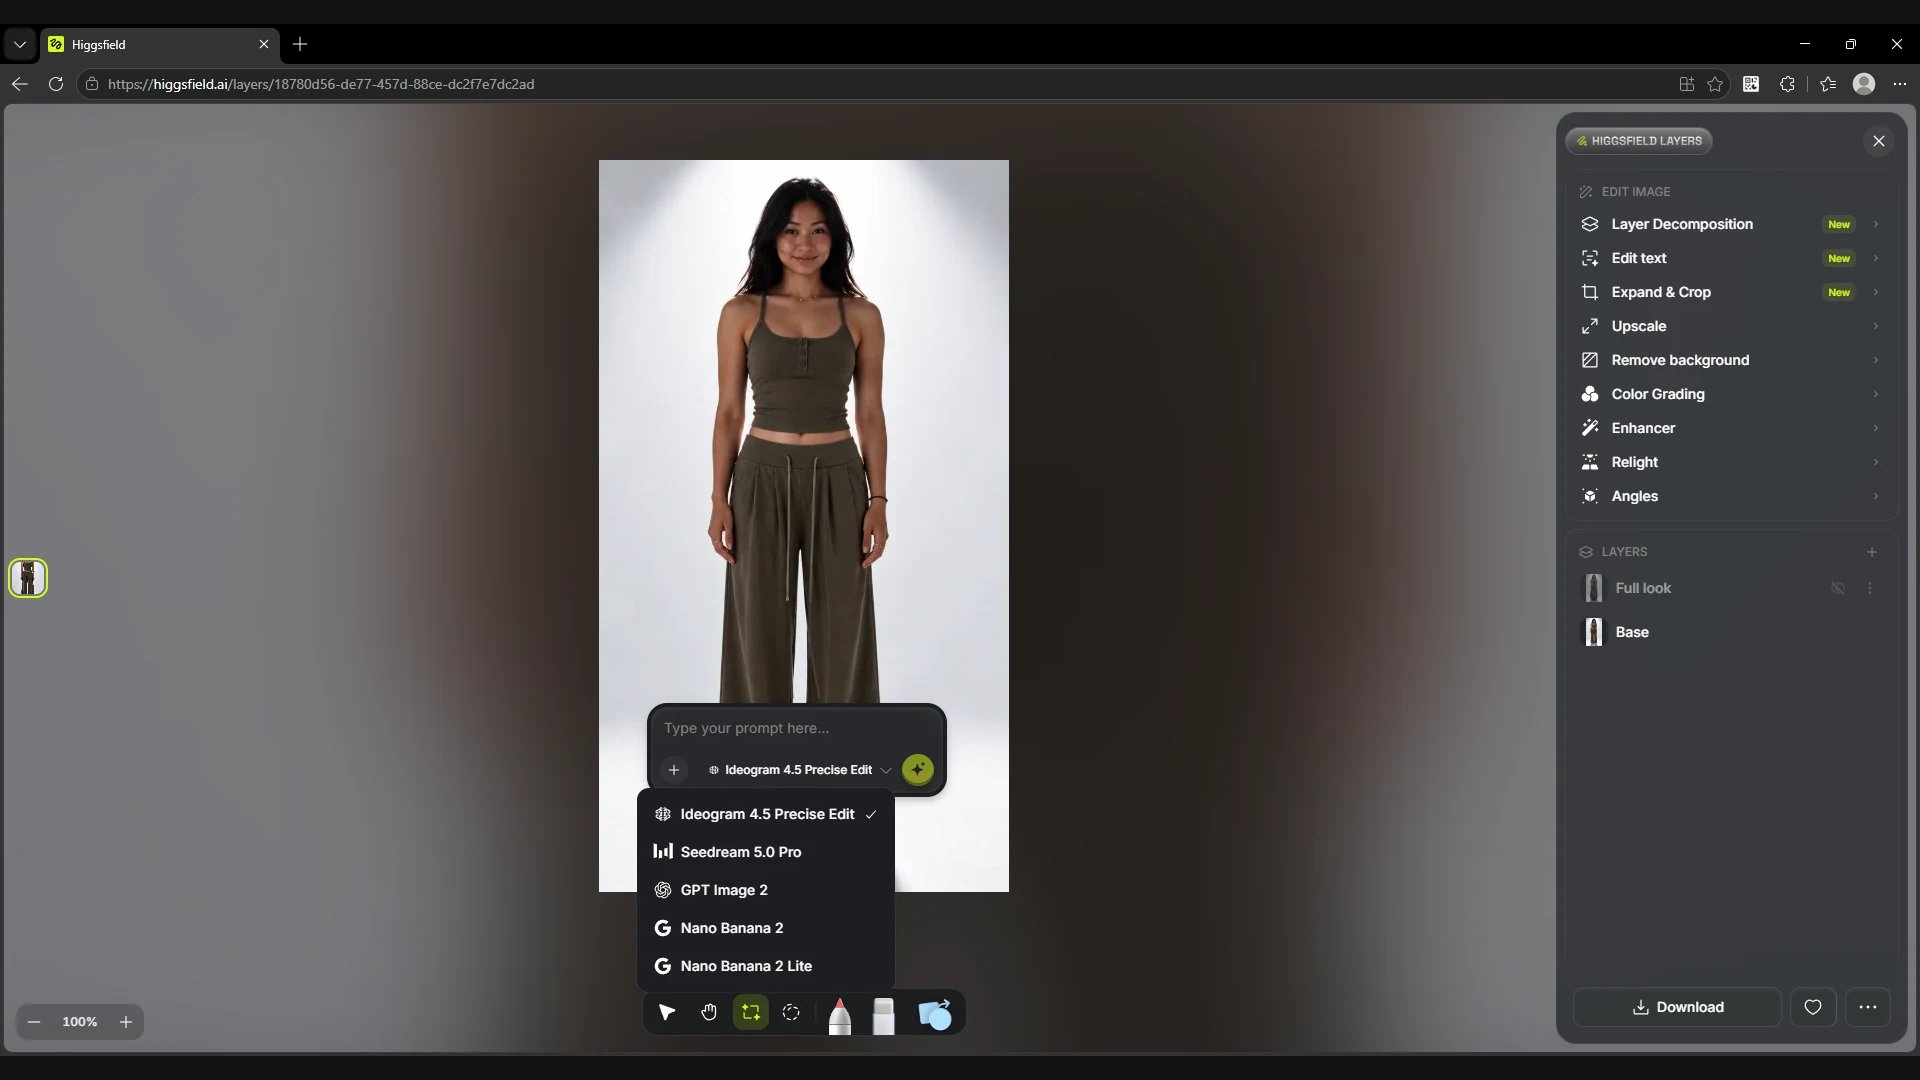
In our example, Seedream 5.0 Pro was selected at first. Clicking the model name opens a list that also has Ideogram 4.5 Precise Edit, GPT Image 2, Nano Banana 2 and Nano Banana 2 Lite.
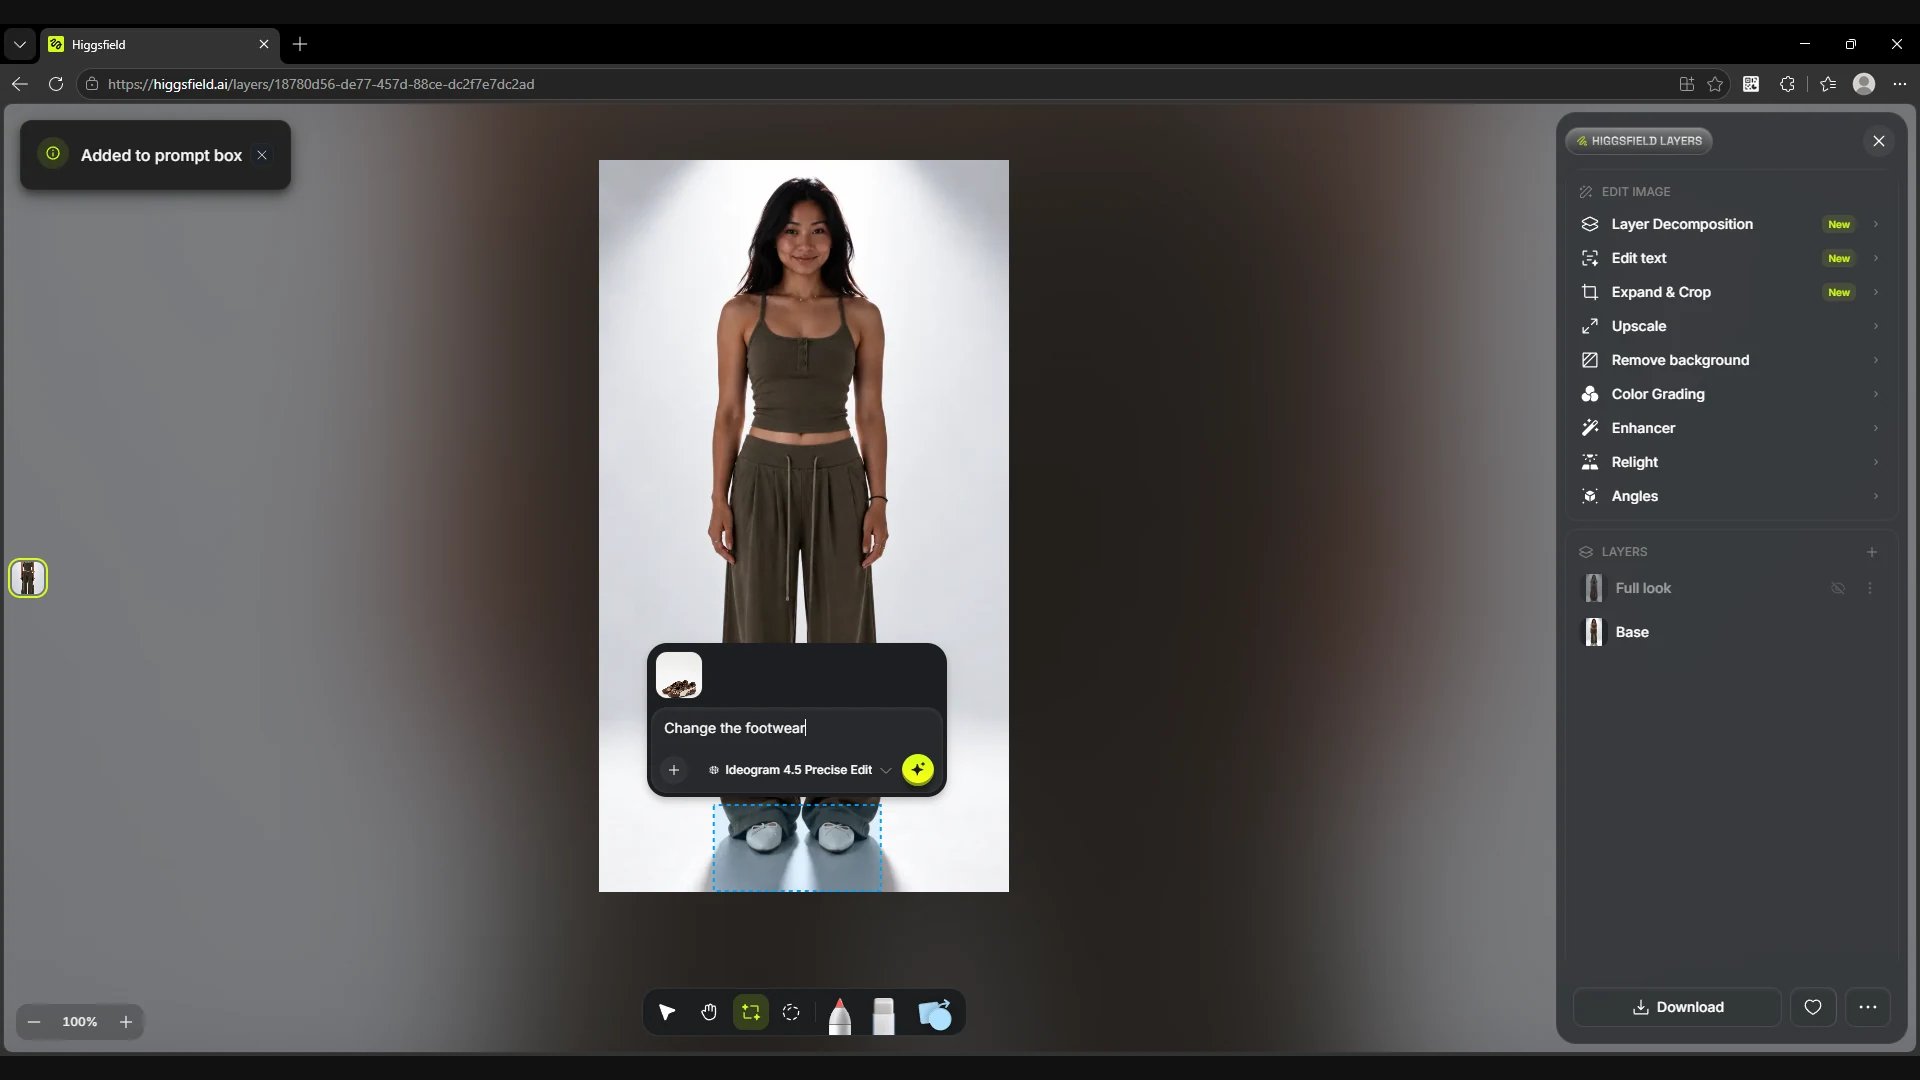
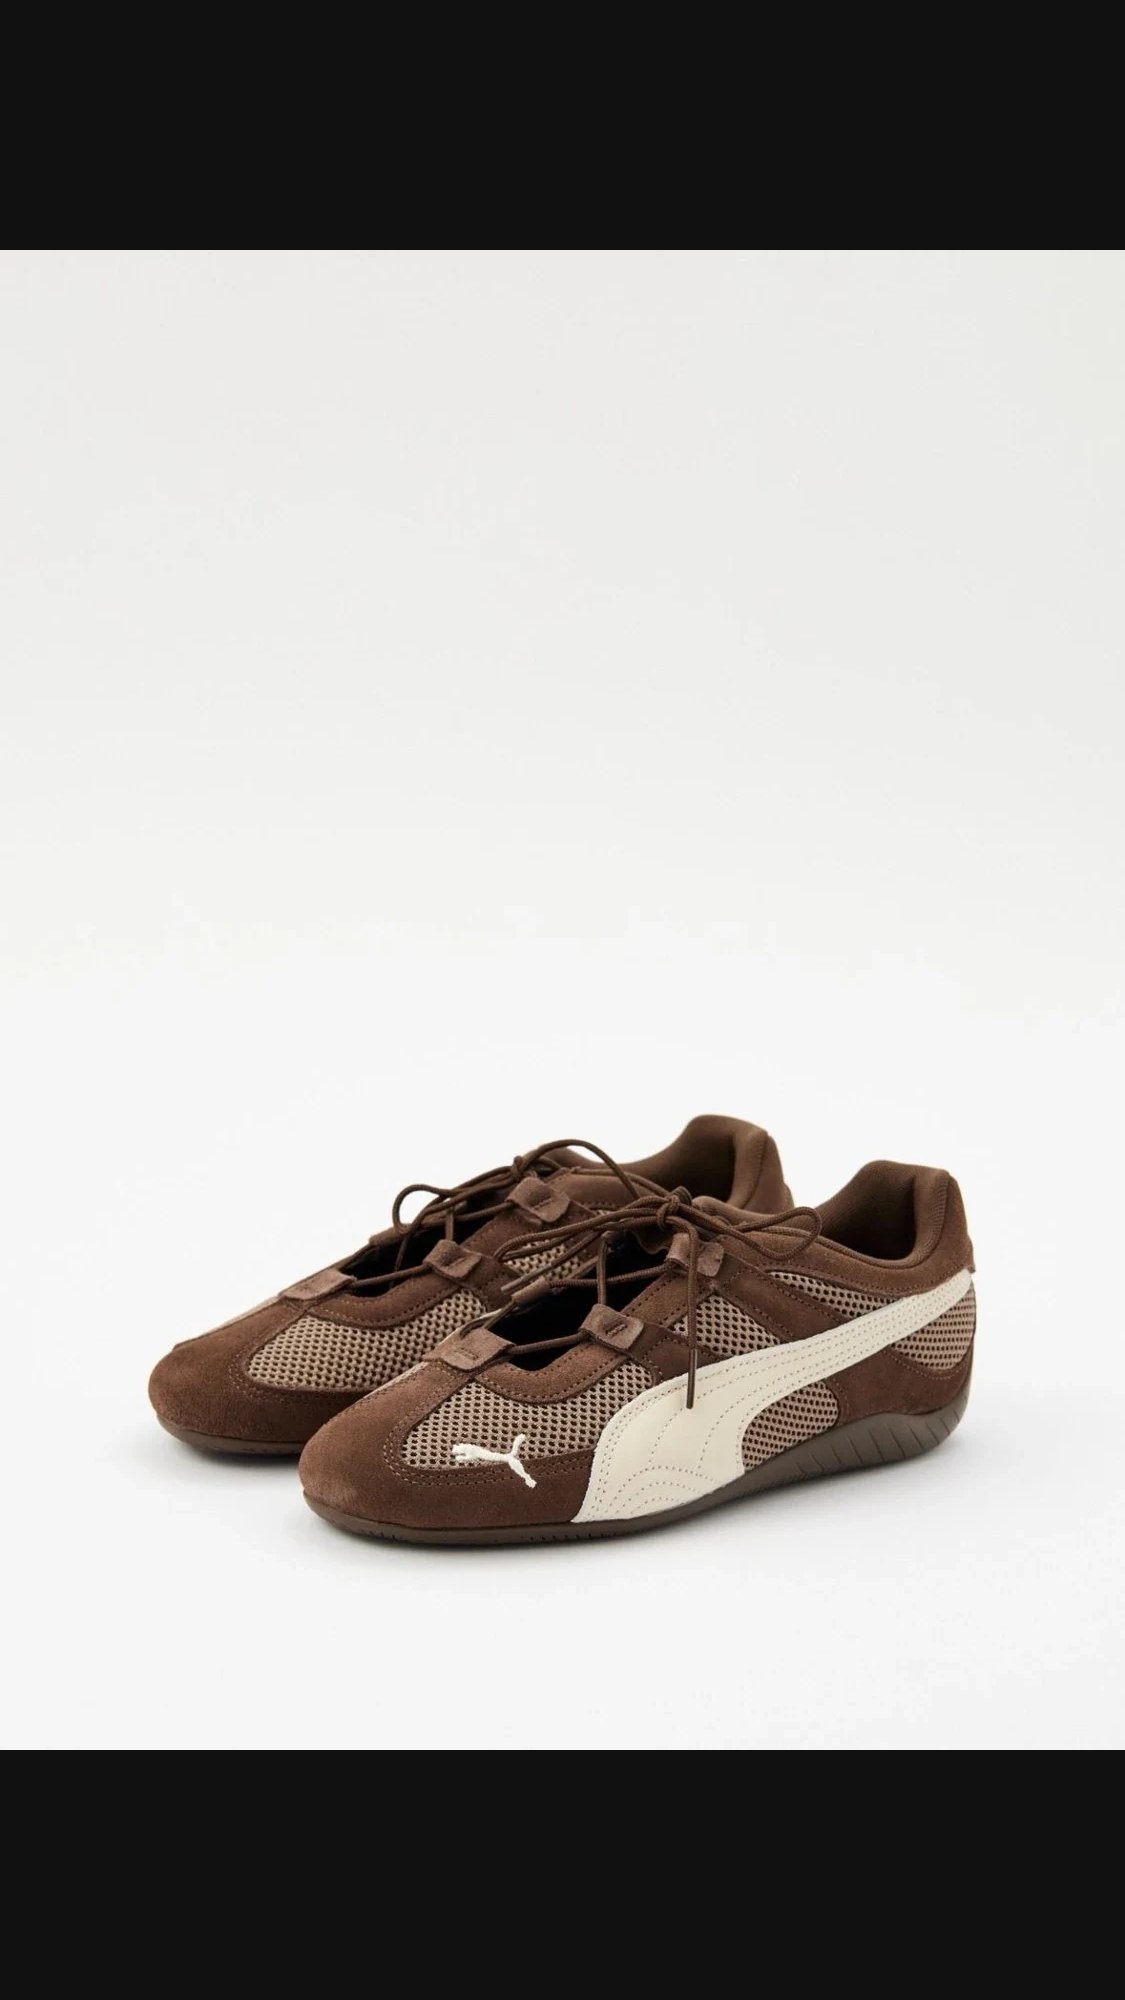
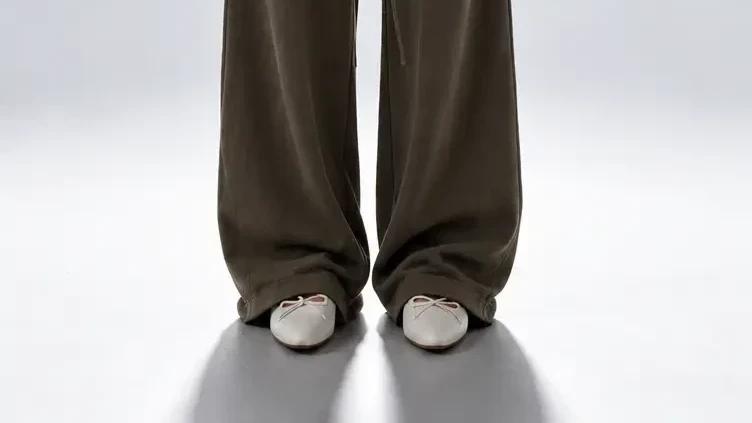
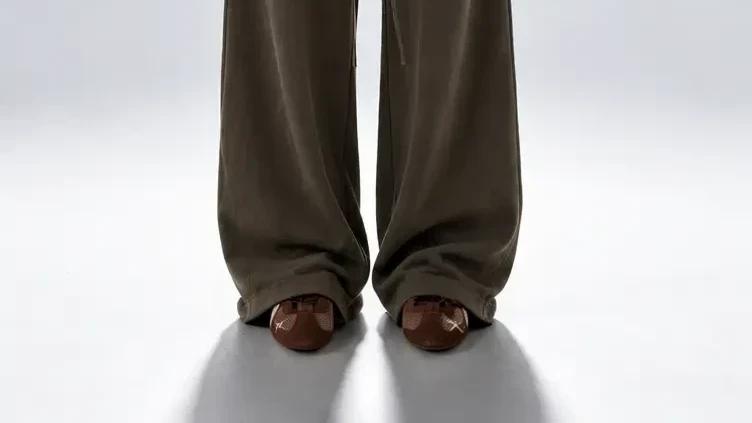
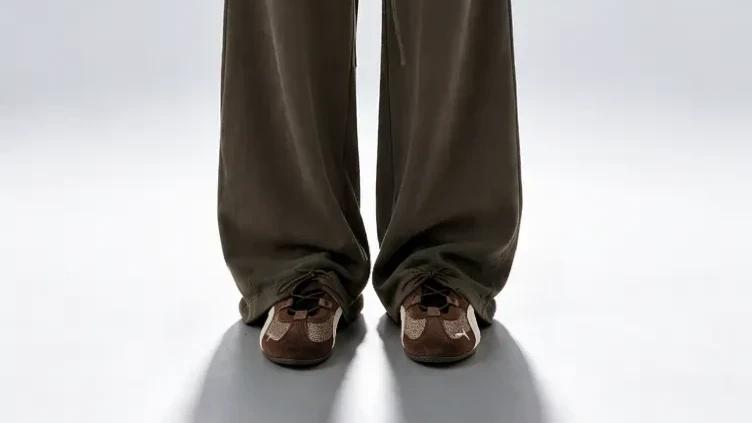
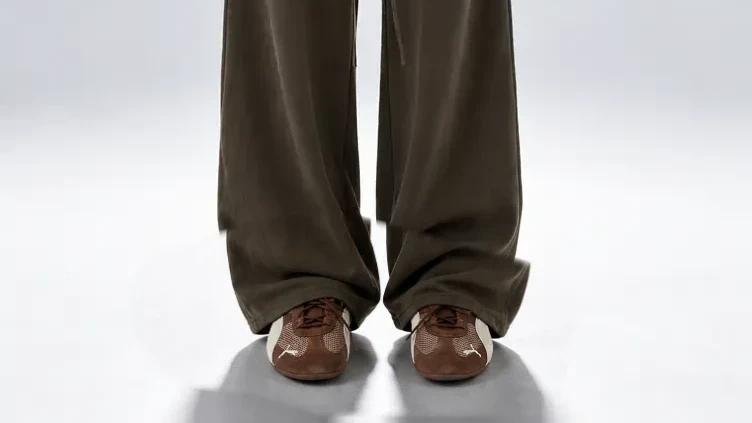
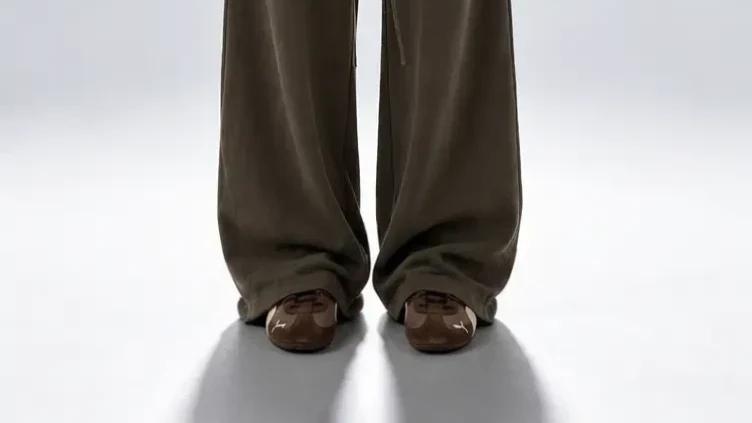
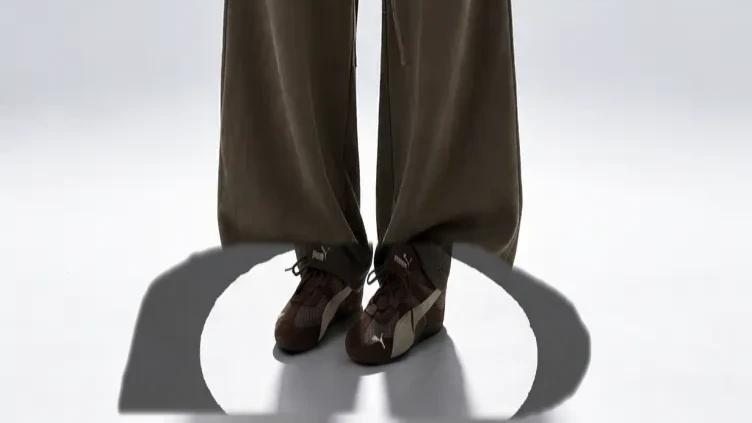
To replace the ballet flats with brown sneakers, we selected the area around the shoes, attached an image of the new pair and used one prompt for all five models.
Prompt
Screen
The selected area around the shoes and the field for the local edit
Screen
The model dropdown for Regional Edit
Screen
A local edit with the shoe reference and the selected model
Original image
Shoe reference
Comparing the shoe replacement results
Before each run we hid the previous generations with the eye icon and selected the same area on Base again. That way every model got the same inputs. In the results you can compare the shape and details of the sneakers, the trouser hems and the shadow on the floor.
For the next edits we kept Base and Seedream 5 visible, the layer with the chosen pair of shoes. The canvas now shows the character in brown sneakers.
Screen
Layers shows Base and the chosen shoe variant
Result
Original image
Result
Ideogram 4.5 Precise Edit
Result
Seedream 5.0 Pro
Result
GPT Image 2
Result
Nano Banana 2
Result
Nano Banana 2 Lite
Replacing the trousers from a reference
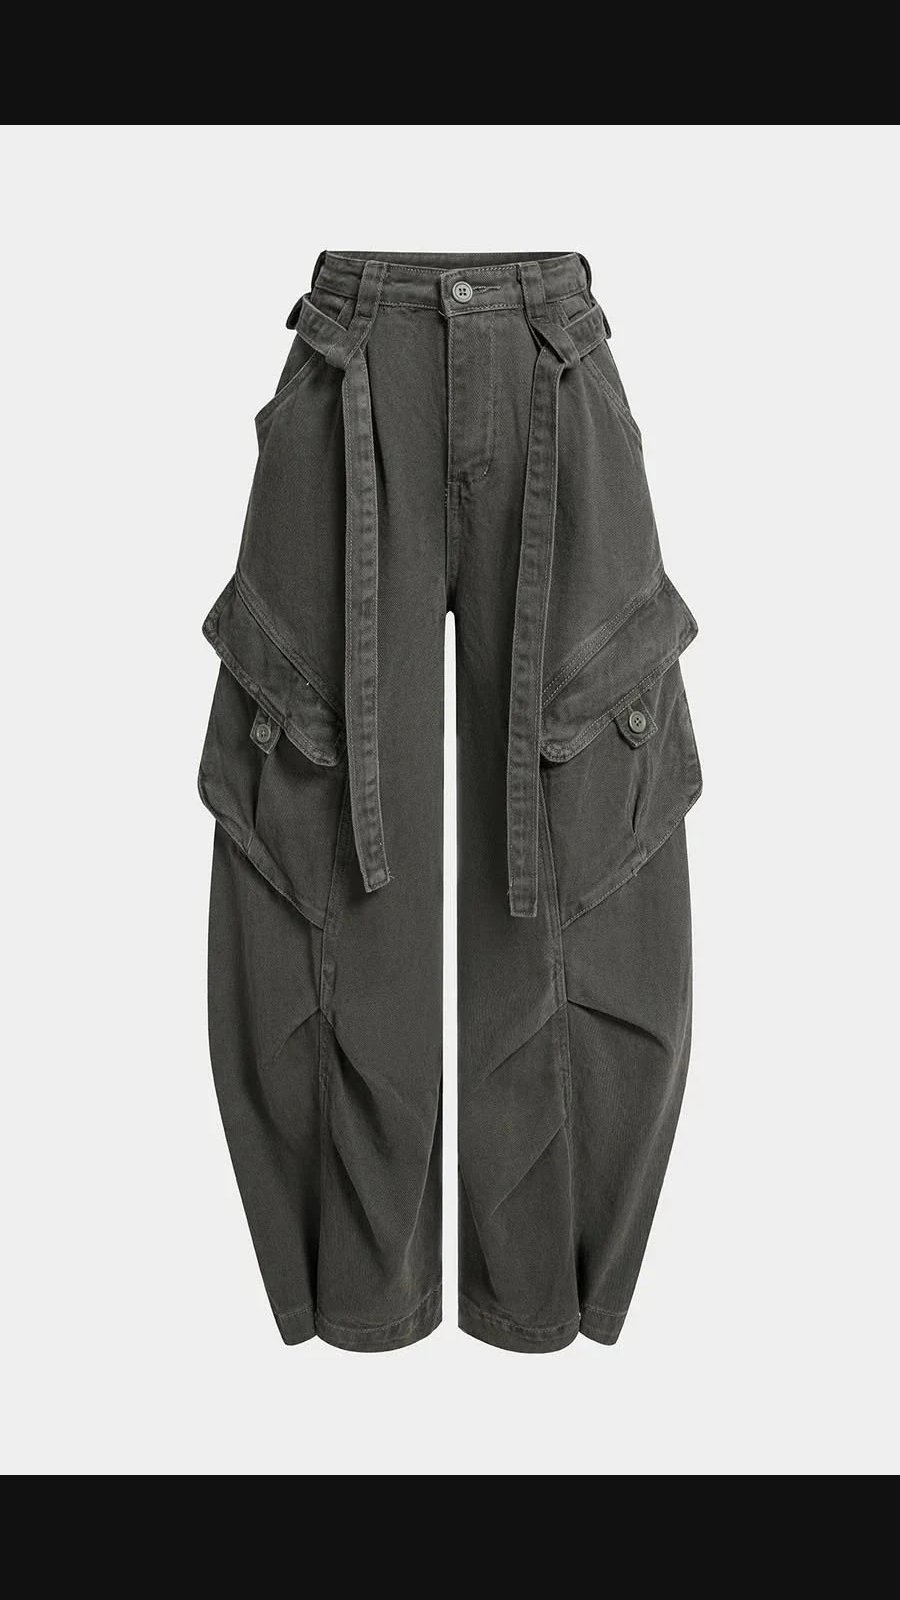
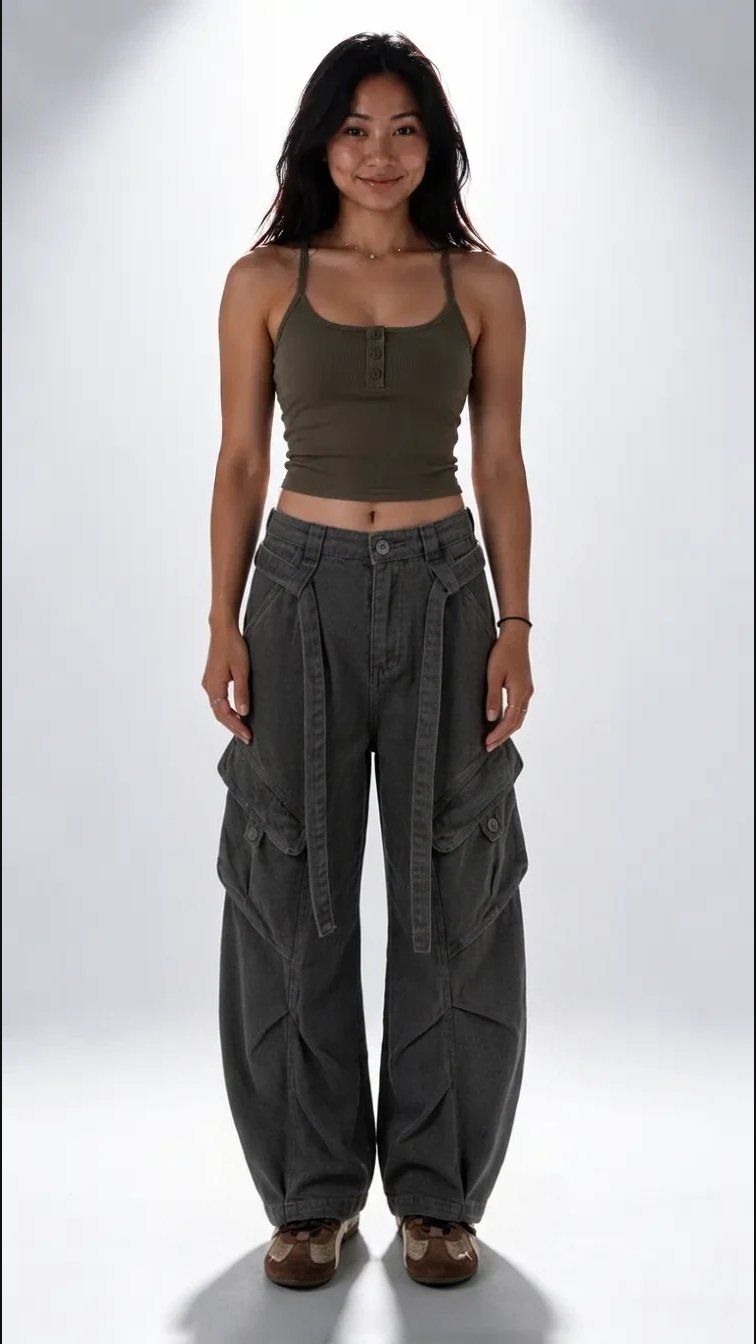
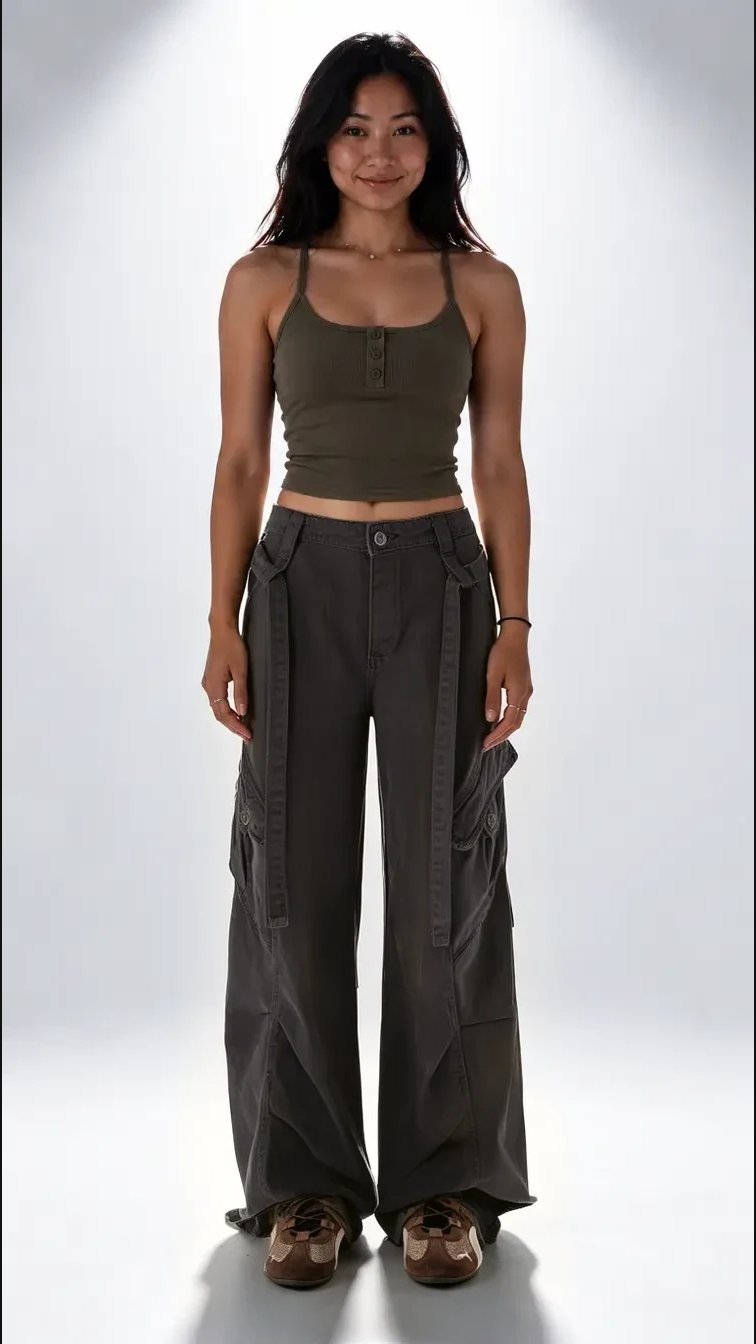
On the image with the new sneakers we selected the area from the waist to the floor and added a reference of grey cargo trousers. We used one prompt in Nano Banana 2 and Ideogram 4.5 Precise Edit.
Prompt
Both variants show side pockets with flaps and long straps. For the next edit we chose the Nano Banana 2 result.
Screen
The edit area and the trouser reference. The sneakers layer is visible
Trouser reference
Nano Banana 2
Ideogram 4.5 Precise Edit
Editing from a sketch with the pen
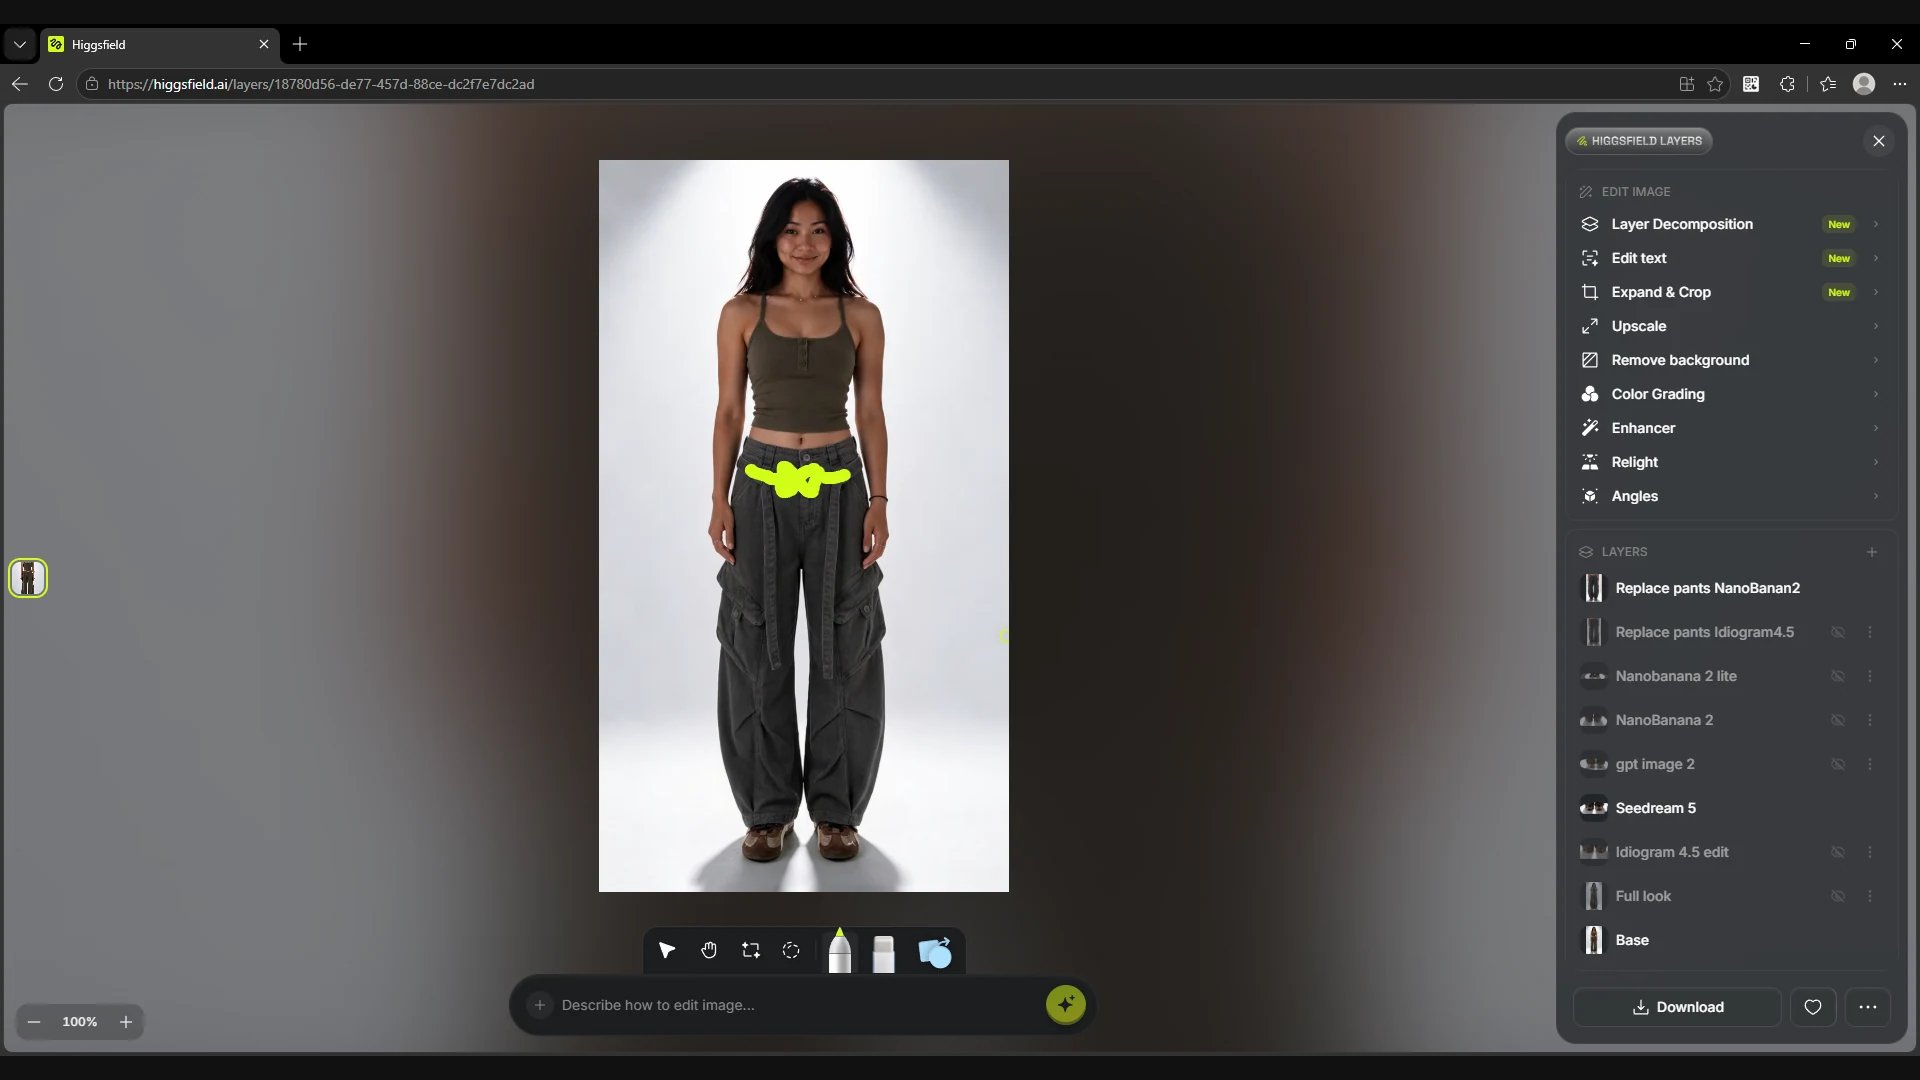
With the pen on the bottom toolbar you can sketch right on the image. Here we drew a bow at the centre of the waistband. In the main prompt field we specified that the bow should be tied from the trousers' own straps.
Prompt
Screen
The bow sketch on the waistband and the pen selected on the bottom toolbar
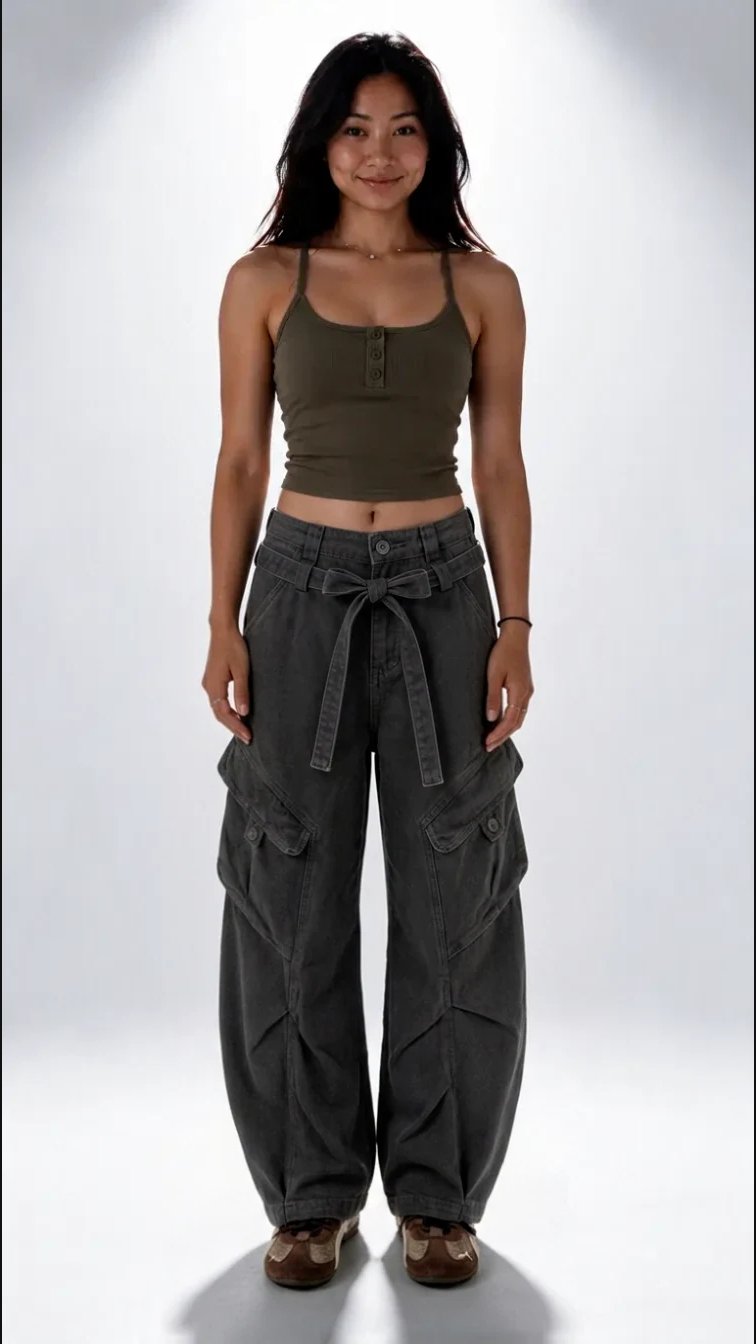
Result
Before the edit. The straps hang loose
Result
After the edit in Nano Banana 2. The straps are tied in a bow
Guide lines with Shapes
The Shapes menu on the bottom toolbar has a line, an arrow, a rectangle and a circle. You can choose the markup colour and mention it in the prompt to tie the description of the edit to specific marks on the canvas.
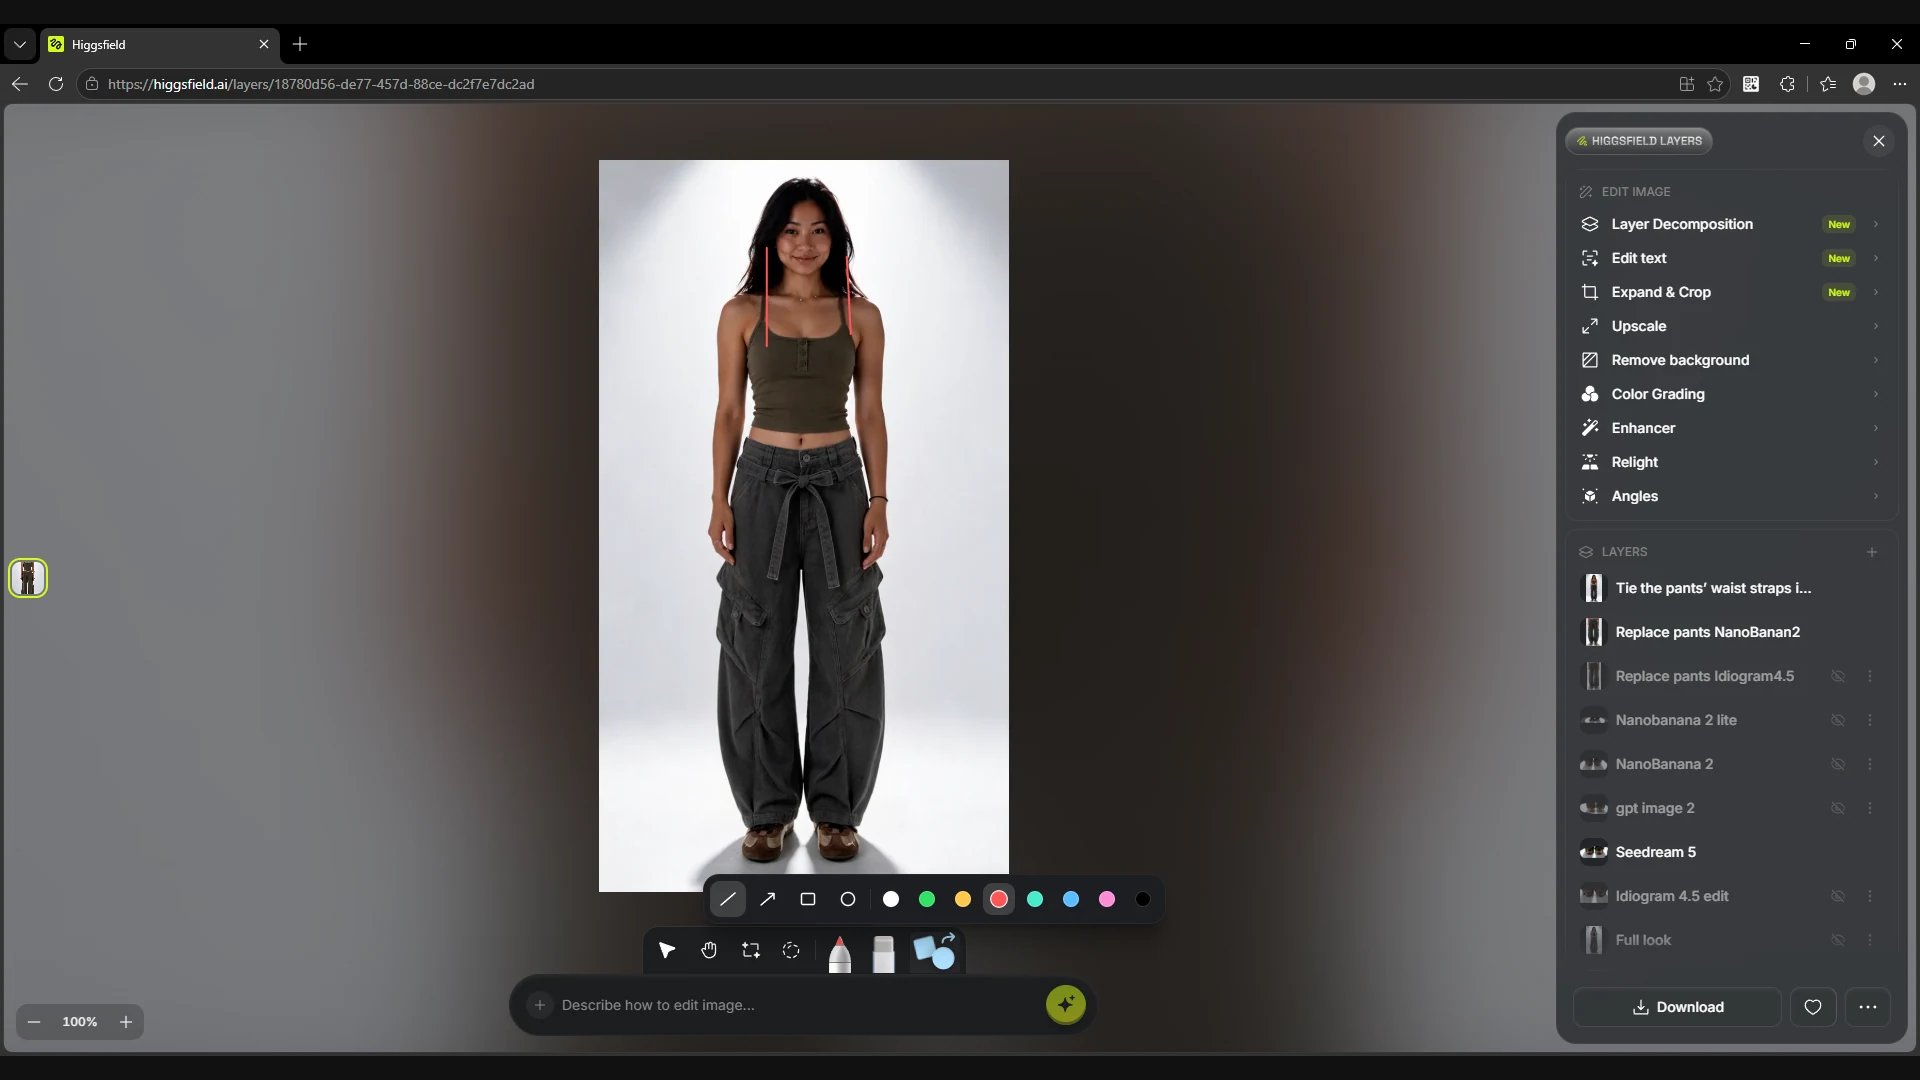
For the hair edit we drew two red lines on either side of the face. The lines show where the strands should go over the shoulders and fall onto the chest.
Prompt
Screen
The Shapes menu and two red guide lines for the strands
Result
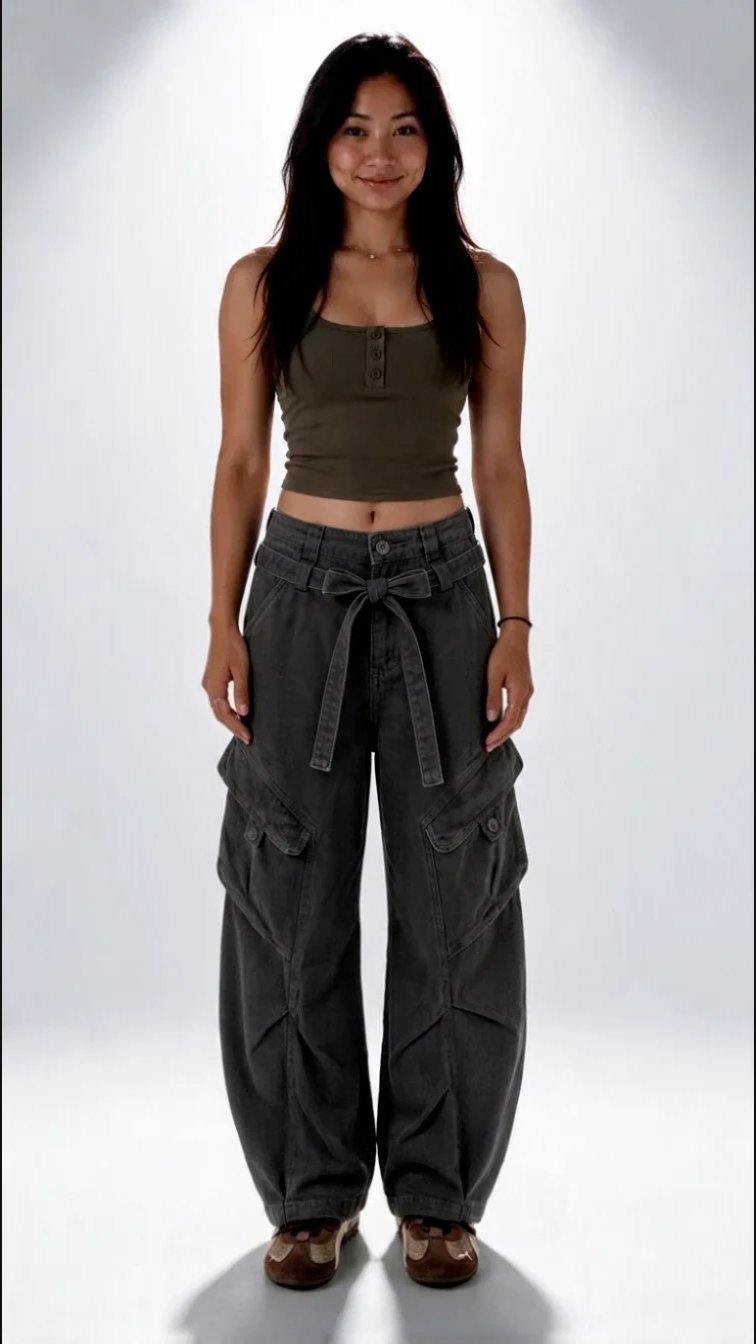
Before the edit. The hair is behind the shoulders
Result
After the edit. The strands lie over the shoulders
Adding a new item from a reference
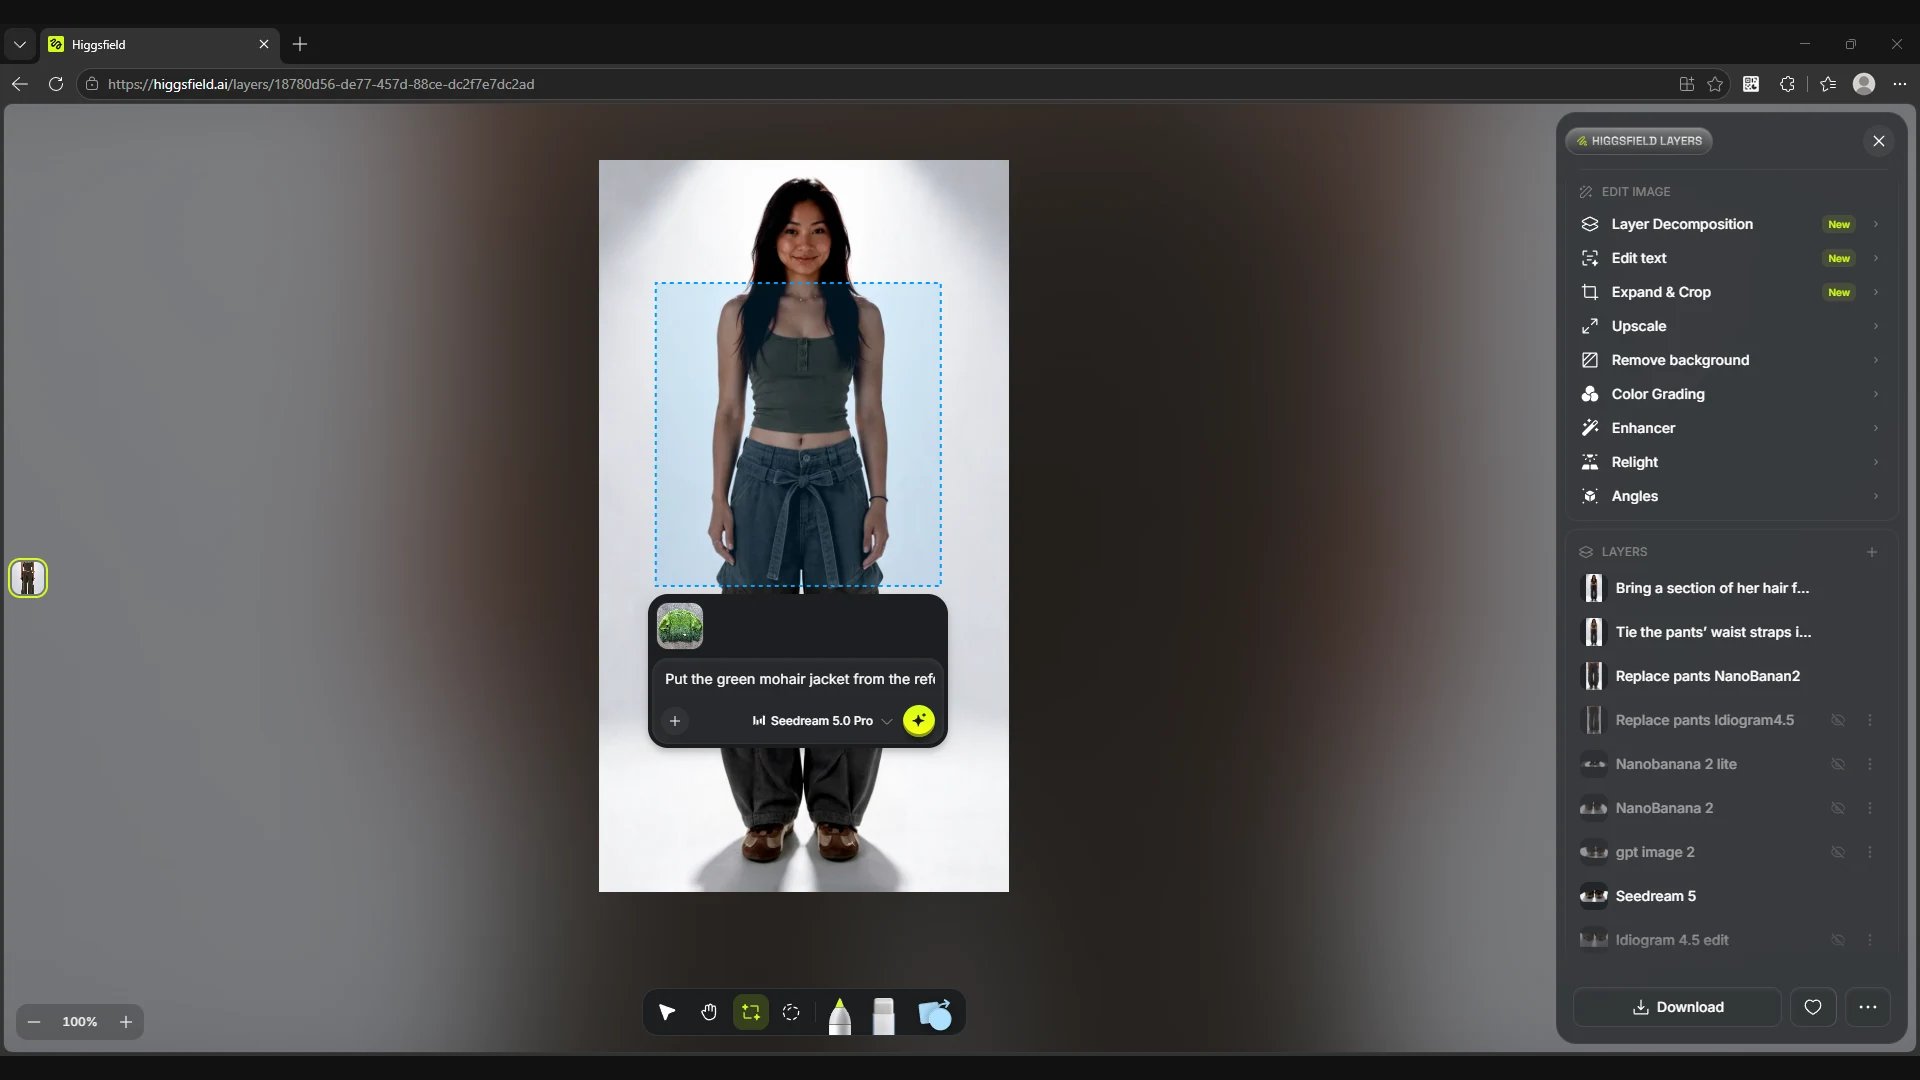
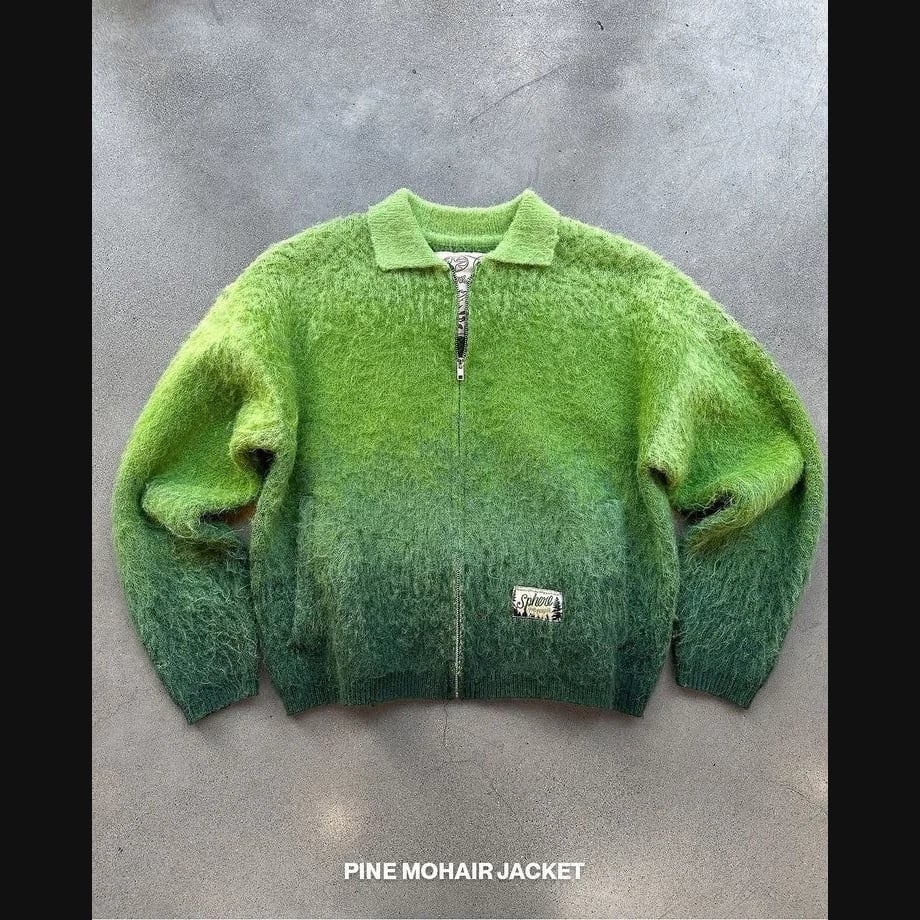
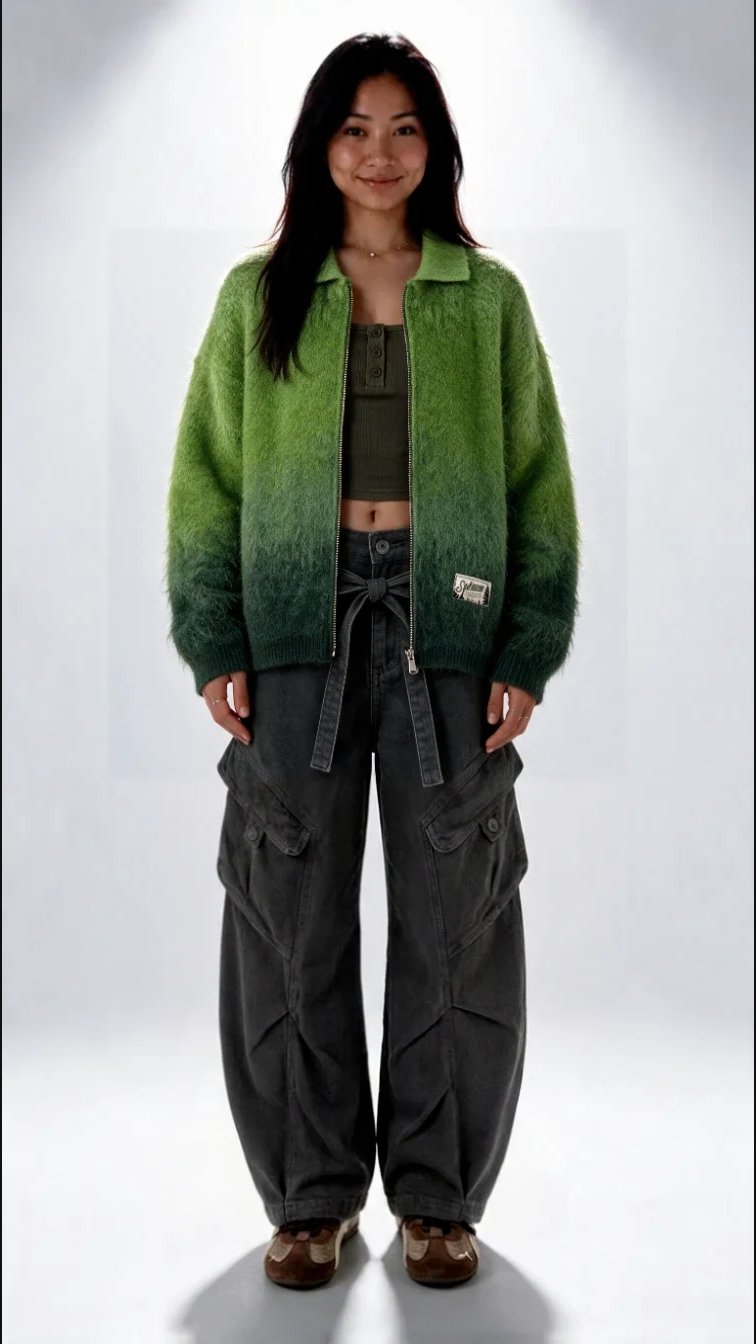
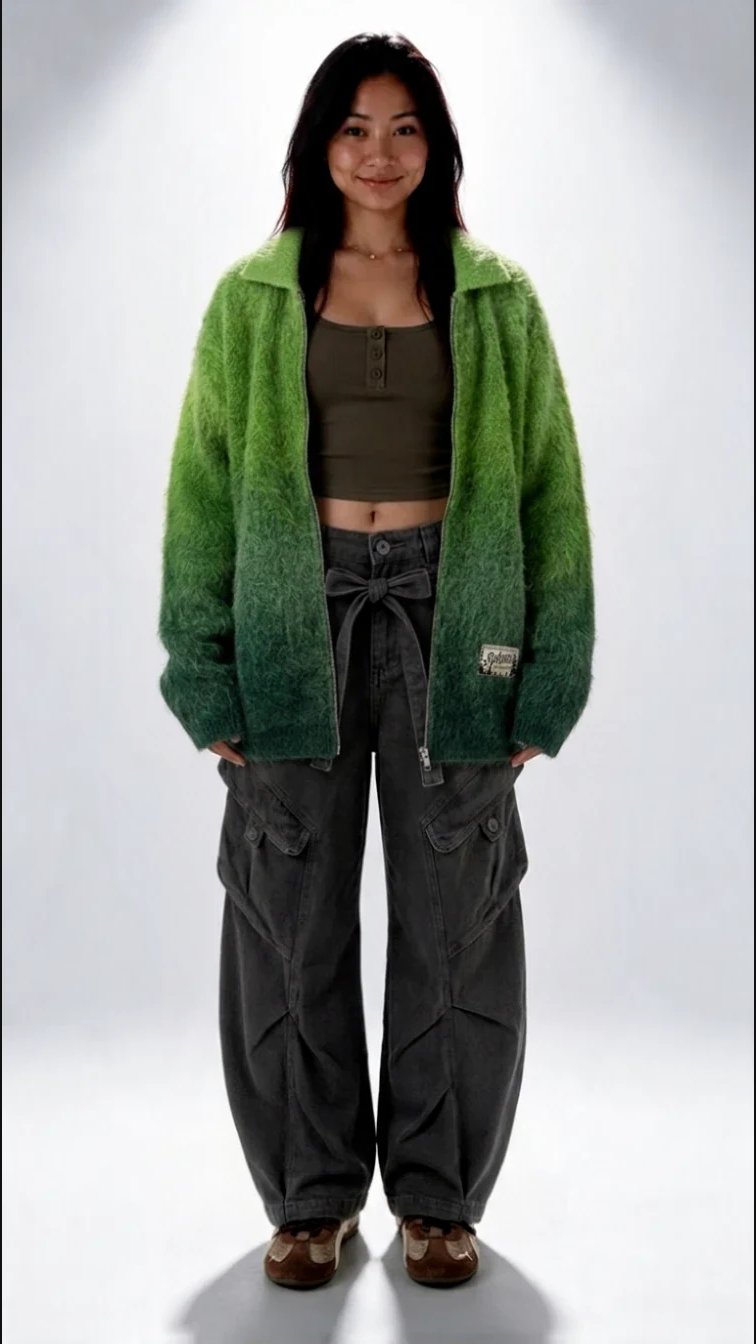
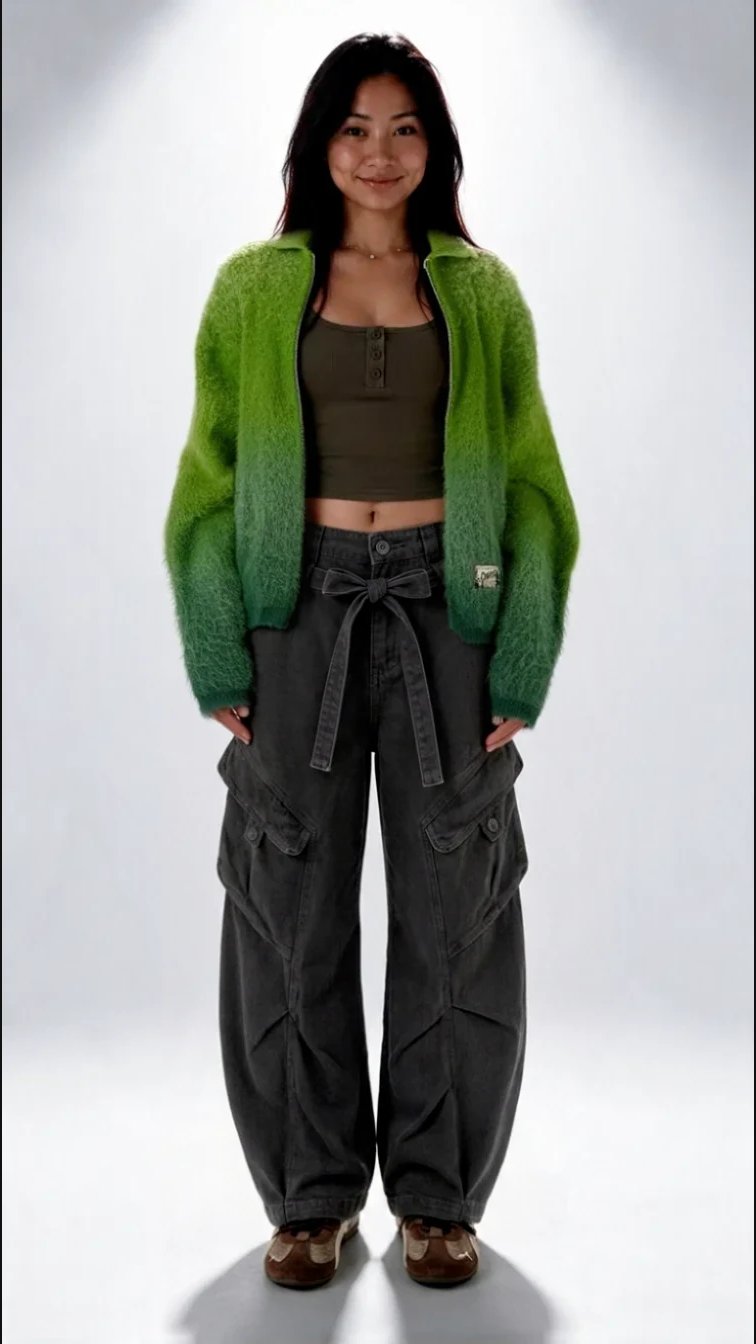
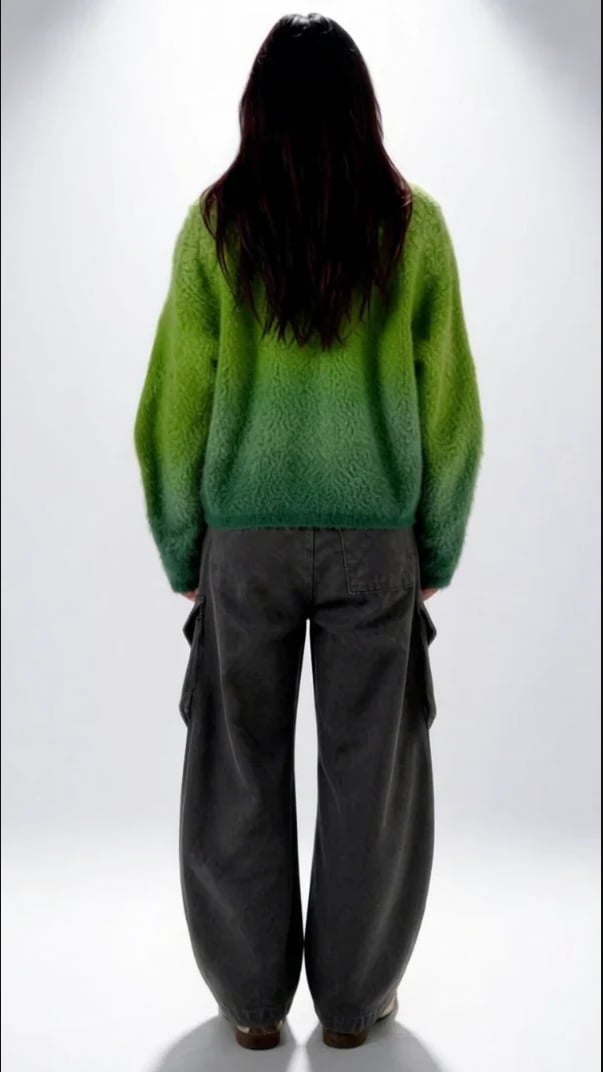
Regional Edit also works for adding an item. To put a green mohair jacket on the character, we selected the shoulders, torso and arms. In the prompt we said the jacket should go over the original top, with the zip fully open.
Prompt
In all three variants the jacket is open and the top is visible. The models handled the jacket length, the volume of the sleeves and the transition from light green to dark green differently.
If a model keeps giving you a result that doesn't fit, try the same edit in another model. Keep the original image, the selected area, the reference and the prompt the same so you can compare the results. In the jacket example you can choose a variant by fit, sleeve length and how the model rendered the mohair texture. Keep the layer you like visible to continue from it.
Screen
The selected area, the jacket reference and the generation settings
Jacket reference
Seedream 5.0 Pro
Nano Banana 2
Ideogram 4.5 Precise Edit
From the original frame to the finished look
For the final look we took the original frame and made five edits one after another. In this series, each frame shows the chosen result we continued working with.
Result
Original frame
Result
New sneakers
Result
Cargo trousers
Result
Bow on the waistband
Result
Strands over the shoulders
Result
Final look
New angles of the finished look with Angles
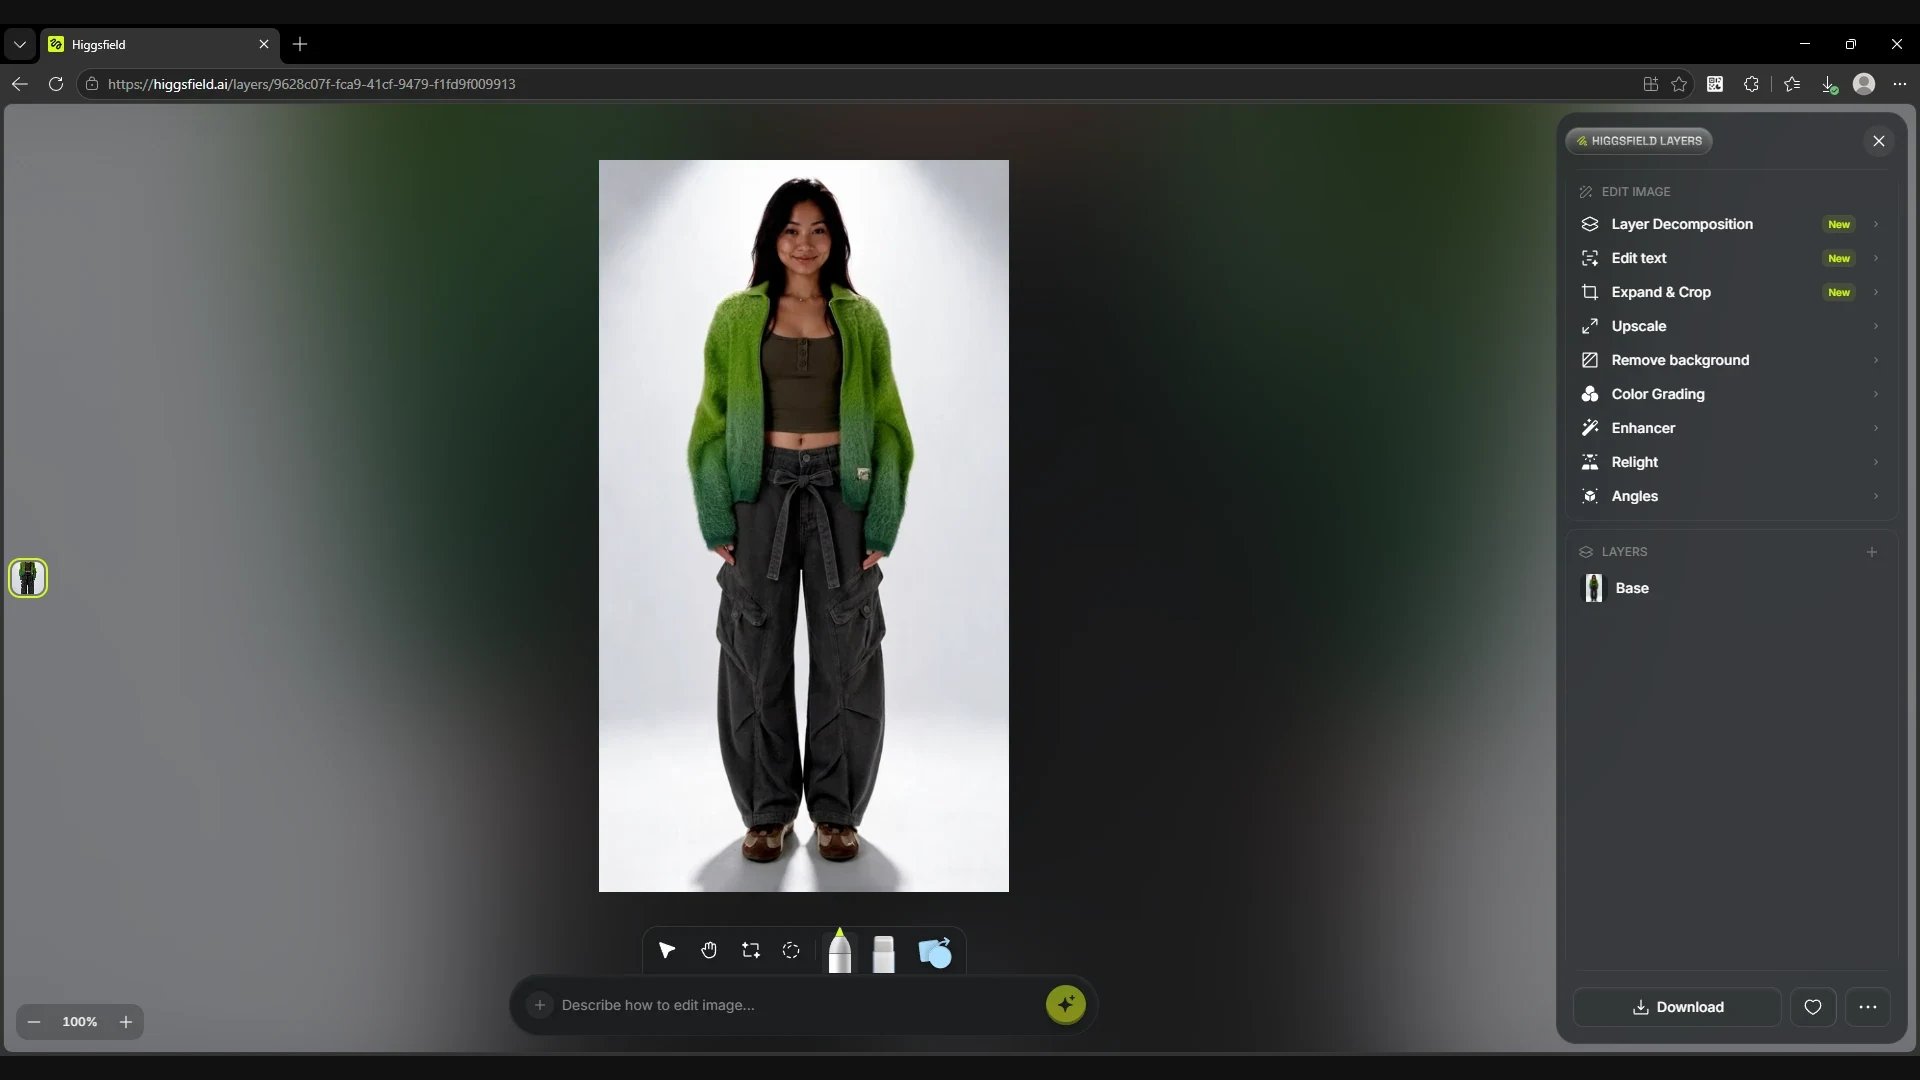
In our test, Angles used the original Base layer. In the first project that was a photo of the character in basic clothes. To get angles of the finished look, we opened the final frame as Base in a new project.
On the start page, click Upload Media and choose the finished frame in Image Generations. If you have already downloaded it, add it through Uploads → Upload file. In the new project, make sure the Base thumbnail shows the right look.
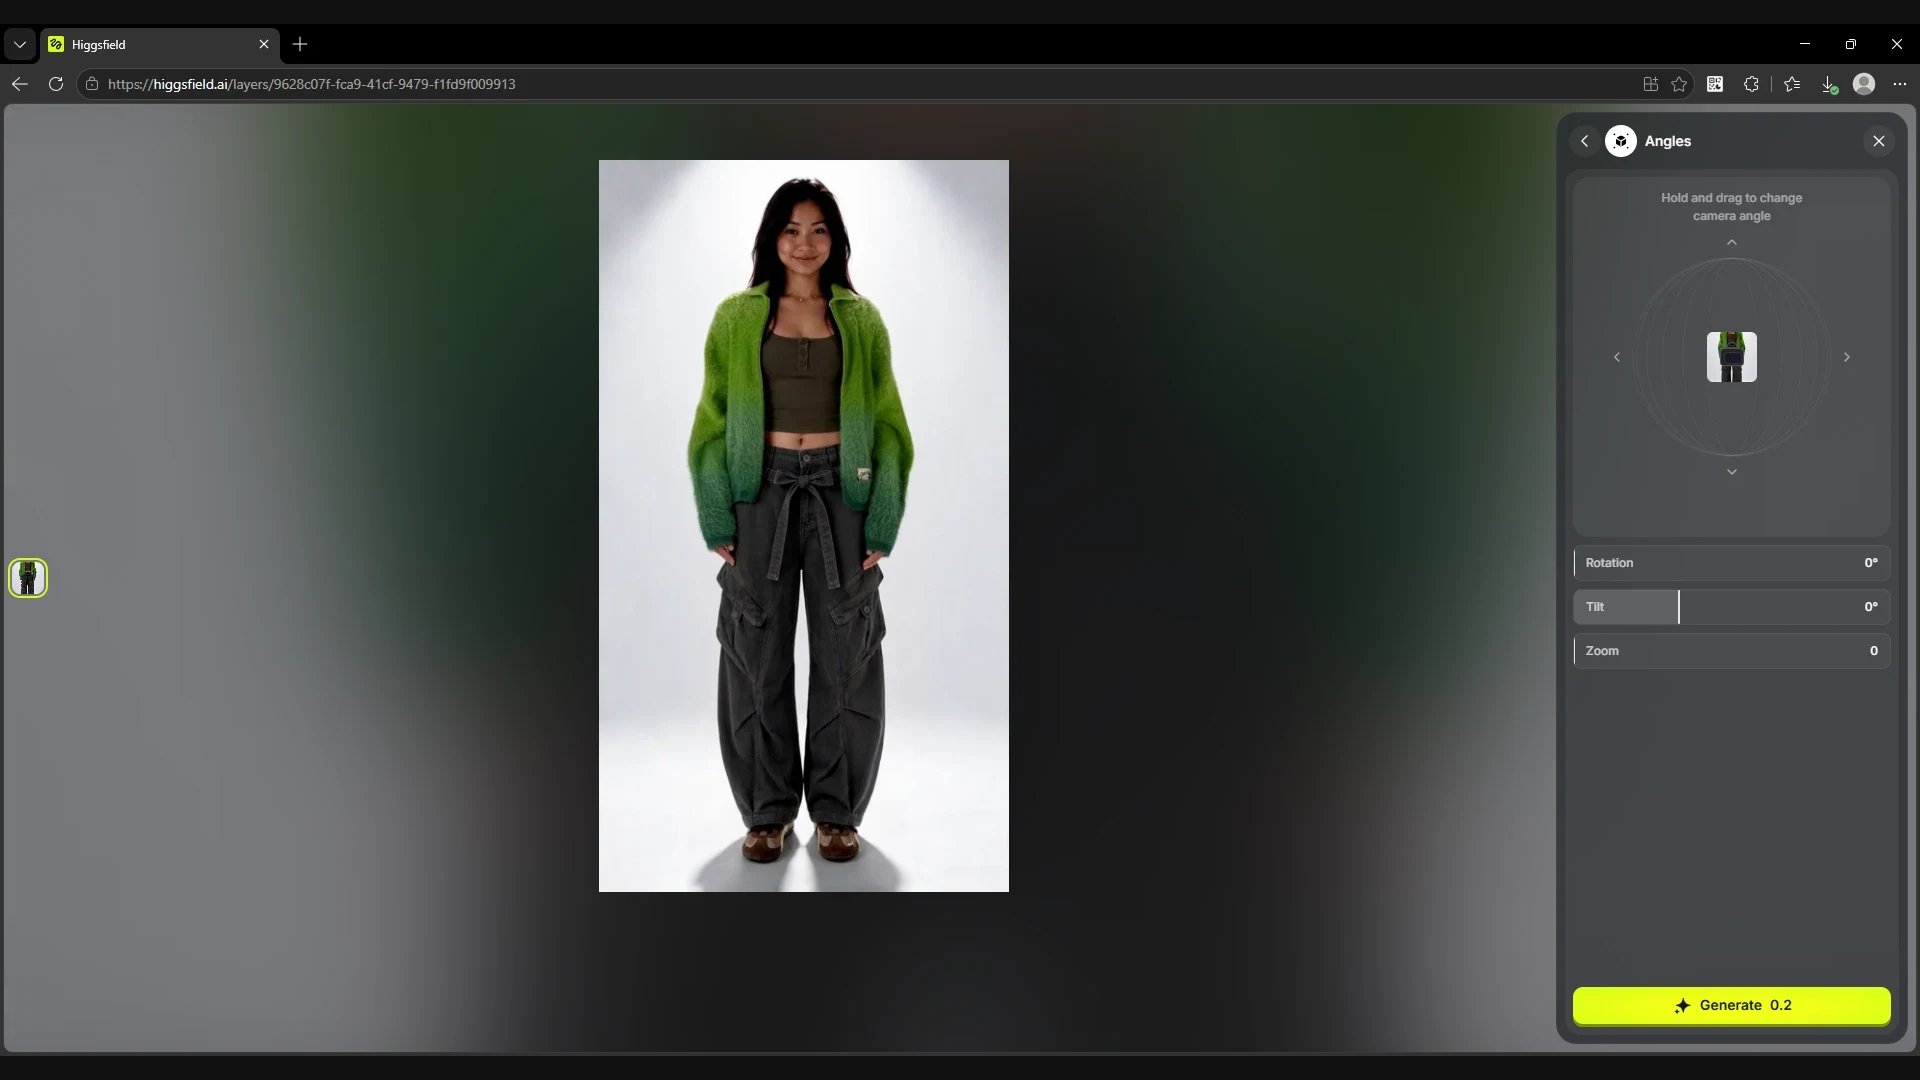
In the Edit Image panel on the right, open Angles. Drag the camera icon around the sphere or adjust the settings below it.
New angles of the finished look with Angles
Setting
What it changes
Rotation
Camera rotation around the character. For example, 45° gives a three-quarter angle.
Tilt
Vertical camera angle. A value of 0° keeps the camera level.
Zoom
Shot size. Increase the value to show the look closer.
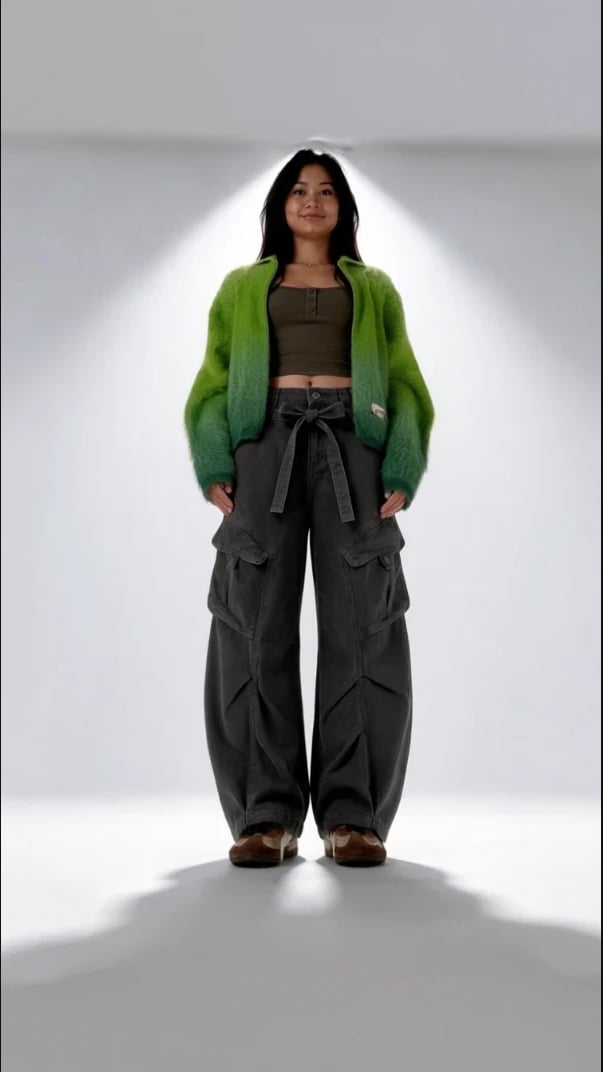
When the angle is set, click the generate button. For the next view, change the settings and run the generation again. From one front-facing frame we got six variants.
Screen
New project. The finished look is uploaded as Base
Screen
The Angles panel with the default values Rotation 0°, Tilt 0° and Zoom 0
Low angle
High angle
Three-quarter, one side
Three-quarter, other side
Three-quarter from behind
Back view
How to change the text on packaging with Edit text
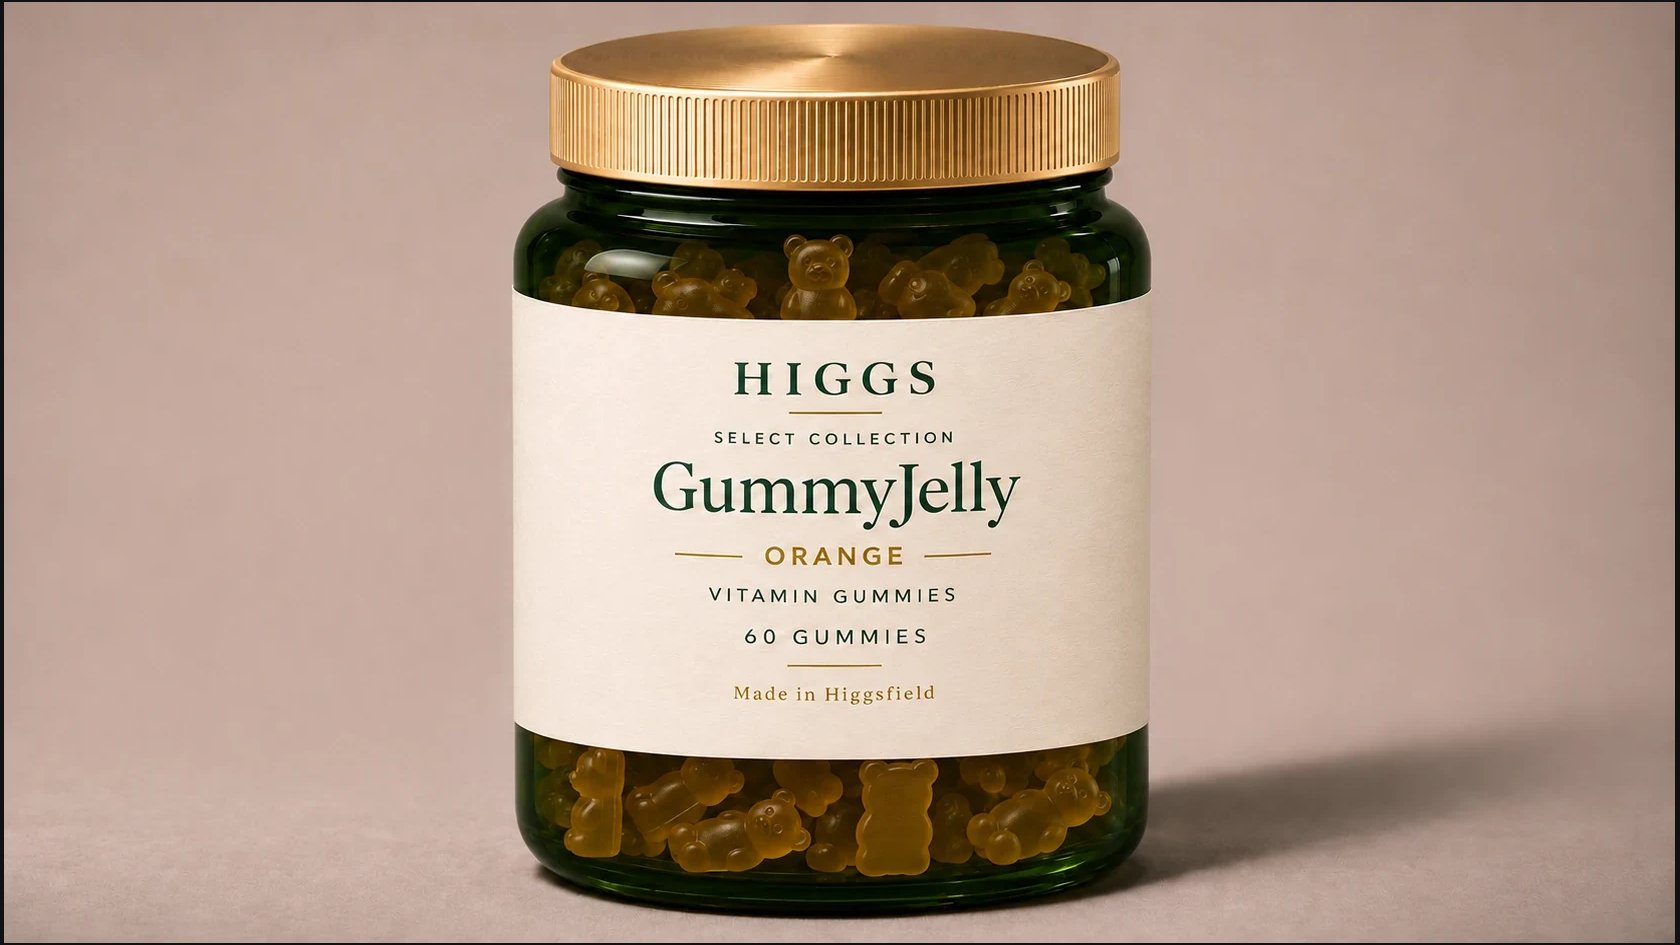
For the product example we take an image of a HIGGS GummyJelly jar. It becomes the Base layer in a new project. The label has a name, a flavour and a count, so it is a good way to show how to update several text lines in one generation.
Frame
The original HIGGS GummyJelly packaging image
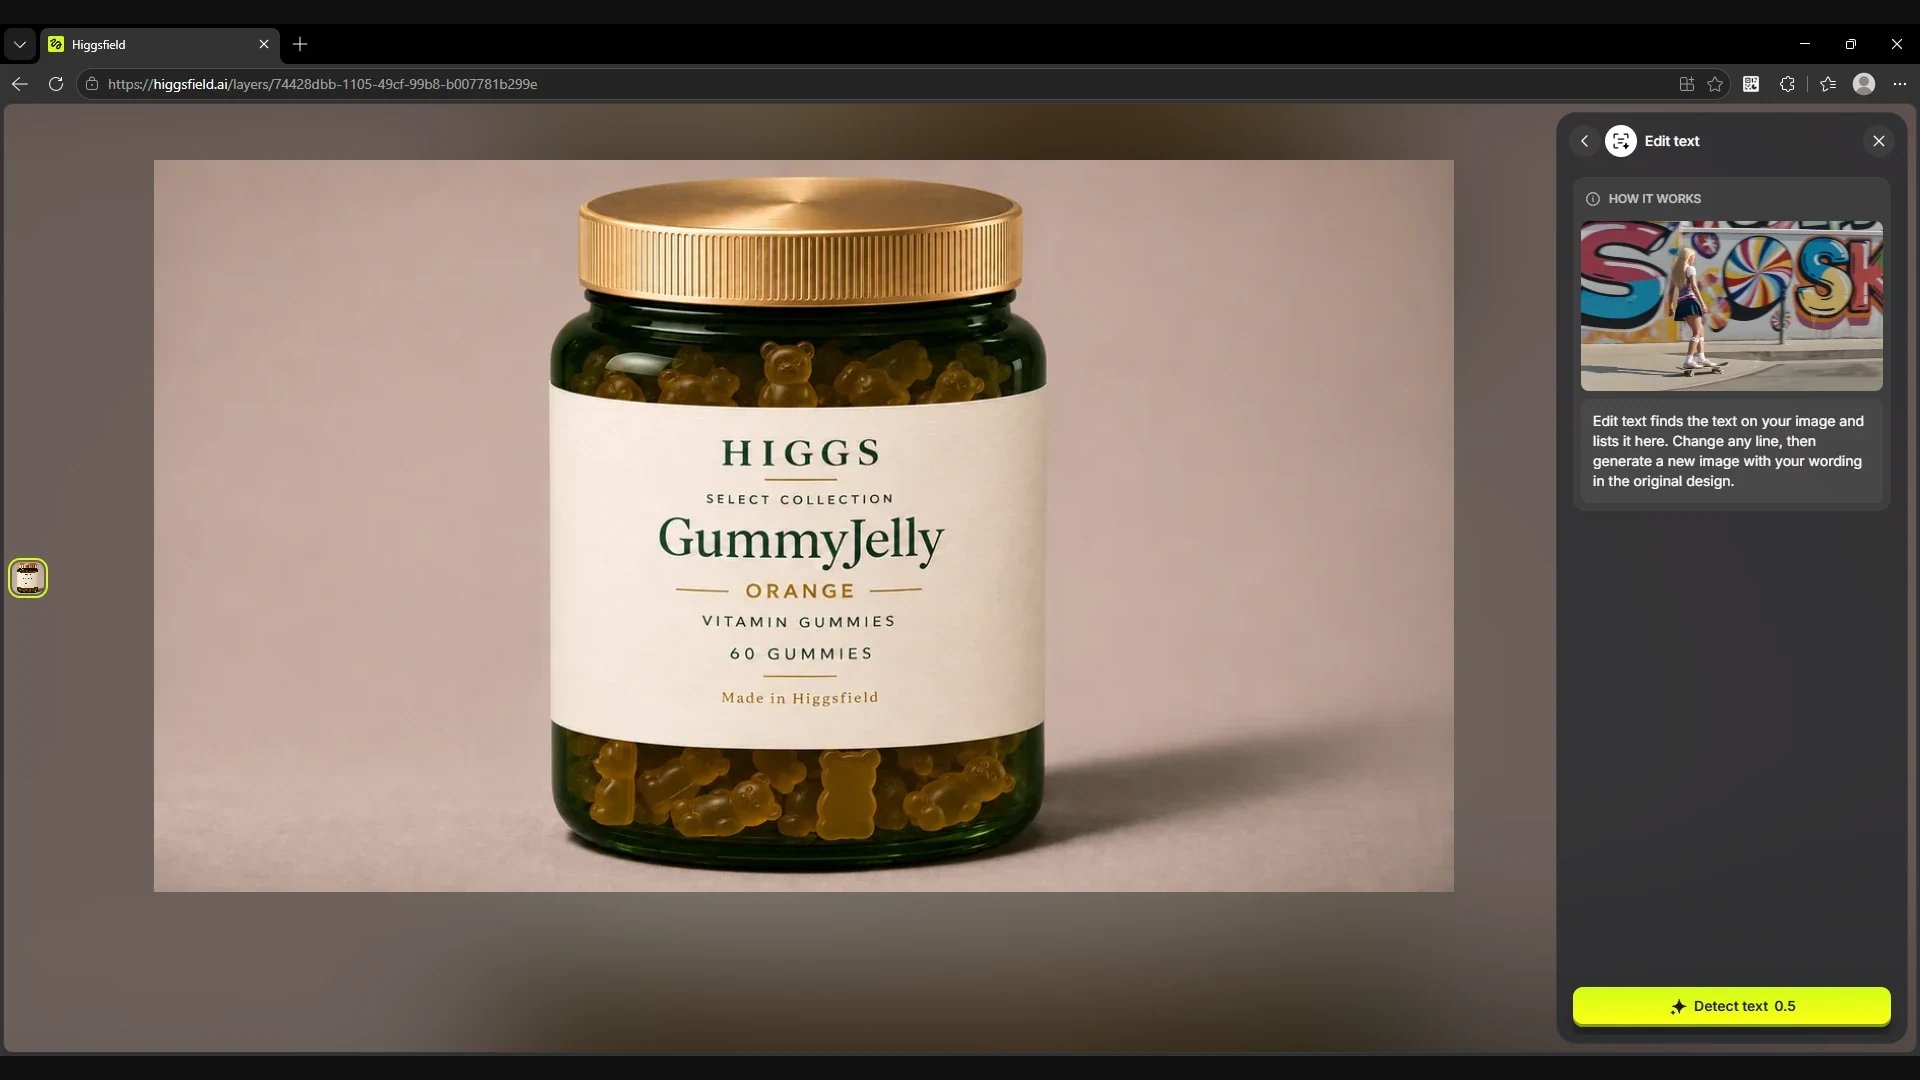
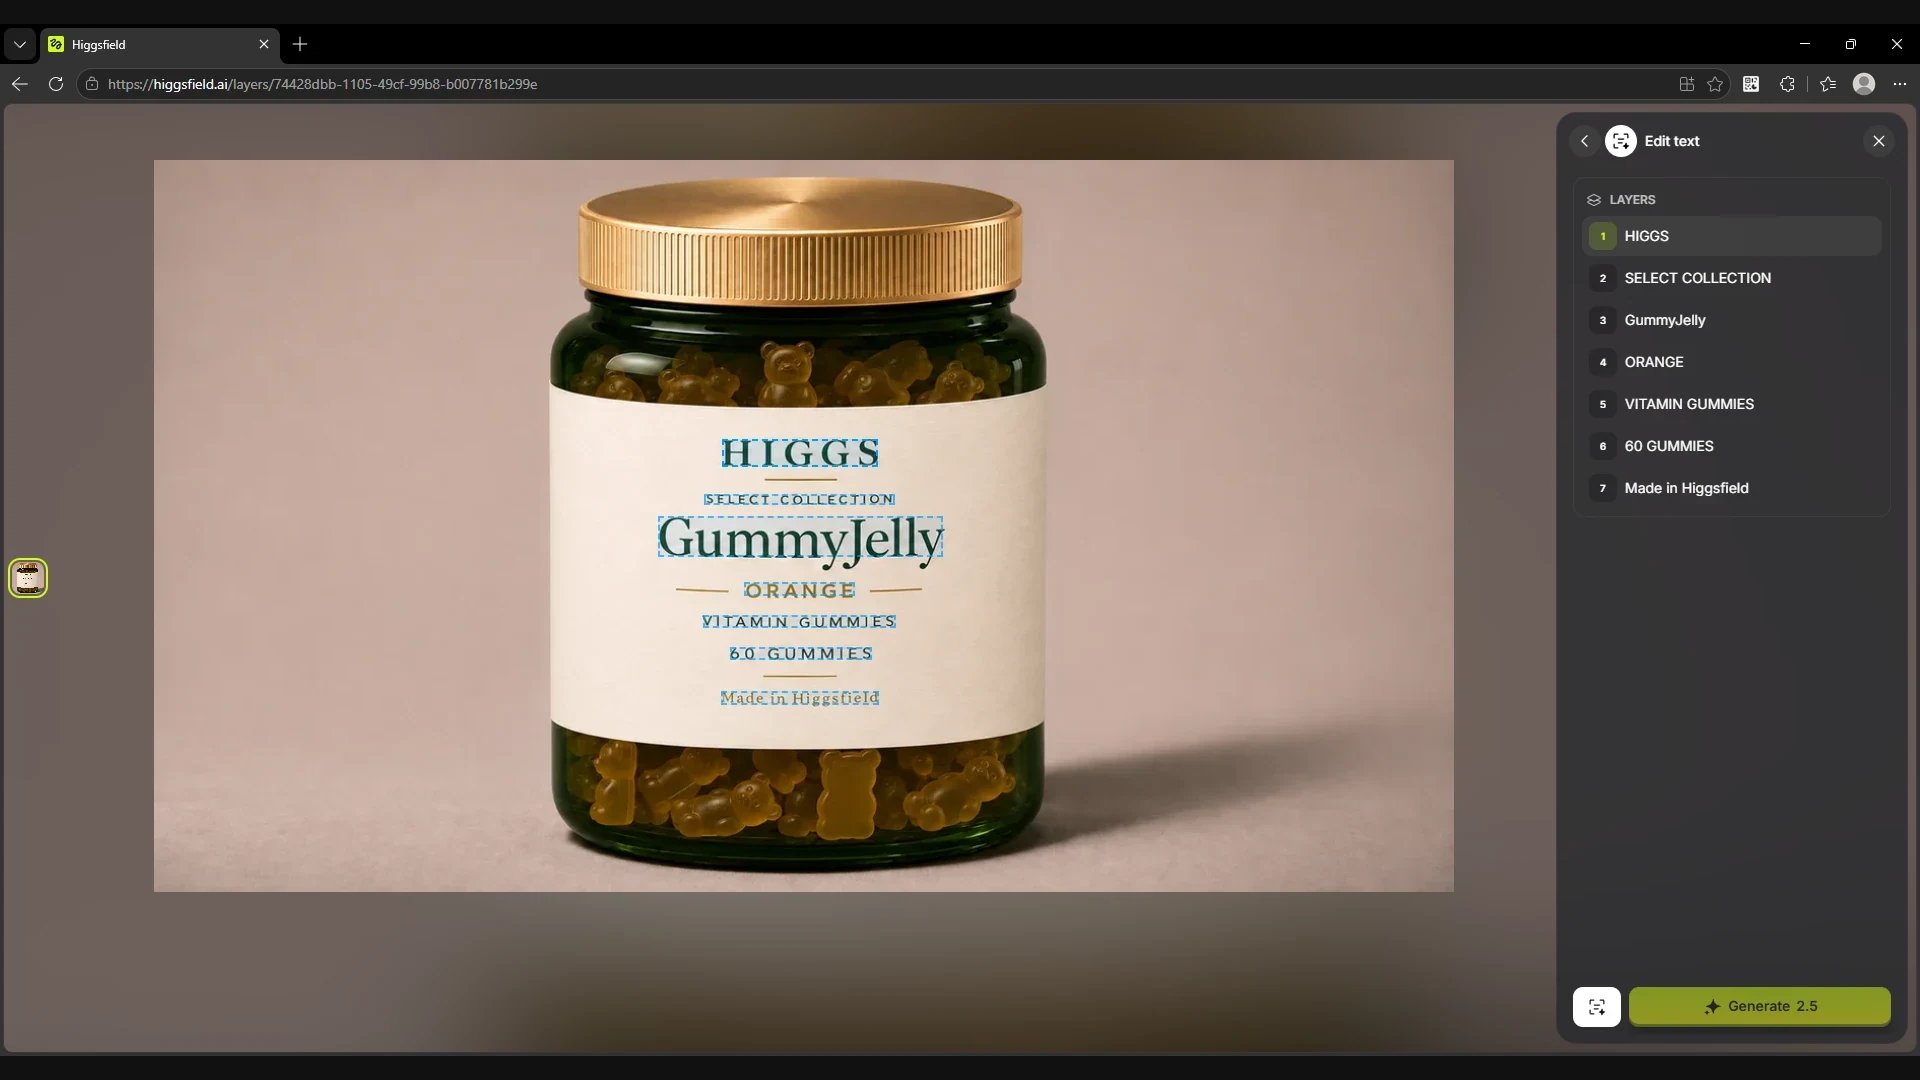
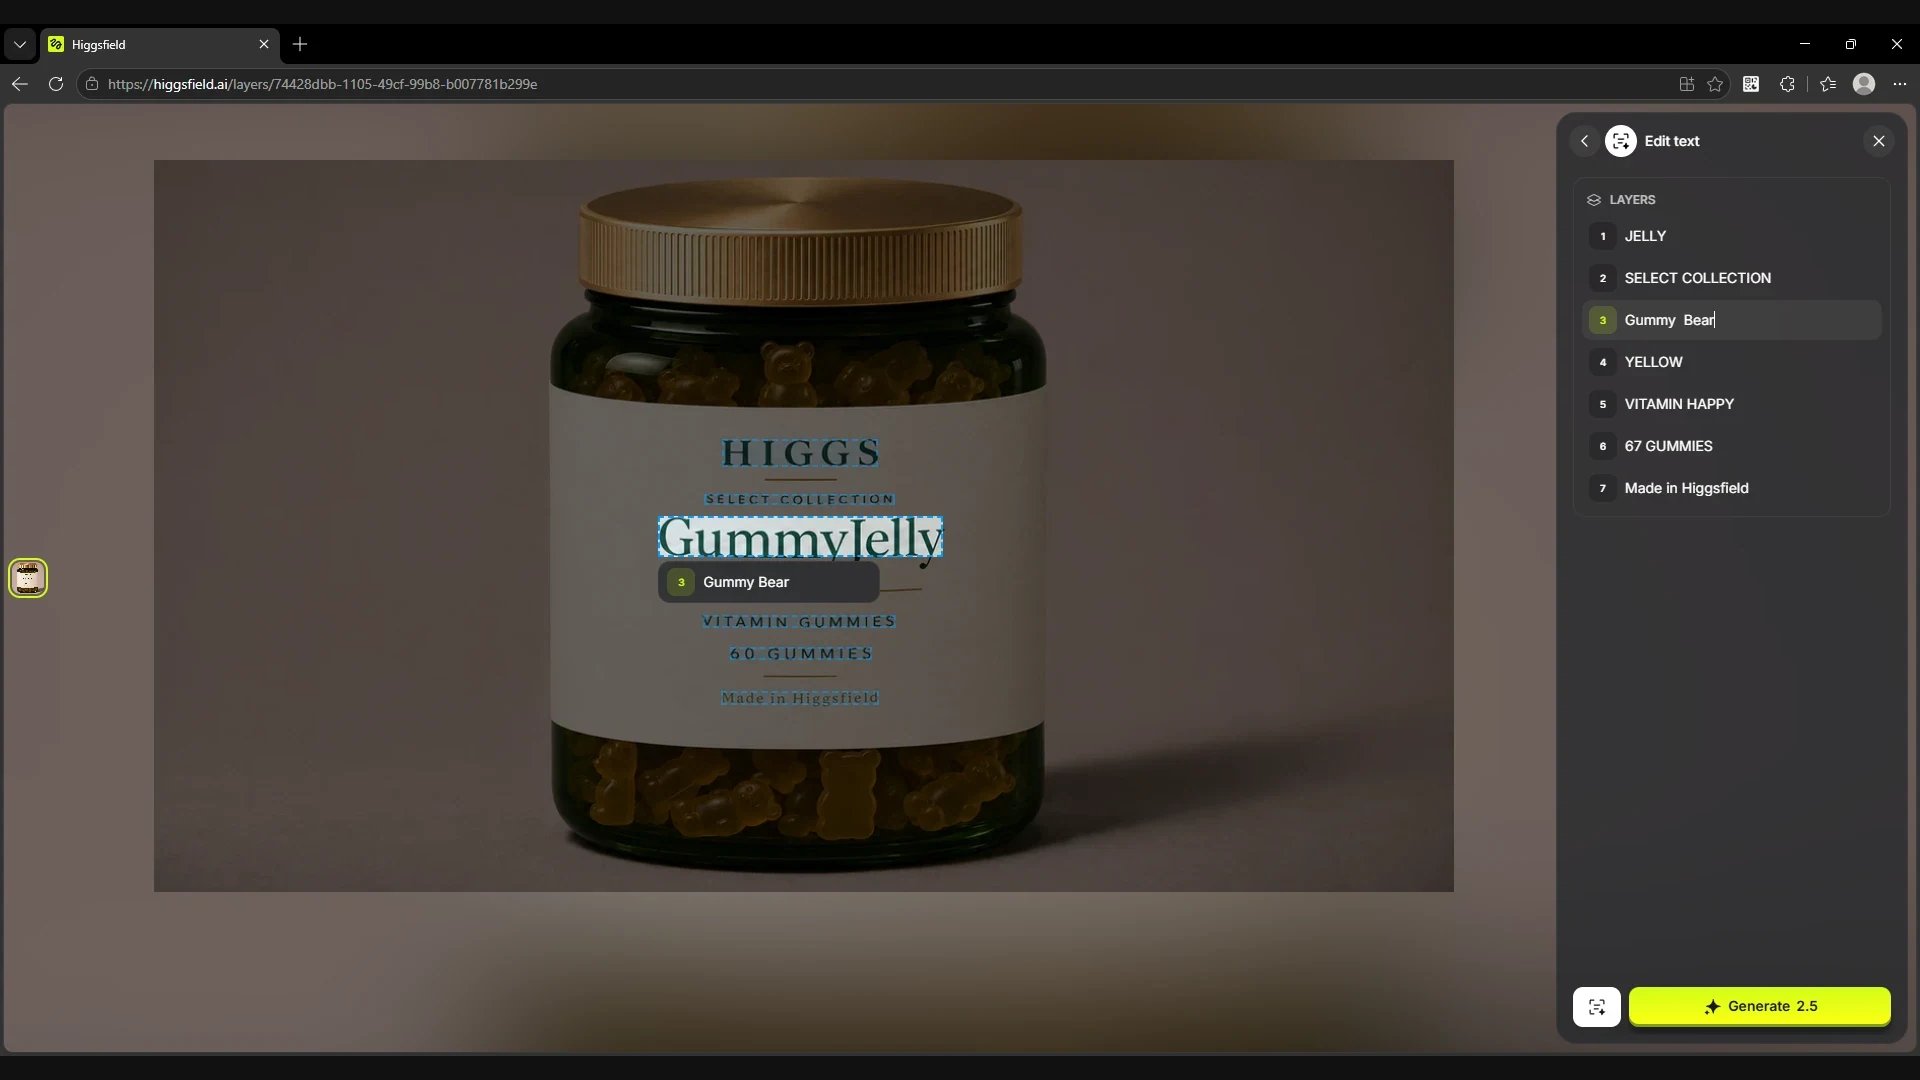
Open Edit text in the right panel and click Detect text. Layers outlines the recognised text on the image with blue dashed frames and lists each line separately on the right. In this example the tool found seven lines.
Click the frame you need on the label or choose the line in the list on the right. Type the new text and repeat for the other fields you want to change. In the screenshot the name GummyJelly is selected and Gummy Bear is typed in the field.
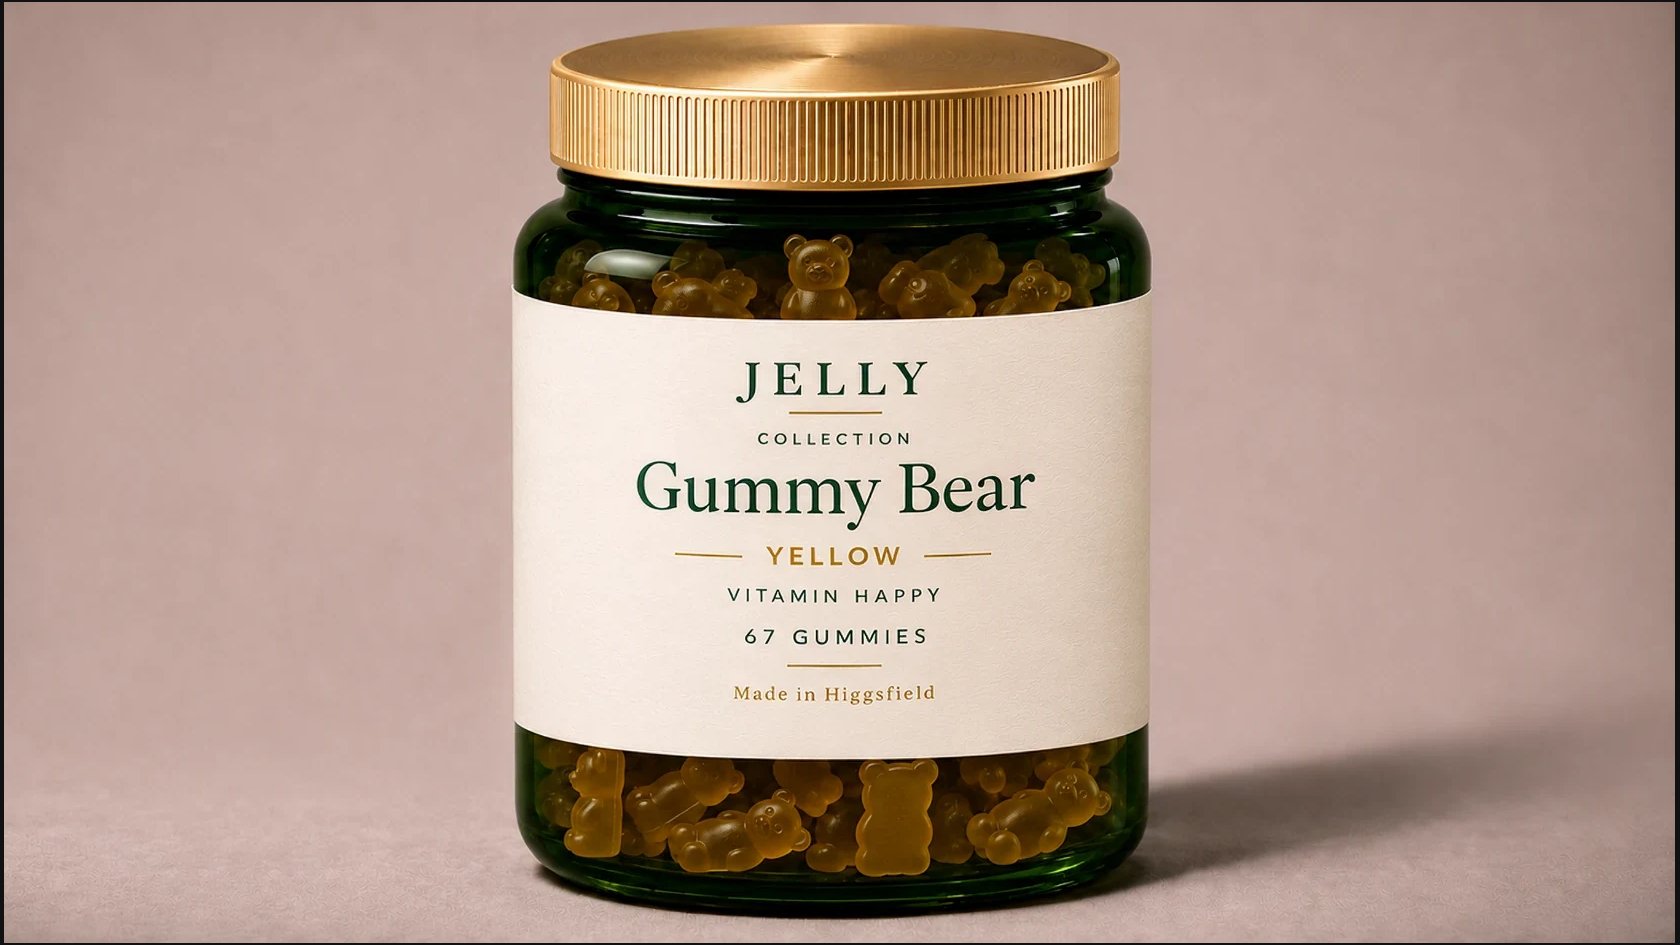
When all the lines are ready, click the generate button. Then go back to the main editor with the arrow next to the Edit text heading. The result appears in the Layers panel on the right. In our version of the label we removed the word SELECT on purpose.
How to change the text on packaging with Edit text
Before the edit
After the edit
HIGGS
JELLY
SELECT COLLECTION
COLLECTION
GummyJelly
Gummy Bear
ORANGE
YELLOW
VITAMIN GUMMIES
VITAMIN HAPPY
60 GUMMIES
67 GUMMIES
Screen
The Edit text panel before detection. The Detect text button is at the bottom
Screen
Seven recognised text lines on the label and in the Layers list
Screen
Replacing the name in the selected field
Result
Before the edit
Result
After Edit text
How to increase resolution with Upscale
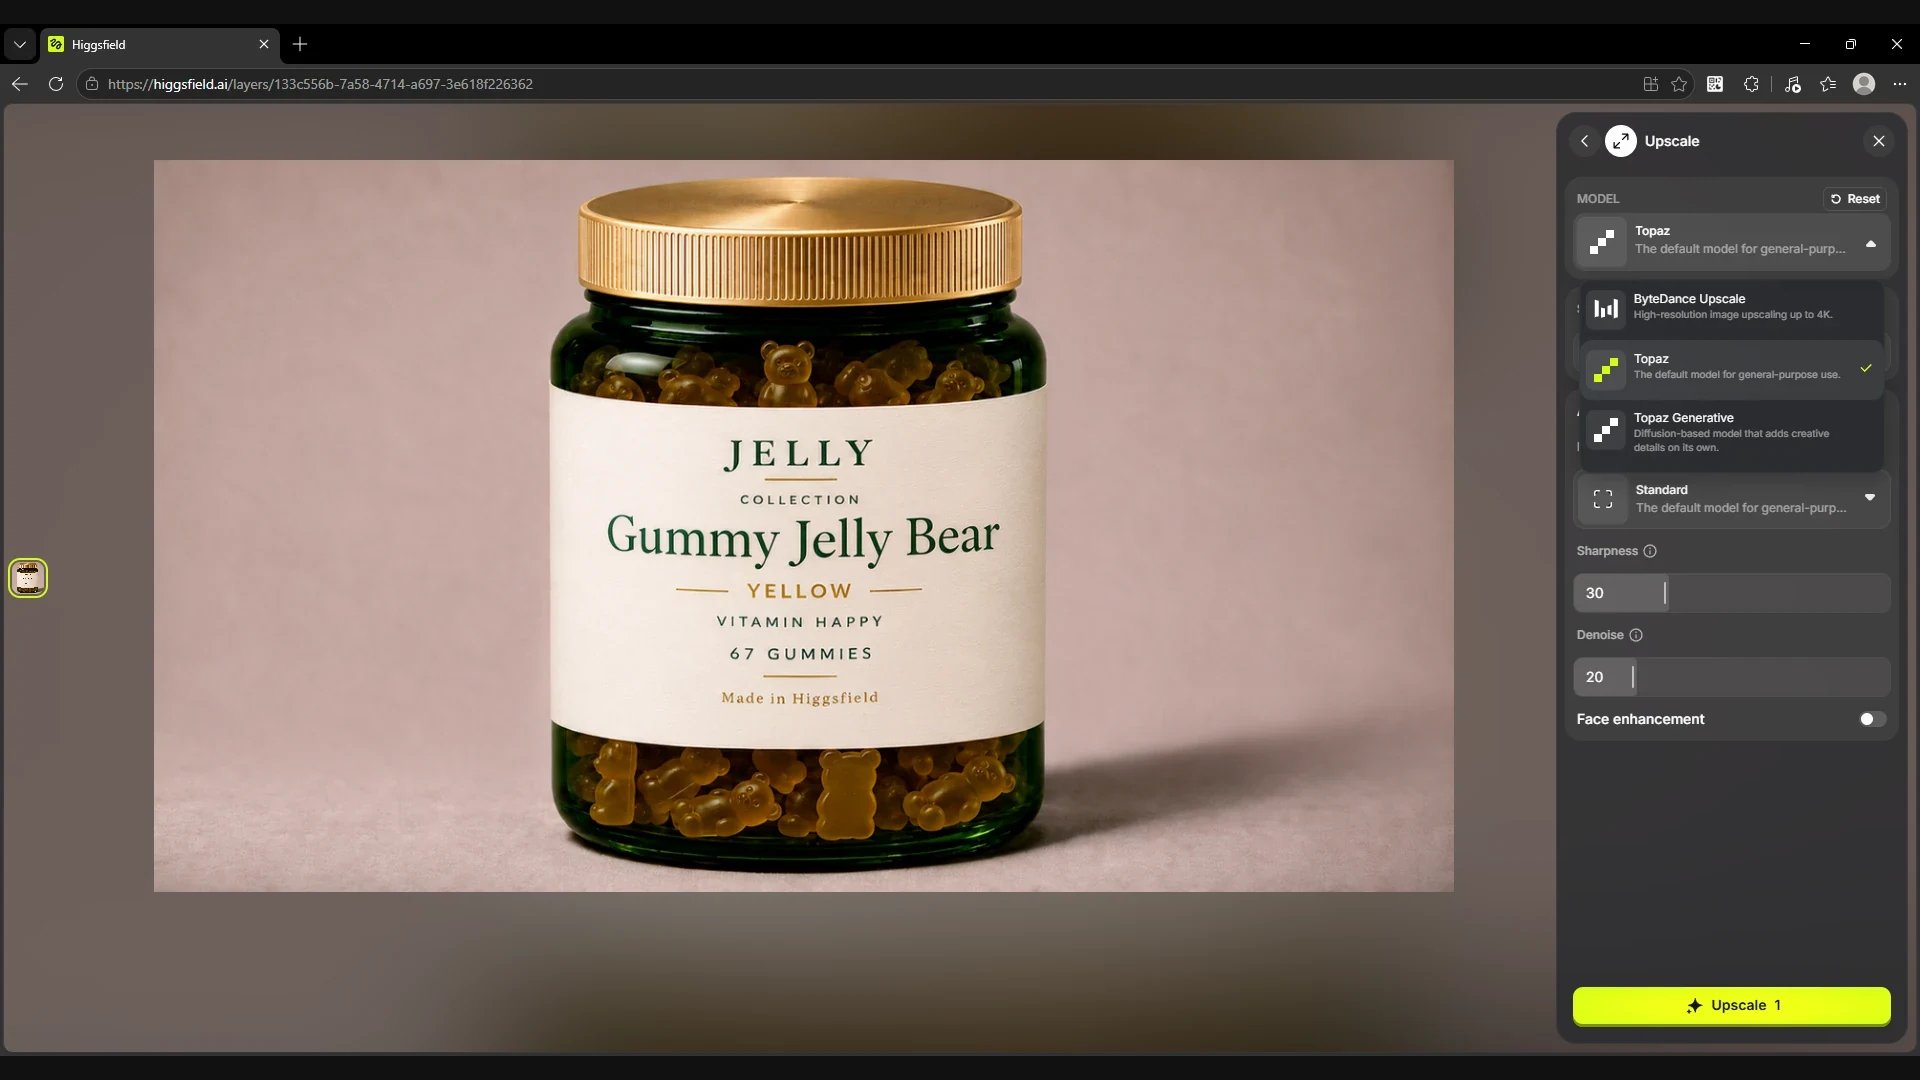
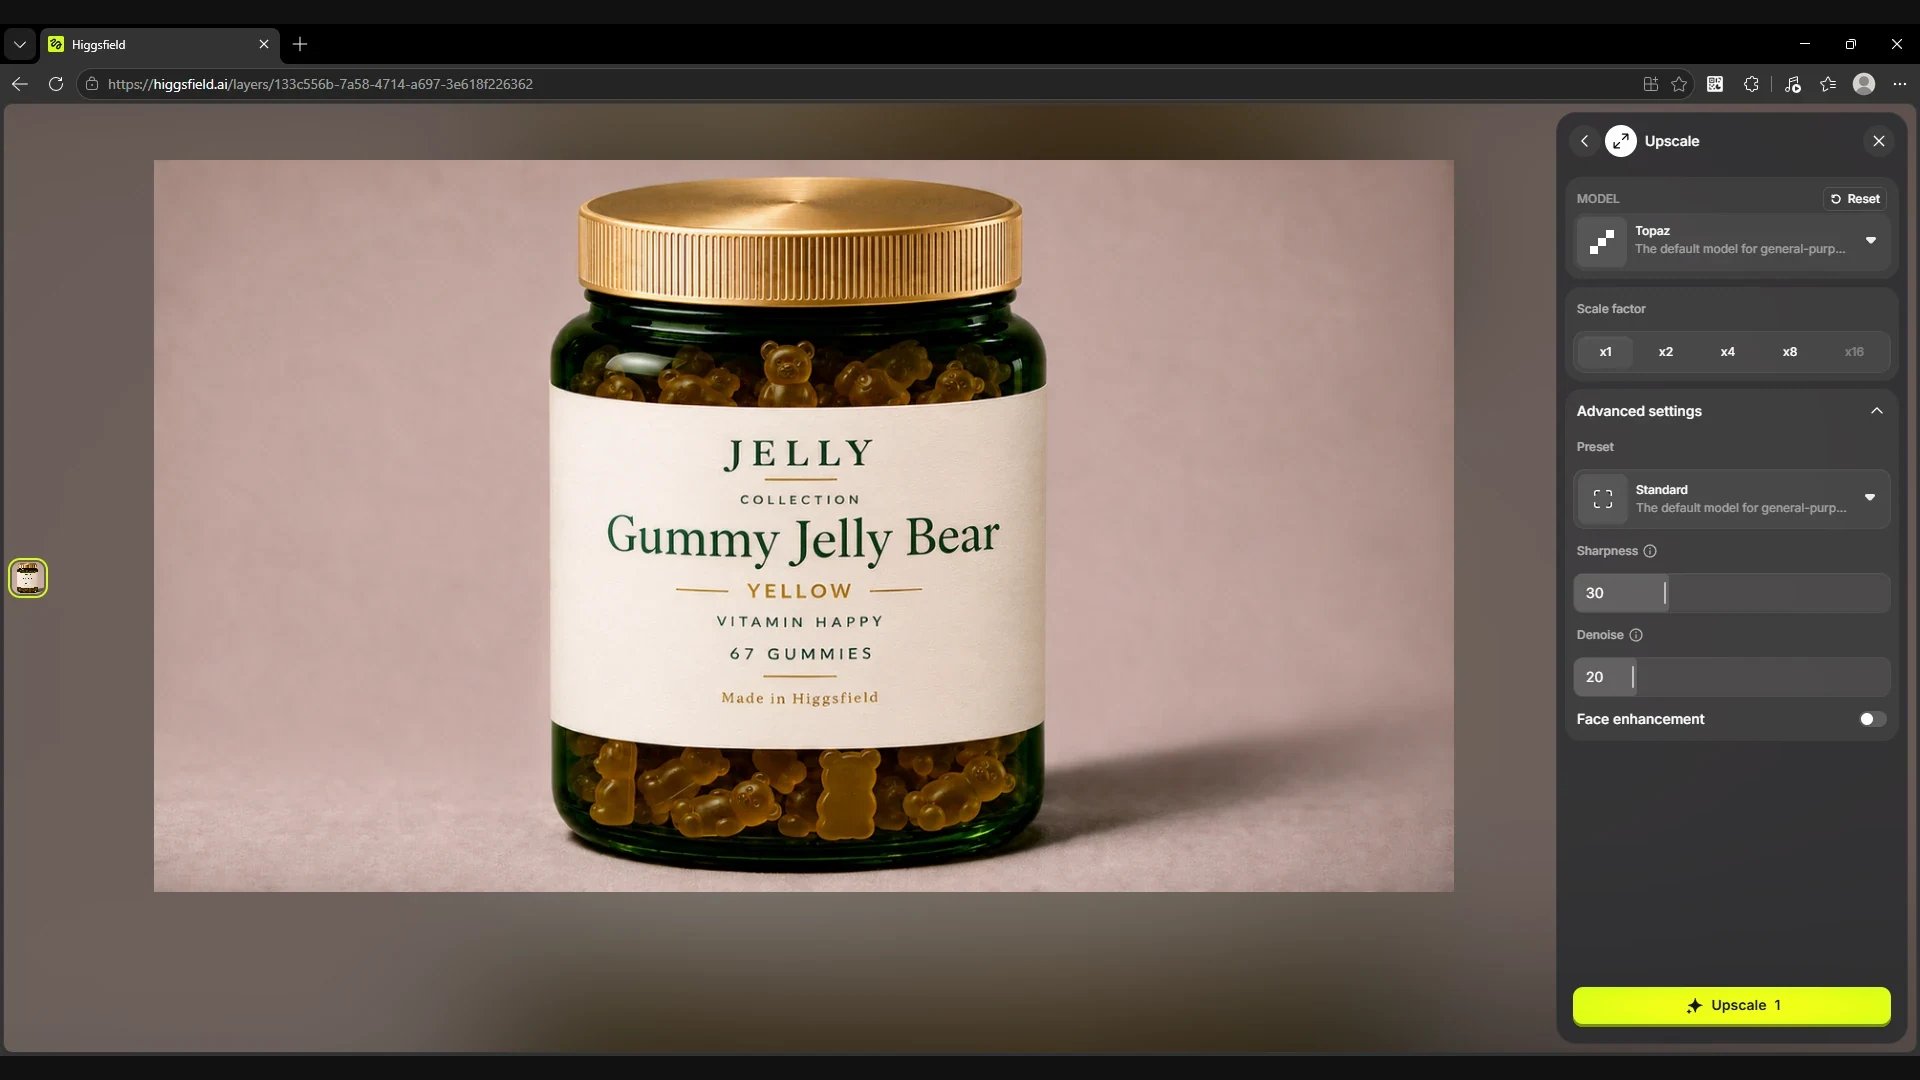
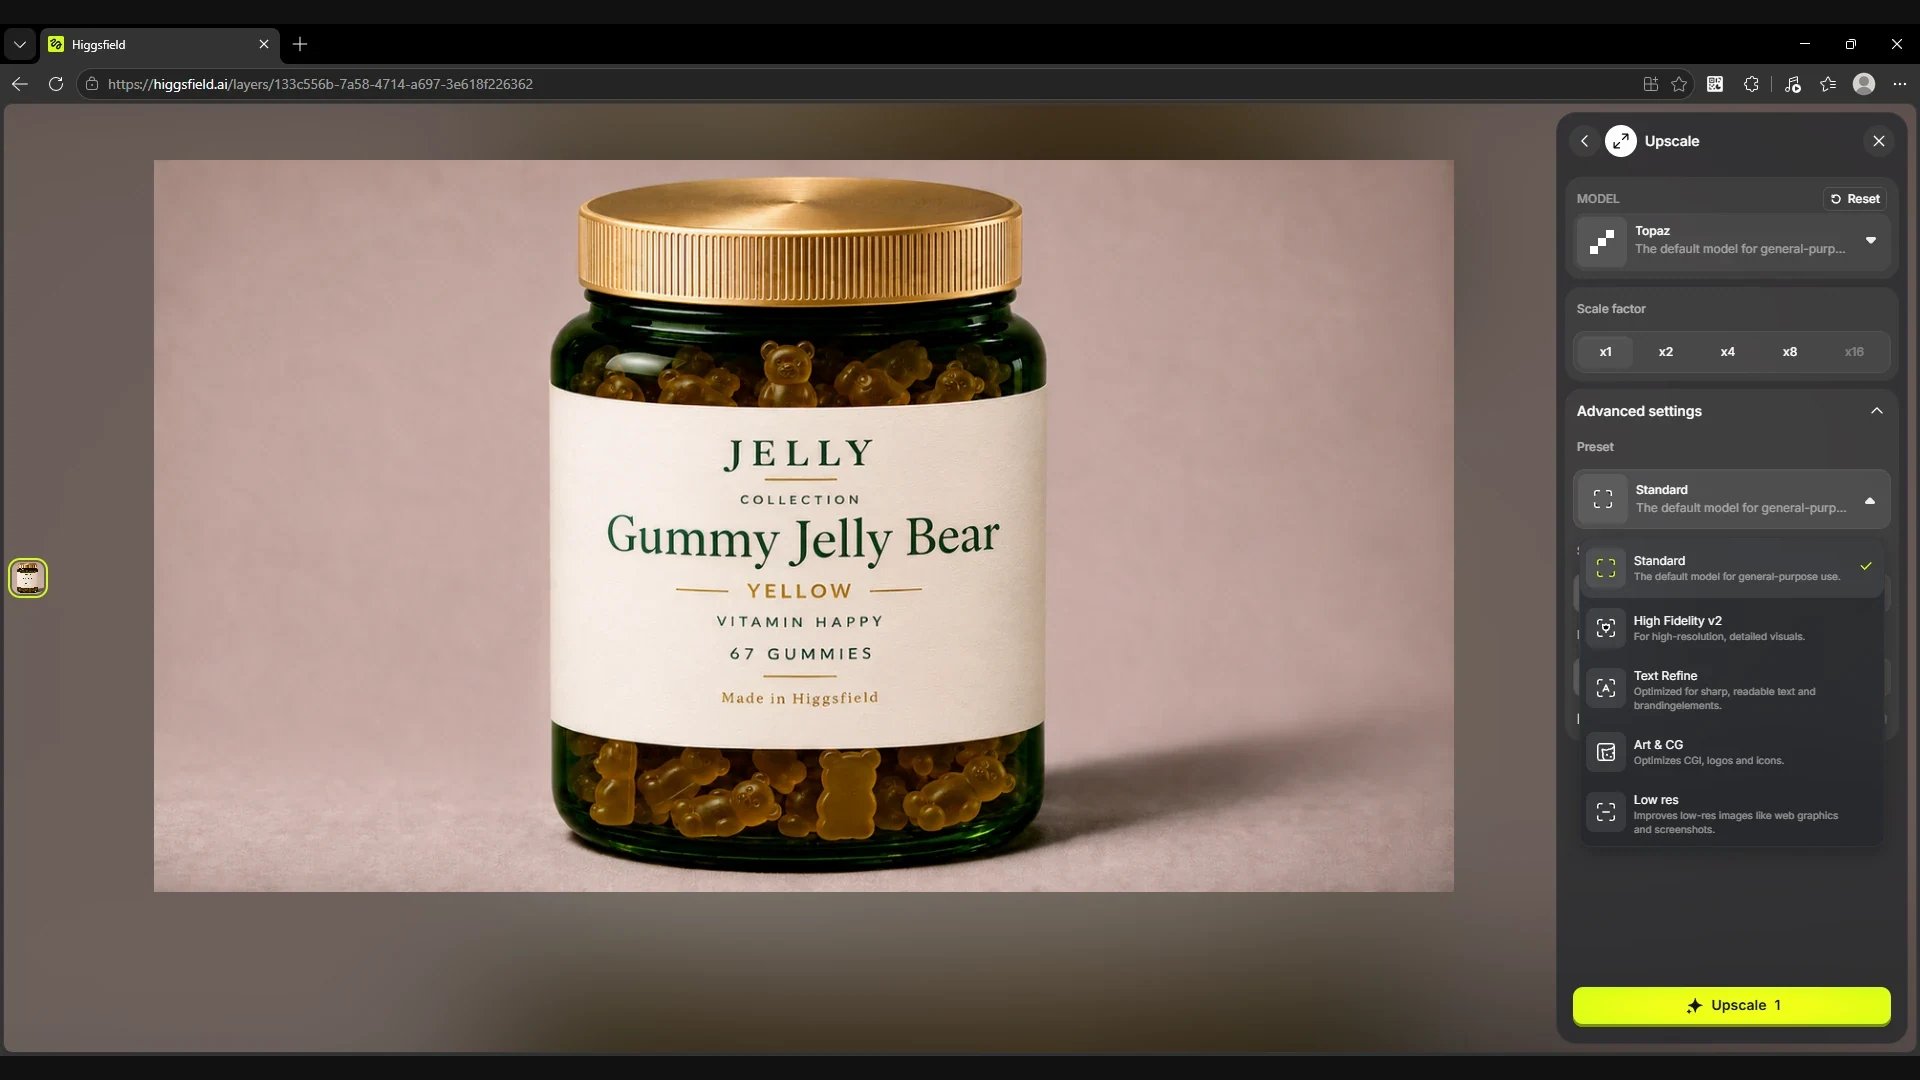
Open Upscale in the Edit Image panel. In the Model menu you can choose the processing method, and in Scale factor set the scale.
How to increase resolution with Upscale
Model
What it is for
ByteDance Upscale
Upscaling to 4K.
Topaz
General-purpose processing.
Topaz Generative
Upscaling that generates extra detail.
The Topaz example shows the values ×1, ×2, ×4 and ×8. At ×1 the image size stays the same. The ×16 option is not available in this example.
In Advanced settings you can choose a preset and adjust Sharpness and Denoise. The Face enhancement toggle is for frames with faces. It is off in the jar example. Reset restores the default settings.
First steps in Higgsfield Layers
Preset
What it is for
Standard
General-purpose processing.
High Fidelity v2
Detailed high-resolution images.
Text Refine
Text and brand elements where legibility matters.
Art & CG
Computer graphics, logos and icons.
Low res
Low-resolution images, including web graphics and screenshots.
For packaging with small text you can try Text Refine. Click Upscale, then zoom in on the label and check that the small text and numbers are legible.
Screen
Upscale with the model list open
Screen
Scale and additional Topaz settings
Screen
The Preset menu with the available processing modes
How to remove the background from a product image
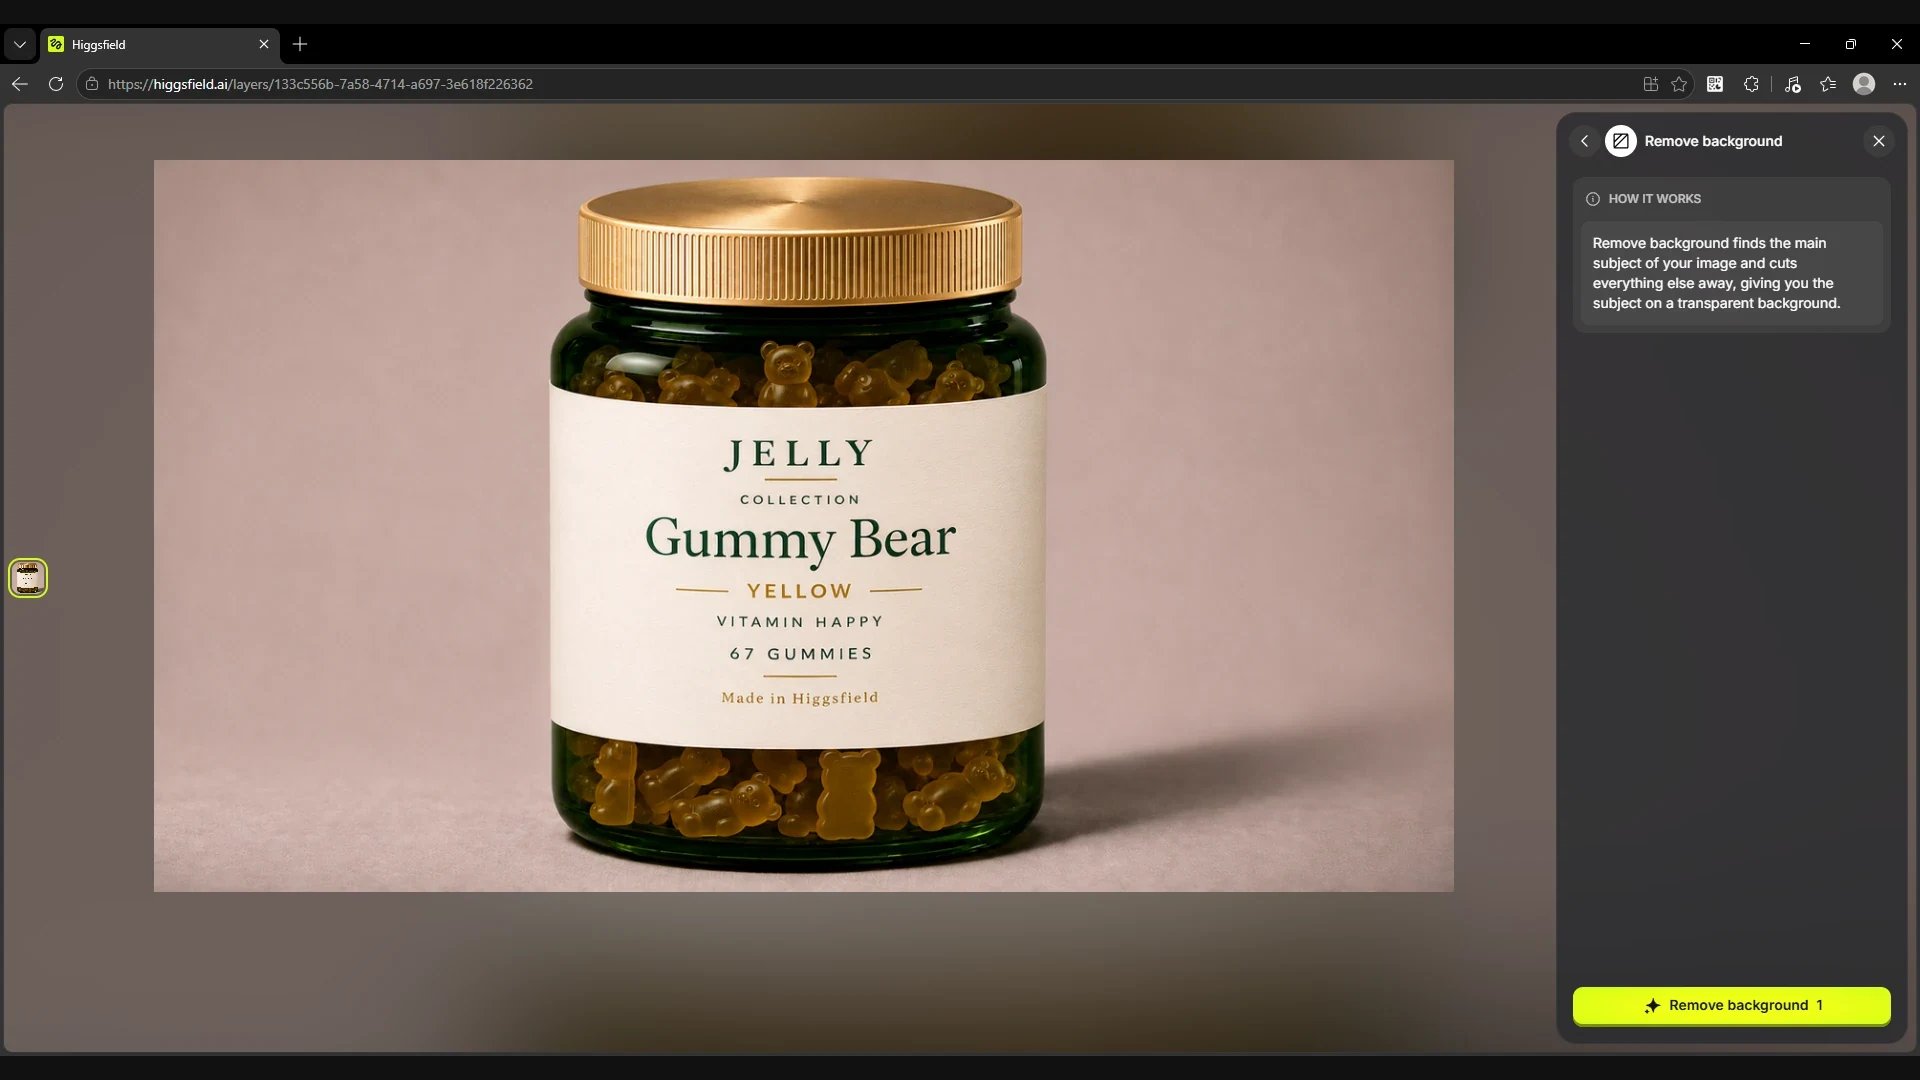
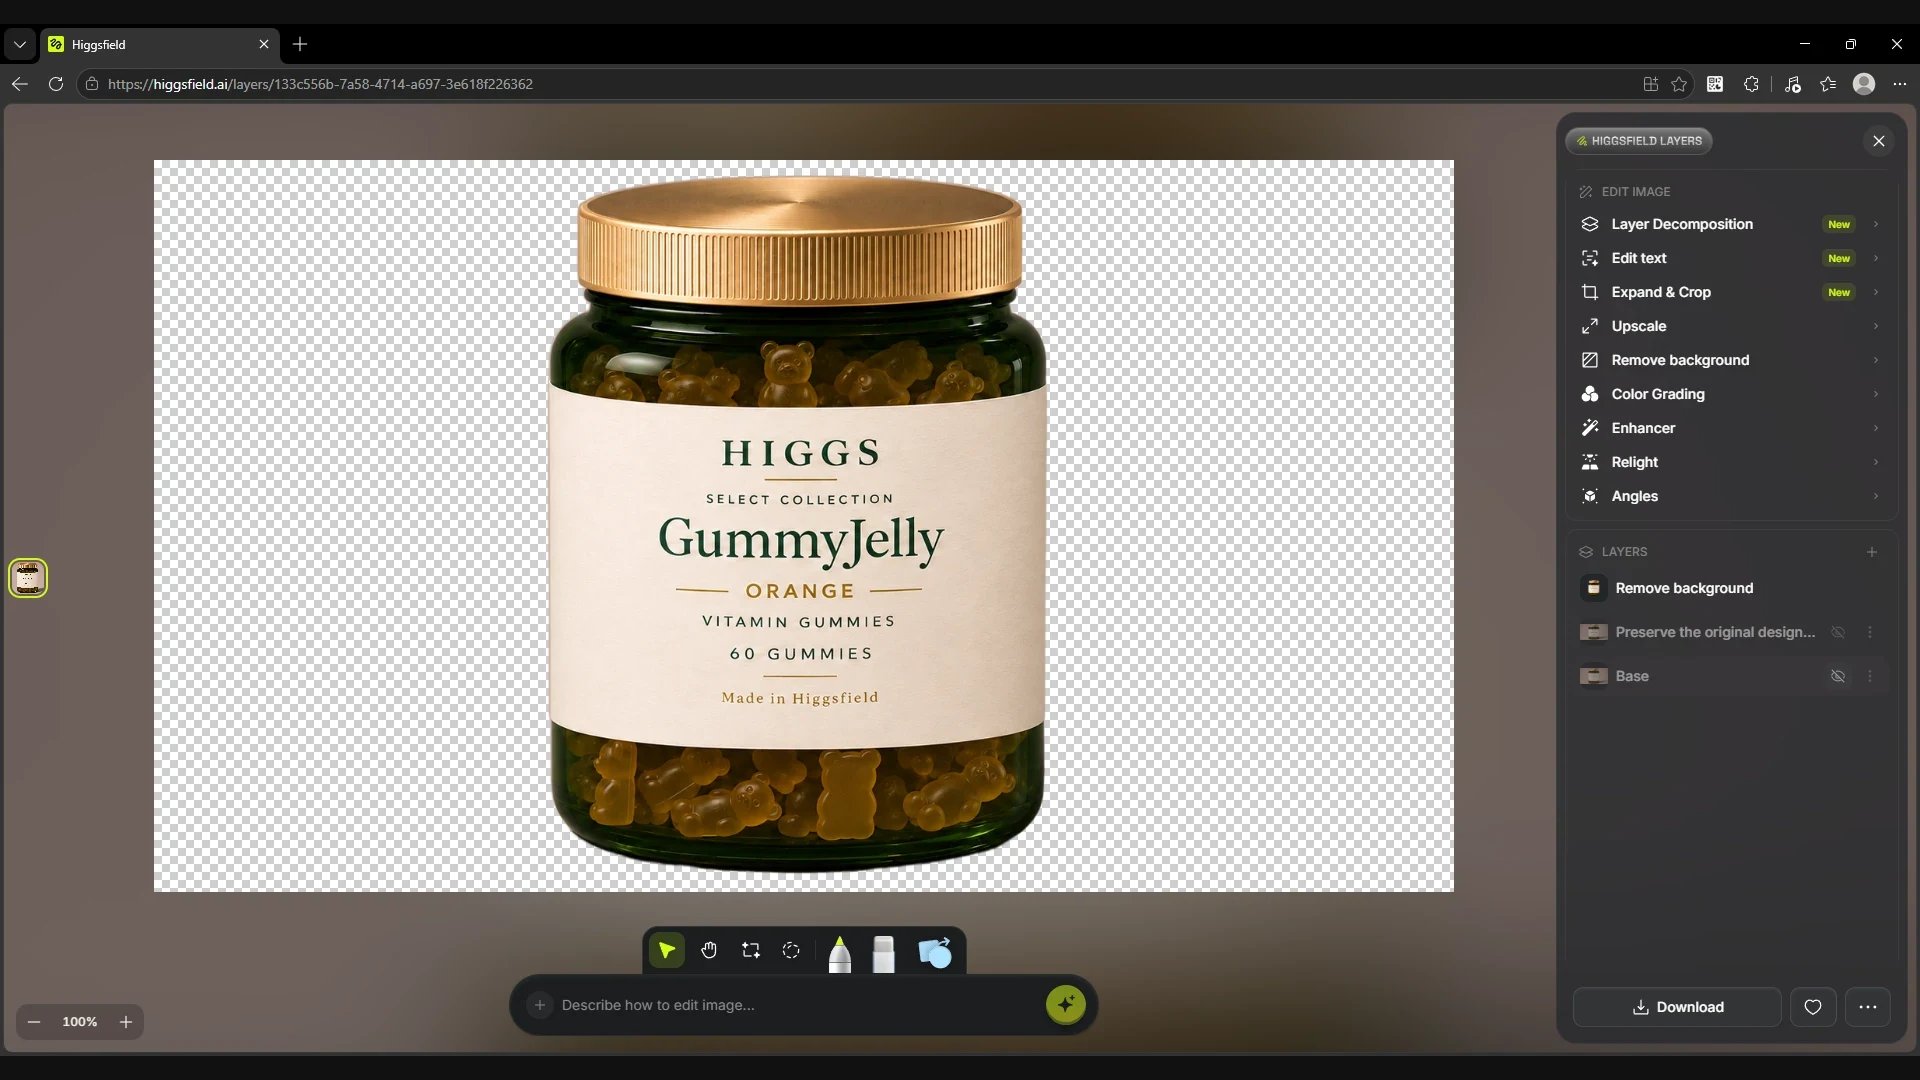
Open Remove background in the Edit Image panel and click the button with the same name at the bottom. The tool selects the main object, and the result appears as a separate layer.
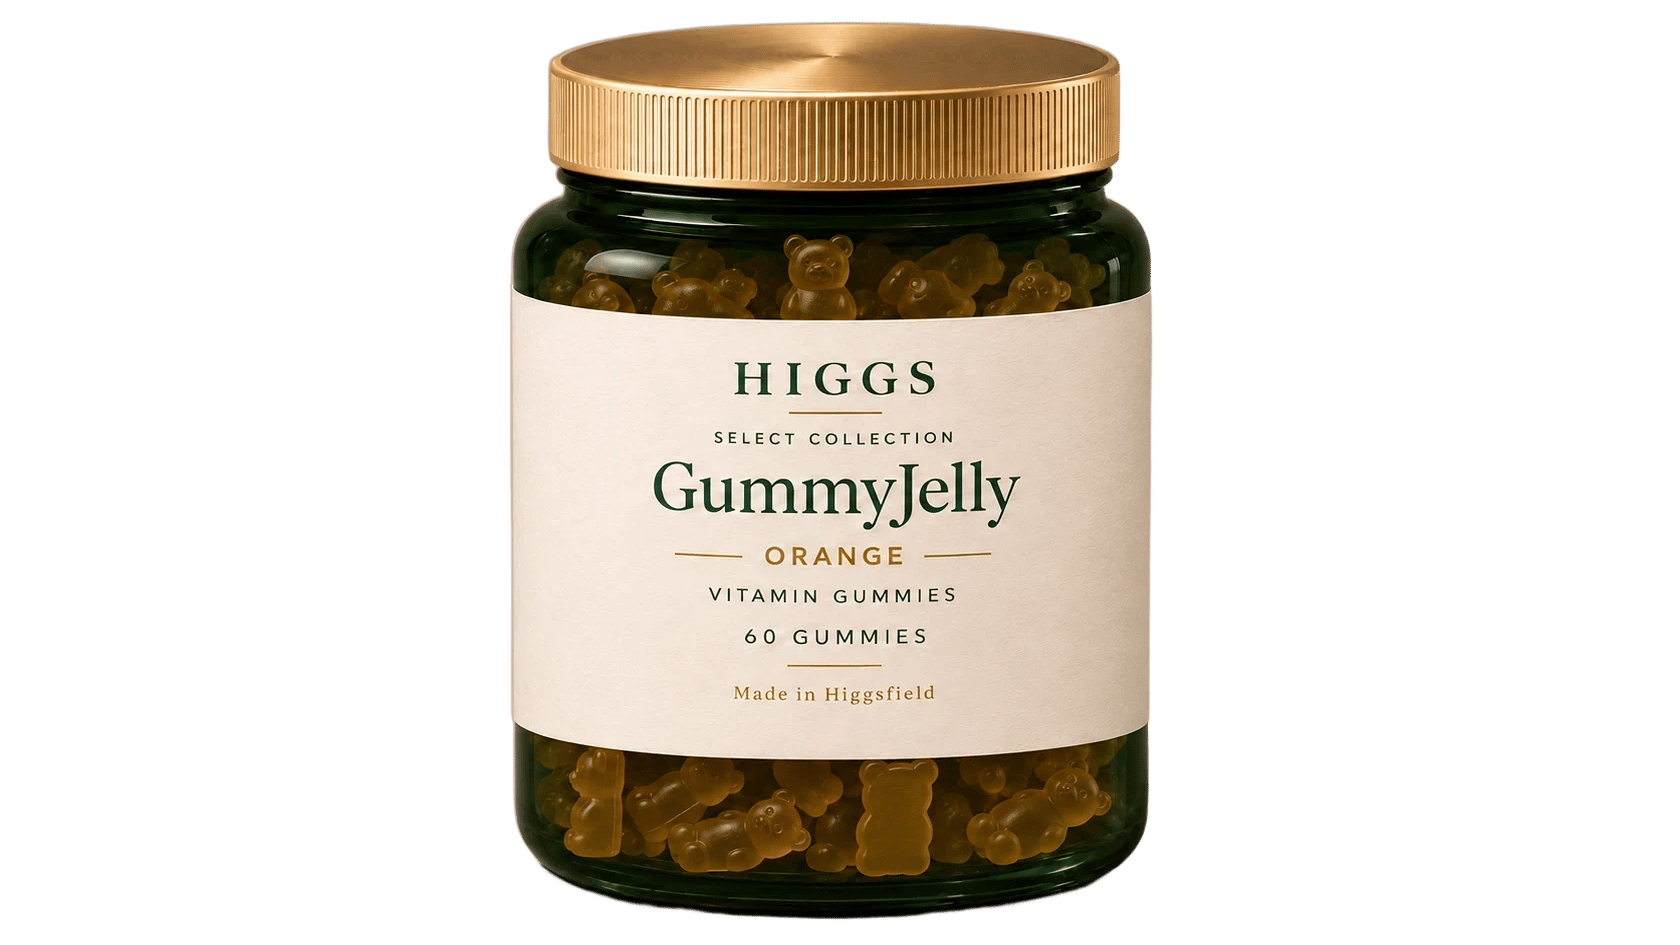
To see the transparency, hide Base and the other layers with a background using the eye icon. The grey and white checkerboard shows the transparent area. Our result kept the jar with its original label, and the background and the cast shadow were removed.
Screen
The Remove background panel before processing
Screen
The Remove background layer in the editor. Transparency is visible around the jar
Result
The HIGGS GummyJelly jar after background removal
How to adjust colour and exposure with Color Grading
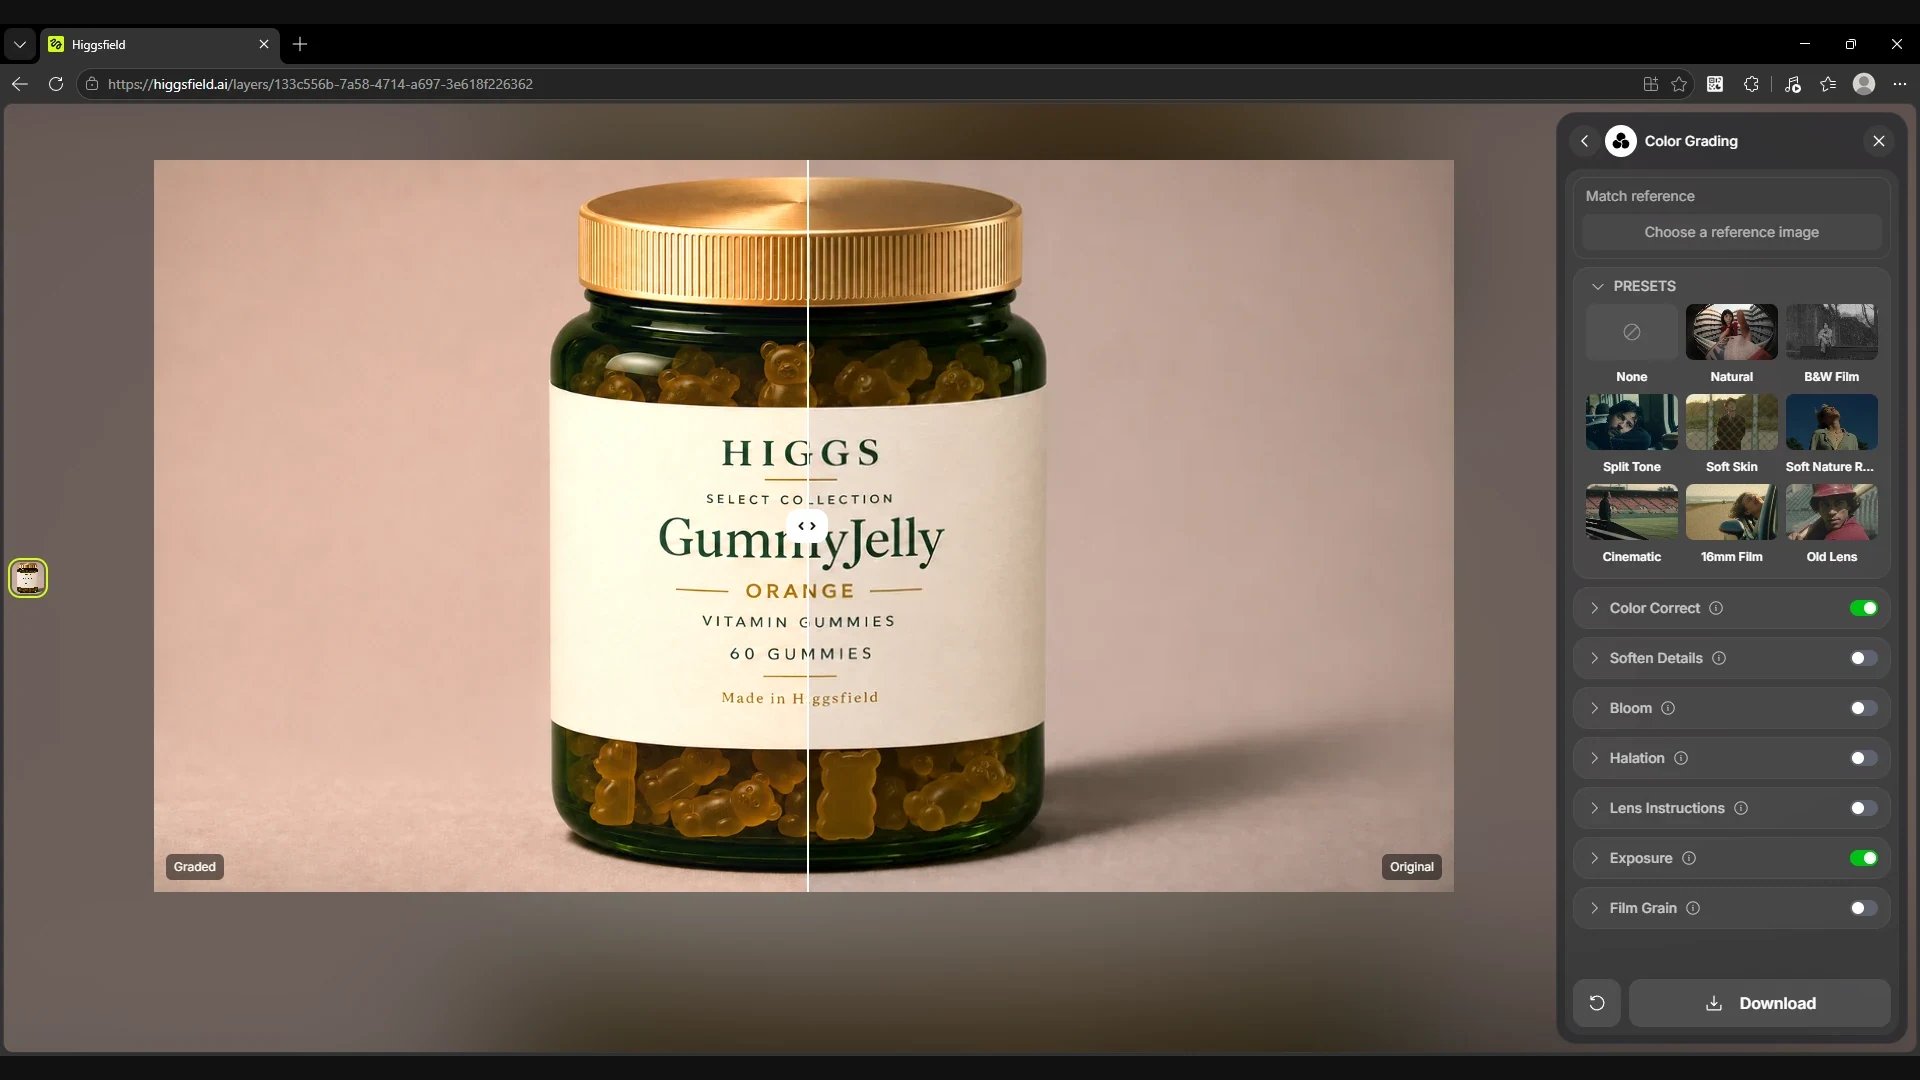
In Color Grading you can choose a preset, upload an image through Match reference or adjust the processing by hand. In our example Color Correct and Exposure are on. After the edit the background looks warmer, the label lighter and the highlight on the lid more visible.
Screen
Graded on the left, Original on the right. The divider can be dragged
Drag the divider to compare both versions on the canvas. On a product shot it is a good way to check small text, a light label and highlights on glass. You can download the version you like with Download at the bottom of the panel.
How to split a finished ad into layers
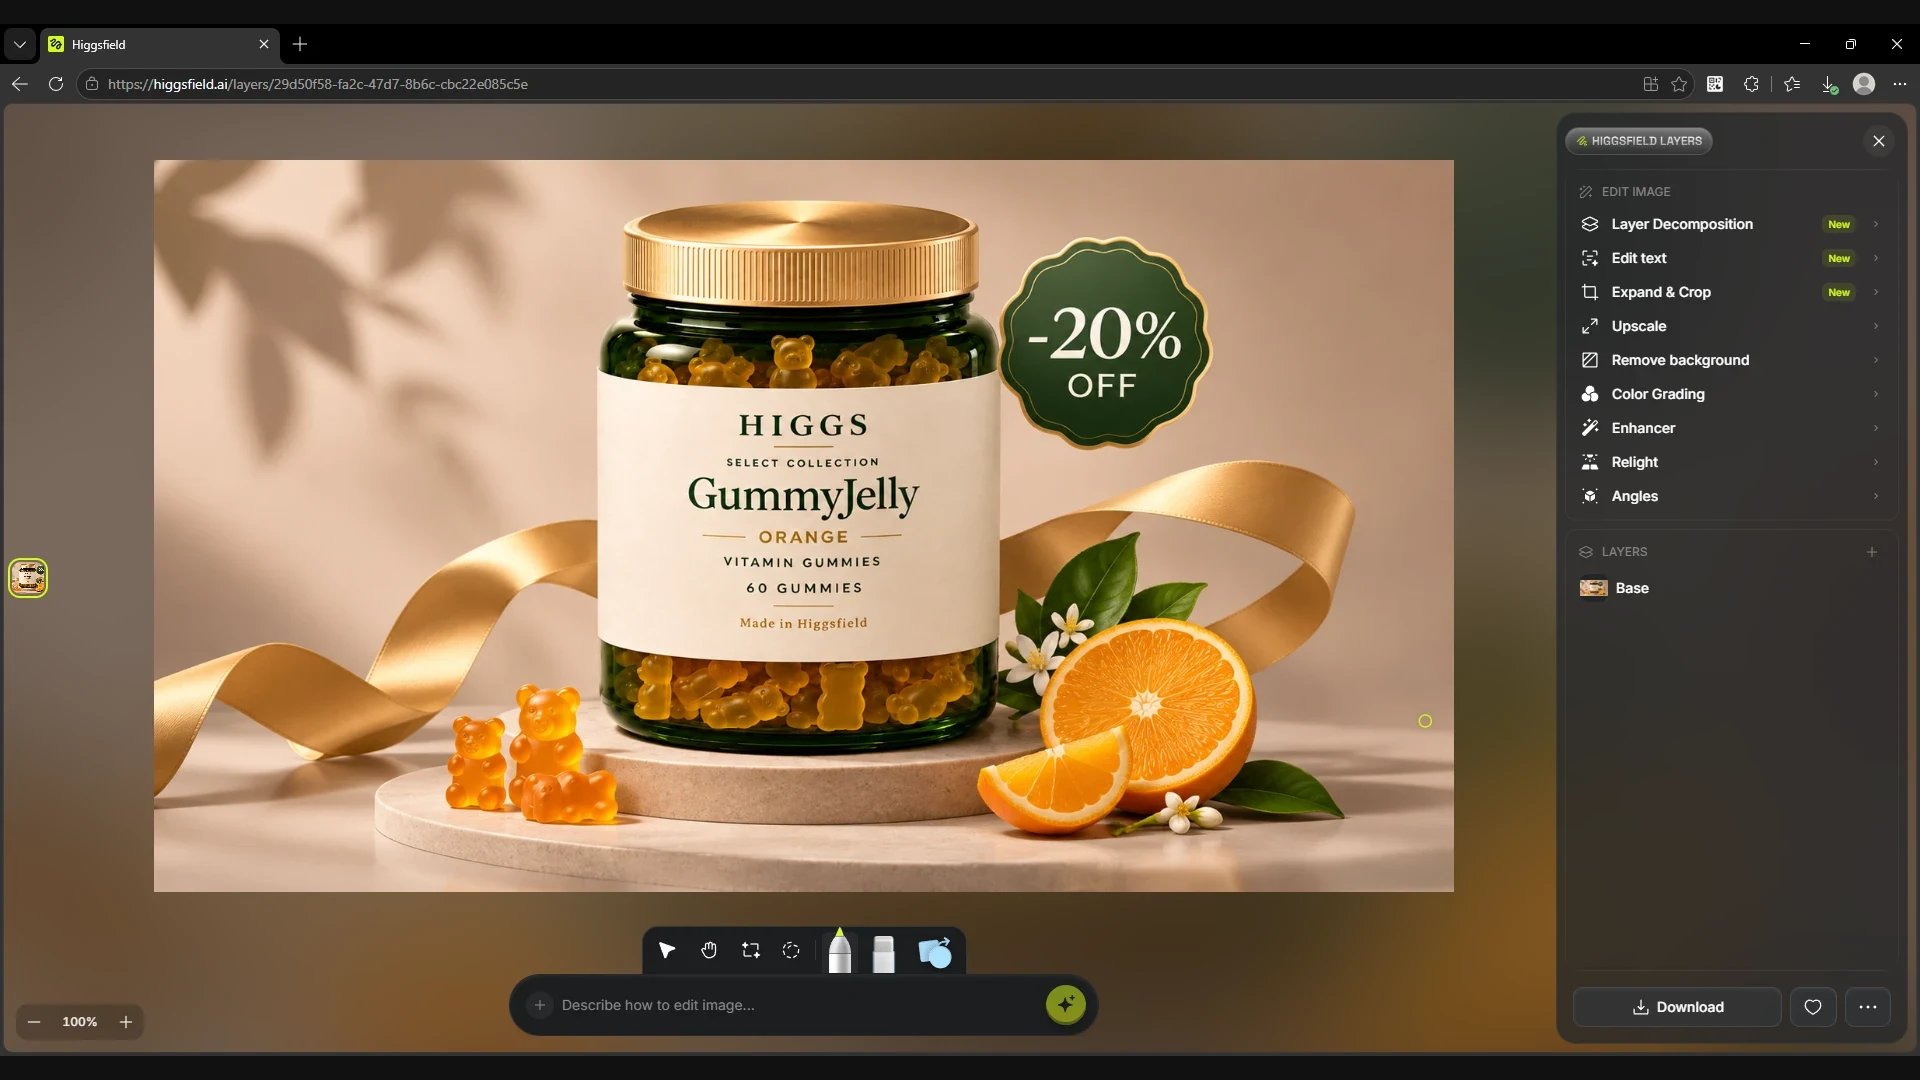
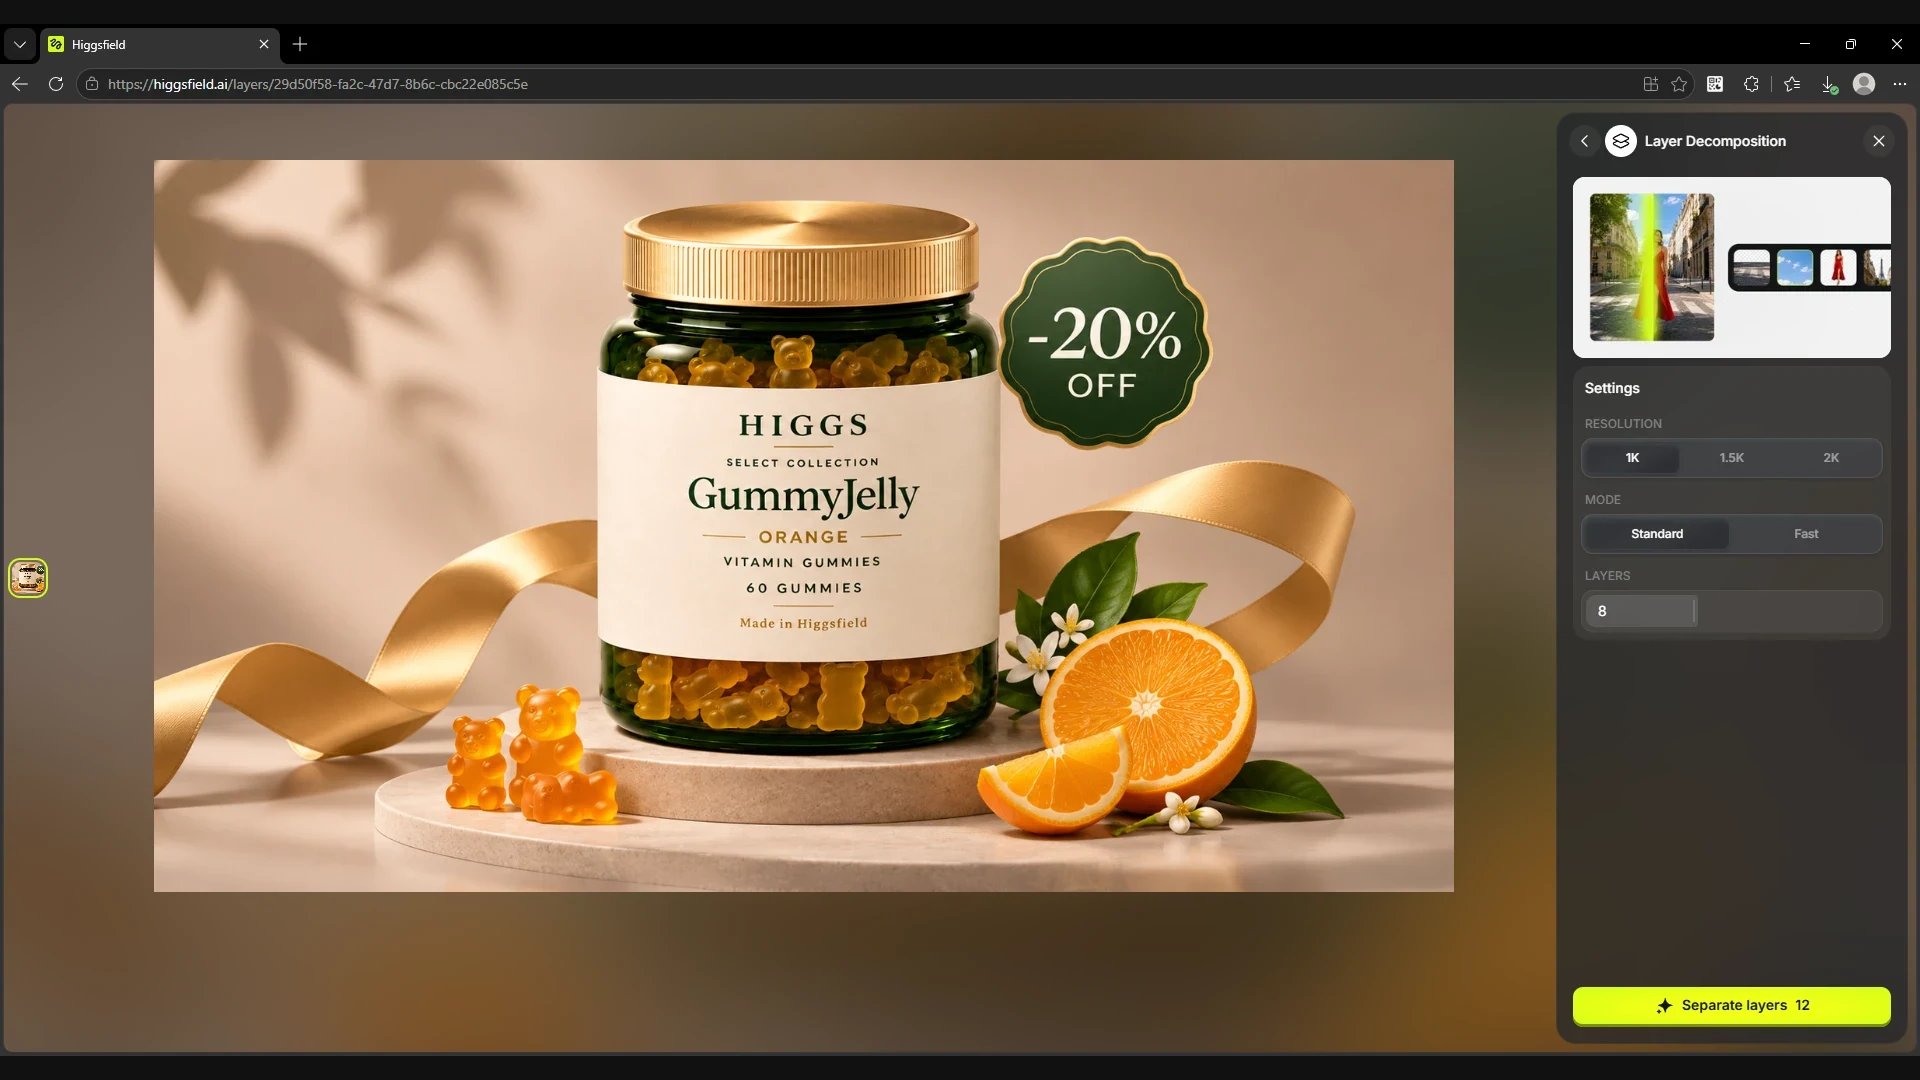
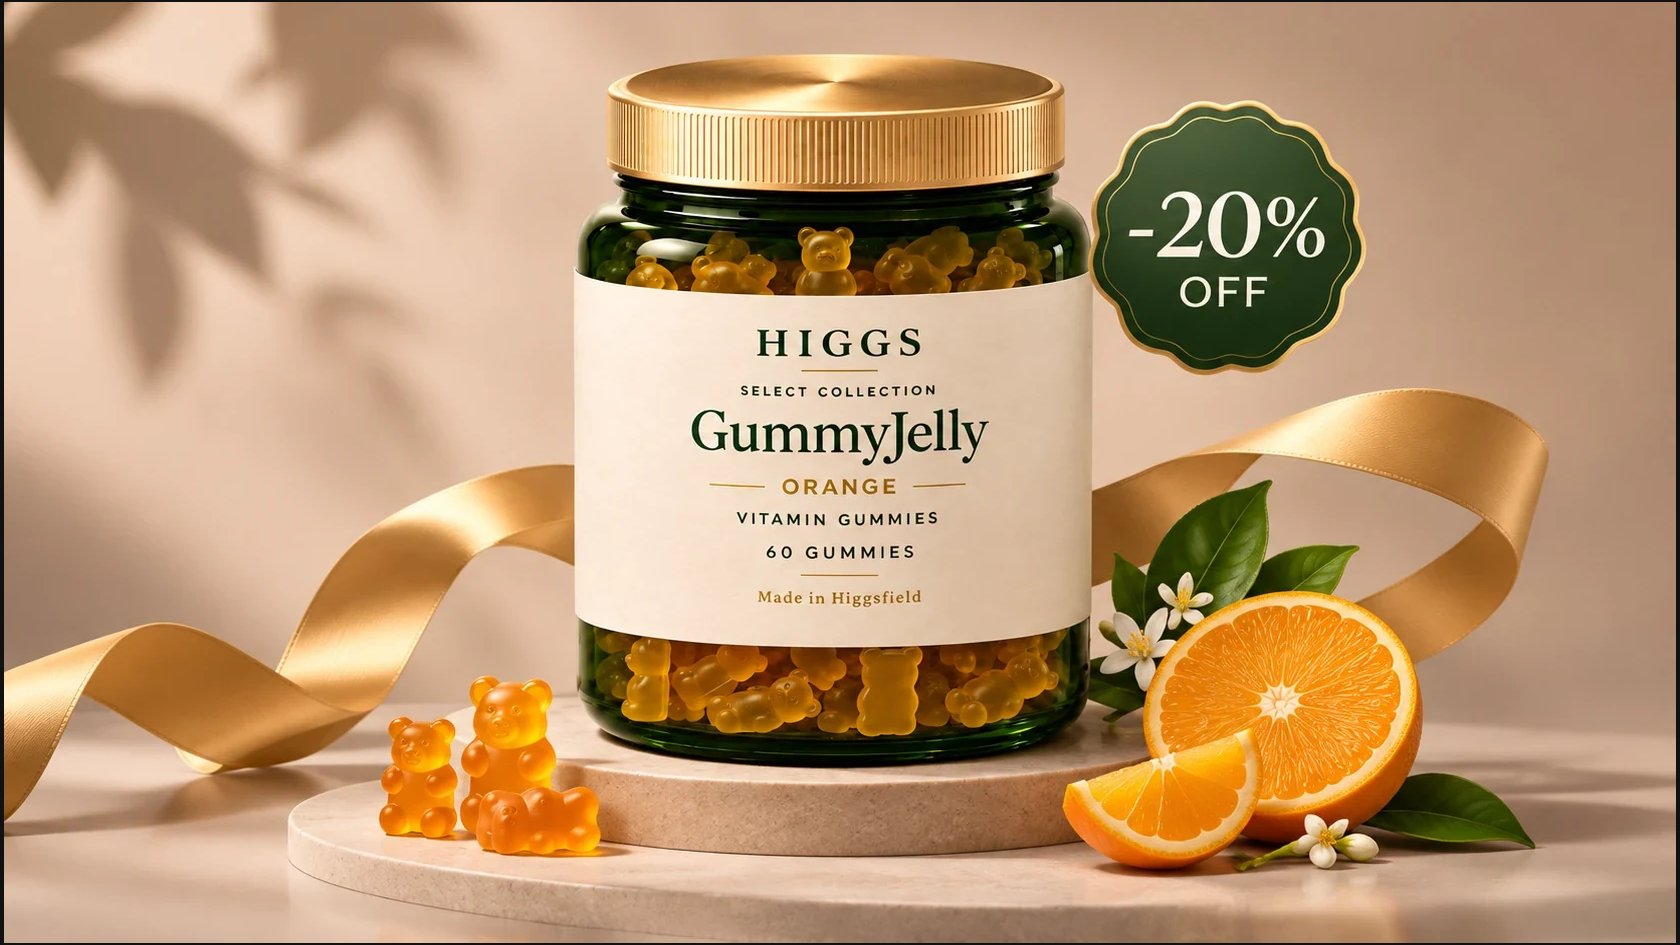
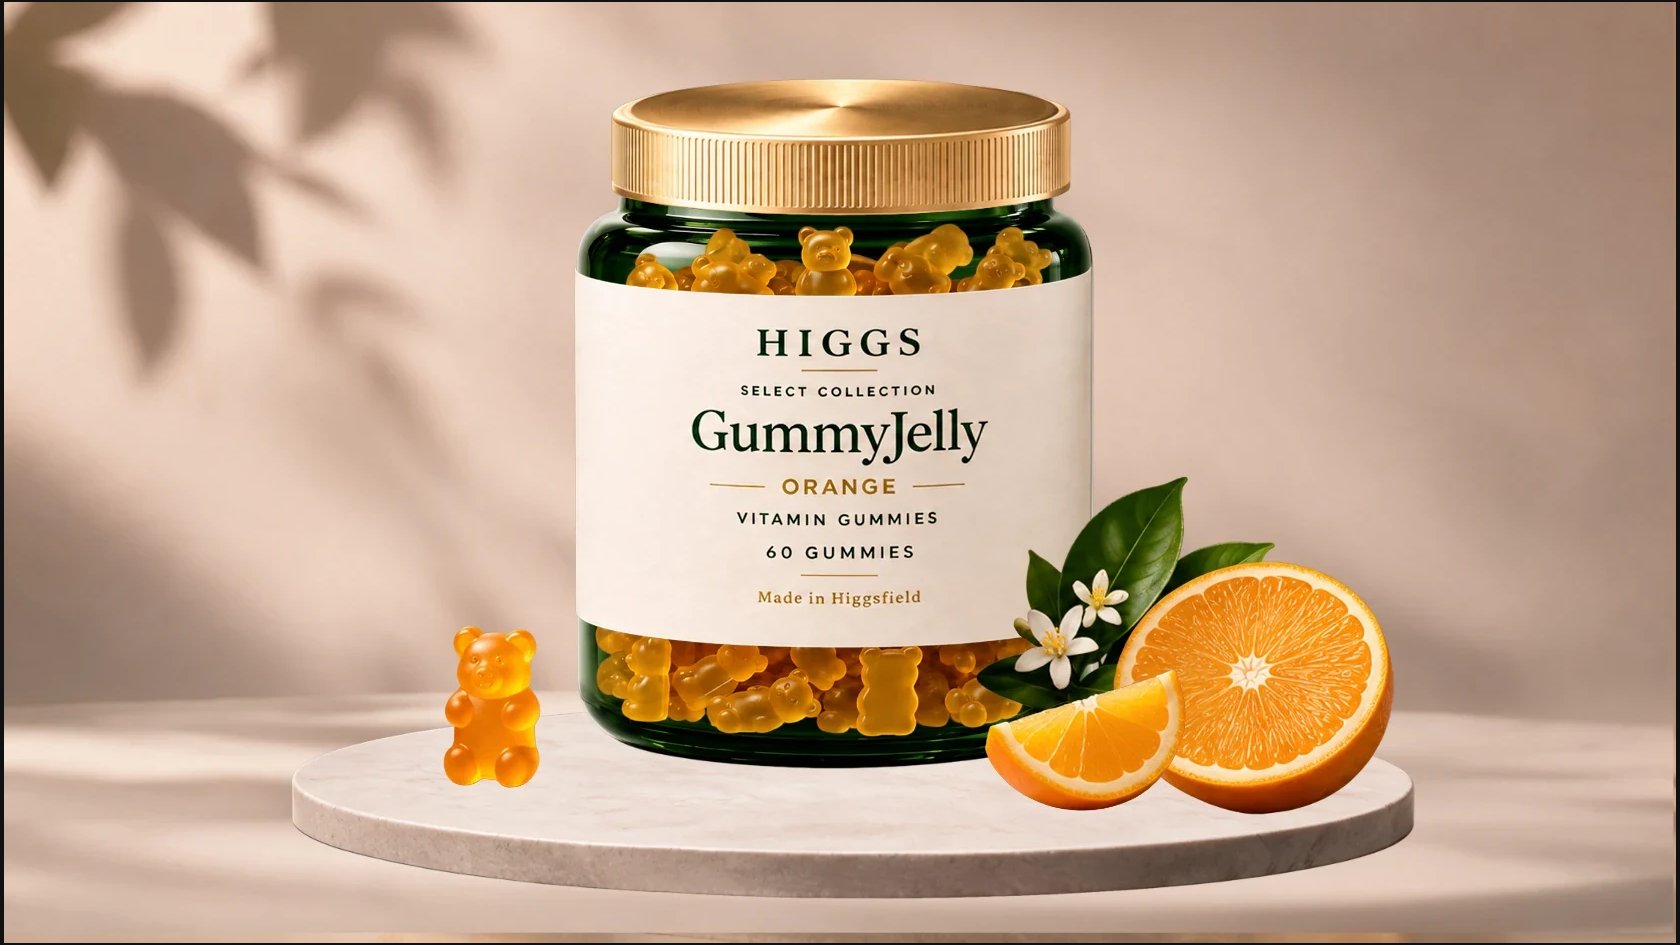
In the GummyJelly ad layout we wanted to change where the oranges are and remove some of the decor. When the layout is uploaded as one image, the list shows the Base layer. To work with separate elements, open Layer Decomposition in the right panel.
How to split a finished ad into layers
Setting
What it sets
Resolution
Output resolution. 1K, 1.5K and 2K are available.
Mode
Processing mode. Standard and Fast are available.
Layers
The number of layers, set before processing.
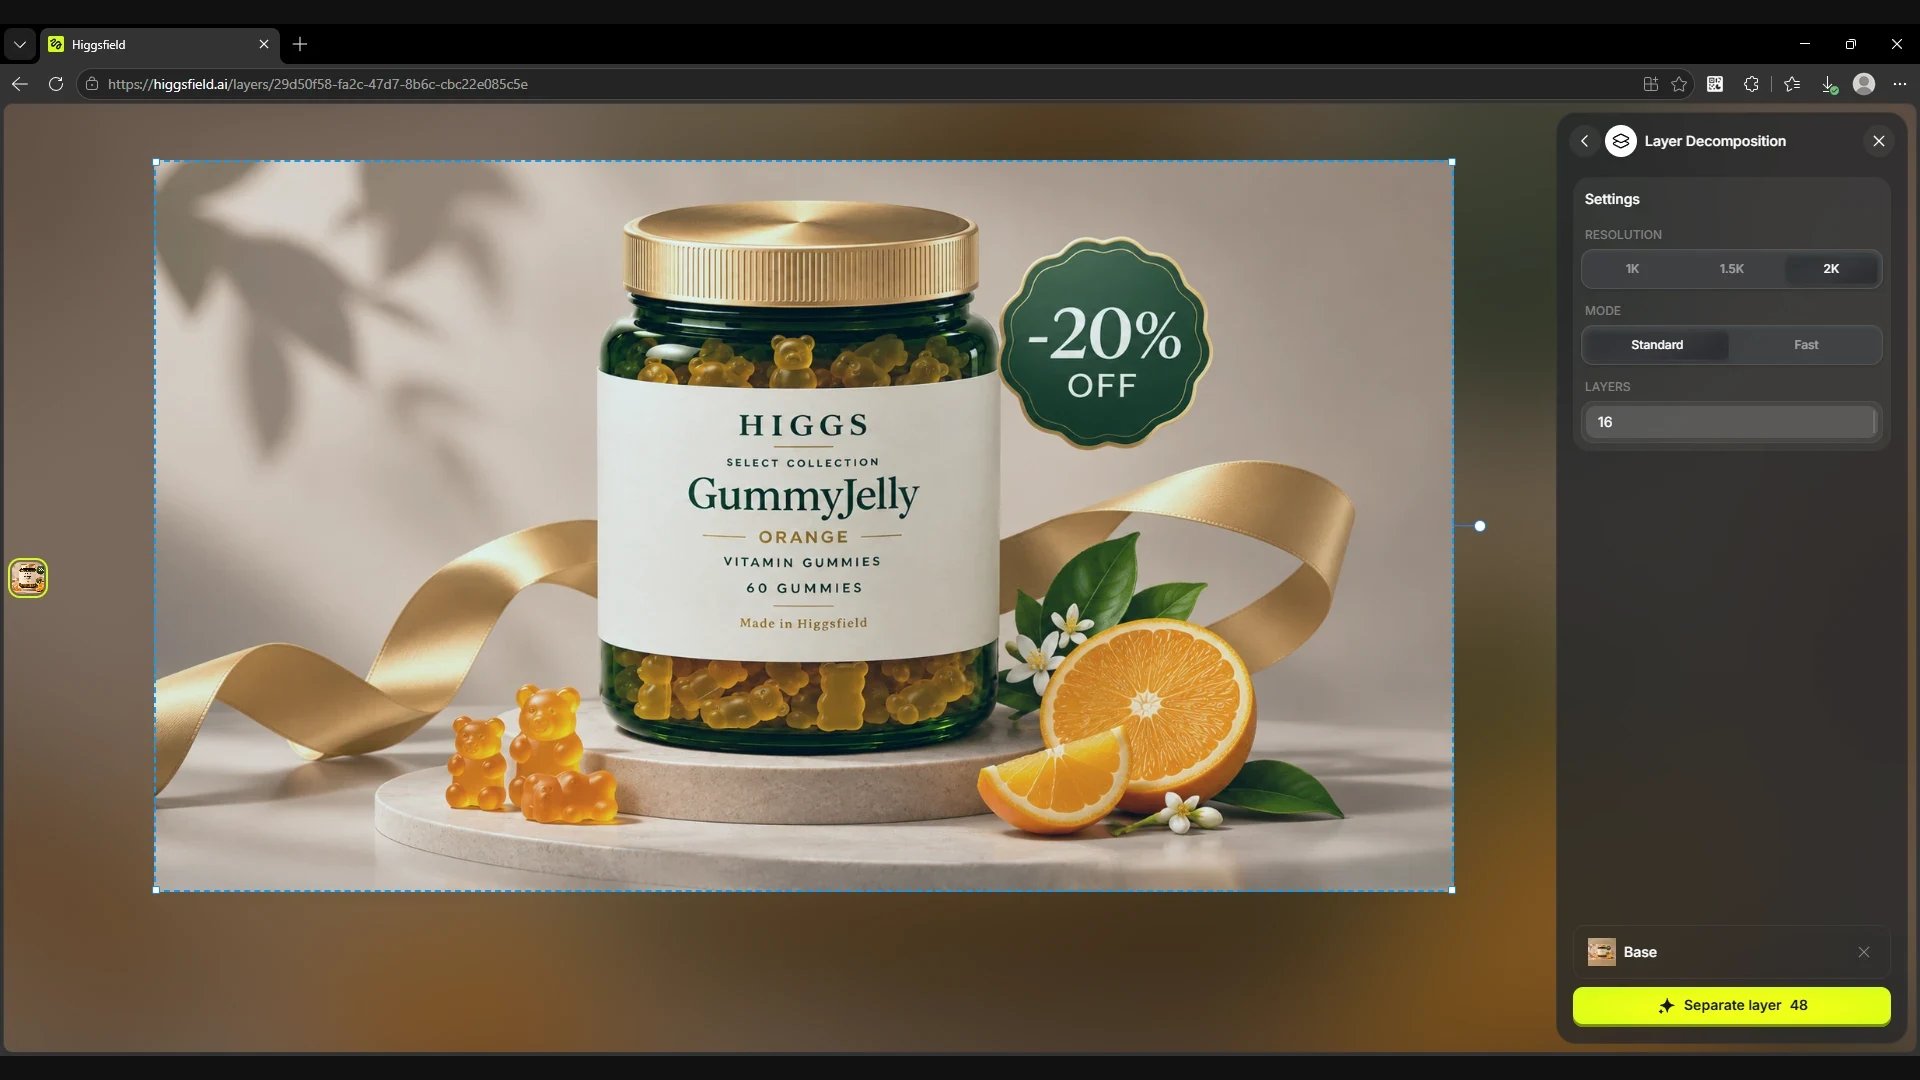
In our example, in Standard mode the 1K and 8 layers option cost 12 credits, and 2K and 16 layers cost 48. The cost of the selected setting is shown on the button before you run it. When the settings are ready, click Separate layers.
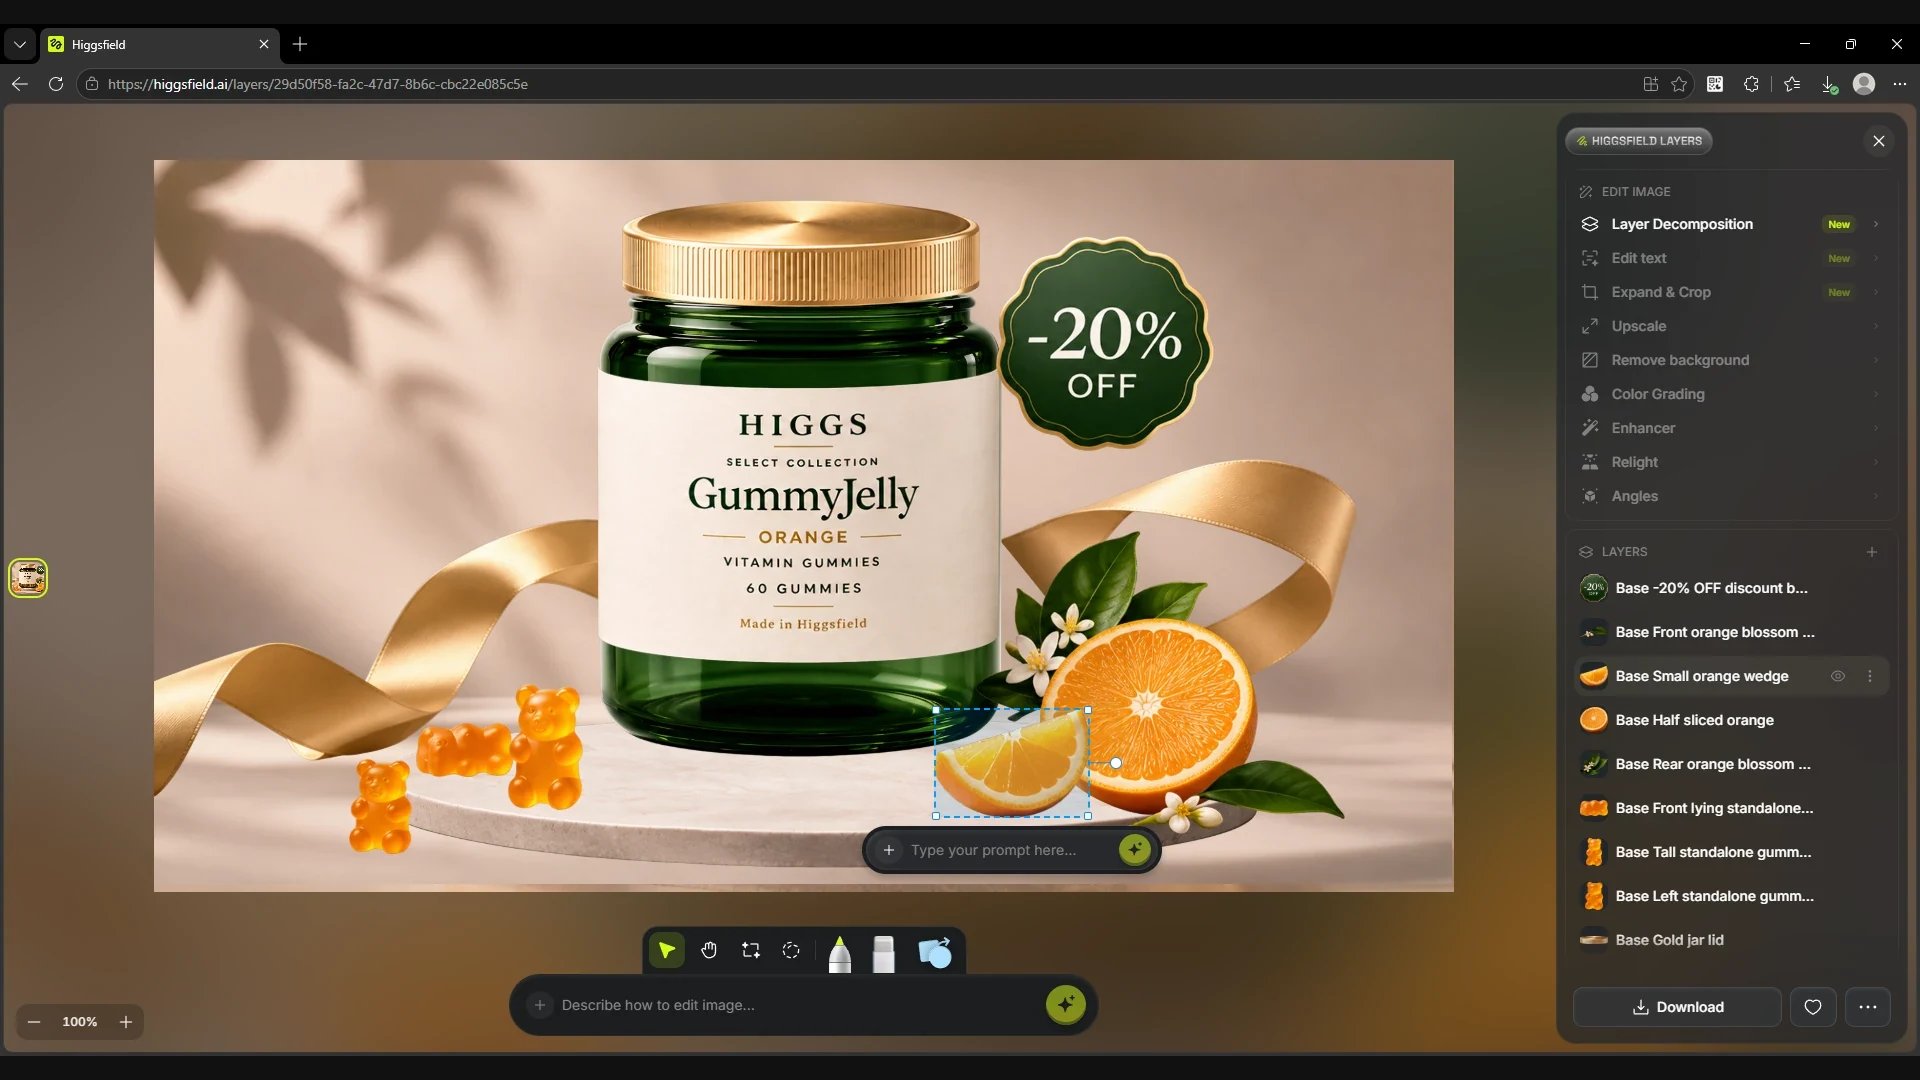
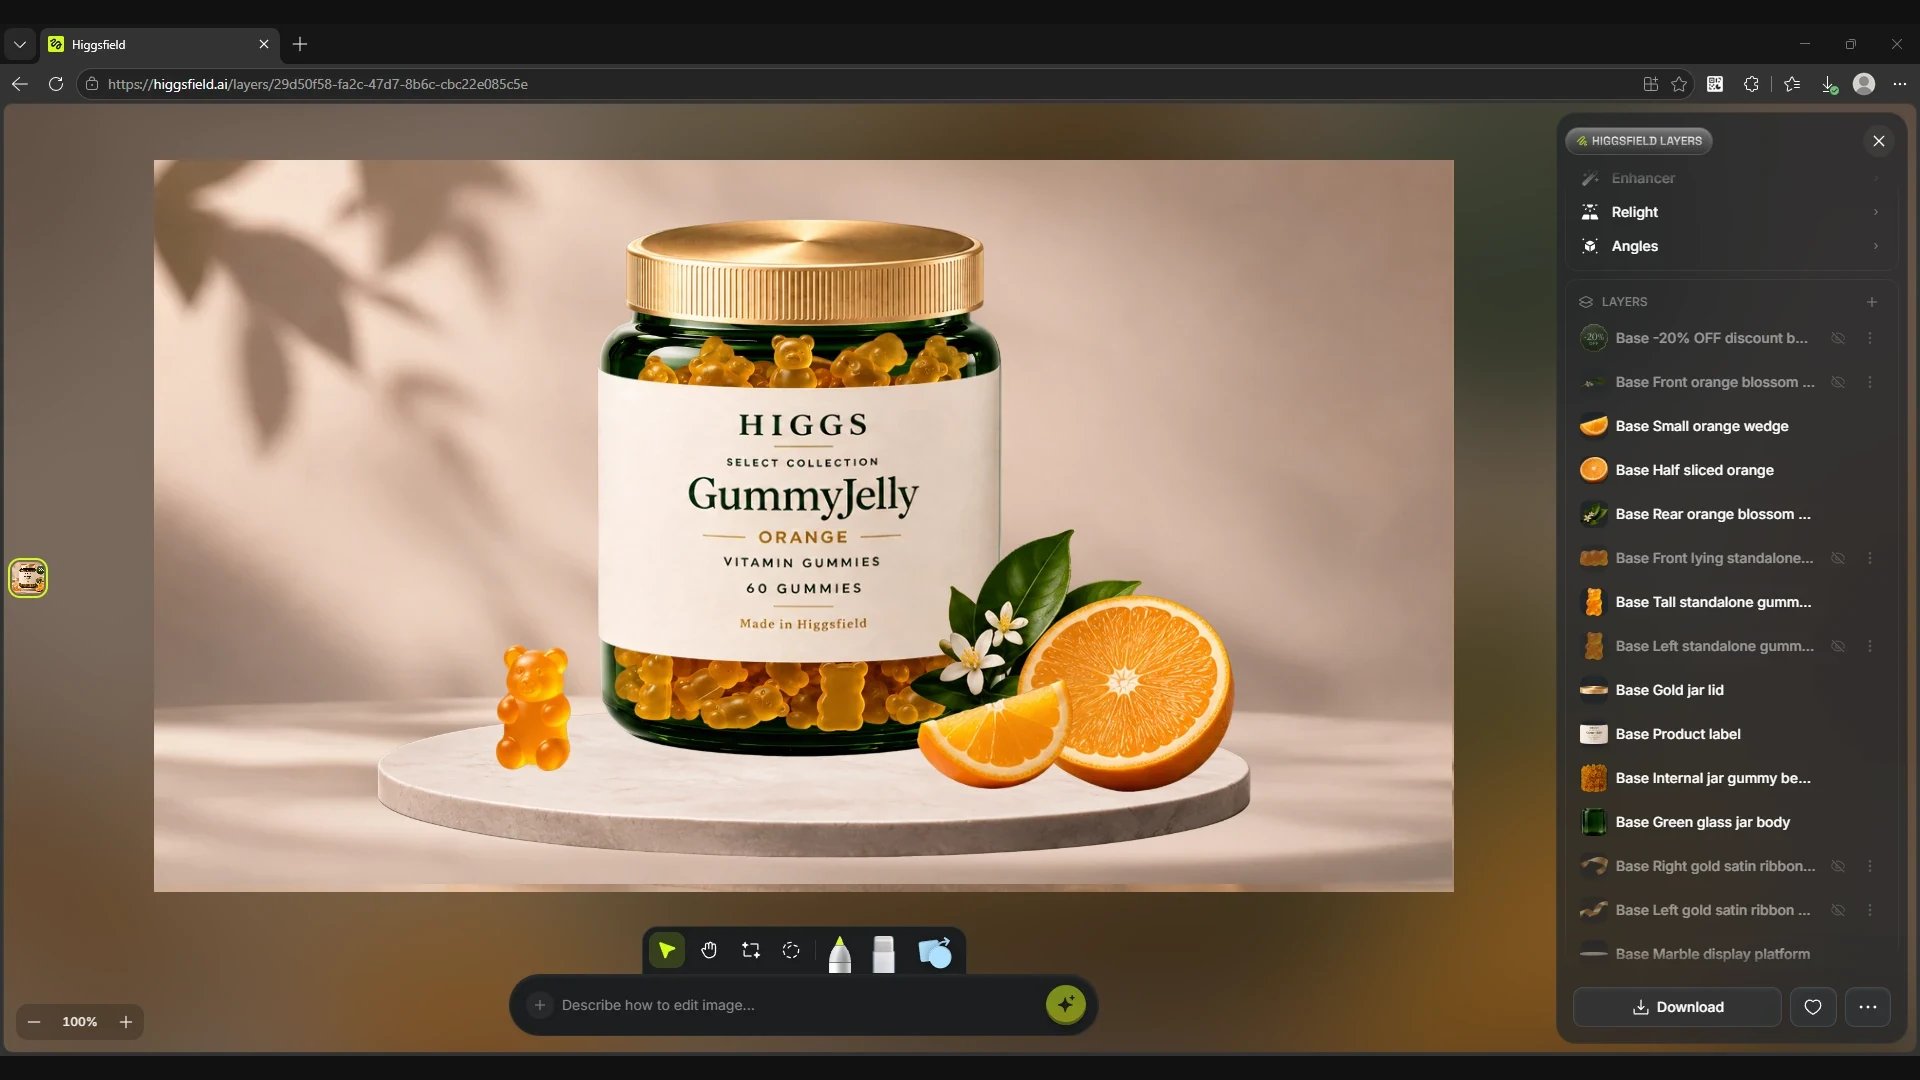
After processing, separate layers appeared in the Layers panel, including the discount badge, the oranges, the flowers, the gummy bears and the jar lid. You can move the selected element on the canvas or describe an edit in the field next to it. If an element gets in the way, hide it with the eye icon to compare the composition, or delete it.
I moved the oranges closer to the jar, kept one bear and hid the badge, the ribbons and the other figures.
Screen
The original ad layout uploaded as a single Base layer
Screen
Settings 1K, Standard and 8 layers
Screen
Settings 2K, Standard and 16 layers
Screen
The orange slice layer is selected. The prompt field is open under the frame
Screen
The layout after moving and hiding some layers
How to match light and shadows after rearranging
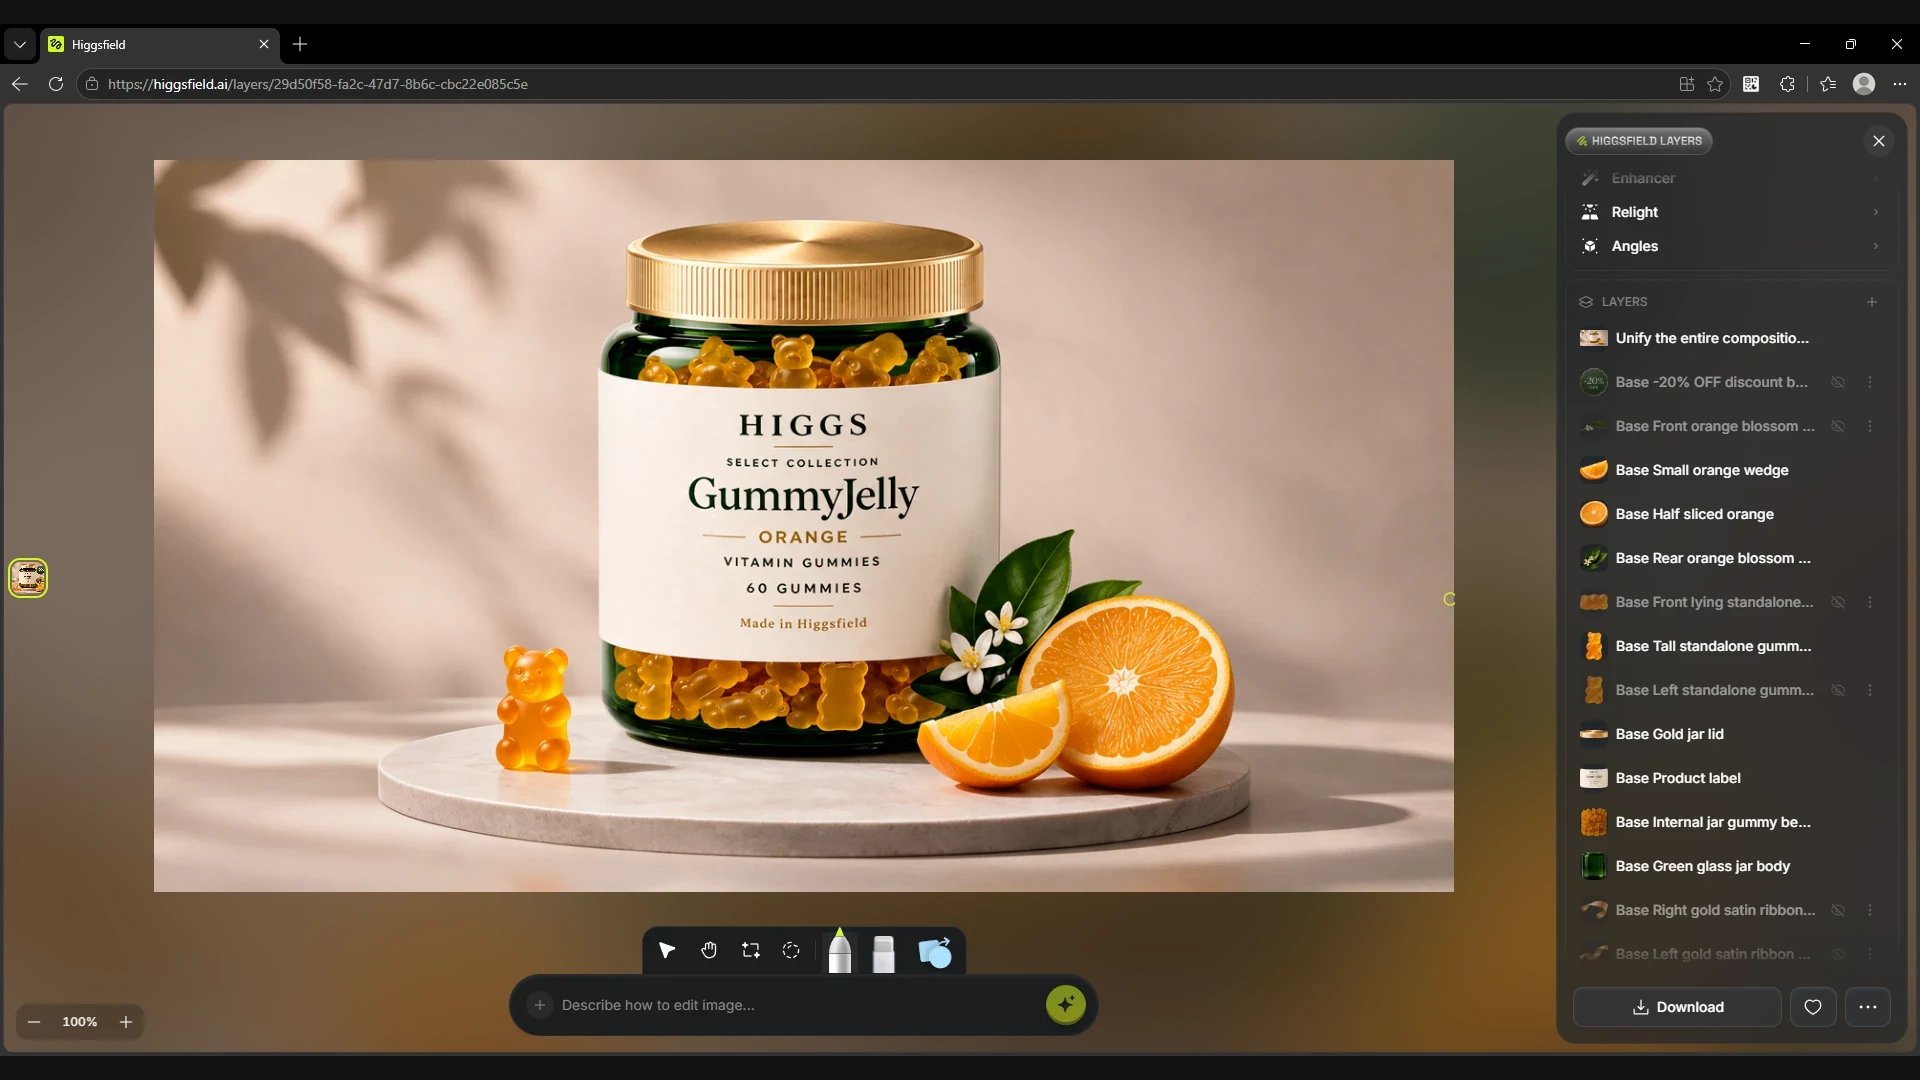
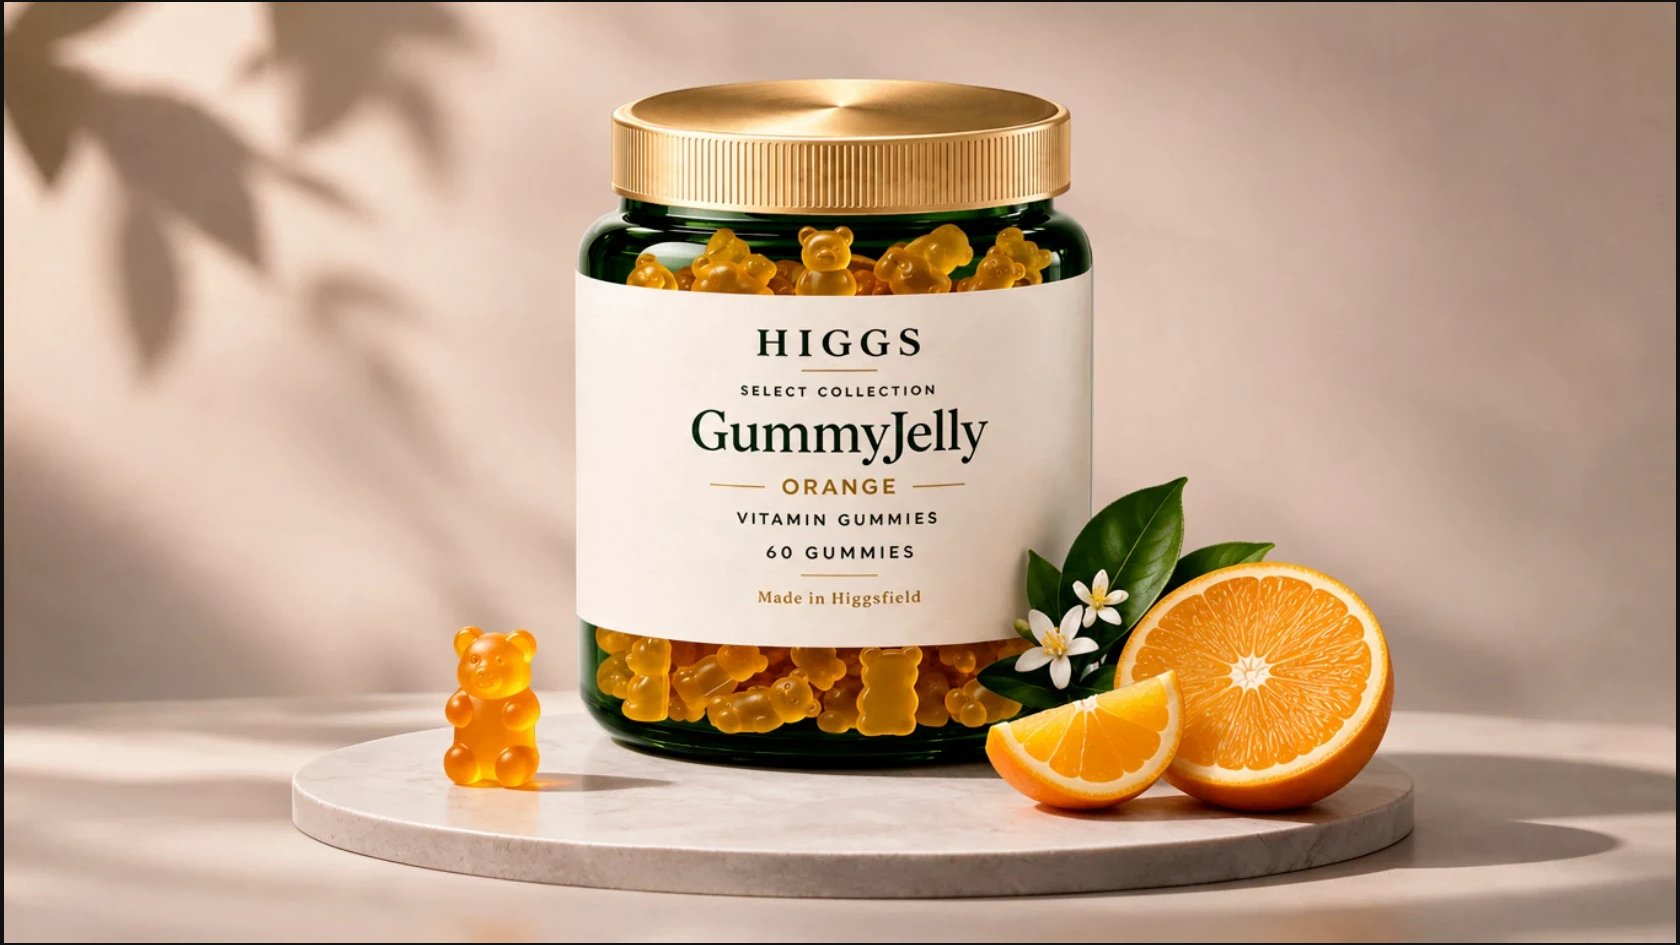
After rearranging, I added contact shadows and matched the light across the whole composition in one generation. I pasted the prompt into the main Describe how to edit image… field under the canvas and clicked the generate button. In the prompt I set a warm light from the upper left and asked to keep the placement of the objects, the packaging and the text.
Prompt
Screen
The result of the light and shadow edit on a separate layer
From the original ad to the updated layout
The difference between the second and third frames is easiest to see under the bear and the oranges. The contact shadows connect the objects to the surface of the stand.
Result
Original ad
Result
After splitting and rearranging the layers
Result
After the light and shadow edit
How to download an image or separate layers
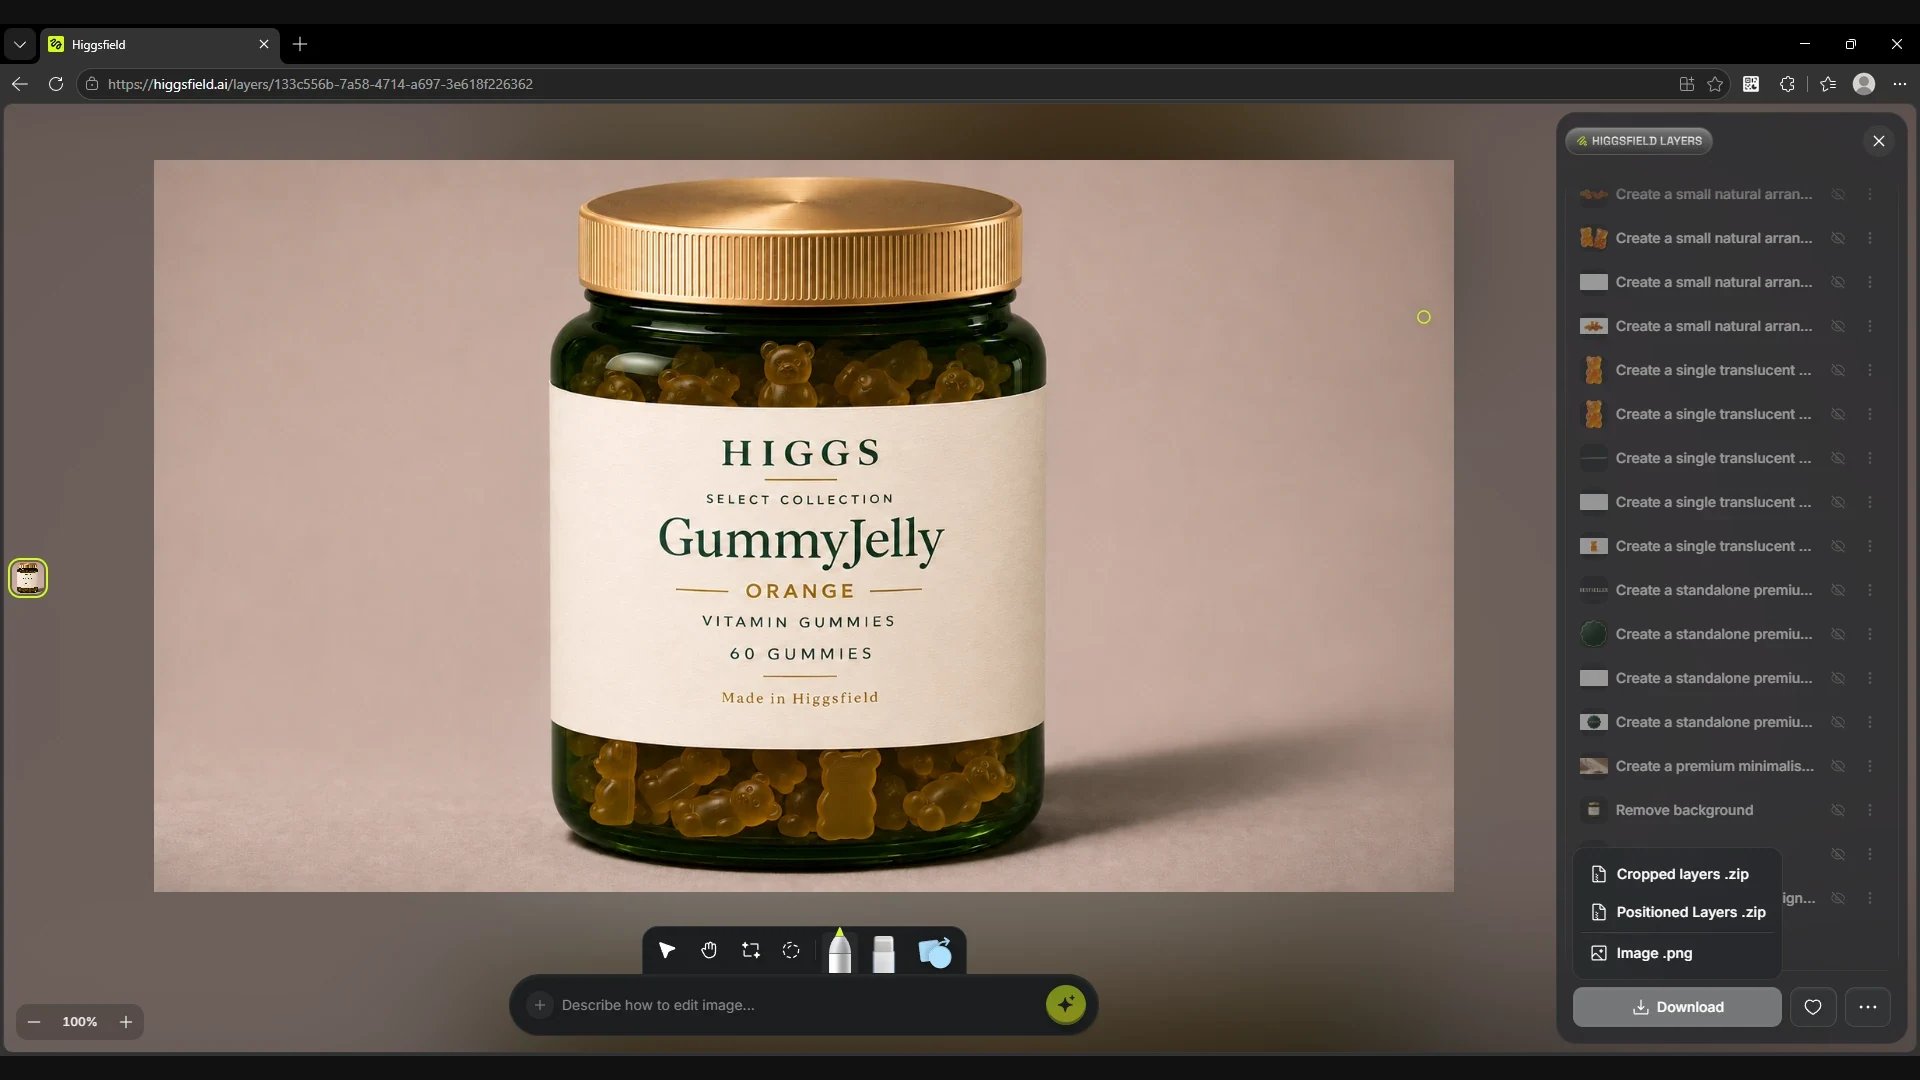
Click Download at the bottom of the right panel in the main editor. In the menu that opens, choose the format for your task.
Screen
The Download menu with three export options
How to download an image or separate layers
Menu item
When to choose it
Image .png
The finished frame as one file.
Cropped layers .zip
Separate elements, each cropped to the edges of its layer's content.
Positioned Layers .zip
Separate layers that keep their position relative to the original canvas.
What Layers helps you do
Once a frame has turned out well, you can refine individual details in Layers. On a portrait that could be new shoes, strands over the shoulders or a jacket from a reference. On a product shot you can update the text, cut the product out onto a transparent background and adjust colour and exposure. A finished ad layout can be split into layers, its elements rearranged and the light and shadows matched again.
If you want to compare models, give them the same image, selection, reference and prompt. Keep the variants on separate layers and continue with the one that suits your frame. If you need new angles of a finished result, make that frame the Base layer in a new project.
Good luck with your experiments! May your edits grow into new and interesting frames, looks and ad materials.