Creator Hub
Zurück

So hältst du Charaktere und Locations über KI-Shots hinweg konsistent

Higgsfield
10 min

Damit Charaktere und Locations über KI-Shots hinweg konsistent bleiben, gib dem Modell jedes Mal dieselben zwei Referenzen: eine für die Person und eine für den Ort. In Cinema Studio 4.0 speicherst du beide als Elements und fügst sie mit @ jedem Prompt hinzu, sodass jeder neue Winkel vom selben Gesicht und demselben Raum ausgeht.

  • Elements speichern Charaktere, Locations und Requisiten einmal und stehen in allen deinen Projekten in Cinema Studio zur Verfügung.
  • Eine Generierung in Cinema Studio 4.0 akzeptiert bis zu 50 Referenzen.
  • In unserem Test hat eine 20-Sekunden-Generierung dieselbe Höhle und denselben Charakter über fünf Shots hinweg beibehalten. Die Version, die wir behalten haben, brauchte 3 Versuche.

Warum Location-Konsistenz die schwierigere Hälfte ist

Locations sind schwerer konsistent zu halten als Gesichter. Ein Gesicht muss nur eines bewahren: die Identität. Eine Location hat viele Details, die gleichzeitig fix bleiben müssen: wo die Möbel stehen, aus welcher Richtung das Licht kommt, Farbe und Textur der Wände, was durch das Fenster zu sehen ist, die Tageszeit und die Objekte in einem Regal. Jedes einzelne dieser Details muss fix bleiben, während sich die Kamera über mehrere Shots hinweg durch den Raum bewegt.

Textbeschreibungen scheitern hieran noch stärker als an Gesichtern, und der Grund ist strukturell. „Eine gemütliche Küche mit Morgenlicht“ gibt dem Modell fast nichts Konkretes als Anker, also erfindet es bei jeder Generierung eine leicht andere Küche: Das Fenster wandert ein Stück, die Schrankfarbe ändert sich, das Material der Arbeitsplatte ist anders. Nichts davon ist falsch genug, um in einem einzelnen Shot für sich aufzufallen. Alles davon ist falsch genug, dass die Sequenz auseinanderfällt, sobald du zwischen zwei Perspektiven desselben vermeintlichen Raums schneidest.

Warum Location-Konsistenz die schwierigere Hälfte ist

Kriterien

Gesicht

Schauplatz

Was fixiert bleiben muss

Knochenstruktur, Hautton, Gesichtsgeometrie

Möbelposition, Lichtrichtung, Wandfarbe, sichtbare Orientierungspunkte, Tageszeit

Was ein Text-Prompt dem Modell gibt

Eine grobe Beschreibung, die das Modell jedes Mal neu interpretiert

Fast nichts Konkretes als Anker

Wie „Drift“ aussieht

Eine von Shot zu Shot leicht andere Person

Ein von Shot zu Shot leicht anderer Raum, ein anderes Fenster oder eine andere Lichtquelle

Was es behebt

Ein Character-Element (oder eine Soul ID), das jedem Prompt hinzugefügt wird

Ein Location-Element, erstellt aus einem einzigen Establishing Shot

Warum es schwerer zu lösen ist

Eine Variable, die konstant bleiben muss

Viele Variablen, die alle gleichzeitig konstant bleiben müssen, über jeden Kamerawinkel hinweg

Was sind Elements in Cinema Studio?

Elements sind gespeicherte Referenzen in Cinema Studio 4.0. Jedes Element ist ein Charakter, eine Location oder eine Requisite, erstellt aus deinen Bildern oder Videos. Einmal gespeichert, erhält es einen eigenen @-Tag, sodass du es jedem Prompt hinzufügst, statt dieselbe Referenz für jeden Shot erneut hochzuladen und zu beschreiben.

Musikproduzent Oliver Alge arbeitet so an seinen Musikvideos und TV-Spots: Er erstellt Charaktere und Locations als Standbilder und speichert sie dann als Elements in Cinema Studio, damit sie über Shots hinweg konsistent bleiben. Lies die Story von Oliver Alge.

Cinema Studio ist der Filmmaking-Workspace auf Higgsfield, einer generativen Plattform für kreative Produktion, mit über 35 Frontier-Modellen zum Generieren von Bildern und zum Umwandeln in Videoszenen. Elements findest du in My elements in der Sidebar von Cinema Studio.

Was sind Elements in Cinema Studio?

Feld

Was es kann

Kategorie

Auto, Character, Location oder Prop. Bei Auto wählt Higgsfield für dich.

Medien

Ein oder mehrere Bilder (JPG, PNG, WebP) oder Videos (MP4, MOV)

Name und Element ID

Die ID ist der @-Tag, den du in einen Prompt eintippst

Beschreibung

Notizen zum Element, zum Beispiel „Fenster links, rotes Neonschild“

Eigene Eigenschaften

Zusätzliche Felder, die du selbst definierst

Elements sind nicht dasselbe wie Soul ID. Soul ID trainiert eine Identität aus 20 bis 80 Fotos einer Person. Ein Element ist eine gespeicherte Referenz, die mit einem einzigen Bild starten kann, und kann neben einer Person auch einen Ort oder ein Objekt enthalten.

Referenz, Elements, Popcorn oder 3D Jutsu: Was brauchst du?

Ein einzelnes Referenzbild reicht für einen Shot. Popcorn passt für ein kurzes Storyboard einer Szene in einem Durchgang. Elements lohnen sich, wenn eine Person oder ein Ort über Sessions oder Projekte hinweg zurückkehrt. 3D Jutsu passt, wenn das Layout exakt übereinstimmen muss.

Referenz, Elements, Popcorn oder 3D Jutsu: Was brauchst du?

Wenn du

Verwenden

Warum

Einen Shot eines Charakters an einem Ort brauchst

Ein Referenzbild im Prompt

Es gibt nichts, was später wiederverwendet werden kann

1 bis 8 Frames einer Szene auf einmal willst

Popcorn

Bis zu 4 Referenzbilder; Modi Auto, Manual und Instadump

An verschiedenen Tagen oder in verschiedenen Projekten zur selben Location zurückkehrst

Ein Location-Element

Einmal gespeichert, mit @ in jedem Prompt hinzugefügt

Mehrere Charaktere in einem Raum platzieren willst

Character-Elemente plus ein Location-Element

Jede Person und der Ort erhalten einen eigenen Tag

Ein Layout brauchst, das aus jedem Winkel exakt übereinstimmt

3D Jutsu

Erstellt die Location als 3D-Szene aus einem Prompt; du passt Requisiten und Kameras an und machst dann ein Video aus der Szene

Dasselbe echte Gesicht in vielen Bildern brauchst

Soul ID

Eine trainierte Identität, erstellt aus 20 bis 80 Fotos

Die Wahl ist nicht endgültig. Ein Frame, der dir gefällt, aus Popcorn oder aus einem einzelnen Referenz-Shot kann zum Ausgangsbild für ein neues Element werden.

Schritt 1: Erstelle einen klaren Establishing Shot der Location

Starte mit einem weiten Bild, das den ganzen Raum zeigt: das Layout, woher das Licht kommt und drei oder vier Details, die leicht zu erkennen sind. Wenn der Ort noch nicht existiert, generiere ihn zuerst. Dieses Bild wird zur Referenz, mit der jeder spätere Winkel verglichen wird.

Was einen guten Establishing Shot ausmacht:

  • Der ganze Raum ist sichtbar, nicht nur eine Ecke davon.
  • Die Lichtquelle ist klar erkennbar, zum Beispiel ein Fenster oder eine Lampe.
  • Markante Objekte lassen sich später leicht prüfen: ein Schild, eine farbige Wand, ein Möbelstück.
  • Niemand steht im Bild, sodass das Element nur den Ort speichert.

Schritt 2: Speichere die Location als Element

Öffne My elements in Cinema Studio und klicke auf Add new. Zieh den Establishing Shot hinein, stelle die Kategorie auf Location, gib einen kurzen Namen ein und klicke auf Create. Higgsfield füllt die Element ID aus Kategorie und Name aus, zum Beispiel loc_corner-cafe für eine Location namens Corner Cafe. Die Element ID ist der @-Tag, den du in Prompts verwendest. Du kannst sie ändern, bevor du auf Create klickst.

  • Du kannst einem Element mehrere Bilder oder ein Video desselben Orts hinzufügen.
  • Nutze die Beschreibung, um die Details aufzulisten, die sich nicht ändern dürfen, zum Beispiel „Fenster rechts, grüne Wände, Messinglampe“.

Schritt 3: Füge deinen Charakter hinzu

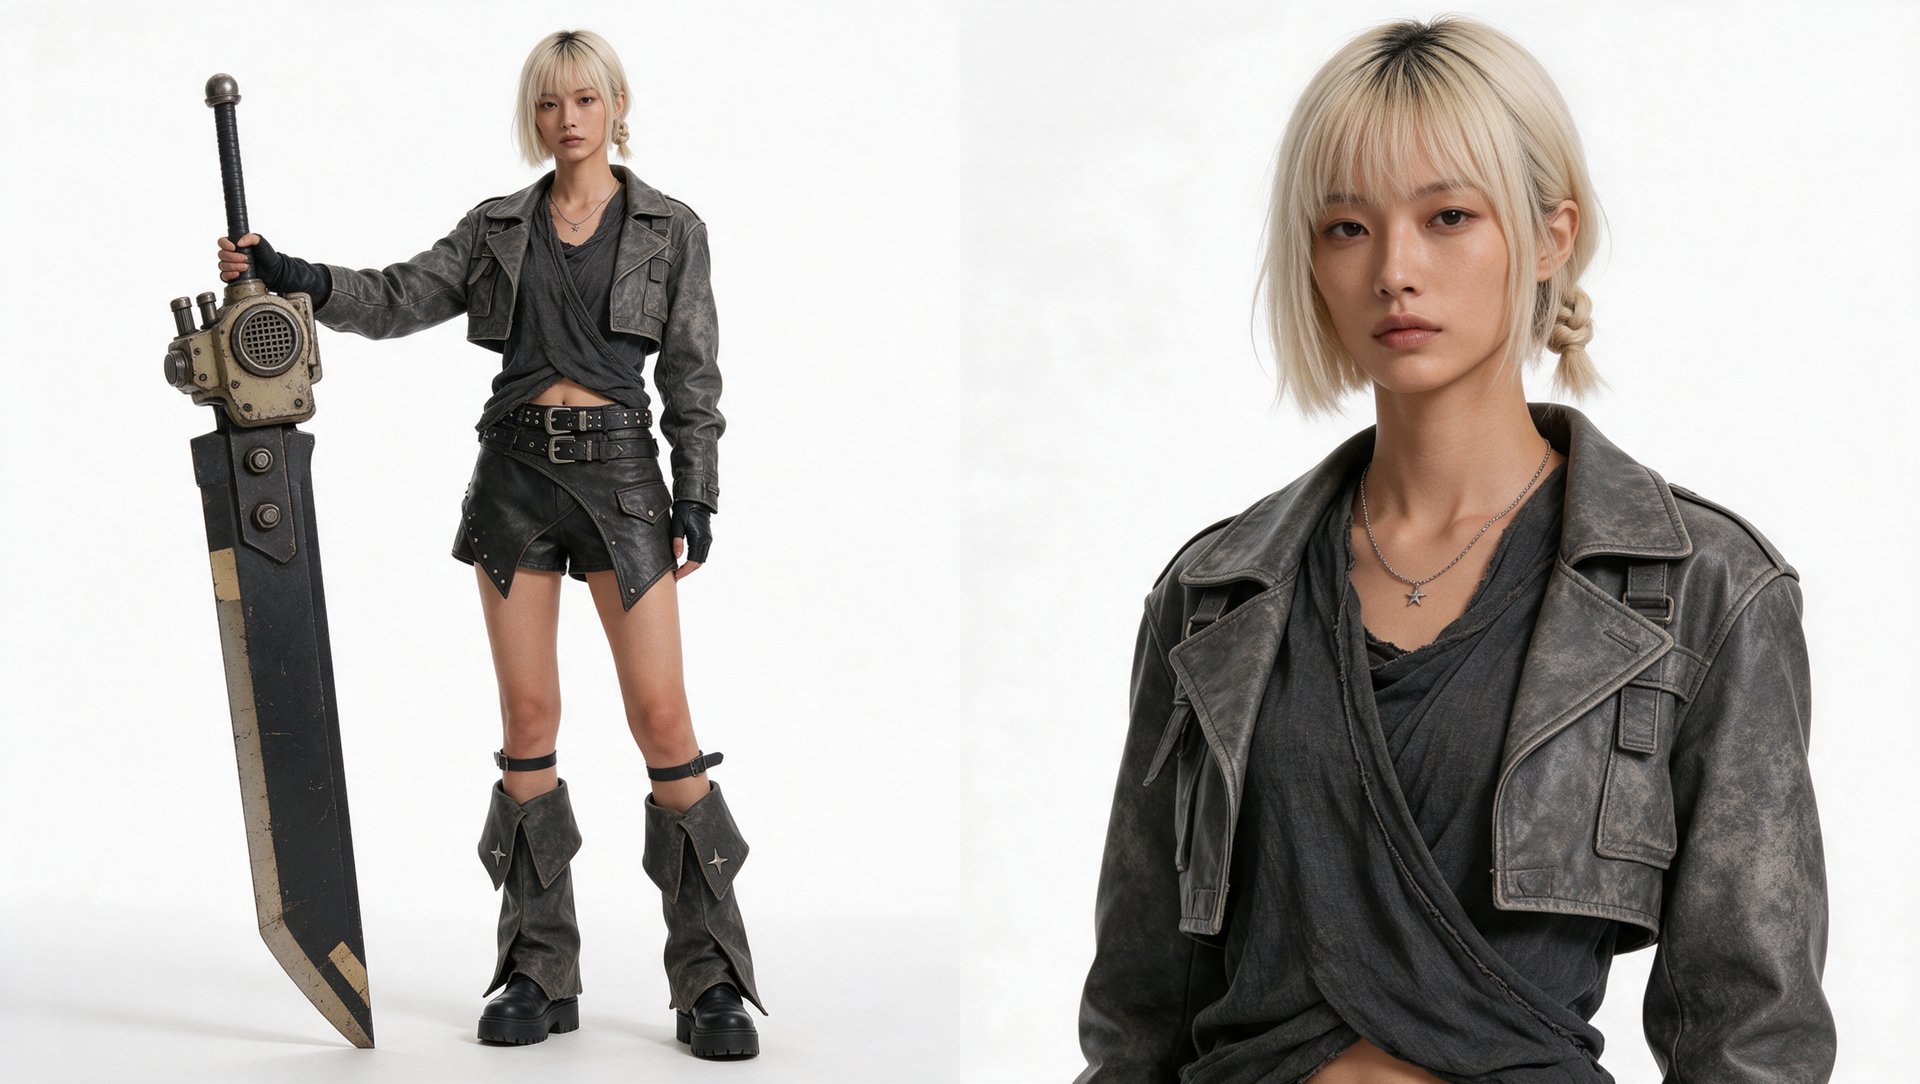
Speichere den Charakter auf die gleiche Weise, mit der Kategorie Character. Ein Charakterbogen eignet sich gut als Quelle: eine Ganzkörperansicht und ein Nahporträt in einem Bild. Wenn dein Charakter bereits als Soul ID existiert, musst du ihn nicht erneut speichern. Als Soul ID trainierte Charaktere erscheinen automatisch in My elements als Character-Elemente.

  • Verwende ein Bild mit klar sichtbarem Gesicht und dem kompletten Outfit.
  • Das Outfit und alle Requisiten, die später zu sehen sein sollen, gehören in dieses Bild.

Double Shots hat denselben Ansatz bei Musikvideos für das Pop-Idol Ivy genutzt: Die Crew fotografierte die Künstlerin und wichtige Requisiten während des Drehs, damit die in Cinema Studio erstellten Shots dieselben Gesichter, dieselbe Garderobe und dieselben Objekte zeigen wie das Live-Material. Lies die Story von Double Shots.

In unserem Beispiel wurde das Character Sheet mit Soul 2.0 erstellt und als Character-Element gespeichert.

Schritt 4: Generiere jeden Winkel mit beiden Tags

Öffne ein Projekt in Cinema Studio. Im Prompt-Feld steht „use @ to add characters & locations“: Tippe @, wähle den Charakter und die Location aus und beschreibe dann den Winkel und die Action. Du kannst einen Winkel nach dem anderen generieren oder mehrere Shots in einem Prompt beschreiben: Ein Video in Cinema Studio 4.0 läuft 4 bis 30 Sekunden, eine Generierung kann also mehrere Winkel derselben Szene enthalten.

Ein Prompt kann diesem Muster folgen:

“@Character + Aktion + @Location + Kamerawinkel + Licht, zum Beispiel: „@char_mira sitzt im roten Sessel in @loc_corner-cafe, Totale von der Tür aus, Morgenlicht vom Fenster.“”

  • Film setup, Camera, Color palette und Lighting liegen über dem Prompt. Behalte sie für jeden Winkel einer Szene bei.
  • Ändere zwischen den Shots nur den Kamerawinkel und die Action.
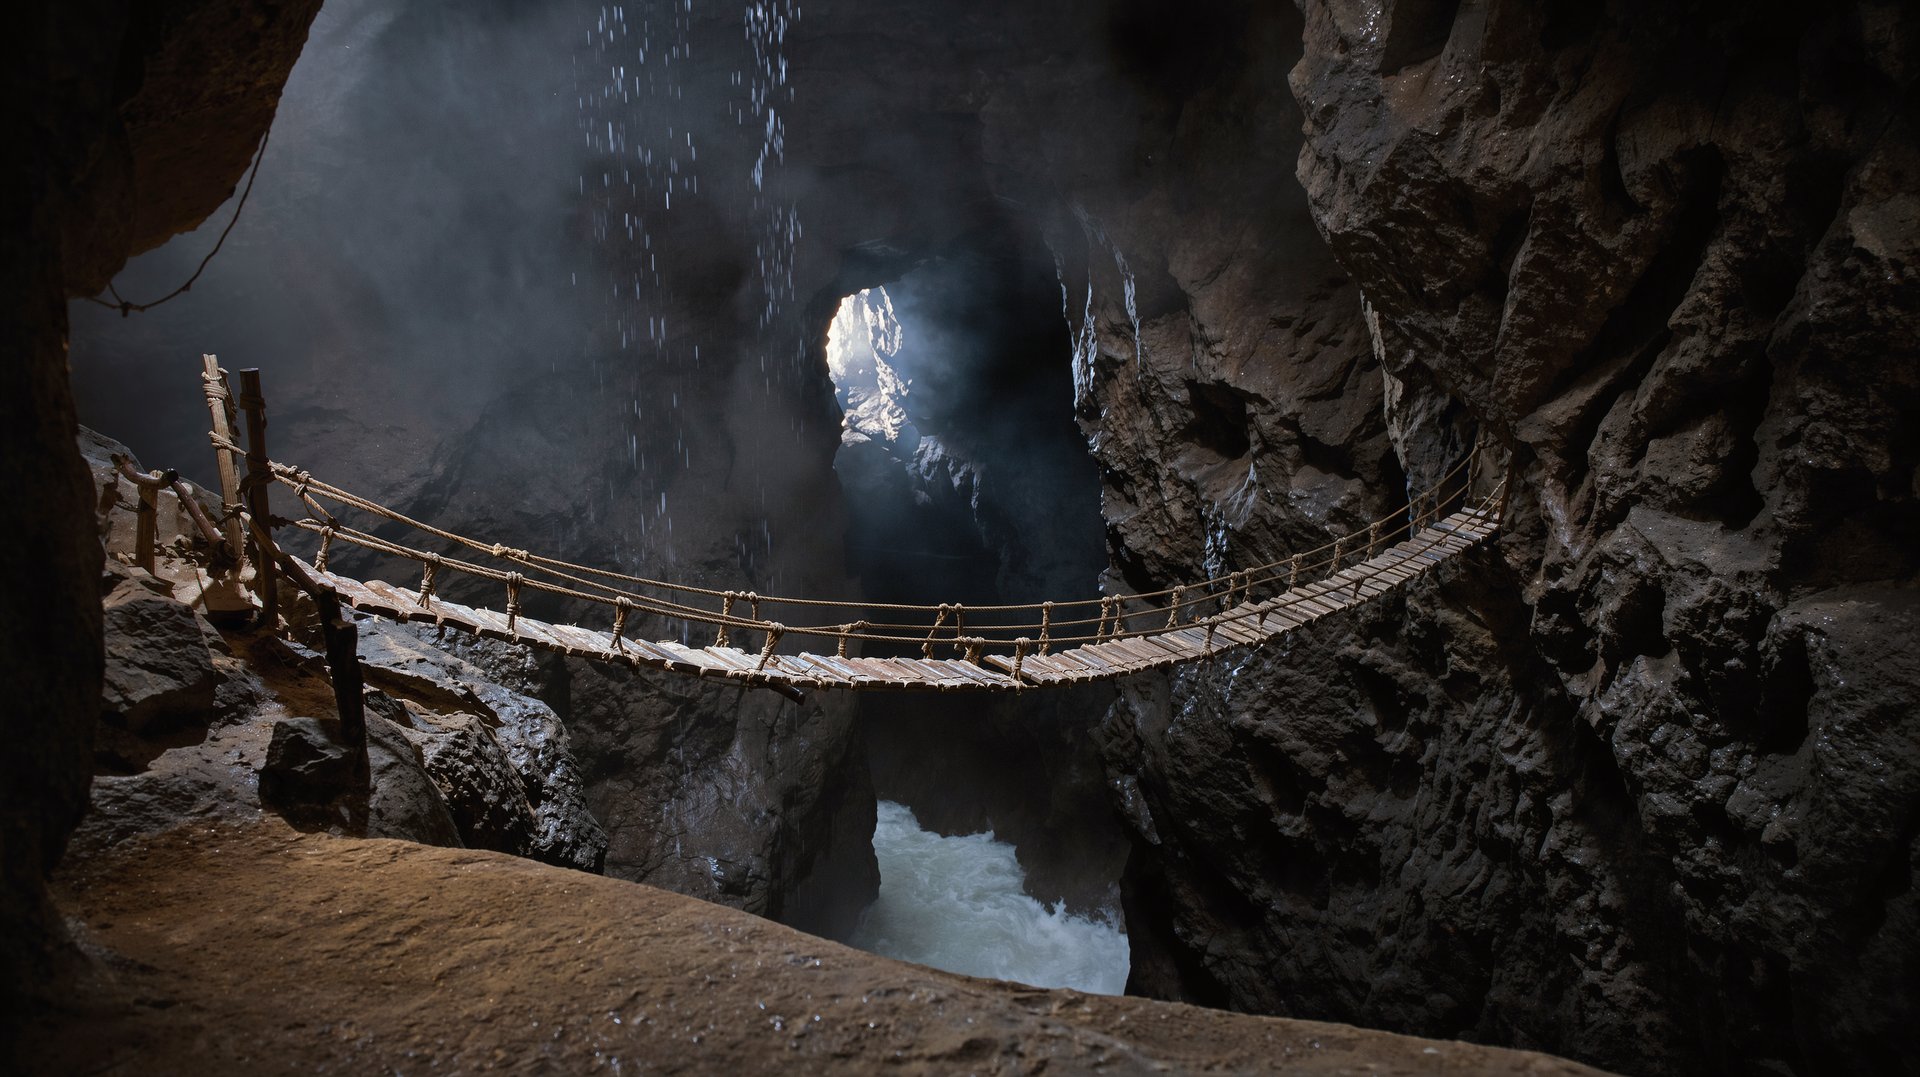
SCENE CONTEXT A 20-second cinematic sequence of six shots, grounded and believable, with the weight and patience of a large-format feature film. In a vast, dark, wet cave, a lone swordswoman of immense strength walks out of a tunnel and crosses a colossal 100-meter rope bridge over a bottomless chasm, dragging an enormous sword behind her. The bridge groans under its weight, but she moves with total, unbothered power. On the far ledge she stops, steam hisses from the sword's grille, and without turning around she cuts the bridge loose with one stroke behind her, then walks on into the darkness as it falls away. Quiet, heavy, completely nonchalant. ACTIVE REFERENCES <<<image_1>>>: the location only: the kind of place, its geometry and materials: - the rock ledges with rope-lashed wooden posts - the long sagging rope bridge with wooden planks and twisted hemp rope rails - the opening in the cave behind the bridge - thin streams of water falling from the ceiling - the white river at the bottom of the chasm - the massive wet rock walls Its camera angle, its scale and its brightness are not used: every shot is filmed from a new angle, the cave and the bridge are far larger, and the cave is much darker. <<<image_2>>>: the single source of truth for the heroine and her sword, 100% identical in every shot: her face, platinum-blonde bob with dark roots, blunt bangs and small braid, her full outfit, and the oversized sword with its broad black bolted blade, beige edge stripe, boxy beige mechanical guard housing with a round mesh grille and two small cylinders, and long black grip. The white studio background of <<<image_2>>> never appears. ADDITIONS TO THE LOCATION - A dark tunnel in the rock just behind the left posts; she emerges from it. - At the right end of the bridge, a narrow stone ledge with a second pair of rope-lashed wooden posts, and a dark narrow crevice in the wall directly behind them, leading deep into the rock. SCALE - The cave is colossal, a cathedral-sized void of rock. - The bridge is about 100 meters long and sags deeply in the middle. It is made of several hundred narrow wooden planks, each about 25 cm wide, with rope rails at her waist height. Its far end fades into the mist. - The river churns about 150 meters below, so deep that it is only a faint white thread in the darkness. - She is a normal 1.75 m person in her platform boots, and the sword is about her own height. Against the bridge and the cave she is tiny. - In the wide shots she occupies only 3 to 5 percent of the frame height, dwarfed by the rock, with layers of mist and falling water hanging between the camera and her. HEROINE: POWER AND WEIGHT - The sword is massively heavy, and its weight shows in the world around her: the planks bend and crack under it, the bridge dips with each step, and the blade gouges the wood as it drags. - She herself moves with complete, effortless strength: upright, shoulders square, a long, steady, heavy stride. She never hesitates, never checks her footing and never holds the rails. - She holds the sword only in her right hand by the long grip, her arm relaxed and straight, the blade dragging behind her on a low diagonal, its tip scraping the planks about a meter behind her heels. - When the tip snags on a plank edge, she yanks it free with a casual one-handed tug, without glancing back. - Her face is calm, tired and blank, her eyes fixed ahead, her mouth closed. No sighs, no exhales and no visible breath. - Her hair, straps, belt tails and gaiter flaps swing heavily with each step, and wet drops darken her shoulders. - Screen direction: in every side shot she moves from screen-left to screen-right. The image is never mirrored. - She never looks into the lens. FORMAT MODE Controlled multi-shot sequence, 20.0 seconds, six shots joined by hard cuts at 3.0s, 6.5s, 8.5s, 11.5s and 16.0s. Every shot uses a different camera position and angle, and no angle is ever repeated. CAMERA LANGUAGE - Shot like a large-format feature film: the camera sits on a tripod, dolly, crane or a rigid body-mounted rig, with deliberate, weighted moves and precise framing. No handheld shake, no drone glide, no fast pans. - Real large-format film texture: fine grain, soft highlight halation, deep blacks and true-to-life color. LIGHTING - A dark cave. The only light is the dim, diffuse daylight that seeps in from the distant opening and spreads softly through the mist. It is present everywhere but weak, like natural light deep inside a real cave: no visible beams, no spotlight, no bright pools and no studio look. - Most of every frame is deep, near-black shadow. Shapes read through soft gradations, the faint pale glow of the mist, thin specular glints on wet rock, and the dim white thread of the river far below. - She is lit only by that faint ambient glow: a subtle, soft rim on her hair, shoulders and blade, with her face mostly in soft shadow and only gently readable in the close shots. There is no fill light and no added colored light. - The palette is cold, muted and naturalistic: blue-grey and black stone, pale mist and muted earth tones. Underexposed, moody and real. SHOT 1 — 0.0s to 3.0s, medium, the emergence - Camera: on a tripod low on the rock floor just outside the tunnel mouth, a low 3/4 front angle looking slightly up, a normal lens, about 3 meters from her. - From the pitch-black tunnel she walks out toward the camera into the faint light, steady and unhurried, the heavy sword dragging behind her and its tip grinding across the stone with a little dust. - She passes the camera and steps between the posts onto the first planks, and the bridge visibly sinks under her weight. SHOT 2 — 3.0s to 6.5s, extreme wide, side, the scale - Camera: on a tripod far out on the opposite cave wall, level with the bridge, a wide shot from the side with a very slow pan to the right. - The whole 100-meter bridge crosses the frame as a long, thin, deeply sagging line over the black chasm, its far end fading into the mist. - She is a tiny figure near the left third of the bridge, only 3 to 5 percent of the frame height, striding steadily from screen-left to screen-right. Each of her steps sends a slow wave rippling along the enormous bridge. - Falling water and drifting mist hang soft in the foreground between the camera and her. SHOT 3 — 6.5s to 8.5s, beneath the bridge - Camera: rigidly mounted under the deck, looking straight up through the gaps between the planks. A wide lens. - Her heavy platform boots pass overhead across the gaps, the planks flexing down toward the lens under each step. - Right after them, the sword's blade drags across the planks just above the lens, gouging the wood; sand and splinters trickle down through the gaps, and drops of water fall past. SHOT 4 — 8.5s to 11.5s, extreme wide from below, the depth - Camera: on a tripod far down near the river at the bottom of the chasm, looking straight up. A wide lens with a very slow push-in. - High above, the bridge is a thin dark thread against the dim glow of the opening, and she is barely a dot on it. - 8.8s: one rotten plank slips out of its lashing behind her and falls. It tumbles slowly toward the camera through the mist and falling water, growing larger, for about three seconds, and splashes into the white river near the lens just before the cut. SHOT 5 — 11.5s to 16.0s, the head rig, the stop and the grille - Camera: one continuous shot on a rigid rig fixed in front of her face, about 80 cm away at eye level, moving exactly with her. A normal lens. - Her head stays in the same place in the frame while the world moves behind her: the last planks, the enormous sagging bridge stretching back into the mist, and then the rock of the right ledge. - Her face is steady and blank, her eyes looking past the lens into the distance, her hair swinging with each heavy step. - 14.0s: she steps off the bridge onto the stone, takes two more strides past the right posts, and stops dead. The rig stops with her. - 14.5s: the camera detaches from her face and glides smoothly down along her right shoulder and her relaxed arm, to her gloved hand on the grip and the guard housing of the sword resting behind her. - 15.3s: the round mesh grille on the beige housing fills the frame in close-up. With a sharp hiss, dense white steam forces out through the mesh holes in a thick jet, and the two small cylinders beside it twitch. Her gloved fingers tighten on the grip. SHOT 6 — 16.0s to 20.0s, from behind, the cut and the exit - Camera: on a tripod low on the right ledge, just behind the two right posts on the bridge side, looking past the posts at her back and the black crevice ahead of her. A normal lens. - 16.3s: without turning around, she swings the sword back in one effortless, lazy stroke. The steam jet from the grille drives the blade around behind her in a short, low, tight arc that passes cleanly through both wooden posts right in front of the camera, and the momentum carries it straight back into its trailing position in her hand. - The cut posts tip over, the ropes whip loose, and the end of the enormous bridge drops away out of the bottom of the frame into the chasm. - A thin arc of steam hangs in the air behind her and slowly dissolves. - Her body never turns. She simply walks on into the black depth of the crevice, the sword scraping behind her, until the darkness swallows her. - The frame holds on the dark crevice and the drifting steam until the last frame, with the long groan of the falling bridge echoing from below. PHYSICS - The bridge: each of her heavy steps presses the deck down, sending a slow wave along its great length, and the whole bridge sways sideways with a delay. The hangers stretch and slacken, and the rope rails creak and twist. - The sword has real mass: it drags, gouges and catches on the plank edges. Wood on metal makes a dry scrape with no sparks. - The steam comes only from the round mesh grille on the guard housing, as a dense white jet pointing opposite to the blade's motion, like thrust. It billows, hangs along the arc and fades. - The cut: one fluid, effortless flick driven by the steam thrust, not a muscular swing. Her feet stay planted and her body faces away from the bridge. - The collapse: with the right anchors cut, the 100-meter bridge falls away from the ledge into the chasm like a heavy chain, slowly, because of its enormous size, with planks shedding and snapped ropes recoiling with frayed ends. It is purely mechanical: wood and rope, with no explosions, sparks or debris near her. - Falling objects take as long to fall as the real height demands, without floating. - Water drips fall in straight fast streams, the river churns and throws up fine mist, and the wet rock glistens faintly. AUDIO - No music. - The cave: the deep, distant roar of the river, the hiss of falling water, echoing drips and a cold draft. - Her crossing: heavy boot thuds, cracking planks, groaning ropes and the long dry grind of the sword, all with long cave echo. - The plank's splash arrives late from far below. - The grille: a sharp, building steam hiss. - The cut: a whoosh and a double wooden crack, then the long groan and distant crash of the falling bridge echoing through the cave, while her footsteps fade into the crevice. - No breathing sounds. POSITIVE LOCKS - Six cinematic shots, each from a different angle, never using the camera angle of <<<image_1>>>. - A dark cave lit only by dim, diffuse natural light, with deep shadows everywhere. - The bridge is 100 meters long and she is tiny against it in the wide shots. - She is identical to <<<image_2>>> in every shot, moving with effortless strength. The sword is massively heavy and always in her right hand, and she always moves from screen-left to screen-right. - The steam comes only from the round grille. - Shot 5 is one continuous head-rig shot that ends on the grille close-up. - She stops on the ledge, cuts the bridge without ever turning around, and walks into the dark. She never sighs and never looks into the lens.

Schritt 5: Prüfe jeden Frame gegen den Establishing Shot

Lege jeden neuen Frame neben den Establishing Shot und prüfe die Details, die du in Schritt 2 aufgelistet hast. Wenn ein Detail abweicht, benenne es direkt im nächsten Prompt oder generiere den Winkel neu.

Schritt 5: Prüfe jeden Frame gegen den Establishing Shot

Prüfen

Worauf du achten solltest

Hell

Kommt in jedem Frame von derselben Seite

Wichtige Objekte

Dieselben Objekte, dieselbe Position zueinander

Oberflächen

Dieselbe Wandfarbe und dieselben Materialien

Charakter

Dasselbe Gesicht, dieselben Haare, dieselbe Kleidung

Beispiel: Eine Location, fünf Shots in einer Generierung

Wir haben eine Höhle mit Seilbrücke als Location-Element und ein Character Sheet als Character-Element gespeichert. Dann haben wir ein 20-Sekunden-Video in Cinema Studio 4.0 generiert (1080p, 16:9, mit Ton), mit beiden Tags im Prompt. Die Version, die wir behalten haben, brauchte 3 Versuche. Wir haben diesen Test am 05.11.2026 mit einem bezahlten Tarif durchgeführt.

Beispiel: Eine Location, fünf Shots in einer Generierung

Shot

Uhrzeit

Kamera

1

0:00 bis 0:02

Auf der Brücke, Blick auf den Charakter, während sie die Brücke betritt

2

0:03 bis 0:05

Totale der Höhle und der Brücke vom Felsvorsprung aus

3

0:06 bis 0:10

Von unterhalb der Brücke, dann vom Fluss hinauf zur Lichtöffnung

4

0:11 bis 0:15

Nahaufnahme des Charakters mit der Brücke hinter ihr, dann ihre Hand an der Waffe

5

0:16 bis 0:20

Gegenschuss: von hinten, während sie zurück zu den Brückenpfosten geht

Über die fünf Shots hinweg kehrten dieselben Details zurück: die Holzbrücke mit ihren Seilen, die dunklen Felswände, die Lichtöffnung oben und der Fluss darunter. Was sich von Shot zu Shot änderte, war der Kamerawinkel.

Die Konsistenz-Checkliste

Bevor du eine Szene mit mehreren Shots generierst, prüfe:

  • Location-Element ist gespeichert: ein Establishing Shot, der Layout, Lichtrichtung und wichtige Details zeigt.
  • Character-Element ist gespeichert: ein klares Porträt oder Character Sheet, oder dein Charakter mit Soul ID, der bereits in My elements liegt.
  • Beschreibung listet die festen Details auf: die Dinge, die sich zwischen den Winkeln nicht ändern dürfen.
  • Einstellungen sind für jeden Winkel gleich: Film setup, Camera, Color palette, Lighting.
  • Jeder Prompt hat beide Tags: @Character und @Location, plus den Winkel jedes Shots.
  • Jeder Frame ist geprüft: gegen den Establishing Shot, bevor du weitermachst.

Was kostet es?

Ein Video in Cinema Studio 4.0 mit 1080p, 16:9 und Ton kostet 16 Credits pro Sekunde. Unser 20-Sekunden-Clip kostete 320 Credits pro Generierung (≈ 15,68 $). Mit 3 Versuchen kostete der Clip, den wir behalten haben, 960 Credits (≈ 47,04 $).

Was kostet es?

Videolänge

Credits

Ungefähre Kosten

5 Sekunden

80

3,92 $

10 Sekunden

160

7,84 $

20 Sekunden

320

15,68 $

20 Sekunden, 3 Versuche

960

47,04 $

Die ungefähren Kosten basieren auf 49 $ für 1.000 Credits. Preise geprüft am 05.11.2026. Preise und Tarifdetails können sich ändern, die genauen Kosten stehen auf dem Generieren-Button. Die Tabelle umfasst nur das Video, nicht die Bilder, mit denen die Elements erstellt wurden.

Gesichter und Orte driften aus demselben Grund: Das Modell interpretiert eine Textbeschreibung jedes Mal neu. Die Lösung: Gib ihm für jeden Shot dieselben gespeicherten Referenzen. Elements in Cinema Studio 4.0 machen daraus eine einmalige Einrichtung statt eines erneuten Uploads für jeden Winkel.

Für die Wahl eines Charakter-Tools sieh dir unseren Guide zu Tools für konsistente KI-Charaktere an. Für einen wiederkehrenden Markencharakter lies, wie du ein Marken-Maskottchen erstellst.

Wie du Charaktere und Locations über KI-Shots hinweg konsistent hältst (Guide 2026)

Cinema Studio 4.0 testen

Noch offene Fragen?

von Higgsfield