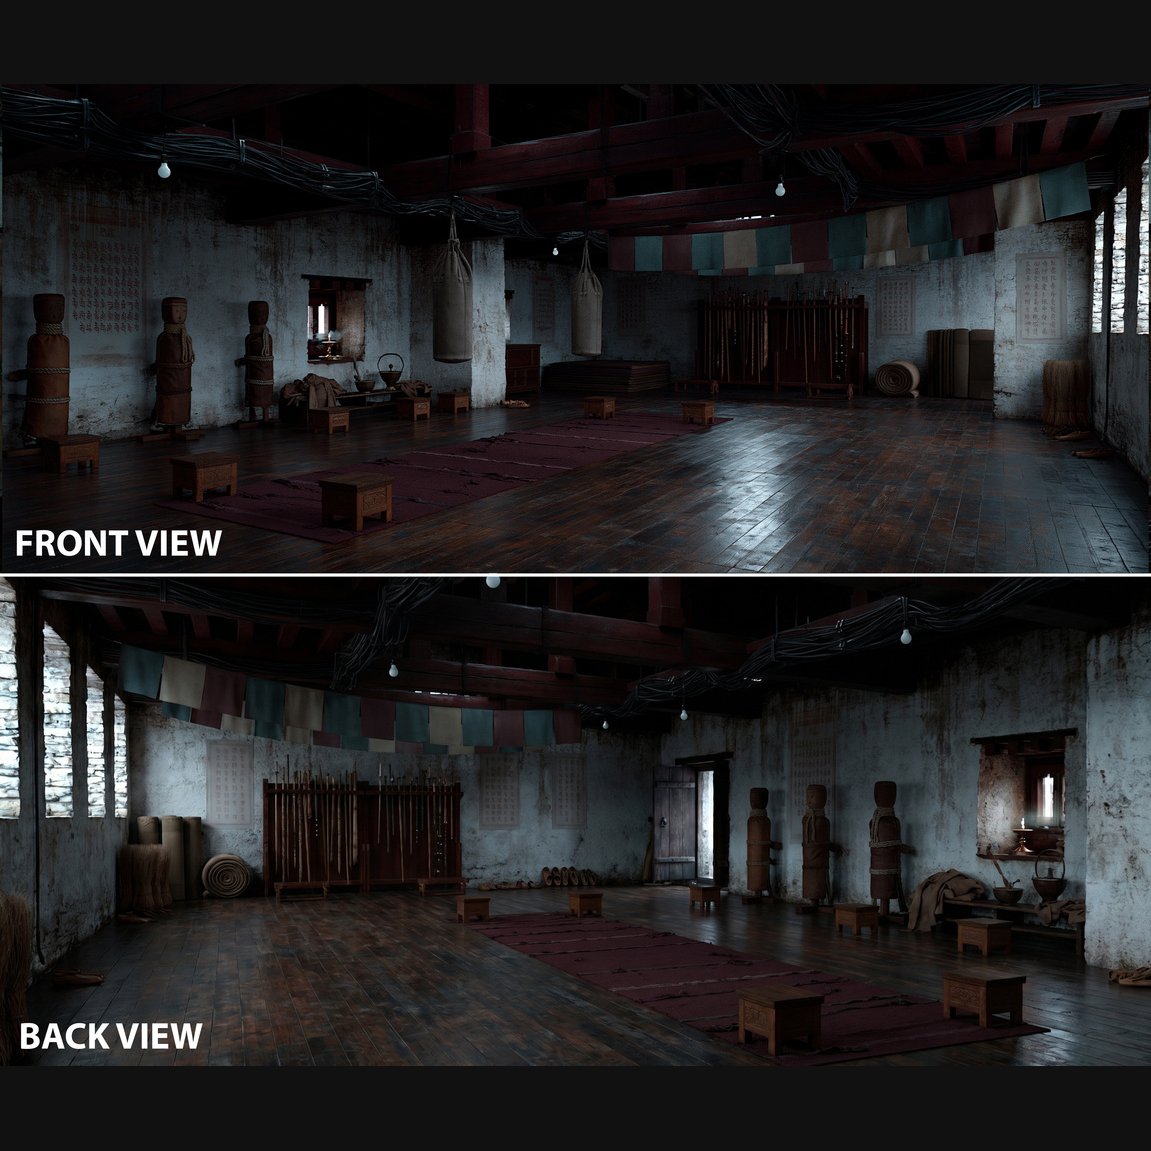
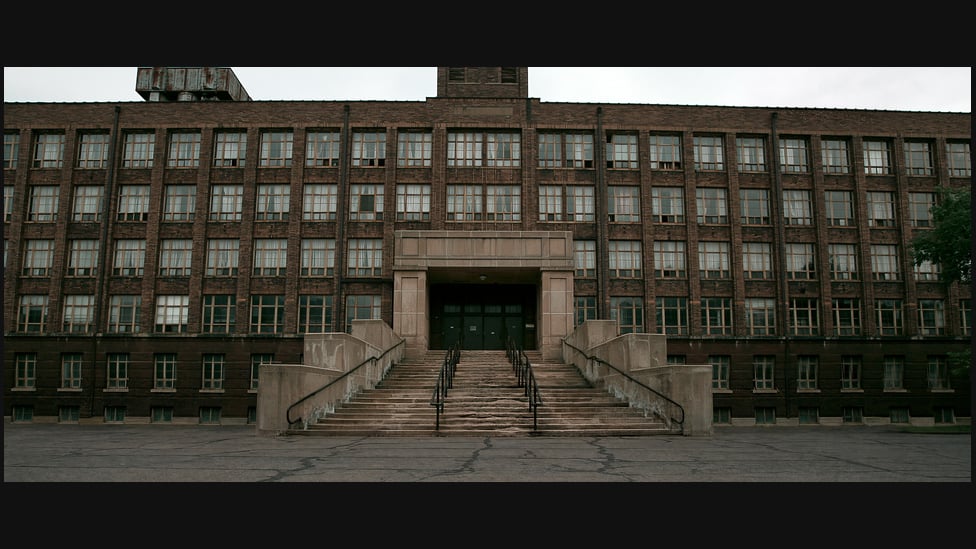
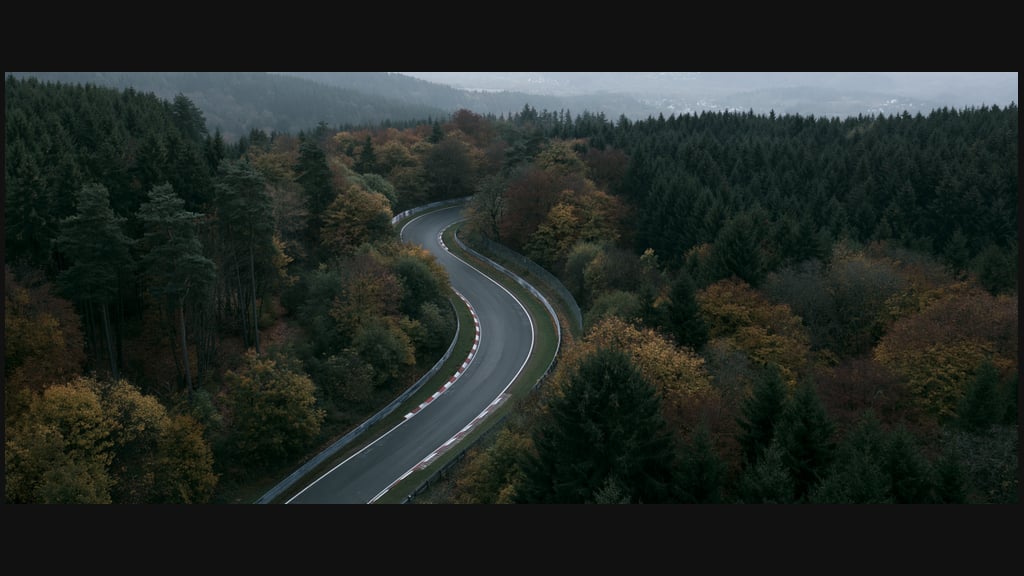
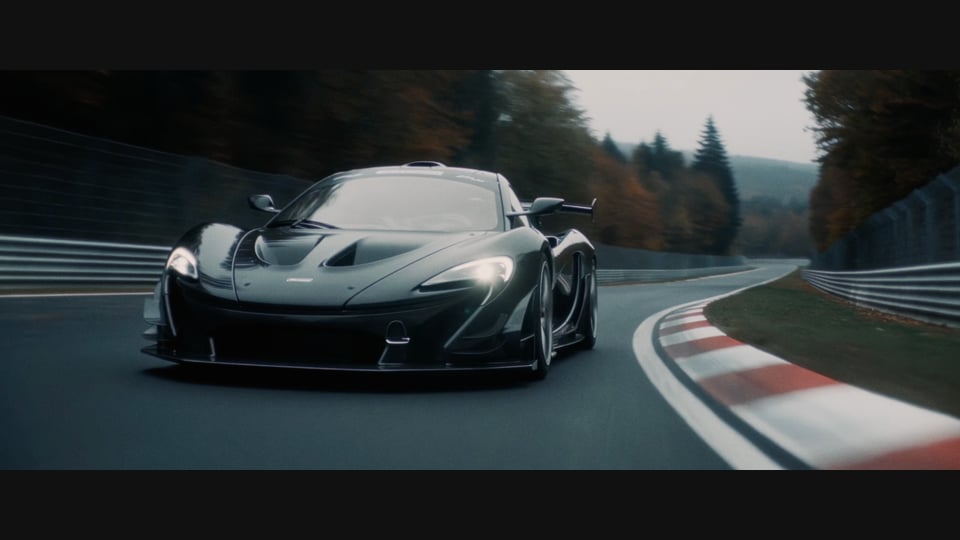
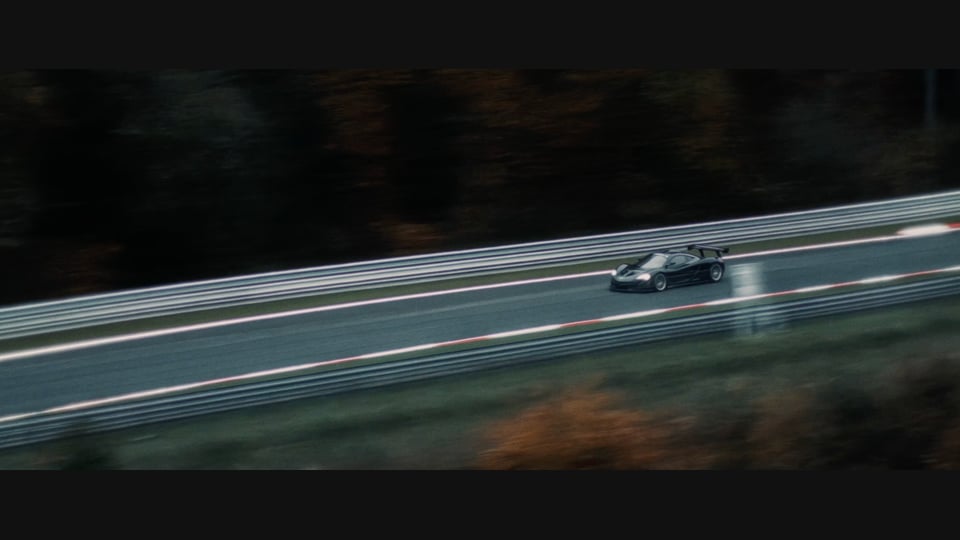
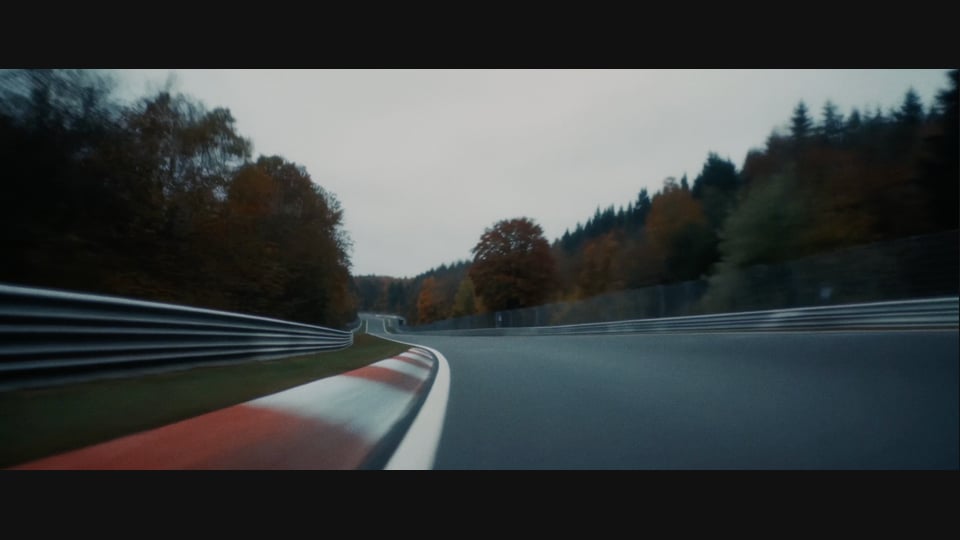
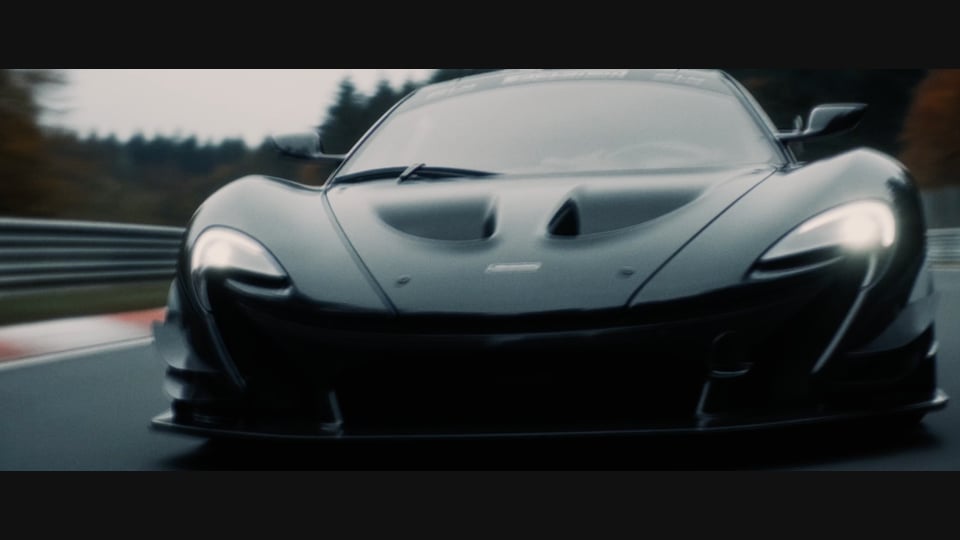
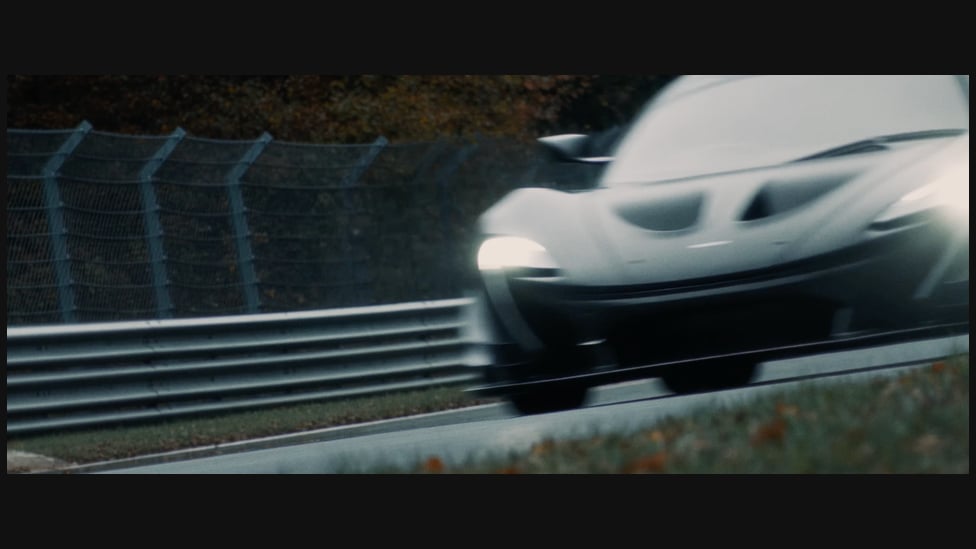
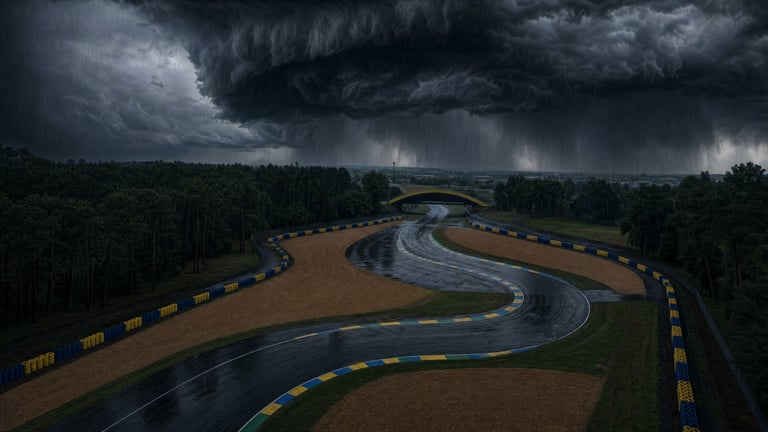
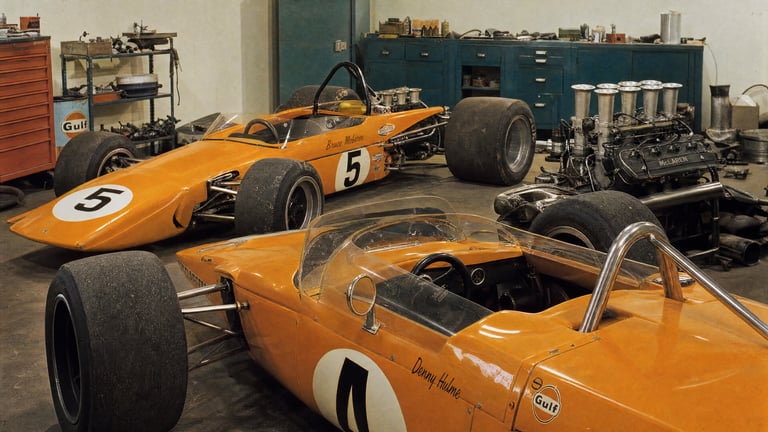
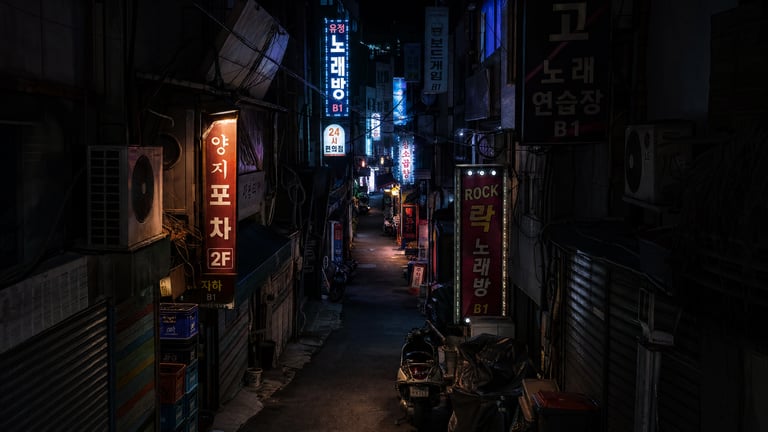
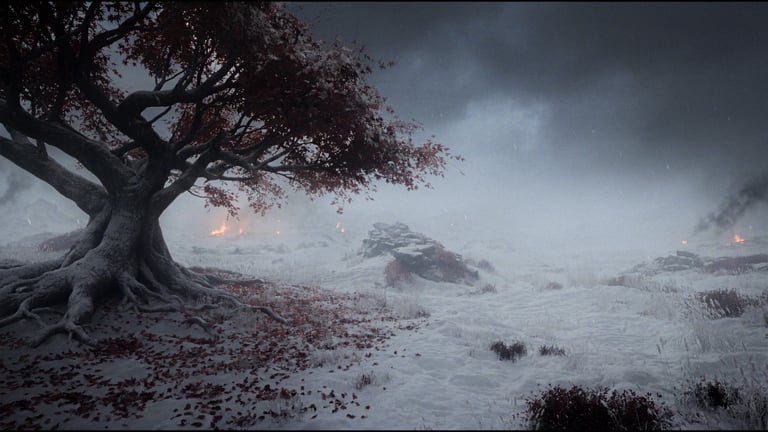
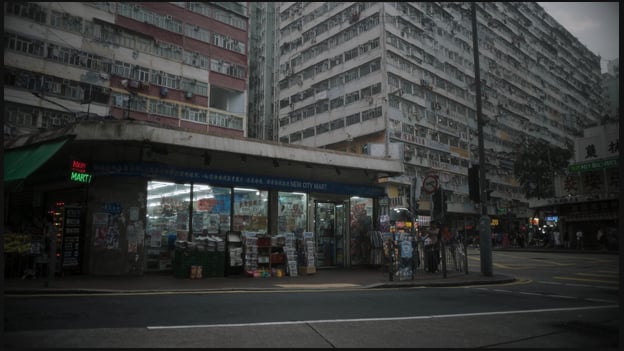
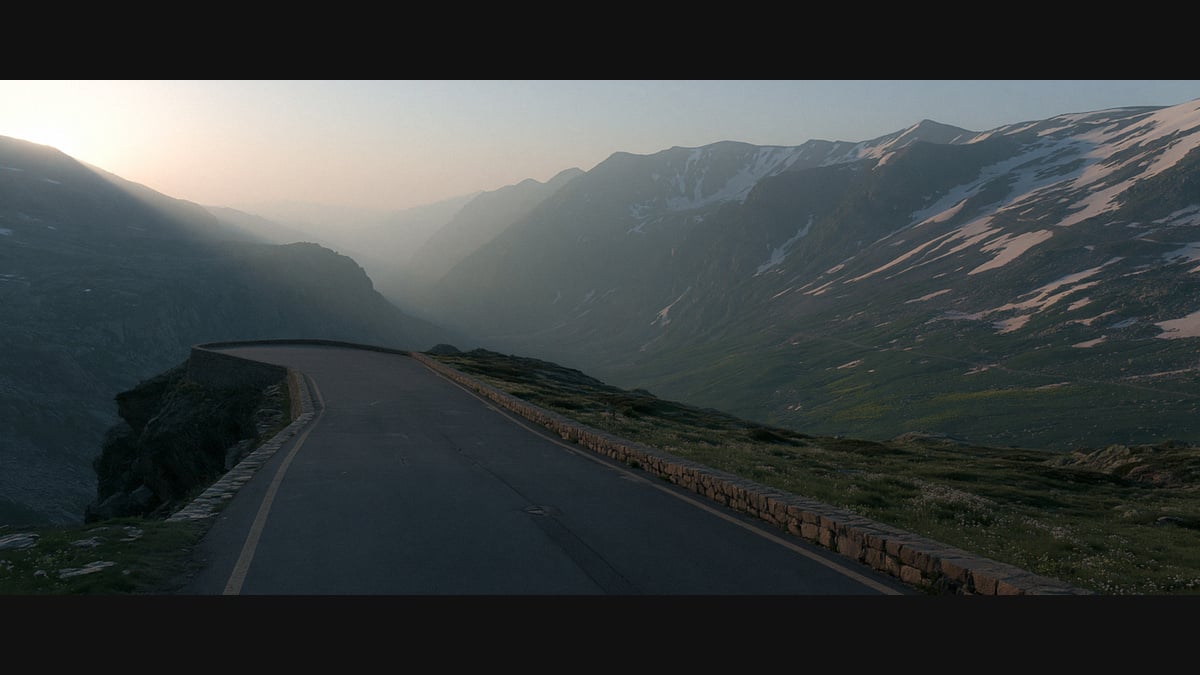
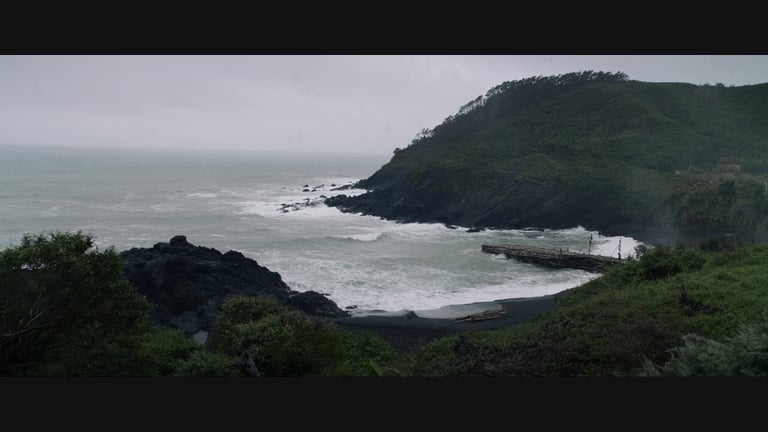
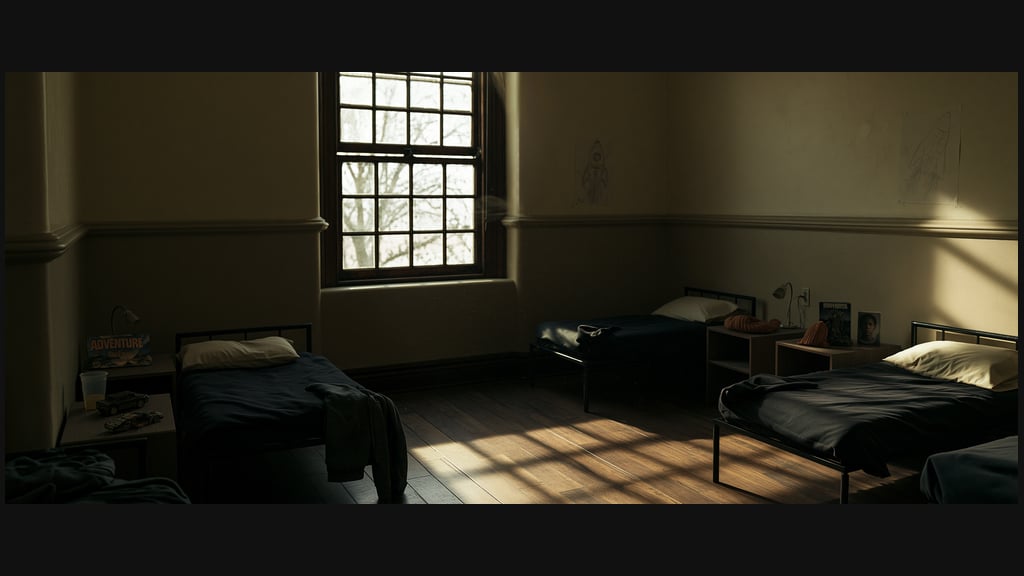
A strong prompt is made of concrete visible things: what the object is, what it does, where it stands, where it looks, how the camera moves, what the light is, how tight the frame is.
3.1 How a prompt thinks — principles and architecture
Write what is visible
If you read your prompt and can’t picture what it describes, the model certainly can’t make what you intended. The model doesn’t “feel a mood” — it reacts to what can be seen and measured. The most common mistake is describing an impression: “epic,” “beautiful,” “dynamic,” “expensive-looking.” To the model these are empty words; it doesn’t know how to show them. A strong prompt is made of concrete visible things: what the object is, what it does, where it stands, where it looks, how the camera moves, what the light is, how tight the frame is.
The working rule: translate every abstraction into something observable. Not “a tense scene,” but “the man freezes, slowly clenches his fist, light only from the side, half his face in shadow.” If a phrase can’t be seen, it probably needs rewriting or deleting.
Weak (impression):
cool cinematic shot of a car, epic, fast, lots of movement
Strong (visible):
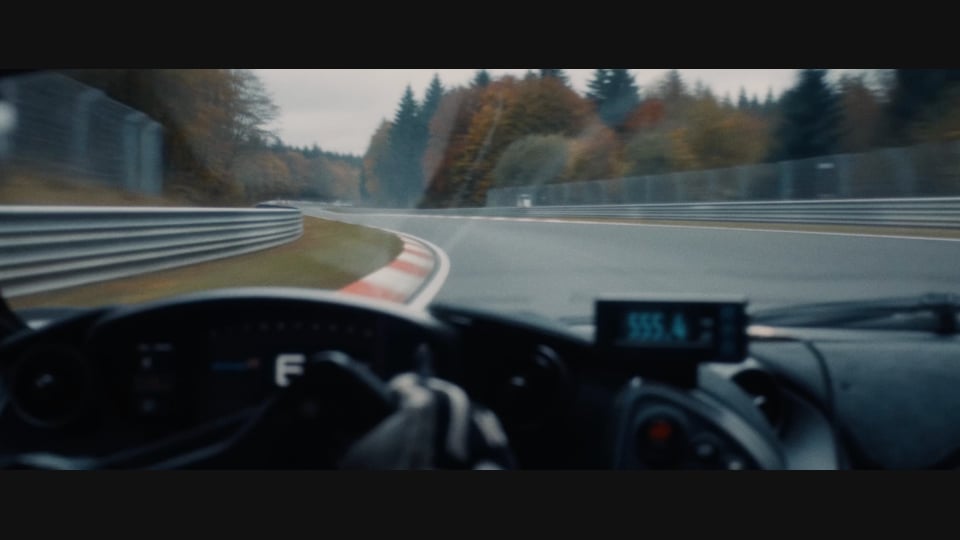
low tracking shot alongside the car as it powers through a wet curve, headlights glowing, spray off the tyres, hard buffeting camera shake
Check yourself with a viewer’s eyes: once a shot is written, mentally “watch” it. Is everything unambiguous? Is the first frame non-empty? Is it clear where the subject is and where they’re looking? Where the light comes from? That quick self-check matters more than adding more beautiful words.
Simple words, concrete numbers
Seedance likes plain, direct formulations — “the man walks, stumbles, falls onto his right side.” It does not like abstract words like “fast” or “hard”: instead of “fast,” write “90 km/h.” Prefer direct visual verbs (stands, faces, looks, holds, walks, raises, touches, leans, breathes, drips, falls, slides, presses, turns, opens, closes, enters) and measurable language (within 1 meter, screen-left, foreground, midground, background, at hip height, at eye level, 47° diagonal field of view, 0:03, one step, two characters, three visible people). Avoid over-complex nested clauses, and avoid vague psychology unless it appears as visible behavior.
Constraints are written in the positive
Start with the desired state: “the character is alone in frame,” “clear dry night,” or “clean air.” Add a short exclusion only when it resolves a known failure. Negative-only lists are a poor substitute for staging, but a necessary local lock such as “no music” still belongs in the brief. Judge the instruction by the returned result rather than assuming one wording rule works for every mode.
When a known failure must be blocked, put a short local lock right next to the positive rule it protects — “Faces remain in deep shadow; no flat front light” — rather than a big standalone NEGATIVE block at the end. Positive control is stronger than negative-only control: write the desired state first, then the forbidden failure only if needed. If no lock is necessary, write none. (A lock is a short hard fixing phrase that stops the model drifting off an important detail — “headlights stay glowing in every shot.” It’s your insurance against typical failures.)
Good local negatives, when they earn their place: no duplicate characters · no extra people unless specified · no unused @tags · no empty first frame · no wrong gaze direction · no flat front lighting · no CG gloss · no game-engine look · no floating motion · no subtitles · no music.
Dense where control matters, sparse everywhere else
The prompt should be dense only where control matters.
High detail is required for:
identity anchors, spatial blocking, the first frame, gaze lines, landmark proximity, hand states, prop states, timed action, optics, the lighting lock, physics, and dialogue.
Lower detail is preferred for
generic beauty description, non-critical costume detail, background extras, non-active props, and anything already obvious in the reference.
Fewer words, but exact, beat many general ones: the model responds to specificity, not to length — decorative adjectives only add noise and provoke instruction conflicts. Improvement comes from stronger signal, not more bloat.
The prompt is a sealed document
You hold the whole project in your head — the story, past scenes, who is who, what happened in the previous shot. The model knows none of it. Every generation is a blank slate: no memory of previous shots, no sense of “the overall story.” Everything that matters for this shot must be written in this shot; everything that belongs to other shots or to your internal context only gets in the way.
Never carry into the prompt: scene numbers, episode labels, script headers, summaries of previous scenes, unused @tags or characters, people or objects that were only mentioned in earlier dialogue, or the words “previously,” “again,” “same as before,” “continues,” “from last shot,” “as above.” The model doesn’t understand “as before” — it has nothing to compare against, so it either ignores the phrase or invents something. If it isn’t visible or audible in this exact shot, it doesn’t belong in the prompt.
Style support staging
Style supports control; it does not replace it. Keep identity, blocking, action, camera, and lighting unambiguous. This team commonly writes those decisions before the aesthetic layer (3.9). Other valid templates begin with a global look; use a consistent project convention and adapt it to the operation.
The architecture: a prompt as a map of blocks
A prompt is a set of blocks with different jobs. The table below is the team’s scene-first convention: establish context, references, and space, then direct camera, action, light, and sound. Omit blocks that carry no decision. Do not bury placement rules in style prose. This is a working template, not a required parser order; the Seedance 2.5 notes below explain how to scale it to generation, editing, and extension.
The architecture: a prompt as a map of blocks
Block
What it carries
SCENE CONTEXT
One or two short sentences: what happens in this shot only, and why — state of the characters, objects, and setting
ACTIVE REFERENCES
The @tags used in this shot, each with a minimal description (3.2)
LOCATION MAP
Where the camera is, foreground/midground/background, landmarks, character positions, movement paths, where the light comes from (3.4)
FIRST FRAME AND SPATIAL BLOCKING
Who is where in frame one — positions, orientation, gaze (below)
FORMAT MODE
One continuous take, or a controlled multi-shot with defined cuts (below)
OPTICS
Shot size and lens character, in degrees of field of view (3.5)
Source, direction, exposure priority — a lock, not a mood (3.6)
AUDIO
Only the needed sound and lines — and never music (3.8)
POSITIVE LOCKS
Short fixing phrases against the likely failures of this specific shot
Output settings stay in the interface, not in the prompt. Duration, aspect ratio, reference mode, fps, model name, resolution — if you select them in the prompt box, don’t repeat them in the text; repeated settings are noise. Include a setting in the prompt only when it is story-critical or not handled by the UI — useful prompt-level settings are things like “single take or controlled multi-shot,” “real-time or slow motion,” audio rules, subtitle rules, dialogue rules. Good: “Controlled multi-shot sequence with one HARD CUT at 1.0 second. Real-time motion. No subtitles, no music.” Bad, when the UI already has it: “8 seconds total, 21:9, R2V multi-reference, 24fps, 180-degree shutter.”
Scene context, precisely. One or two short sentences describing what happens in this shot only — a simple piece of context that doesn’t appear in frame but tells the model what state everyone is in. Example: “A wounded young man stands beside a lone tree in a blizzard while two friends face him from the foreground. He slowly raises a crystal sword and quietly refuses to continue.” No scene numbers, no prior-scene summaries, no characters who aren’t in this shot, no script headers.
First frame and spatial blocking
Blocking is the film term for placing people and objects in the frame and defining their movement — you are the director putting actors on their marks. Where everyone stands and where they look must be said directly, not left for the model to guess.
The first frame. If subjects must be there at the start, say it outright — Seedance works with the scene far better when the first seconds are staged. Use the occupancy lock:
The first visible frame already contains all required characters in their correct positions. No empty establishing frame. No delayed character reveal. The spatial relationship is readable immediately in frame one.
An empty opening is allowed only when you deliberately want one — then state at which second who enters. A flash cut or a very short establishing cut must still carry the required subject or location information immediately: no empty flash cuts, no abstract filler, no random landscape insert.
Positions in measurable words. The model reads “near / around / beside / somewhere / nearby” however it likes. Replace weak words with physical ones: within 1 meter · touching · boots planted inside the root circle · back against the wall · hand on the door handle · standing directly under the sign · in front of the rear passenger door · at the south kerb edge.
Screen coordinates for complex scenes. When there are many subjects or landmarks, give positions by thirds of the frame or in percentages (x: 0–100% left to right, y: 0–100% top to bottom) plus a depth plane (foreground / midground / background). Also write what position the characters are in at frame one (running, standing, sitting), which way they are turned, and where their gaze goes.
Body and gaze are two different things. Describe them separately: “torso faces X, eyes stay locked on X.” A body can face the camera while the eyes look past it. Useful forms: head turns toward X · back faces camera · profile faces screen-left · character looks past camera toward X · character does not look away unless specified.
Anchor to a landmark. If a character must be at an object, pin them physically — “@ROCO_COLD stands within 1 meter of the lone tree trunk, boots planted inside the exposed root circle” — never “near the tree.”
A full blocking passage, as it looks in practice:
@ROCO_COLD stands within 1 meter of the lone tree trunk, boots inside the exposed root circle. @JAX_LATE and @REIN_LATE stand together in the foreground, facing @ROCO_COLD. Jax is camera-right of the pair. Rein is camera-left of the pair. Both bodies face Roco. Both gaze lines are locked on Roco. Roco faces them from the tree.
Format mode: one take or controlled cuts
Decide the mode before writing — these are different tools.
Default to a single continuous take (a oner). Switch to a controlled multi-shot sequence when: the user or the piece explicitly needs cuts, flash cuts, montage, insert shots, reverse shots, or hard cuts; the action can’t be clearly staged from one camera position; a critical detail needs an insert close-up; two simultaneous reactions must be shown from different angles; the scene needs geography plus reaction plus detail; or the piece wants trailer-like, fragmented, memory, dream, chaos, impact, or music-video editing.
In a controlled multi-shot, define every cut explicitly — never let the model invent them. For each shot: duration, camera, subjects visible in its first frame, spatial blocking, action; then the cut type; then the next shot the same way. A useful lock: each segment is one continuous shot, cuts happen only at the specified points, the camera does not cut by itself.
Every internal cut preserves continuity: the same active character list, the same location geography, the same screen direction (unless the camera angle deliberately changes), the same gaze targets, the same left/right relationships, the same lighting direction, wardrobe, wounds, props, hand states, and the same blood, snow, dirt, sweat, water, fire, and smoke states. Do not reset action after a cut, do not teleport characters, do not change distance to landmarks unless time and movement justify it, and do not introduce new props or characters after a cut.
Cut types — use only explicit ones: HARD CUT, SMASH CUT, MATCH CUT, INSERT CUT, REVERSE CUT, WHIP CUT. Fades, crossfades, and dissolves only if deliberately requested; otherwise lock them out: “NO fade-to-black. NO crossfade. NO dissolve. HARD CUTS only.”
The opposite mode exists too. Sometimes it pays to give the model freedom — a freestyle multi-shot you will later cut into b-roll. Then you don’t lock the cuts hard; you let the model sketch different angles and movements and do the selection in the edit. Choose the mode by the goal: a precise story shot, or material in reserve. (Building whole scenes out of shots — chained beats and storyboards — is Part 2, section 2.8; the team’s shotlist workflow is 3.11.)
Match the prompt to the operation
Decide what the model must invent and what the source already supplies. Use the full scene architecture for a new shot. For an edit, identify the target, describe the change, and state what must survive.
Genjutsu Object Swap. The clip supplies the existing performance. Identify the object or person being replaced and attach the replacement reference. Add text when the intended substitution needs clarification; a preset may supply the instruction. Example: “Replace only the shoulder bag with the bag in the attached product reference. Keep the actor, outfit, hand movement, camera path, and background.”
Genjutsu Motion Transfer. Separate movement from appearance. Example: “Use the source clip for the dancer’s movement and camera timing. Use the character reference for appearance and the location reference for the room.”
Seedance 2.5 Edit. Name the local change. If the target is ambiguous, use Draw to Edit where available. Example: “Replace the marked wall poster with the attached design. Keep its perspective and position. Preserve the people and camera movement.”
Extension. Describe the state at the join and the next action. Keep the existing references and continuity decisions attached to the shot.
Preservation is an acceptance criterion. Compare the returned clip with the source, including the frames before and after the edited element is obscured.
Seedance 2.5 — scale the structure to the scene
For a new multi-shot sequence, use labeled sections: global look, scene, active references, location, first-frame blocking, individual shots, camera, physics, lighting, and audio. Give each shot its own action and intended transition. State explicitly whether the result is one continuous take or a sequence with cuts.
A simple shot can use a shorter brief. When a reference already defines appearance, identify its role instead of writing a competing description. Use only the sections that carry a real decision.
The team’s block order is a working convention. Keep it consistent within the project, but adapt the prompt to the operation and active controls. A clear instruction in the correct mode matters more than reproducing a heading sequence.
The settings are part of the brief
Record the model, mode, references, and selected controls beside the prompt. In Cinema Studio, inspect genre, tempo, lighting, and camera settings before rewriting a scene that repeatedly misses the intended treatment. Remove conflicts between those controls and the text.
Prompt length is not a quality setting. Give the shot a clear purpose, order the actions, and move exact appearance into references. If several competing demands fail together, simplify the shot or divide the sequence before adding more adjectives.
Review adherence separately from visual appeal. A polished result still fails if it changes the required object, action, screen direction, or spoken line.
3.2 References, tags, and assets
The reference and the text are one mechanism
A reference image is the source of truth for appearance: face, body, proportions, costume, texture, color. Don’t rewrite what it shows in prose — a long description of appearance conflicts with the picture and destabilizes it. But Seedance will not guess what matters in the scene. The reference shows how something looks; it does not say what it does, how it moves, what must stay unchanged, or what to look at. That is the text’s job. So the pairing is:
The reference → appearance and identity (“take the face / the body / the costume from here”).
The text → action, movement, timing — and explicit locks on the critical details that must survive 1:1: lettering, logos, colors, hand states, props, “headlights stay glowing.”
Say the important things in words even if they are “already on the reference” — otherwise the model can lose or distort them, especially small text and logos. The rest — let the picture do its work.
@tags: the handles
An @tag (for example @char_W1) is the handle of an attached reference; you write it in the prompt exactly where the object must appear. On the site, references are saved as Elements, and the @ is added automatically — that is what pulls the element straight into a prompt.
The rules are strict. List only the @tags active in this shot. Keep them exactly as provided. Never invent new @tags. Never carry a stale @tag from a previous shot — the model will try to force that object into the frame. Every @tag in the final prompt must correspond to something visible or required in the current shot.
Naming standard
Element and file names follow one convention, agreed inside the team at the start of every project:
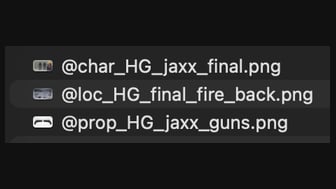
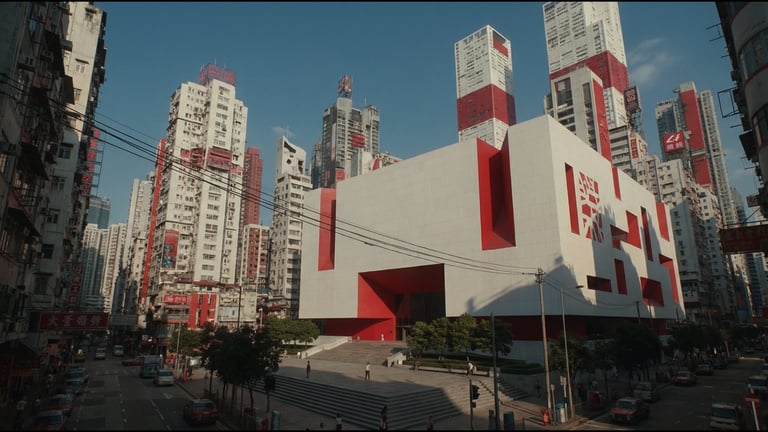
@loc_project-name_name for locations — e.g. @loc_HG_museum_front
@char_project-name_name for characters — e.g. @char_HG_Jaxx
@prop_project-name_name for props (a sword, a phone…) — e.g. @prop_HG_phone
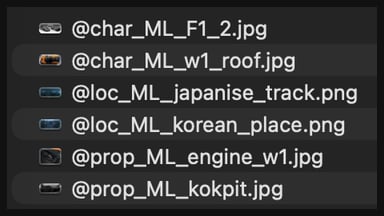
The project prefix matters: a museum location can exist in several projects, and the prefix prevents name collisions in your file system and in the site’s Elements panel. When you create an element on the site, you type the name without the @ — the symbol is added automatically. And Claude must know these exact names, because it writes them into prompts (3.11).
Describing a referenced character: the formula
Describe each referenced character with only the minimum critical anchors needed for this shot:
@TAG: age + role/body type + current state + unique visible identifiers + action-critical body parts or props + voice (only if there is dialogue).
Always include the age (the character’s voice depends on it), the temperament where acting matters (“blunt, hard, strict” — it drives how the character behaves in frame), and the important particulars you decide are critical — blood on the face, a bandaged hand. Do not include full facial anatomy, costume detail already clear in the reference, random adjectives, old injuries irrelevant to this shot, props that aren’t visible or used, or relationship labels that don’t affect the frame. Two real examples:
@ROCO_COLD: 20yo lean wounded male, cropped dark messy hair, torn dark shirt, left hand bandaged, bare right hand bloodied and holding the sword.
@JAX_LATE: 20yo dark-skinned male, raw emotional state, bleached buzz cut, green war-paint stripes, safety glasses, black tactical jacket.
Expanded detail only when it is action-critical — a hand state, a wound, ownership of an object, a transformation — or when the model has been consistently getting a detail wrong, in which case you spell that detail out and lock it separately.
Location reference: architecture, materials, geography, atmosphere, landmarks, lighting direction if relevant — geography, not framing. Never let a location reference dictate the camera angle or composition unless you explicitly ask for that (3.5).
Prop reference: shape, scale, material, hand contact, state.
Style references never override identity, spatial blocking, action, optics, or lighting (3.9).
For multi-character staging there is one more reference type: the staging reference — a color-coded outline schematic that carries positions only, with its own tag pair (@staging_ / @loc_) and one hard rule: it attaches last, after the location and character references. The full method is the Diagram Skill (3.11A).
More reference slots, clearer reference roles
The current model may accept more material than an earlier version, but the reference set still needs one coherent explanation. Assign roles explicitly: identity, location, product, style, staging, motion, audio, or boundary frame. When two references conflict, state which owns that decision or remove the conflict before generating.
Keep a short reference map with the shot: file or element name → role → facts that must survive. Use the actual element names and input handles exposed by the active tool. Do not invent @tags, and do not assume one surface’s token syntax works in another.
For independent variants, branch from the canonical source. For a deliberate edit chain, preserve the original and every accepted checkpoint. An output becomes the next input only after its intended change and preservation requirements pass review.
Keep source provenance with the reference map: where the asset came from, what use is authorized, and which project it belongs to. For a video source, account for its sound and visible background material as well as the replacement target. Recasting the subject does not turn the rest of the source into an original team asset.
Preparing an input — the standard
Before any file becomes an element, two things get settled once.
Know the contract. Every model treats an attached image in one of two ways, and the model tables in 1.3 and 1.4 say which. Edit material means your image is preserved and then modified — the Seedream editors, GPT Image 2 edit passes. Context only means your image is consumed as inspiration for a new one — the Soul models. “It ignored my reference” is usually a context-only contract doing exactly its job. The Soul models add one more rule: text or a reference, never both in one run — steer them in alternating single-mode rounds.
Prepare the file, once. Clean of watermarks, borders, and UI fragments — a dirty reference gets reproduced as content. One subject per file — a group photo yields the wrong person or a blended face; when the background pollutes, remove it first (1.7). If the file is soft, run one faithful upscale and store the upscaled copy — a soft reference caps every generation built on it (1.7). And outpaint it once to the production ratio (3.4), so generations stop improvising the edges differently every run (1.7). Prepare once, store the prepared copy, and attach that copy everywhere — never the raw original. Then, in the prompt, address every input and give it a job (1.4): an unaddressed reference is noise the model resolves however it likes.
Capacity, and the trick around it
Seedance takes up to 9 assets. When nine isn’t enough, combine: several props photographed together in one clean image count as a single asset — then name each object and its job in the prompt. These “cassette” moves are how larger sets get through the door. (The full slot arithmetic — frames counting against the total, audio references — is in 1.4.)
Casting, anchors, and approved edits
A recurring asset begins with casting: one description, several candidates, and a winner selected for the specification and information it carries. That approved file becomes the canonical element. Independent variants branch from it. Deliberate edits and continuity-dependent shots may use an approved checkpoint, while the original identity and location anchors remain available for comparison and reuse. Save approved assets in the project’s local working folder and the ordinary production folder (3.11). On the site, like the accepted generations so the shared feed remains searchable.
Protect the canonical source. Make independent variants from that source where possible; use sequential edits only when each accepted change intentionally becomes part of the next checkpoint. Inspect each pass against the original for identity, color, sharpness, and texture drift. When only a local change is useful, mask it back onto the original in Photoshop. Keep the original and accepted checkpoints instead of repeatedly editing an unreviewed output.
Intellectual property — team production rule. Use original characters and unbranded designs unless the project explicitly authorizes owned or licensed material. For the default workflow, remove logos and redesign branded details; blank surfaces also prevent unwanted generated text. Review reference provenance and the model’s restrictions separately. The full process for Genjutsu, Seedance 2.5, permissions, and blocked jobs is in 4.4.
Generated frames tend to keep everything uniformly sharp, and a frame with no focal falloff is one of the quiet tells of a synthetic image. Instead of re-rolling an approved take, add the optics in post: Filter → Neural Filters → Depth Blur. Set the focus point on the subject, then tune Focal distance and Blur strength until the falloff reads like a real lens. The approved generation stays untouched — this is a finishing pass on the original, in the same spirit as masking fixes onto the original instead of stacking edits. (Source: Tigran's master-class.)
3.3 Characters — casting, sheets, and continuity
The pipeline
A character starts before any generation: collect references and build a moodboard, so the team shares a direction. Then describe the appearance through Claude — looks, clothing, particular features — attaching the selected references so the description lands exactly where you want it. Ask Claude to pack the result straight into a character sheet prompt, so one generation returns all the angles you need. A sheet can also be grown from a single generated portrait you already love — sometimes that path is better.
Model routing for characters. Soul Cinema and Recraft V4.1 are the primary generators; Seedream 4.5 and GPT Image 2 also work. AI Cast, inside the Cinema Studio tab, is a strong tool for this too. Nano Banana Pro is used only for editing finished sheets, never for generating a person from scratch — it produces "banana faces": symmetrical, lifeless, and they turn to slop the moment they animate. GPT Image 2 is the lane for creatures rather than humans (its over-detailed skin texture slops on people), and for precise, spec-exact additions on top of a finished character: a specific tattoo, a patterned eye, a metal arm. None of this is a ban — these habits were earned by testing, and a new test can always find a better path.
The character sheet
One prompt, editable through Claude for your task — swap the appearance, clothing, and features. What must stay: the grey background and the split into panels.
Claude understands what a character sheet is and will write you a similar prompt on request — it's worth building one through Claude yourself at least once, to feel the process.
The rules that make a sheet work
The portrait panel is 25–30% of the image. It is the base Seedance reads appearance from — all the facial detail and nuance comes from here. In the initial generation, the face on the full-body panel always distorts relative to the portrait.
Angle the portrait. A three-quarter portrait beats a frontal one — or add a second, smaller 3/4 portrait panel alongside the main one.
Eyes must never read as black. The iris color has to be clearly legible — even dark brown eyes cannot be black, or the eyes carry no light information into Seedance and the tones drift between generations.
A catchlight is mandatory. As in photography and in film frames, the glint in the eyes is what makes a character alive; without it, the video generations come out dead-eyed.
Break the symmetry. Perfect facial symmetry is a common cause of slop and the "AI look." Real faces are symmetrical but not perfect — the right side subtly differs from the left. Watch for this at the face-generation stage; it shows up in the final result.
Not a game render. A sheet that looks like a 3D game model or a toy gets animated by Seedance like game-screen material. Realistic skin and fabric texture is the point.
Keep large facial details to a minimum. Wrinkles, pimples, and other bold face marks get exaggerated almost every time in Seedance — start the character with as few of them as possible.
Write the small imperfections in. The flip side of the rule above: bold marks get exaggerated, but skin with zero flaws reads as AI at a glance. Give the face small, real ones — a couple of moles, faint acne marks, uneven skin texture — written directly into the sheet prompt. The sample sheet above already carries this layer (freckles, subtle imperfections); keep it when you swap the appearance. It is the imperfections that make Seedance render skin as skin.
Deep grey background, not white and not black. White bleeds into the video generation and lightens your location; on pure black, details get lost. The dark grey (#3a3a3c) is the working middle.
The decapitation trick. Crop the head off on the full-body panel. Seedance is then forced to take the face texture from the portrait panel, where there are more pixels and more accurate detail — instead of from the small, always-distorted full-body face.
Editing a sheet
Editing means the face and the skin texture of the character do not change — you change only the targeted spots. The pipeline is fixed:
Edit the original in a model. Seedream 4.5 is the main sheet editor — it re-dresses and adds/removes details without introducing banana or GPT textures (its cost: it slightly shifts the character's position or angle, so the Photoshop pass takes longer). Nano Banana Pro handles most general edits; GPT Image 2 handles text and mathematically precise details.
Take the new variant and, in Photoshop, transfer only the changed regions onto the original with a mask or eraser. The original stays untouched everywhere else.
Regenerating instead of editing is also allowed — it depends on the task. What is never allowed is generating over an already-edited output: textures layer into dirt, and the sheet dies (3.2).
Test on video, immediately and often
A finished, edited sheet must be tested in Seedance before it is trusted — and tested on a good, clean location, so you know whether any slop comes from the character or not. Around 70% of a generation's quality comes from the location: a slightly imperfect character is carried by a strong location, but on a slop location even a great character fails the check.
The testing rhythm: two batches of four generations. When one detail bothers you and you don't know whether it's worth fixing — throw the sheet into eight test video generations. If the problem shows in all eight, change it. Test as much as possible: a full day spent polishing an asset that was never once tested on video is a day at risk — if the video comes out slop, the work was inefficient, whereas constant testing surfaces problems the moment they appear. (The full iteration discipline is 3.10.)
Slop sheets — what they look like
A dirty, layered texture (edits were generated on top of edits instead of masked in Photoshop). A full-body face that differs from the portrait. A plastic, game-render look. A portrait panel too small to carry the information. A colored rim light — say, orange — that then bleeds into every generation. And the classic banana version: maximum facial symmetry, soapy skin texture, no dominant portrait panel, the whole thing reading like a game model.
The character inside a video prompt
Once the sheet is an element, the character enters prompts through the formula in 3.2 — age (it selects the voice), temperament (it drives the acting), state, action-critical details, "100% matches the reference." The skin imperfections travel with it: name them in the character's line — small mole on the left cheek, faint acne across the forehead — because the realism they buy on the sheet survives only if the words keep insisting on it in every prompt. For programs where one person must recur across many projects, the platform's trained-identity route (Soul ID Character, 1.3) plugs into the same place; the sheet pipeline above is the film-production route.
3.4 Location
Locations decide more than anything else in the pipeline — around 70% of a video generation’s quality rides on them (3.3). A location is developed, edited, and tested like a character.
Prompting a location through Claude
There is no universal recipe for image prompting; there is one working approach — use Claude to turn your (sometimes messy, fragmentary) thoughts into prompts a generative model understands. From this:
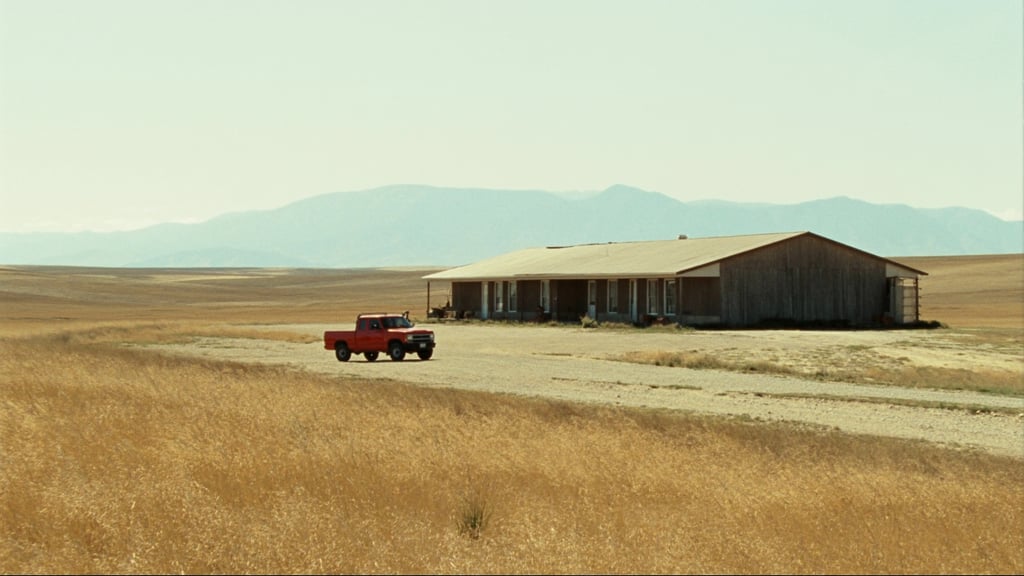
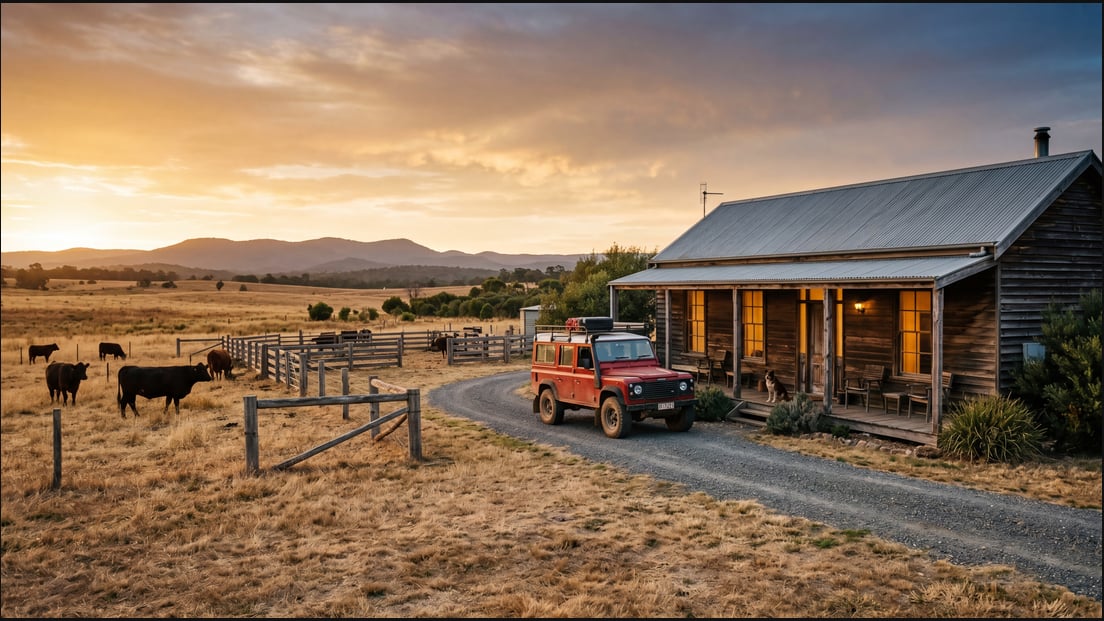
I want some location, really beautiful, I need a big farmhouse deep in the countryside with a red jeep in front. Summer, hot day.
Claude produces this:
A long single-storey timber farmhouse standing alone deep in open countryside, weathered wood siding, low wide porch running the length of the front, tall windows. A boxy red off-road 4x4 parked on the gravel drive out front. Golden sun-dried fields roll out to hazy blue hills under a vast clear summer sky. Harsh midday light, hard shadows, shimmering heat haze over dry grass. Warm earthy palette of bleached wood and amber fields, the red truck the single bold accent. Photographic, deep depth of field, natural light.
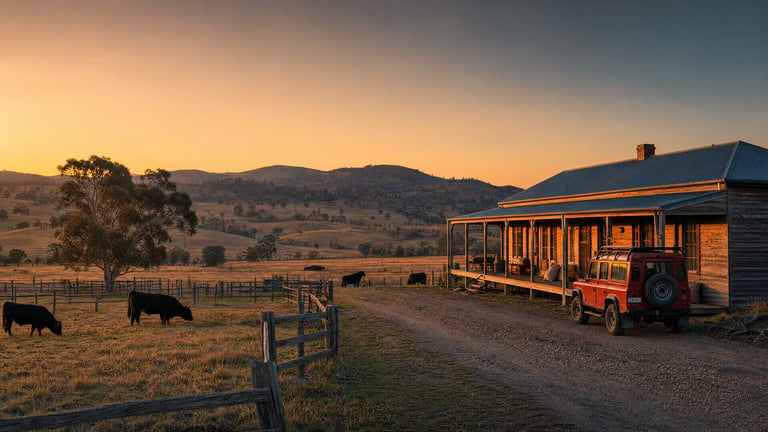
Then you iterate the prompt in dialogue — placing elements, changing the time of day, explaining what you don’t like and how it should be:
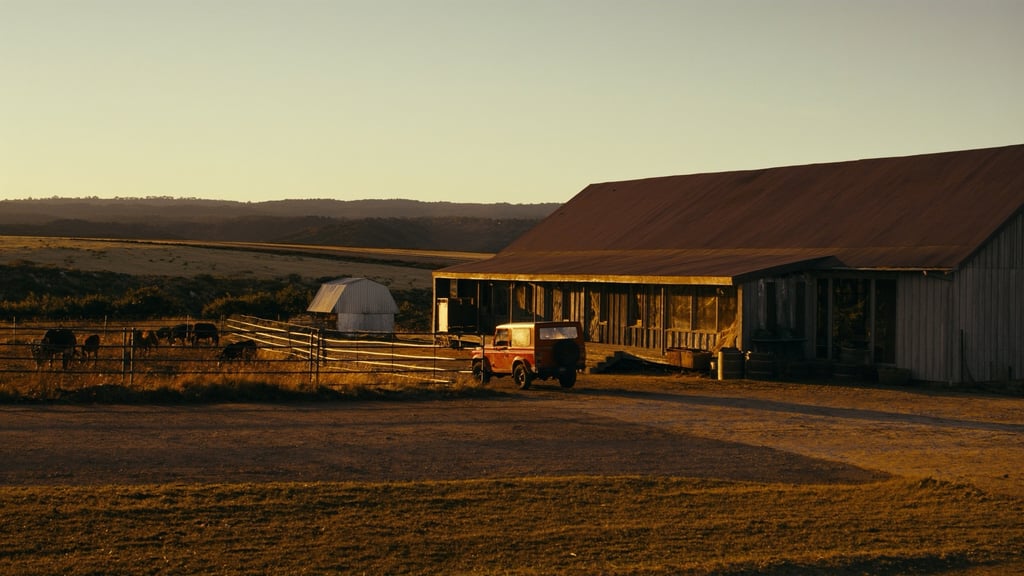
the house should be in the right third of the frame, and to the left of the house a farm with bulls. change the time to sunset, sun not visible in frame
A long single-storey timber farmhouse sitting in the right third of the frame, weathered wood siding, low wide porch, tall windows, a boxy red off-road 4x4 parked on the gravel drive beside it. To the left, a rustic farmyard with fenced pens of bulls grazing on dry summer grass. Open fields roll out to hazy hills behind. Late sunset, the sun out of frame, warm low golden light raking across the scene. Warm amber and dusty-gold palette, deep blue dusk creeping in at the edges, the red truck a single bold accent. Photographic, deep depth of field, natural light.
A dedicated location chat with a prompt-optimizer persona loaded (3.11) keeps this process disciplined instead of improvised.
The anchor object — mandatory
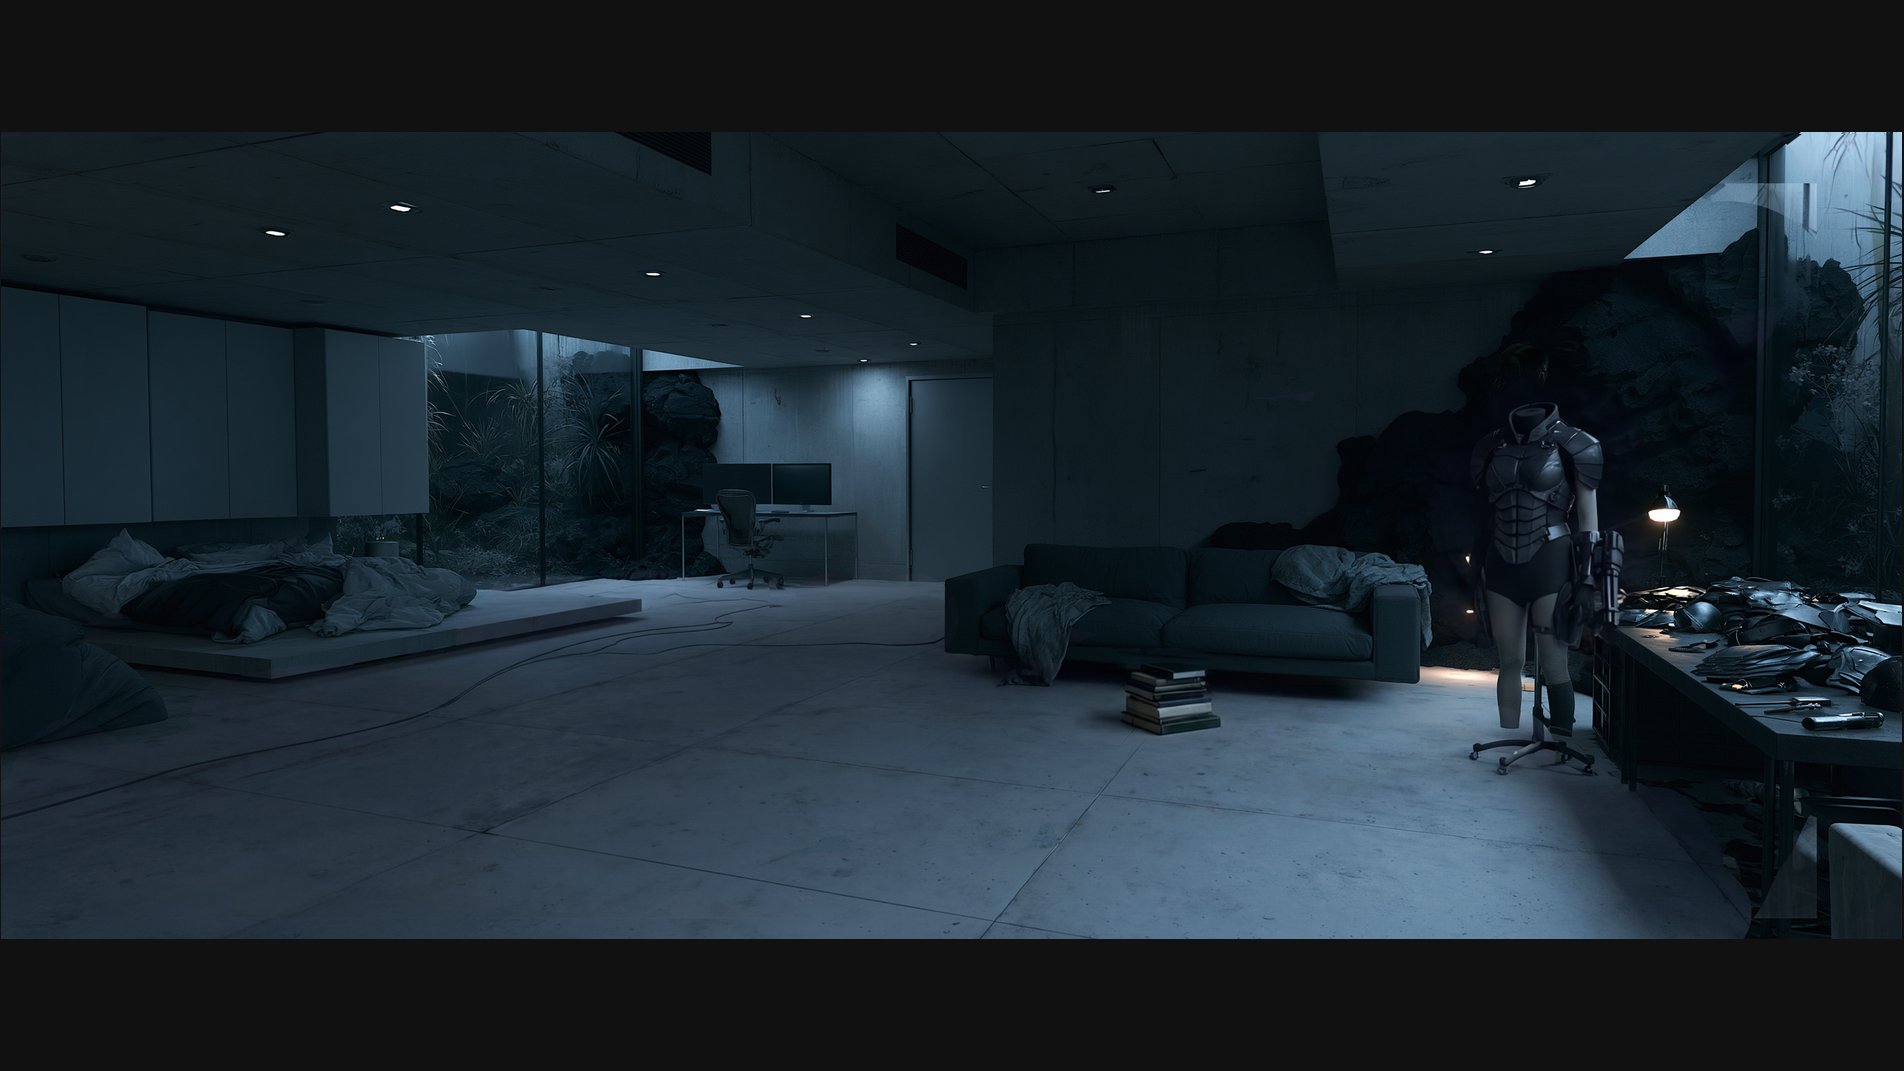
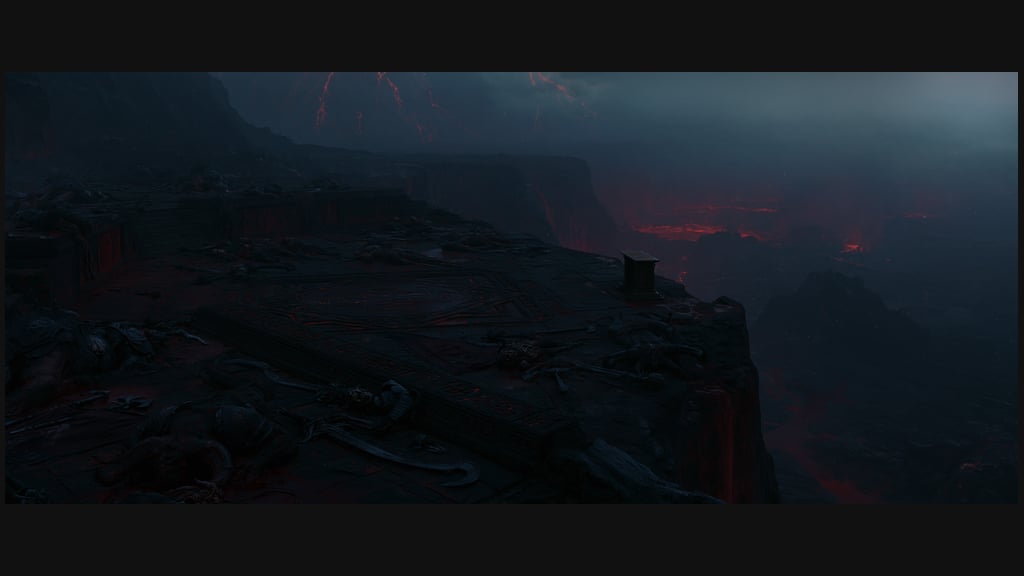
Every location must contain an anchor: an object inside the frame that doesn’t stand out to the viewer but is unambiguous to the AI — a big couch, the entrance door, a distinctive street banner, a pulpit at a cliff’s edge. To create one, first understand the scene’s logic yourself — what will happen in this location according to the script — and place the anchor accordingly. Then use it during video generation: when you describe where the characters stand or where the action happens, you reference the anchor, and Claude writes out for Seedance what goes where relative to it. A clear anchor is what lets you place characters and camera exactly the way you picture it.
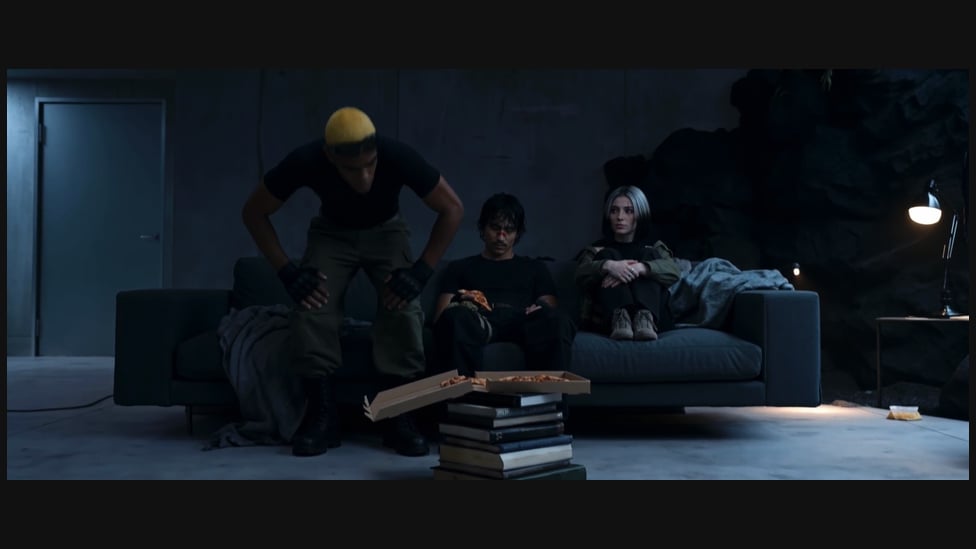
The sofa and the stack of books in front of it are the anchor.
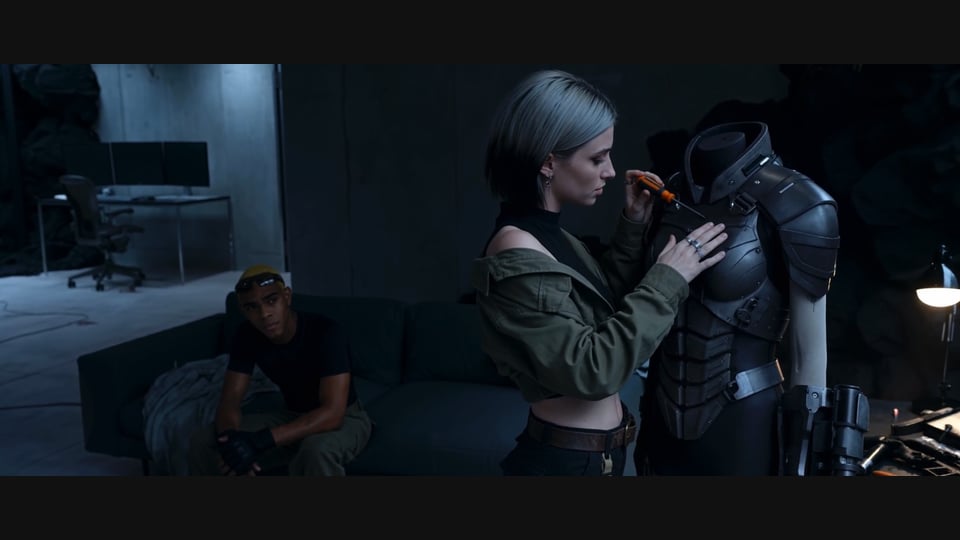
Characters and camera placed off that anchor.
A pulpit at the cliff’s edge doing the same job.
Shoot the location at 3/4
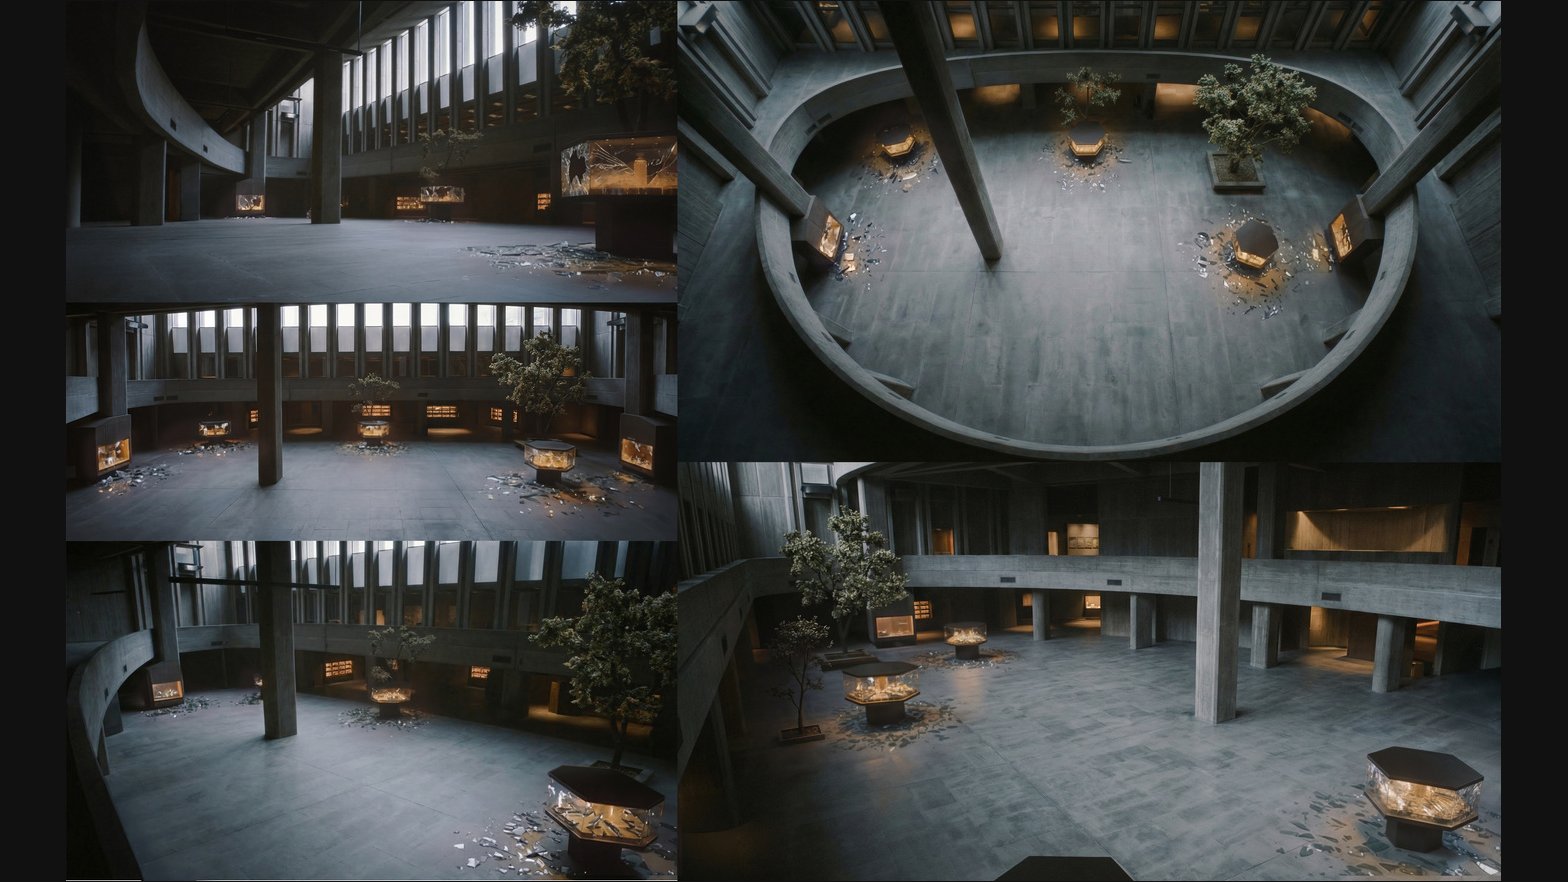
Seedance understands a location’s depth — and places characters inside it — when the camera sits at an angle, in three-quarter view. A 3/4 location also makes the reverse angle possible, giving you close to 360° of coverage. If the location is generated frontally, then on almost any wide shot it becomes a backdrop behind the characters instead of a space they stand in — and if you try to angle the camera later in the video generation, Seedance invents new surroundings left and right of frame every time.
Generate the location at 21:9
The horizontal counterpart of the 3/4 rule. Generate location plates wide — 21:9 — even when the video itself ships narrower. The wide plate carries more of the space in the file: what stands left and right of the playing area, how the walls continue, where the street goes — and since a reference supplies geography, not framing (3.2), all of that width becomes information Seedance can draw on. When the camera pans, tracks, or a character moves toward the frame edge, the model extends the scene from what the plate actually shows instead of inventing new surroundings on the spot. A location generated at the video's exact ratio gives the model nothing in reserve — every move past the original framing is improvised again on every run.
Reverse locations
When a scene needs the opposite side of your location: imagine what would be there behind the camera, describe it to Claude with the frontal (original) location file attached, and generate the reverse. GPT Image 2 is the main model for reverse-angle plates; Soul Cinema also generates them well from the prompt.
B-roll locations
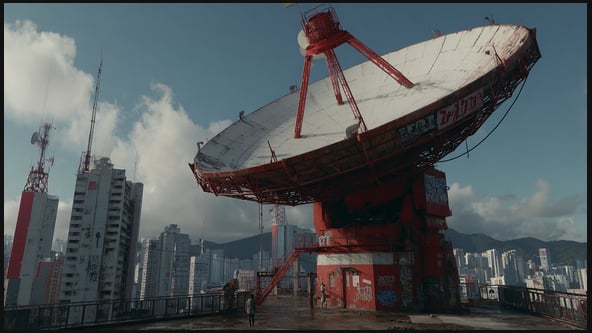
If a location serves b-roll or doesn’t need strict consistency between shots, one good wide is often enough — you punch in to mediums and close-ups from it, and Seedance logically extends the needed surroundings as the action moves.
One wide b-roll master
The mediums and close-ups Seedance grew out of that one master.
Light and logic — what a location must obey
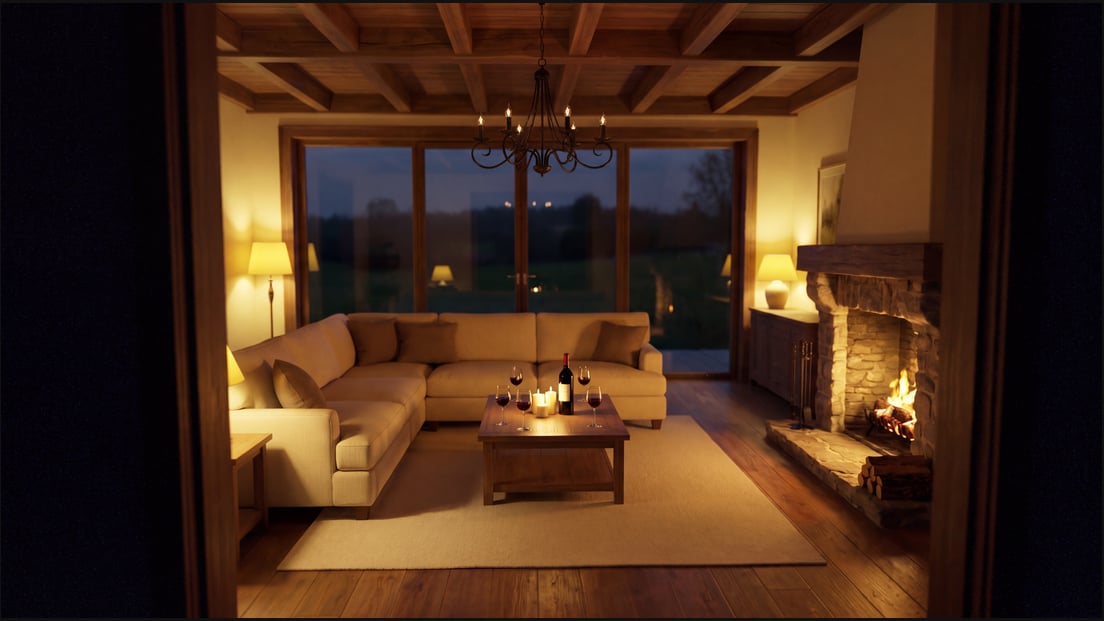
Watch the tonality. Most models handle color well; what breaks is tonal range — avoid harsh contrast jumps, crushed shadows, and blown highlights. Burned-out highlights in actual light sources or the sun are fine, but they must not occupy a significant part of the frame.
The location must make sense. An entrance door next to a window in a 12th-floor apartment breaks the viewer instantly.
Light sources must be coherent. Not two suns; not sun on the left with shadows also falling left; not a ceiling lamp with light hitting objects from the side.
Interiors: soft light. In interior locations Seedance works best with soft sources; pronounced hard rays usually produce slop — unless the location’s design genuinely justifies them.
Locations that obey: watch the light, color, tonality, texture.
Editing a location
The following stack and images record the original production tests. For a new job, also compare GPT Image 2.5, Layers, and Relight 2.0 against the specific change. Keep the old results as evidence about those tested versions, not as a ranking of every current editor.
Editing is an inseparable part of developing a good input — almost every strong result still needs detail swaps, removals, and a color pass for your project. The stack:
GPT Image 2 — text, and crisp details of complex objects.
Nano Banana Pro — most edits that don’t need GPT’s mathematical precision.
Seedream 4.5 — run it in parallel with the two above; it rarely slops but may miss your request the first time, so it takes more batches.
Photoshop — assembles everything: soften the textures, remove leftover objects, correct color, and combine all edits as masks on the original image.
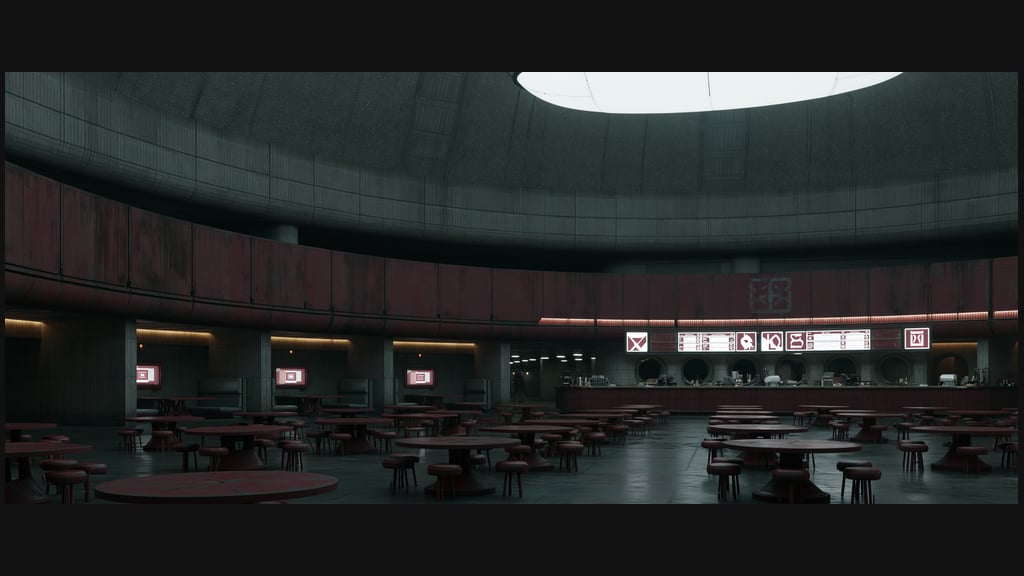
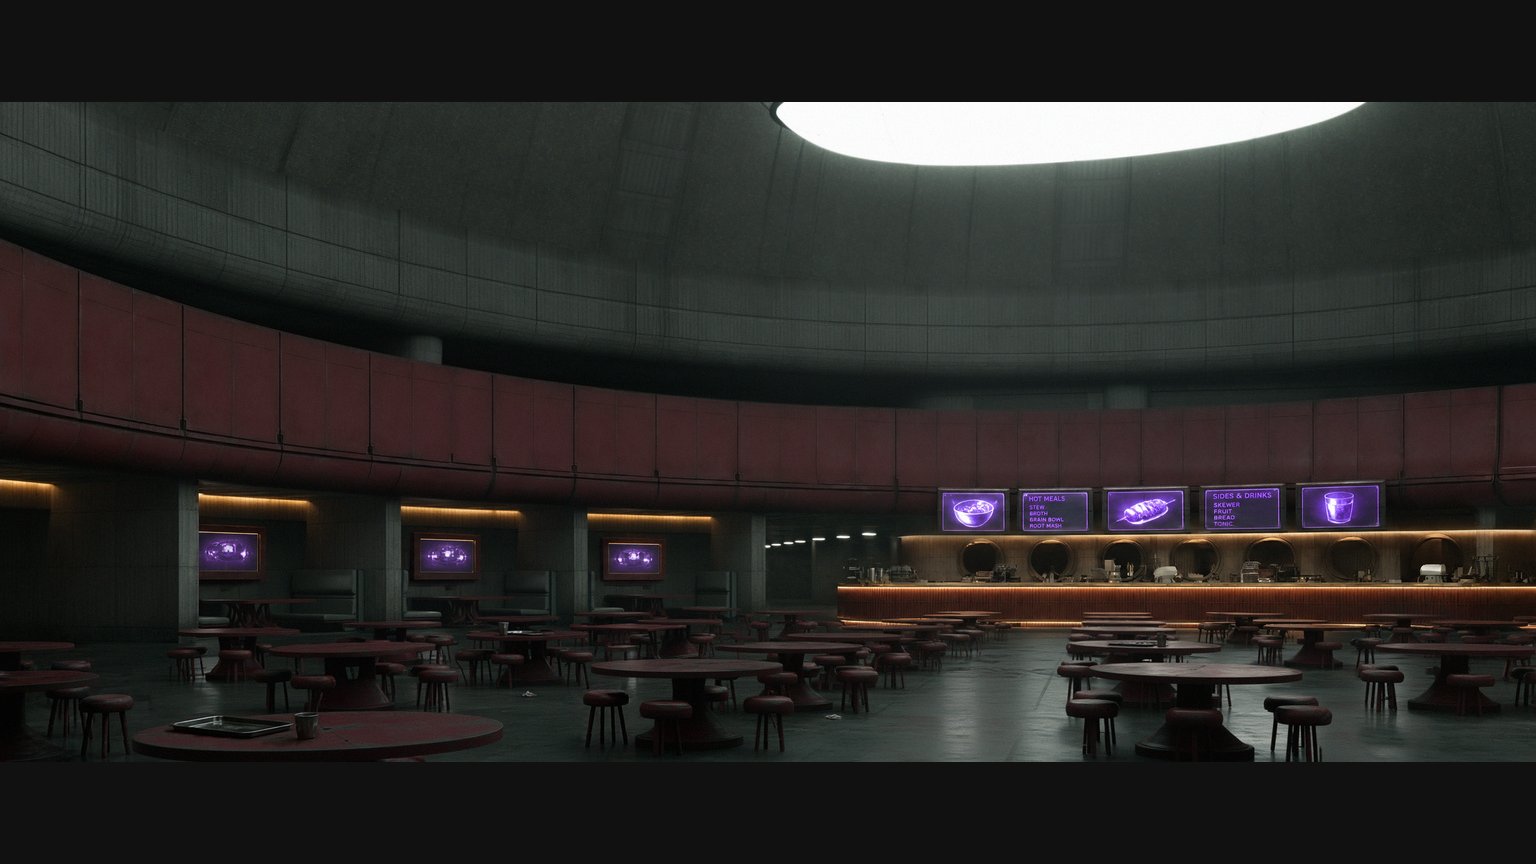
One worked pass, as documented in the handbook: Nano Banana Pro removed grime from red metal and fixed fused stools, adding trays and floor litter; GPT Image 2 replaced the lamps, TVs, and menus and added readable text; Photoshop softened the textures, cleaned the receding corridor, corrected color, and merged every edit onto the original.
That pass: raw cafeteria generation → assembled final.
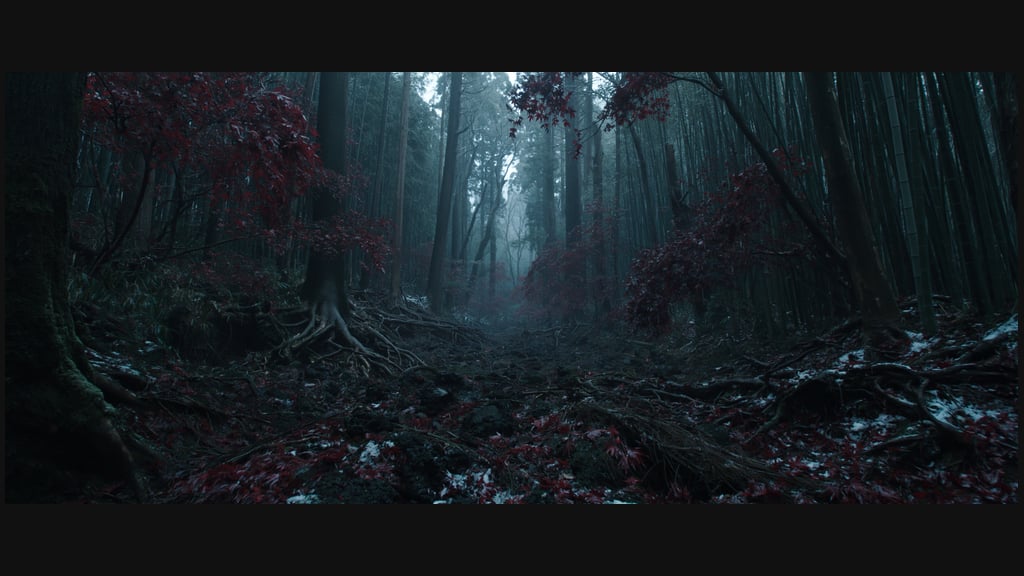
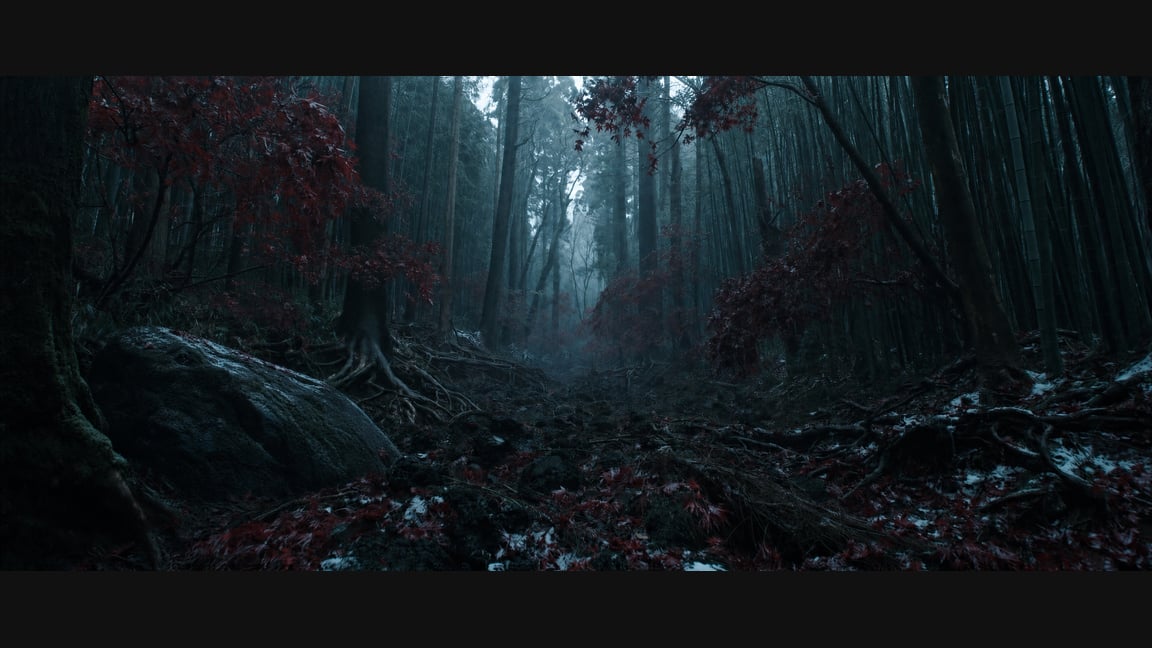
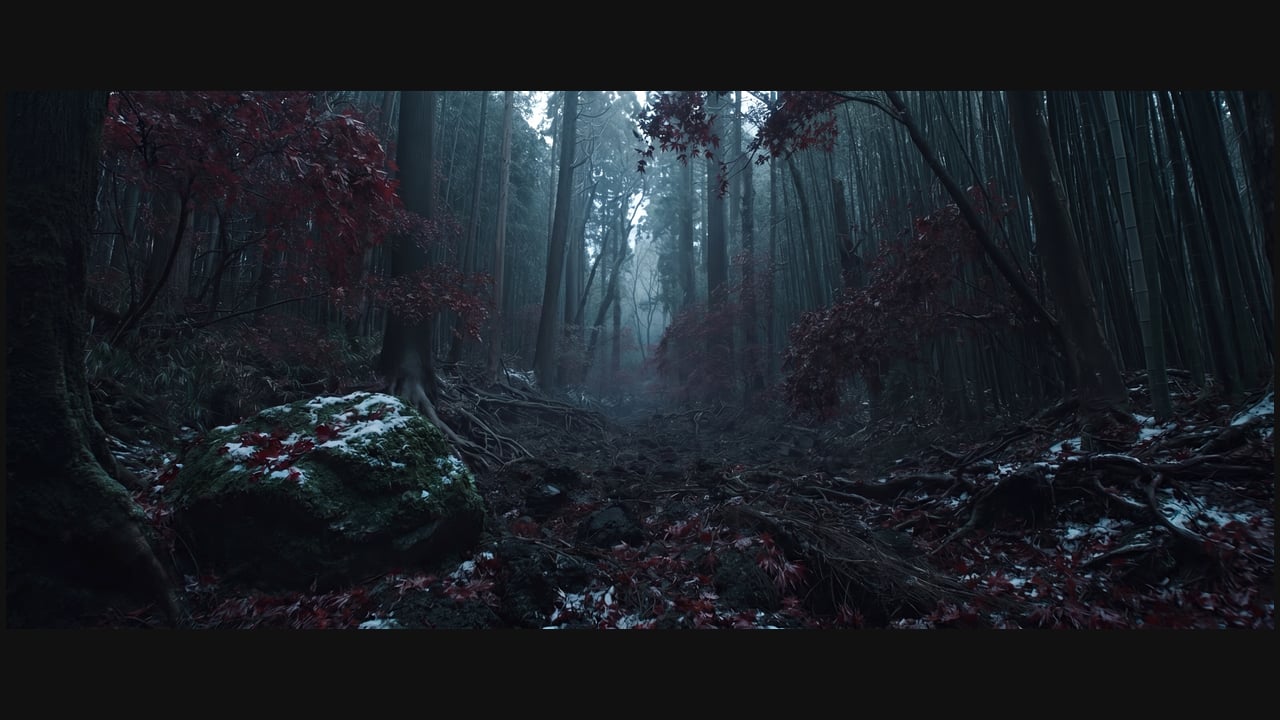
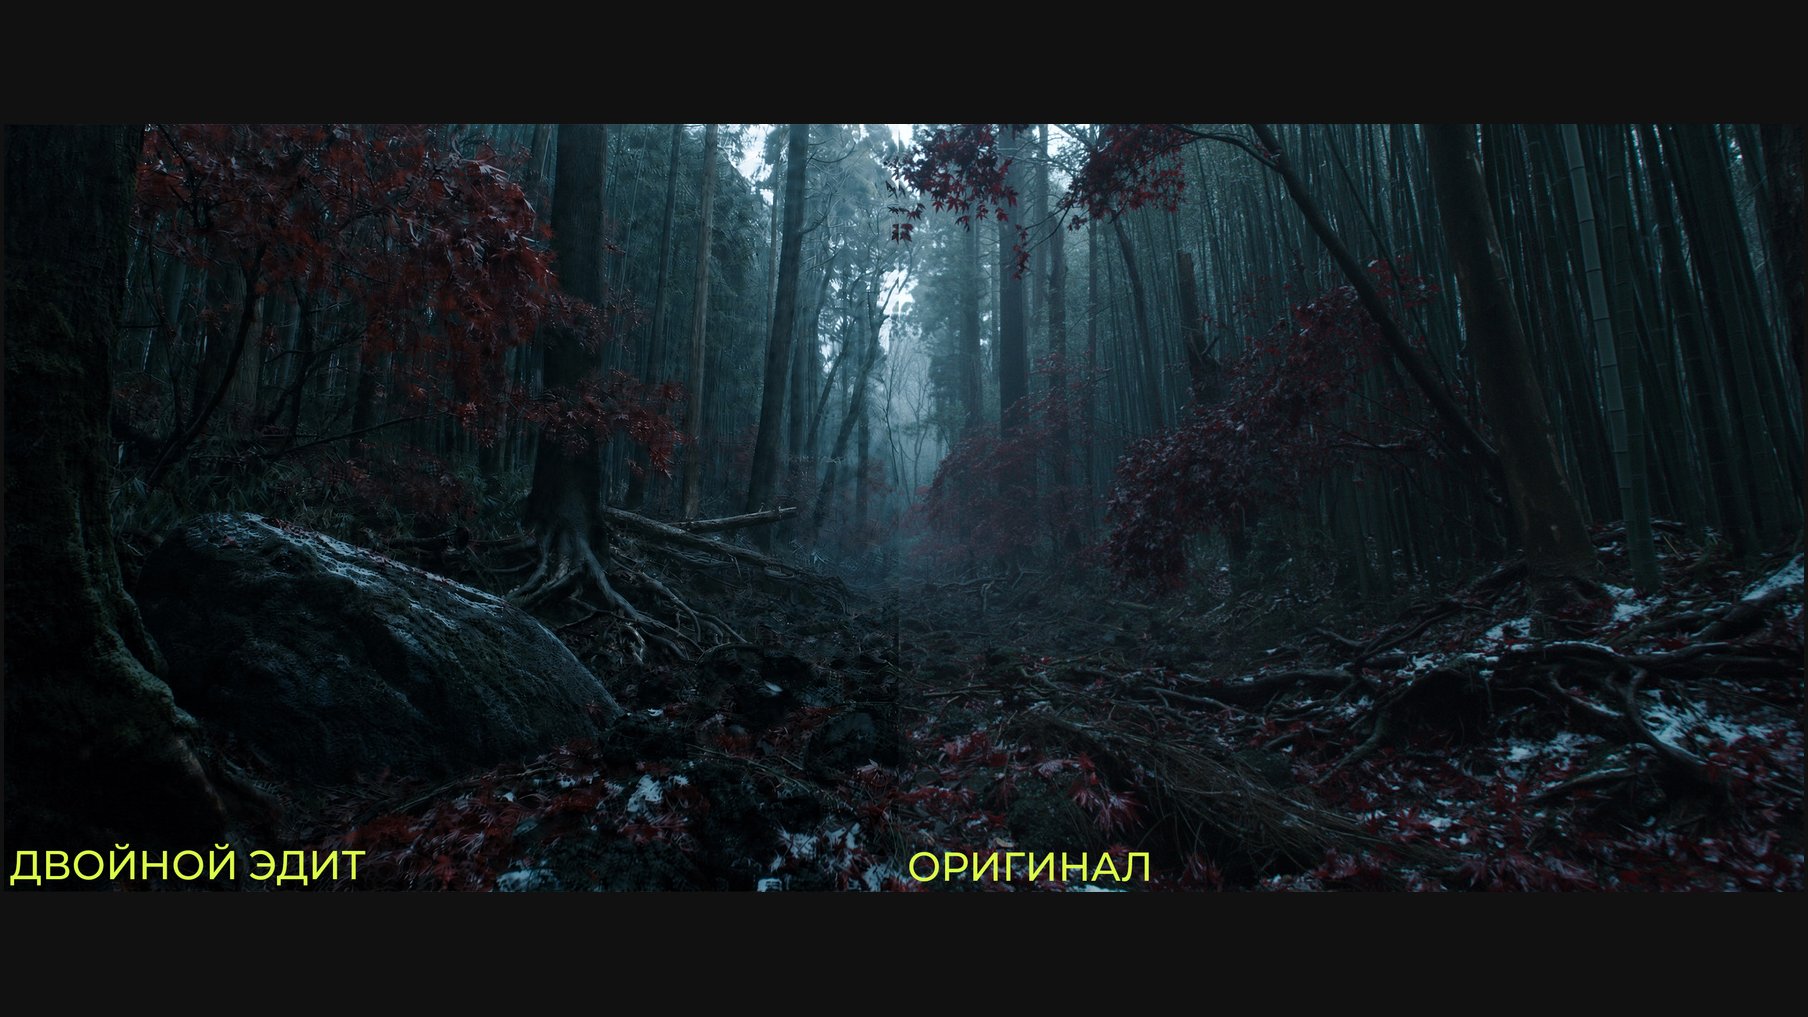
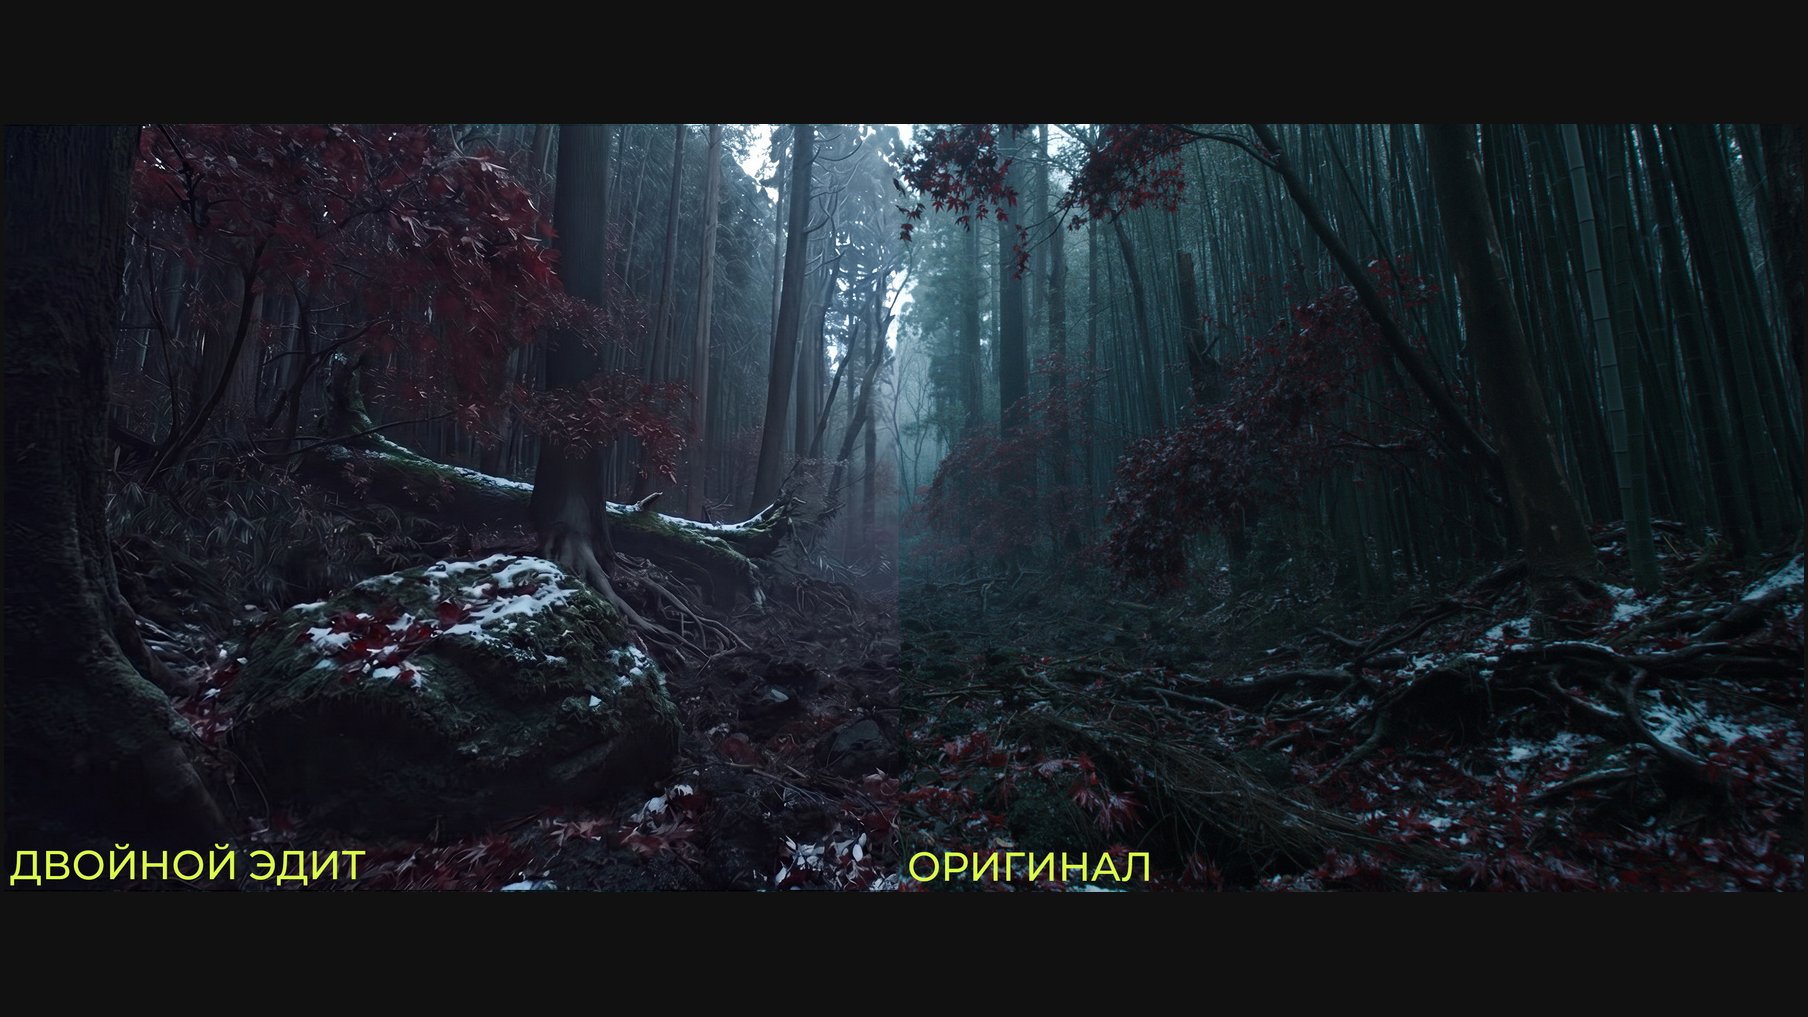
Why masks are non-negotiable. Each model pass damages the whole image, not just the edited spot. Adding one rock in GPT Image 2 oversharpened an entire forest plate, killed its depth of field, and stamped slop blotches across the tree bark; the same edit in Nano Banana Pro pulled the color to magenta and re-sharpened everything. Generate on top of an already-edited image and it gets worse fast — more blotches, textures turned to soap, magenta deeper, leaves reduced to mush, depth gone. Every added or removed detail is masked onto the original in Photoshop. An image that has been generated over twice is unusable.
The original plate
One rock added: GPT Image 2 oversharpens and kills depth; Nano Banana Pro drifts magenta.
A second pass on top, GPT Image 2 — against the original.
A second pass on top, Nano Banana Pro — against the original.
The location map, inside a video prompt
When the location enters a Seedance prompt, it becomes a map: where the camera is and which way it faces; foreground, midground, background; the main landmark positions; where each character stands; the movement path; where the light comes from; the depth relationships. The location reference supplies geography, materials, atmosphere, and landmarks — not the camera angle or framing, unless you explicitly ask for that (3.2, 3.5).
Location slop — learn to see it
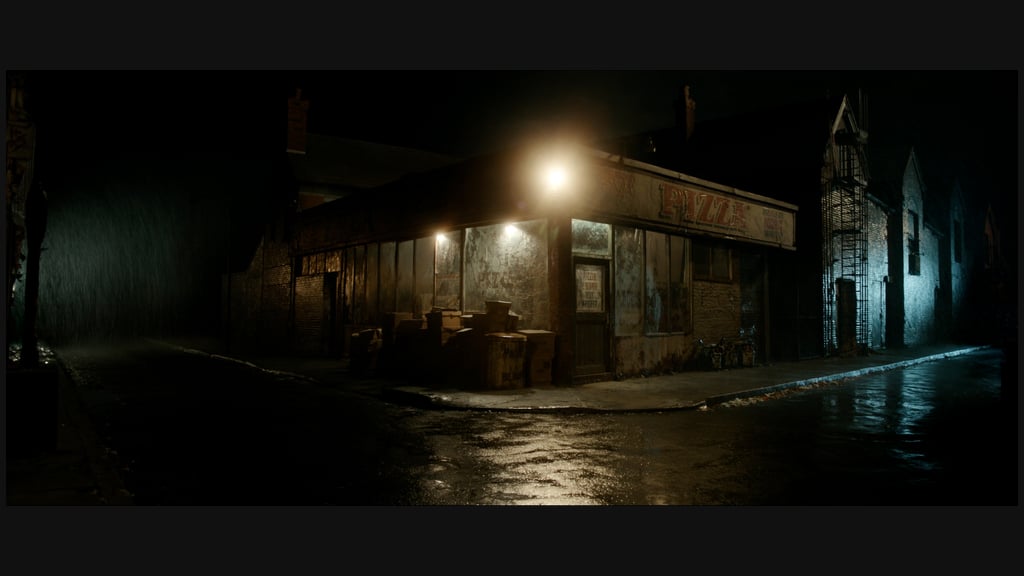
Soul Cinema slop: visual noise and broken small objects that read as mush to the model — and the same broken objects then crawl into the video; “rain” that looks like scratches and falls only in one part of the frame; no smooth transitions between light and dark, shadows crushed; textures soapy, as if painted in oil.
Nano Banana Pro slop: rigid symmetry — everything parallel, angles ruled, perspective staged and lifeless; every request hyperbolized (ask for graffiti on a wall, the whole location gets tagged); flat light and color with no contrast play; no character — pretty but faceless stock; a CGI feel where objects read as 3D renders; and when asked for “more alive and cinematic,” it takes you literally and buries the frame in litter and dirt.
Nano Banana Pro slop: ruled symmetry, flat light, stock-photo sterility.
GPT Image 2 slop: oversharpening with hard halos on edges; no depth — everything in focus, no separation of planes; one sickly texture pattern laid over the whole frame; white balance pulled warm; plastic, licked surfaces; compressed dynamic range that makes the frame limp.
GPT Image 2 slop: halos, no depth, one texture pattern over everything.
Study these failure modes deliberately — the fastest skill gain in location work is learning to see slop before Seedance does.
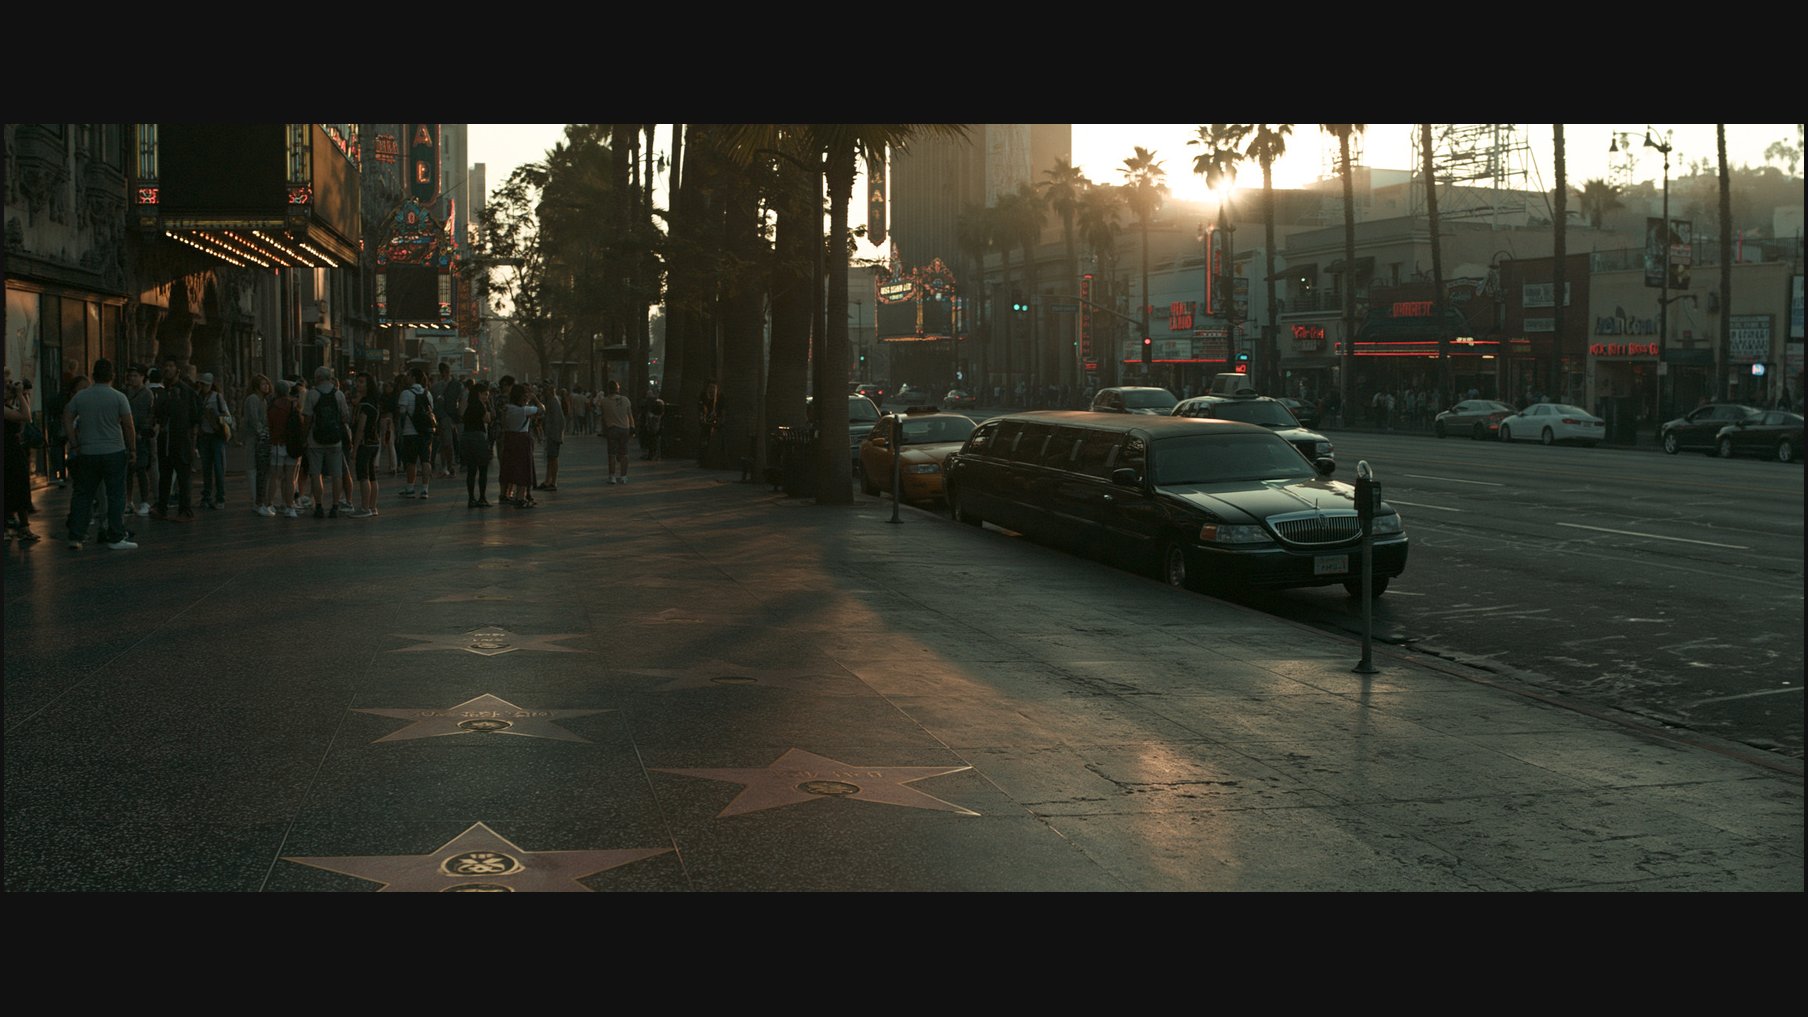
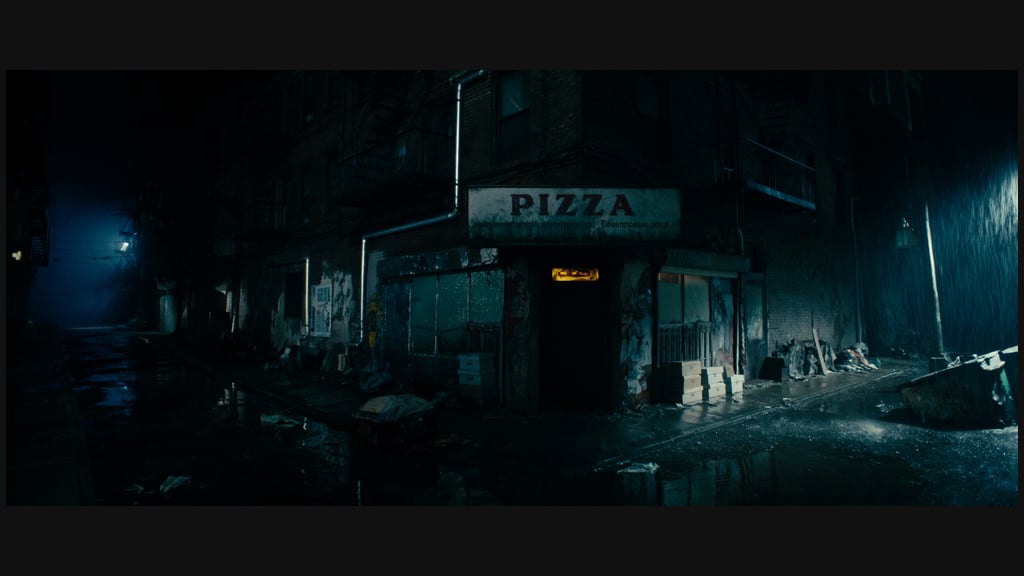
And keep the counter-examples in your eye as deliberately as the failures — the handbook’s “not slop” wall is the calibration target: coherent light with real tonal range, textures that survive a full- zoom look, spaces with depth and logic.
The NOT-slop wall: study these the way you study the failures.
3.5 Camera and optics
The camera is an operator, not an abstraction
In Seedance, the camera/operator is a separate character. You describe what the operator does: watches the characters, acts alongside them, follows them. All camera movement is written as operator movement, the way it would be described on a film set — and if the camera moves, the world and the characters are described along with it.
For every camera write-up, define: the lens character, camera height, camera distance, camera angle, camera side, subject size, screen placement, camera movement, focus behavior, depth of field, handheld quality, and framing priority. Prefer physical phrasings: camera fixed at X · camera moves from X to Y · lens at hip height · lens at snow level · operator stands on the shadow side · subject occupies screen-left third · landmark holds the left third · negative space on screen-right · profile preferred · 3/4 angle preferred · frontal only when emotionally required.
Handheld is described physically: operator breath, micro-settling, weight shift, organic imperfect correction, shoulder-mounted mass, subtle pulse, human correction. Avoid “random shake” and “digital jitter” — they produce unnatural digital tremor. “Gimbal smoothness” and “floating drone feel” only when you actually want them.
Composition freedom is not chaos. Even when you give the camera freedom, keep locked: subject placement, the gaze line, landmark proximity, lighting direction, the active references, action timing, and the lens character.
Shot sizes
The camera is an operator, not an abstraction
Abbr.
Name
What is in frame
ECU
Extreme Close-Up
a detail: eyes, a button, a headlight, a hand
CU
Close-Up
the whole face / one element large
MCU
Medium Close-Up
head and shoulders
MS
Medium Shot
roughly waist-up
MW / WS
Medium Wide / Wide
full figure plus surroundings
EWS
Extreme Wide / establishing
the big picture: scale, location
Optics: degrees, not millimeters
Seedance responds far better to the diagonal field of view in degrees and to the visible optical outcome than to camera metadata. Don’t use millimeters, f-stops, ISO, or lens brand names (85mm, f/1.4, Cooke S4, Helios, K35…) as your primary control — keep the mm equivalent only as your own mental reference. It isn’t enough to write “300mm”; write what the lens does to the image: “a 5-degree field of view, very strong background blur.” For a fish-eye: “the lens has a 180-degree field of view, with (or without) distortion.”
Optics: degrees, not millimeters
FOV
≈ mm
What it does
What it’s for
107° ultra-wide
~16mm
foreground looms large, space visible to the frame edges, straight lines stay straight
immersion, tight interiors, subject right at the camera
84° wide
~24mm
big foreground presence, surroundings readable across the frame, mild perspective expansion
strong compression, background flattened and pulled close, “watching from afar”
observation, distance, sports
8° super-telephoto
~300mm
extreme compression, background dissolved into a color wash, only the subject sharp; foreground occlusion required
surveillance, stakeout, wildlife
Tie shot size and angle into one notation, the way shotlists do: MEDIUM 84°, ECU 29°, TELEPHOTO 18° slow tracking. And always add the observable result — “background compressed and blurred to soft bokeh, subject razor-sharp” (telephoto) or “foreground large, surroundings visible to the edges” (wide): that steers the picture more reliably than the numbers alone.
The lens language bank
Copy these blocks into the OPTICS or CAMERA section.
47° Standard normal
47° diagonal field of view, standard normal lens character, camera 3 to 5 meters from subject, natural human-eye perspective. Zero obvious distortion, natural face and body proportions, comfortable depth of field, background readable but not exaggerated, classic grounded cinema framing.
84° Classic wide
84° diagonal field of view, classic wide-angle lens character, camera 1 to 1.5 meters from subject, slight low angle if needed. Wide-angle lens with strong but natural perspective expansion, foreground body presence feels larger and closer, environment remains visible to the frame edges, deep readable spatial context, straight architectural lines stay rectilinear, no fisheye curve.
107° Wide rectilinear
107° diagonal field of view, wide rectilinear lens character, camera 0.5 to 0.8 meters from foreground subject. Immediate foreground looms large, surrounding environment spreads wide to all frame edges, deep edge-to-edge focus, straight lines remain straight, subtle chromatic aberration near frame edges, no circular vignette, no fisheye bubble.
29° Short telephoto portrait
29° diagonal field of view, short telephoto portrait lens character, camera 4 to 6 meters from subject. Close framing achieved through lens reach, not physical proximity. Subject is razor-sharp, background begins to compress closer behind them, face proportions are flattering and stable, background dissolves into creamy soft bokeh, subject pops clearly from the environment.
18° Classic telephoto
18° diagonal field of view, classic telephoto lens character, camera 6 to 8 meters from subject. Strong background compression, distant elements appear stacked closer behind the subject, razor-thin focus isolates the eyes and key facial features, foreground and background melt into soft bokeh, the image feels observed from a distance.
8° Super-telephoto observation
8° diagonal field of view, super-telephoto observation lens character, camera 20 to 25 meters from subject. Extreme background compression, background flattened into a soft color wash, only the subject is sharp, everything else dissolves into creamy bokeh. The image feels like distant paparazzi, wildlife documentary, or sports-broadcast observation. Foreground occlusion is mandatory: blurred foreground objects occupy the lower 30 to 45 percent of frame as oversized dark bokeh shapes, framing the subject from far away.
Choosing the lens: content decides
Pick the lens character by content type, before writing:
Face portrait — close intimate face with environment visible: 84° intimate-wide. Medium portrait: 29°. Tight emotional close-up: 18°. Distant hidden observation: 8° with foreground occlusion.
Environmental action — natural documentary action: 47°. Wide environmental action: 84°. Large-scale geography: 107°. Extreme immersion (whole beat environmental): 135° pattern only in that case.
Detail / macro — standard detail: 29° or 18°; detail inside a wide environment only via a named technique (the team’s “snake cam” style); keep macro as its own insert beat.
Observation at distance — sports broadcast, paparazzi, wildlife: 8°; compressed surveillance portrait: 18° or 8° with foreground occlusion and atmospheric haze.
The alignment rule: the lens must match the shot’s content. Wide-angle wants environmental, spatial, physical, body-near-camera content; telephoto wants portrait, observation, isolation, compression; macro wants its own insert. Face portrait plus environmental geography plus macro detail in one beat causes lens drift — if the scene needs different content classes, use controlled internal cuts and give each shot its own lens character.
Outcome stacks
For any telephoto shot, include at least four of these observable phrases: background completely blurred into a soft warm color wash · razor focus on the subject · only the subject is sharp, everything else is soft · creamy bokeh wash behind the subject · background compressed flat behind the subject · the subject pops sharply against a dissolved background · close framing achieved through lens reach, not physical proximity · camera positioned far from the subject in physical space · atmospheric haze suspended between camera and subject · foreground occlusion frames the subject as soft dark bokeh.
For any wide-angle shot, include at least three: foreground body presence looms larger than natural · environment remains visible around the subject · deep edge-to-edge focus · straight lines stay rectilinear · wide spatial context visible to frame edges · camera physically close to subject · immersive close perspective · no telephoto compression · no creamy portrait bokeh unless explicitly wanted.
Lens discipline across cuts
In a multi-shot, fix the optics per segment and forbid drift. Same lens throughout:
LENS IS X° ACROSS ALL SHOTS. NOT NEGOTIABLE. Each shot opens with: LENS LOCK SHOT A = X°. Each shot closes with: LENS CHECK SHOT A: X° maintained, no drift.
Mixed lenses: each shot gets its own lens character only when the content type changes; hard cuts only between lens characters; no smooth FOV transitions; no lens change mid-shot. Add “no drift mid-segment” so the optics don’t slide toward a comfortable middle. Anti-drift locks when needed — telephoto: “No part of this shot becomes wide-angle or normal-lens coverage. Wider framing is achieved by the camera being farther away with the same long-lens reach. The background remains compressed and dissolved in every frame.” Wide: “No part of this shot becomes telephoto portrait coverage. The environment stays visible around the subject, the camera remains physically close.” Normal: “No extreme wide distortion, no telephoto compression. The image stays natural, grounded, and human-eye neutral.”
Optics anti-patterns — don’t write: “extreme/ultra/super wide-angle lens,” “wide shot” or “establishing shot” as a lens instruction, “zoom out plus wide-angle,” “tight wide framing,” f-stop/ISO/brand metadata as primary control, compound camera movements in one shot, mixed content classes in one beat, or negative-only lens control.
Changing the angle on an existing scene
Two mechanisms, both built earlier in this part. First, the location route: a location generated at 3/4 with a reverse plate (3.4) gives near-360° coverage — new angles come from describing the camera’s new position against the anchor object, not from re-imagining the space. Second, the reference rule: a location or video reference supplies geography, never framing — never let it dictate the angle (3.2), and never ask for “the same but from above” with the old material attached. Inside one piece, a deliberate angle change is a REVERSE CUT in a controlled multi-shot (3.1), with the continuity list preserved across the cut.
3.6 Lighting
Light is the second most important block after physics — and the strongest single quality lever you hold. Treat it as a hard rule, not decoration. Bad light in a generation almost always traces back to a bad prompt.
Always define: the primary light source, the light’s direction, the camera’s side relative to the light, which side of the subject is in shadow or rim, the background brightness, the exposure priority, the allowed highlights, and the forbidden failure mode. Describe how the light falls on the characters and interacts with them; name overexposure and underexposure deliberately; write in the references where they matter.
The pattern rule. Flat frontal light — light hitting the face straight from the camera’s side — almost always reads as slop: cheap, flat, volumeless. A face should always carry a light pattern: one side brighter, the other in shadow. That alone lifts a frame.
Contre-jour, understood correctly. Backlight is stronger still — and it means the subject sits between the camera and a brighter background, the camera stays on the shadow side, and the face goes into shadow. Detail is carried only by wet speculars, eye glints, and a thin rim contour. It is not “a bright face with a rim of light in the hair.” The lock, verbatim:
Subject stays between camera and the brighter background. Camera stays on the shadow side of the subject. Faces remain in deep shadow unless explicitly lit. Only rim light, edge light, wet speculars, eye glints, and environmental bounce reveal detail. No frontal key. No flat exposure. No beauty fill. No studio light unless requested. And when previous generations kept flattening out, escalate: The entire shot is exposed for the backlight, not for the face. The face is allowed to fall into crushed shadow. The silhouette and rim contour carry the image.
A direction block in practice:
The camera stays on the shadow side of @vamp1. Morning sun comes from camera-right, behind and to the side of him, creating gold rim light along his shoulders and head while his camera-facing back stays dark. No flat front light, no beauty fill.
The location’s own light must already be sane before any of this — coherent sources, no crushed shadows or blown highlights, soft light in interiors (3.4). Lighting locks in the prompt can’t rescue a location whose light is broken in the reference.
Describe the light; choose where to change it
The same lighting intention can be executed at different stages. Use the prompt or Cinema Studio controls while building the shot. Use image Relight for an approved still. Use Video Relight for approved moving footage. Use color grading for the tonal treatment after the lighting decision is settled.
Keep the description physical: source, side, height, softness, color, and the part of the subject that remains in shadow. A preset name is a starting configuration; the acceptance test is what the light visibly does to the scene. In video, review that behavior through the full camera move and performance.
3.7 Action, physics, and timing
Physics is how the eye decides “AI or not”
Physics is the most important block in the prompt — it is precisely by the physics that a viewer’s eye judges whether a shot is AI. Describe all the physics in the frame, in detail: fight scenes, what the car does, everything.
Enforce: gravity, mass, inertia, friction, contact, weight transfer, ground pressure, collision, follow-through, cloth delay, hair delay, liquid flow, blood viscosity, snow accumulation, fire heat shimmer, vehicle mass, door hinge resistance, weapon weight. Motion must have cause and effect. No floating bodies, no weightless weapons, no frictionless feet, no teleporting, no impossible object movement, no rubbery CG motion, no fake game-engine physics.
The recipes, by motion type:
Walking: heel contact, weight transfer, hip shift, toe push-off, body mass settling.
Running: real ground contact, knee lift, opposing arm swing, torso lean, varied stride — no floaty CG-running look.
Weapons and held objects: the arm carries visible weight, the wrist angle reacts to mass, the object has inertia, motion has acceleration and deceleration, the blade doesn’t teleport between poses.
Liquids: blood clings, drips, smears, pools, stains, and follows gravity; droplets travel in parabolic arcs; wet contact leaves visible residue; flow has viscosity and direction.
Snow, smoke, fire, dust, particles: particles move with the wind; they exist in foreground, midground, and background when atmosphere is critical; objects accumulate particles over time; heat creates shimmer where hot air meets cold.
If motion “floats” and looks fake, the cause is almost always missing physical causality in the description.
Timing: events by the second
For timed shots, write events in time blocks — easy to do, because everything else is already described:
0:00 to 0:03
0:03 to 0:06
0:06 to 0:09
0:09 to 0:12
Each block carries the subject’s position, the action, the camera’s behavior, critical prop states, the physics, and the audio if relevant. Don’t overload one block with contradictory actions — keep it to one clear action per block, in the spirit of the beat discipline from 2.8. For a single continuous take, make sure the action can physically happen in the available seconds. For multi-shot sequences, every cut must have a reason.
The reviewer’s shortcut: from scene to scene, only the action timing and the characters’ actions change — everything else (references, location map, optics, lighting) is verified once and then reused. That is what makes long shotlists reviewable (3.11).
3.8 Audio and dialogue
The music rule
Everything is generated without music, always: SFX plus voice only. Music is added later by the sound specialists. The standing lock in prompts is “Diegetic sound only” — sound that belongs to the scene — plus “no music” wherever a model tends to add it. Ambience is named (“faint city hum”) or absent; event sounds ride the physics block (“tyres on dry asphalt, the whoosh of the bullet train”).
Voice is cast by the description
Seedance chooses the voice itself from its presets, based on the character’s description — the age above all, and the current state. That is why age is mandatory in every character line (3.2). Monsters and creatures have no presets: keep one short voice description — literally a few words — and reuse it verbatim in every prompt, or the creature will sound different in every shot.
Reusable custom voices for narration pipelines (voice elements) are built on the audio shelf — that is Part 1, section 1.5; when a voice file arrives from there, check it word against word with the script — the transcript-diff check — before any lipsync, because sync and caption errors inherit from the voice.
Dialogue rules
One phrase per prompt, maximum — plus one second of silence before and one after the line, as editing headroom for the cut. (When a line must open the shot instead, have it begin within the first 0.3 seconds.)
Only the quoted, scripted line is spoken. No extra words, no ad-libs, no character names spoken unless they are inside the provided dialogue.
Lips are still when not speaking. The speaking character’s lips move only for the scripted line; other characters listen silently unless they explicitly speak. No off-screen voices unless specified.
No subtitles, no captions, no narration unless requested.
For clean dialogue: ambient sound ducks under the line; the voice is close, clean, and emotionally controlled.
When a previous line matters only for emotional continuity, mark it so it isn’t visualized: “Prior audio context only, not visual content: ‘line.’” — and never visualize people or objects from prior audio unless they are active in this shot.
Separate spoken words from delivery instructions
Use the control format the voice model actually supports. Qwen provides a separate instruction field for performance direction; other engines may use inline tags or different controls. Do not paste one engine’s markup into another and assume it remains silent instruction.
Lock the words first, choose the voice, then direct the performance. Check the transcript, pronunciation, pauses, and timing on the returned take. When the voice enters a video edit or extension, listen across the join as well: a visual match can still contain a broken sentence, changed room tone, or an extra sound.
3.9 Style
Style is the last layer of the prompt — it sets the texture of the image, but it must not substitute for the staging. Everything that defines the shot comes first; then the aesthetic, briefly.
Write style as compact anchors, not long cinephile chains — the team’s term for a frozen, reusable style block is a style formula. A good one:
Kodak Vision3 500T, naturalistic low-key backlit silhouette, real film grain, grounded physical cinema texture.
Another proven formula, for maximum photographic realism:
“PENTAX 645 camera, maximally realistic and cinematic image.”
The anamorphic look in the prompt
There is no dedicated anamorphic flag — the look is assembled with words in the prompt body. The core is lens geometry: 35mm anamorphic film still at 2.39:1, horizontal squeeze and compression, oval elliptical bokeh with horizontally stretched highlights, curved barrel edge distortion, chromatic aberration toward the edges. Dose the strength from subtle, gentle, moderate up to strong, maximum, extreme — and always ban the junk: NO lens flares, NO light streaks, NO floating bokeh circles. Ready block for the end of the prompt:
STRONG anamorphic lens character: horizontal squeeze and compression, oval elliptical bokeh, horizontally stretched highlights, curved barrel edge distortion, chromatic aberration toward the edges. NO lens flares, NO light streaks, NO floating bokeh circles. 2.39:1.
The camera is film — that is where the beautiful, cinematic rendering comes from — but it carries no visible grain, so the frame stays clean and there is less for the model to turn into slop. Use it when the piece wants the film look without the noise; it sits naturally next to the "clean crisp image" quality suffix.
Anchor to cinematographers, not directors. A director's name is empty to the model — it does not read "style" as an authored whole, so in the style of <director> lands as nothing. A DP's name works, because it decodes into shooting technique the model does read: light, camera behavior, framing. One compact anchor, not a list of ten — Lubezki natural-light handheld · Deakins controlled silhouette — and always pair the name with the visible technique it stands for, so the anchor steers even where the name alone doesn't.
Good style : naturalistic low-key, backlit silhouette, real film grain, grounded cinema texture
Bad style: epic cinematic masterpiece, breathtaking, award-winning, ultra-detailed 8k hyperrealistic, trending, moody dramatic atmospheric, in the style of ten directors at once…
Style references never override identity, spatial blocking, action, optics, or lighting (3.2). Restrictions inside the style layer follow the same positive-first rule as everywhere (3.1) — the needed state, written locally, not a NEGATIVE list. A quality suffix — “sharp clarity, natural colors, stable picture, no blur, no ghosting, no flickering” — is allowed only when useful and non-conflicting, and never as a substitute for real camera, lighting, or physics control.
The visual side of a style is the moodboard: references are collected per character and per project before generation starts (3.3), and in team production the project’s Canvas doubles as the moodboard surface (2.5).
3.10 Iterating and testing
Build the prompt in dialogue, not blind
A prompt is rarely born finished in your head. When it’s written through Claude, don’t dump a raw idea and hope for telepathy — keep syncing. State the intent and directly ask the model to ask you clarifying questions about what’s still unsaid: blocking, angle, light, timing, the character’s behavior and emotion, what’s in the first frame, how it ends. The logic is simple: any ambiguity in your idea is a place where the model will decide for you — and often not what you meant. Closing those gaps in two or three exchanges is faster than catching a miss after generation. “Ask me clarifying questions about anything ambiguous” is a normal, useful request; and if you’re unsure how the model read a detail, ask it how it understood, and correct before the final prompt.
The 4-D discipline
The team’s prompt agents run a four-step method worth internalizing yourself:
Deconstruct — extract only the current shot: active characters, tags, location, props, action, dialogue, duration, format mode, first frame, layout, lighting direction, audio needs — and strip everything else (unused characters and tags, scene numbers, script headers, previous-scene wording, “same as before”).
Diagnose — before writing, hunt the likely failures: could the first frame come up empty? could characters appear late, or the model open on a useless establishing shot? could the gaze line reverse, left and right flip, the camera pick the wrong side? could the lens drift to a comfortable middle, the shot go flat front-lit? could a stale @tag sneak in, extra characters appear, a prop land in the wrong hand? could motion go floaty, dialogue start at the wrong time, the location reference get used as framing instead of geography? For each real risk — one short direct lock in the prompt.
Develop — build the blocks in the fixed order (3.1); spatial rules before camera style, optics before aesthetics, lighting as a priority lock.
Deliver — the finished prompt only, clean of reasoning, notes, and QA.
Expect hundreds, and test constantly
Don’t expect a generation to land by attempt ten — iteration on a real shot can take hundreds of generations. That’s not failure; that’s the work. What makes it converge is testing discipline:
The standing test is two batches of four. Interface practice: batch 4/4 for video generations; images usually run one at a time (1.2).
The eight-generation rule. One detail in a character bothers you and you don’t know whether it’s worth fixing? Throw the asset into ~8 test video generations. If the problem shows in all eight, change it. If it doesn’t, move on.
Test assets on video constantly. Never spend a whole day polishing an asset without a single video test — if the video then comes out slop, the day was wasted. Continuous testing surfaces problems the moment they appear, while they’re still one fix away.
Test on a clean location (3.3, 3.4), so you always know which input is producing the slop.
Fix pointwise. When a shotlist splits a scene badly, you don’t rewrite the shotlist — you edit the one shot (“split 72b into four shots”), the way Claude is instructed to work in 3.11. One change, one reason, then look again.
The pre-flight, before a prompt ships
The QA the prompt agents run silently is a good human checklist too. Before generating, answer: Are all @tags in the prompt actually used in this shot — and all stale ones removed? Is the first frame right, with required characters visible immediately? Is every position, gaze line, and body orientation stated? Is landmark proximity physical? Is the camera side clear? Was the lens chosen by content type, written as visible outcome, and protected from drift? Is the lighting protected from going flat? Are props in the correct hands? Are the actions physically possible in the time given? Are timing blocks consistent? Is the dialogue only the scripted line? Did anything leak in — scene numbers, prior context? If any answer is no, fix the prompt before spending the generation. And before anything ships to a deliverable, one deliberate full-zoom pass over the result — faces, hands, text, contact points.
The verification pass, after the generation lands
Generation is half the loop; verification is the other half — and it is the half where most slop actually ships. A result is never graded by general impression: "looks fine" is exactly the state in which drift, floaty motion, and broken hands slip through, because the eye forgives what it watches at speed. A generation is verified the way the prompt was written — point by point, in binary terms, against ground truth.
Build the test shot so errors have nowhere to hide. When the goal is to test — a new asset, a habit the model keeps showing, a fix — design the shot itself as a stress test:
A locked camera. With the frame static, any change inside it is the model's error, not "operator movement." A fixed frame turns the whole shot into a measurement.
One continuous take. Cuts are where drift hides; in a single take, face drift, hand morphing, and geometry swim accumulate in plain sight.
A genre the eye knows cold. A vlog, an interview, home video — formats the viewer has seen thousands of times, where AI gloss falls out of the genre instantly. Fantasy forgives artifacts; realism doesn't.
Simultaneous processes. Speech plus gesture plus body movement in one take — models fail at the intersections of actions, not on single actions. A character explaining to camera while stretching is a harder test than either alone.
Enough seconds for time to work against the model. Consistency errors accumulate; a longer take surfaces what a short one hides.
Trap constraints.Stays seated for the whole take · the same furniture as the reference · props stay untouched — rules the model is tempted to break for an easier ride. Each one converts a vague "something is off" into a formal fail.
Run the test on a clean location (3.3, 3.4), so it measures the thing being tested and nothing else.
Ultra-realistic photorealistic vlog-style video, one continuous shot. Real live-action footage, shot on a cinema camera, soft natural daylight, rich film color, premium fitness-blog look.
SETTING: <<<image_1>>> — a dim, lived-in apartment room with a worn floral couch against the left wall, polished concrete floor, a yoga mat laid out on the floor, small dumbbells beside it, a window at the back letting in soft daylight, a kitchen counter along the right side. Keep the room true to the reference — same furniture, layout, and moody natural light.
SUBJECT: the young woman from <<<image_2>>>
Action & speech: While stretching, she talks directly TO the camera like a fitness vlogger recording herself, explaining IN ENGLISH how to warm up properly before a workout — warm, engaging, instructional, demonstrating the stretches with her body as she speaks, gesturing, occasionally smiling, natural blogger energy. Realistic lip-sync to natural conversational English speech. She stays seated on the mat throughout, demonstrating and addressing the camera. Keep her face and look true to the reference.
CAMERA: a steady medium shot framing her on the mat from a natural eye-level vlog angle, subtle life in the frame. One continuous real-time shot.
Sound: diegetic — her clear friendly English voice explaining the warm-up, soft quiet room ambience. Natural spoken voice, no music.
The checklist comes from the prompt. A finished prompt is already a list of verifiable commitments — every position, every lock, every timing block. Read it back as pass/fail questions and walk the result point by point: seated the whole take — yes or no. The couch from the reference — yes or no. Lips move only on the scripted line — yes or no. Light still falls from camera-right — yes or no. No general impressions anywhere in the pass. This is also the feedback loop into writing: a requirement that can't be turned into a binary visible check was written too vaguely — rewrite the prompt line (3.1), don't grade the result on feel.
Watch in four modes. One normal-speed viewing catches almost nothing; different failures live in different modes, and each mode is its own pass:
Paused — hands and fingers, face geometry, room geometry, contact points, any text on surfaces.
Slow motion — lip-sync, pose transitions, every moment where two movements meet: the intersections are where morphing hides.
Muted — does the motion read as physical on its own: weight, inertia, ground contact, follow-through (3.7)?
Audio only — one voice throughout, the right age, the scripted line and nothing else, no phantom music (3.8).
First frame against last frame. Drift accumulates too slowly to catch in playback — the eye adapts along with it — and is obvious side by side. Pull the first and last stills and compare them directly: same face, same wardrobe, same furniture, same light direction, same prop states. In a multi-shot, run the same comparison across every cut, against the continuity list (3.1).
The batch is the score, not the best take. One clean generation proves nothing. The standing test is two batches of four (above), and the number that matters is how many of the eight pass the checklist: seven of eight is a stable prompt; one of eight is luck — and luck doesn't carry to the next shot.
Attribute the failure before fixing it. Every miss has one of three sources, and the batch tells them apart. A miss that repeats across the batch on a clean input is a prompt problem — add one lock (3.1) and rerun. A miss that follows the asset from prompt to prompt is an input problem — fix the sheet or the location (3.3, 3.4), not the wording. A miss that shows once in eight is variance — regenerate and move on; rewriting a working prompt over dice is how stable prompts get broken. One change, one reason, then look again.
Harden one variable at a time. When a shot passes stably and the piece needs more — camera movement, an object interaction, a stand-up — add exactly one. One change per step and the failure names itself; three at once and all that's known is "it got worse." The escalation ladder is the fixing discipline run in the other direction.
A result is trusted when it passes the checklist across the batch — not when one take looks good. Only then does the shot move toward the deliverable, through the final full-zoom pass over faces, hands, text, and contact points.
There are many tools for any given problem — never grind against one point when something isn’t working. With persistence, a solution exists for every problem; this is where your individual approach gets built.
Repair the right layer
Keep an approved performance when the defect is local. Route a replacement to Object Swap, a marked-region correction to Seedance 2.5 Edit, and a lighting correction to Video Relight.
Reconsider the source when the requested change needs a new gesture, interaction, or camera structure. A replacement with very different geometry may also require new staging. Extending or restructuring a shot is a separate operation, not an object correction.
After any edit, review the changed area and the preserved scene. Check identity, contact, occlusion, timing, and sound. Keep the original and accepted checkpoints so a failed correction does not become the new master.
3.11 Working with Claude
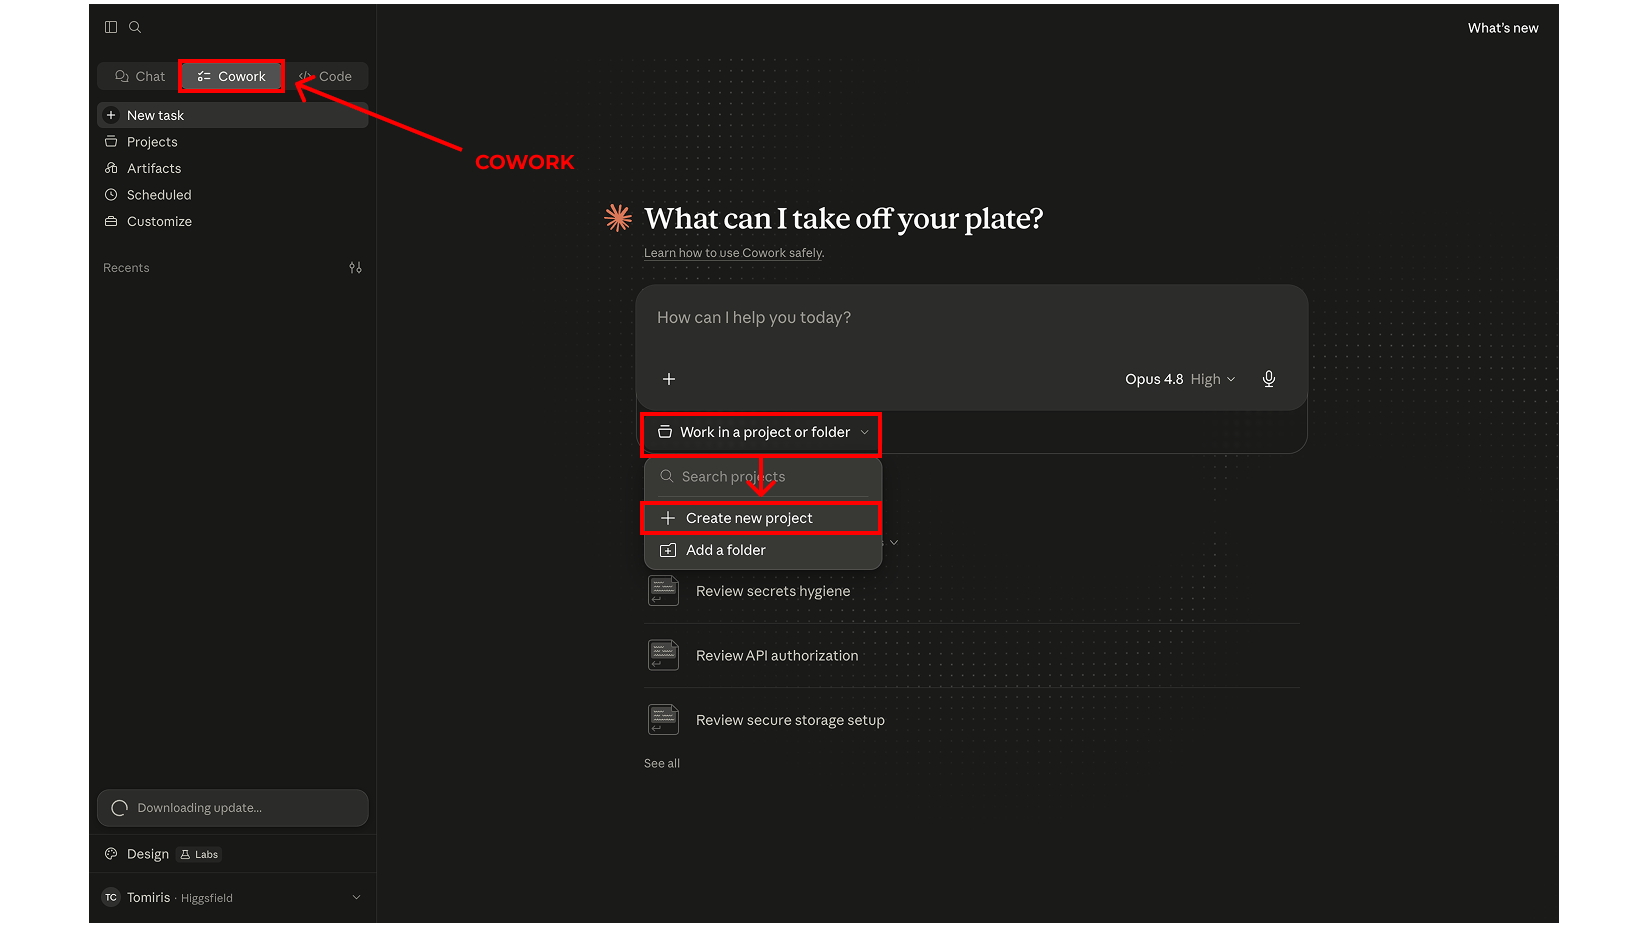
The team’s established setup uses Claude Cowork. The same briefing and review discipline also applies when using GPT-6 Astra or an agent inside Supercomputer. The client and agent model may change; the project’s source of truth must remain stable.
Setup
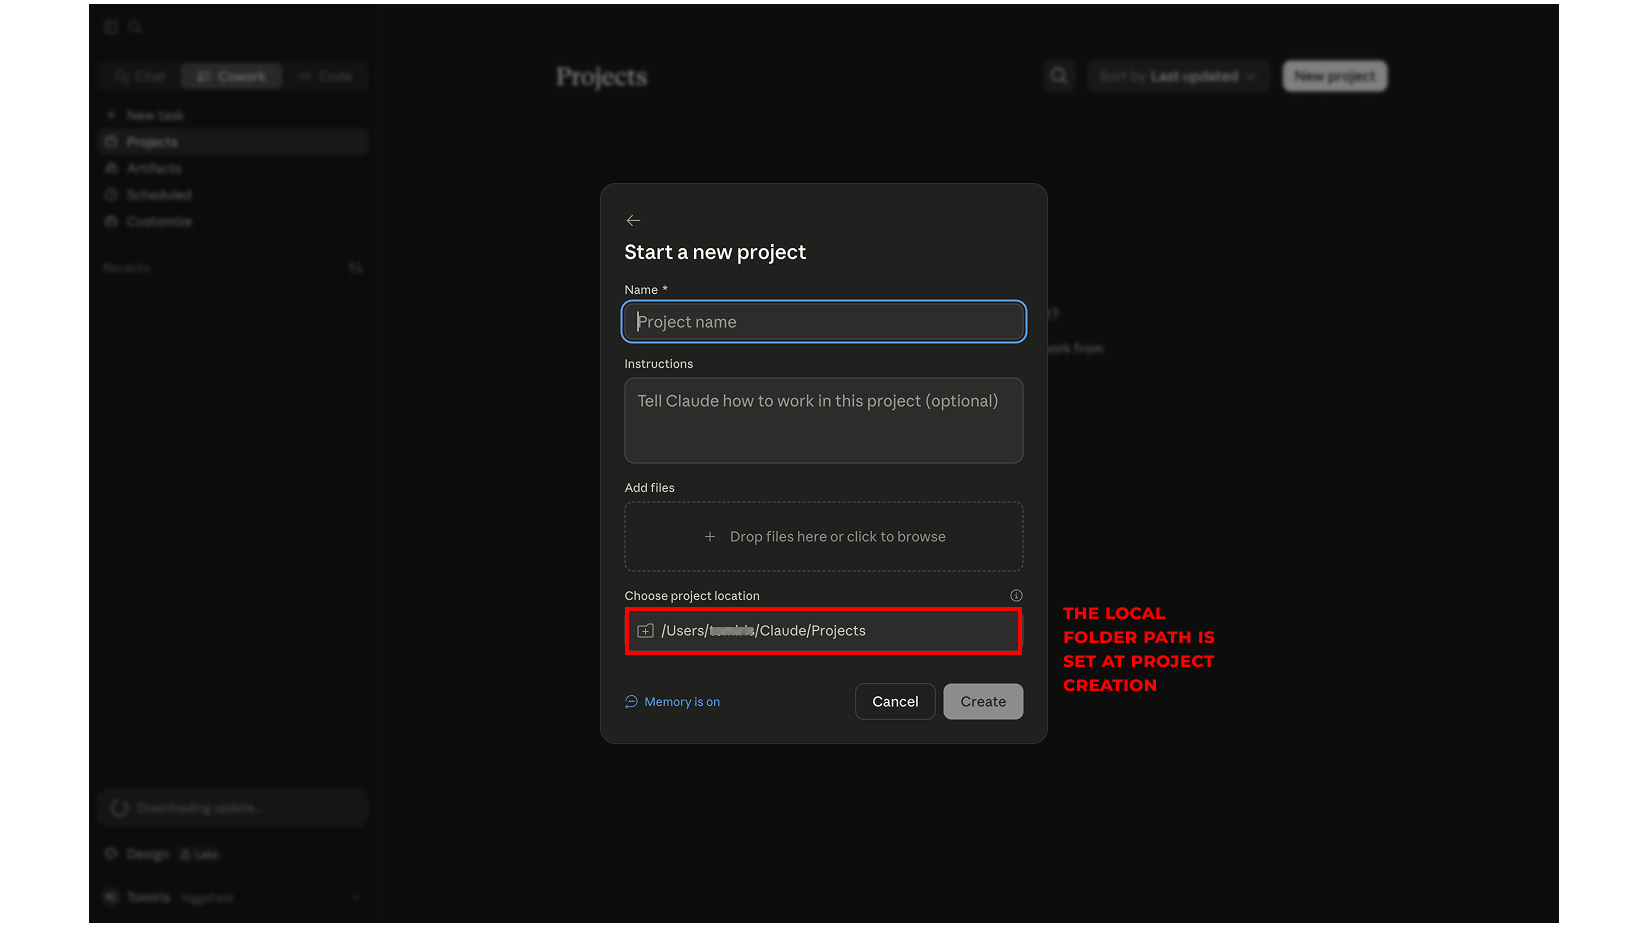
Work in Claude Cowork — its advantage over a plain chat is memory inside the project between chats, and files stored locally on your machine. A new project gets a folder with everything the work needs: the script, storyboards, the assets, and any file Claude can read and use. In settings, enable memory (so context persists) and search reference chats. Open proper projects — naming matters.
Context and questions
Claude works on context: the more, the better. The first rule — give it as much information and context as possible, and ask it to ask you clarifying questions (3.10).
Assets and naming
Inside the project folder, create an assets folder. Approved assets live in two places: the project’s local Claude folder and your ordinary project folder on disk. Names follow the standard from 3.2 (@loc_…, @char_…, @prop_… with the project prefix) — and the names in Claude’s prompts must match the element names on the site exactly, because the @ is what pulls the element into the prompt. The handshake prompt that puts Claude in sync:
“[folder path]” — here are the inputs for generation in Seedance 2.0. Keep the @ names in the prompts matching the file names in this folder.
Separate chats, strictly
Never mix a chat that generates image prompts with a chat that generates video prompts. Never. They accumulate different context and different rules, and cross-contamination shows up as image logic leaking into video prompts and vice versa. A dedicated chat per job type — and for locations, a dedicated chat with a prompt-optimizer persona loaded: the team uses a 4-D optimizer script (“Lyra”) that deconstructs, diagnoses, develops, and delivers each prompt instead of writing it off the cuff. Scripts like that can be loaded as a Claude Skill (an .md file with the instructions) so they apply in any chat, or simply pasted into the chat when needed.
The small vocabulary
Skill — a folder with a SKILL.md of rules on one topic (for example, how to assemble Seedance prompts). When a task fits, Claude opens the file and works by its rules — a pre-written methodology it loads at the right moment, so it doesn’t improvise and the whole team holds one standard.
.md — a plain readable text file; any program renders it nicely. Instructions and systems for Claude are shipped as .md.
.jsx — formally a React code file; in this pipeline it is the shotlist: a structured container for shot data — numbers, descriptions, timings, prompts — where the fields are easy to read and pull from.
The shotlist workflow
A script divides into scenes; scenes divide into shots. The ask to Claude looks like:
Give me a JSX React component — a shotlist for scene … from the script. Split the scene into segments of up to 15 seconds, keep the slow, film-like pacing, this scene is heavy for the character… And add a copy button on every prompt.
Two things make this workable at scale. First, Claude edits prompts inside the shotlist rather than rewriting the shotlist — the artifact is stable; the prompts inside it evolve. Second, the first split is always imperfect: you correct it pointwise (“split shot 72b into 4 shots”), not by regenerating the list. Reviewing a long shotlist is fast because of the 3.7 shortcut: from scene to scene only the action timing and the characters’ actions change — the rest is verified once. (The storyboard doctrine this implements is 2.8; team collaboration around it happens on the project’s Canvas, 2.5.)
3.11A Claude skills
The Acting Skill (tig-acting-task)
Turns a scene into a compact acting breakdown and writes the ACTING TASK block for the prompt. Built on Tigran's directing method: instead of describing external behavior ("eyes flick," "he looks sad" — which produces dead faces), the skill derives what each character is doing to their partner — scene direction, motive, goal, obstacle, tactic — and keys the beats to the actual dialogue lines, with eye-work written as purposeful action. Use it whenever a shot needs performance direction — dialogue delivery, emotional beats, listening behavior, reaction shots — or when a character reads dead, glassy, flat, or over-acted. Every character in frame gets a task this way, including silent listeners. Companion to the Script Stress Test: that skill works at the structure level, this one at the performance level.
Generates a staging reference — a color-coded outline schematic fed to the video model alongside the location and character references, telling it who is where: position, pose, facing direction. The core idea is to make the model read the reference as a system of spatial data — lines, colors, coordinates, directions — rather than a picture to reproduce. The workflow is two steps: from a source frame, the skill delivers the diagram-generation prompt, then a connector block that binds each colored figure to a letter and a character tag in prompt text only (no letters ever appear on the map), plus the @staging_ / @loc_ tag pair. A three-layer anti-bleed architecture — outline-only figures, positive-form connector text, staging attached last — keeps the map's graphic style out of the shot. Use it for precise multi-character staging, or when characters swap places between shot sizes; it extends to trajectory, camera-path, and movement maps.
Runs a scene or sequence through a five-element dramatic engine — Goal, Obstacle, Tactic, Reversal, Value Shift — with Tigran's own definitions applied exactly, not the textbook ones. In audit mode it tests each element in order, names the single weakest point, and returns tiered fixes: a minimal one that preserves your version, a clean one that fully works, and an optional third. In write and co-write modes it drafts scenes in screenplay format with the engine as the spine. The failure it hunts hardest: a reversal that turns the plot but doesn't move the audience's verdict on a character — an inert reversal. Use it at the script stage, before any generation, to find where a scene sags and to work out the director's breakdown.
One real prompt in full — and why every part of it is written the way it is. The scene: at night an orange McLaren W1 races along an elevated Korean highway beside a running bullet train; from a train window a child, shown in silhouette, watches the car; three shots, fifteen seconds.
SCENE CONTEXT: A papaya-orange McLaren W1 races along an elevated Korean highway at night beside a parallel high-speed railway. Three shots: a whip up to the car as it catches the head of a bullet train, a view from inside the train window as a child watches the car accelerate away, and an energetic move on the car. Clear dry night.
ACTIVE REFERENCES: @char_W1_one — McLaren W1 hypercar, papaya-orange bodywork with gloss-black roof, accents and aero, thin hooked split LED headlights glowing white, large black active rear wing, deep front splitter, side intakes, black five-spoke wheels with orange brake calipers, "W1" lettering on the plates. All details and "W1" badges stay exactly as in the reference, clean, crisp and identical. 100% matches the reference. @japanise_track — an elevated Korean highway at night on concrete pillars through a dense downtown of high-rise towers, dashed white lane lines, guardrails and mesh fencing, tall lit towers; running parallel on its own viaduct set slightly higher, a high-speed railway with a sleek white-and-blue Korean KTX bullet train (streamlined white body, blue and light-blue stripes, tapered salmon-nose front). Cold white and blue-white lamps, deep shadows, dry asphalt. All signage and gantry surfaces are smooth, blank and plain. 100% matches the reference.
FORMAT MODE: Controlled three-segment sequence with HARD CUTS at 5.0s and 11.0s, total 15s. Each segment is one single continuous shot; the only cuts are these specified HARD CUTS — the camera does not cut by itself. Real-time motion. Clear dry night. Diegetic sound only.
OPTICS: LENS LOCK SEG 1 = 47° standard normal, low whip rising to a profile tracking shot. LENS LOCK SEG 2 = 29° short telephoto, train-window interior 3/4 view. LENS LOCK SEG 3 = 47° standard normal, energetic orbit and whip. No drift mid-segment.
FIRST FRAME AND SPATIAL BLOCKING
Seg 1: low near the asphalt, @char_W1_one entering from screen-left in profile, the bullet train's nose just ahead on the higher parallel viaduct behind it.
Seg 2: interior of the bullet train, a child silhouette in profile at the left of the window, the highway and car seen out the window at a 3/4 diagonal.
Seg 3: tight on @char_W1_one for an energetic move.
ACTION TIMING: 0.0s to 5.0s — whip to profile. The camera starts low down on the asphalt and whips up fast to a side-on profile of @char_W1_one as it drives left to right and surges forward, catching up to the head of the white-and-blue KTX bullet train, which runs on the parallel viaduct slightly above and level with the car in the background. Strong weighted whip, energetic, motion blur on the background.
5.0s HARD CUT: 5.0s to 11.0s — train-window POV. From inside the bullet train: at the left edge of the window a small child stands in profile as a dark silhouette, face mostly hidden. The camera looks out through the window at a 3/4 diagonal angle onto the highway below, where @char_W1_one is visible. The child notices the car and leans in closer to the glass to watch it; then the car accelerates hard, surging forward and pulling out of the window frame until it is gone from view, and the child turns his head, following it with his gaze. Calm, composed, gentle reflections on the glass.
11.0s HARD CUT: 11.0s to 15.0s — energetic move. Camera whips in tight and fast on @char_W1_one, a hard aggressive orbit and whip as it powers along the highway, strong weighted shake and heavy motion blur, the lights smearing past.
PHYSICS: Car carries real mass and downforce, planted and heavy, surging with real acceleration as it pulls ahead. Tyres grip the dry asphalt in clean air, wheels with rotation blur. The bullet train moves with real mass and speed on its rails. The child moves subtly and naturally as he leans to the window and turns to follow the car. Cold lamp light and reflections crawl over the glossy orange-and-black bodywork and the train. Realistic motion blur on the energetic shots; camera shake there is weighted, physical and mechanical. The train-window shot stays calm and composed.
LIGHTING: Deep dark night, near-black sky, cold white and blue-white lamps, walls of cool glowing tower windows, deep shadows, faint night haze. The car's split LED headlights glow bright white. Cool light reflects over the glossy orange-and-black bodywork and the train.
AUDIO: Screaming engine dopplering and surging, tyres on dry asphalt, the whoosh of the bullet train, faint city hum. Diegetic sound only.
POSITIVE LOCKS: Clear dry night throughout. Each segment is one continuous shot cut only at the specified HARD CUTS; the camera never cuts on its own. The car drives on the right side of the road, left to right. Segment 1 is a low whip rising to a profile of the car as it catches the head of the bullet train. Segment 2 is a 3/4 diagonal view out the train window: a child in profile as a dark silhouette at the left, face mostly hidden, leans in to watch the car, then the car accelerates out of the window frame and the child follows it with his gaze. The KTX train is the white-and-blue Korean bullet train. All signage and gantry surfaces stay smooth, blank and plain. All of @char_W1_one's details and "W1" badges stay exactly as in the reference. No film grain, clean crisp image.
Why each block is written that way.
The scene context declares in the first lines that this is a controlled three-shot piece, not one shot, and “clear dry night” pins the weather and time so the segments can’t diverge.
The active references are the reference-plus-text pairing from 3.2 in action: the images carry the car’s and the location’s appearance, while the text locks exactly the details models lose — the split LED lights, the black wing, the wheels with orange calipers, the “W1” plates — and “all signage blank and plain” keeps slop text off the gantries.
The format mode fixes three segments with HARD CUTS at 5.0 and 11.0 and forbids the model’s own cuts — the most common source of mush — while “diegetic sound only” enforces the no-music rule.
The optics give each segment its own locked lens (47° energy → 29° intimacy at the window → 47° energy) with “no drift mid-segment,” so the middle shot compresses and calms while the outer two stay spatial and fast.
The first frame block makes sure no segment opens empty and the geography reads instantly.
The action timing separates camera movement from subject movement in every window of seconds — the whip versus the car’s surge; the child leaning in versus the car pulling out of frame.
The physics block is why nothing floats: the car’s mass and downforce, wheel rotation blur, the train’s weight, and even the note that camera shake is “weighted, physical and mechanical,” not digital.
The lighting names the sources — lamps, tower windows, the car’s own headlights — and holds one cold look across all three shots.
The positive locks restate every fragile fact once, in the positive: direction of travel, the cut discipline, the silhouette staging, the blank signage, the reference-exact details, “no film grain, clean crisp image.”
Two directorial choices worth stealing: the rhythm is deliberate — energetic, then calm and intimate, then energetic again — and the child is a silhouette, which protects the shot from face slop while carrying the emotion entirely through pose and movement. And notice what is not in the prompt: no music, no neighboring scenes, no advertising text, nothing said twice. Every important thing is said once, clearly.